Monthly Archives: March 2014

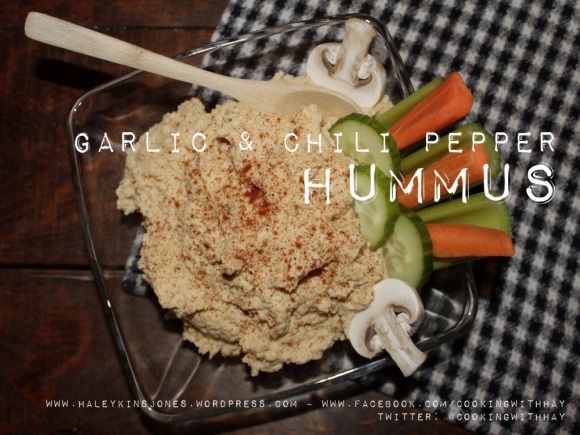
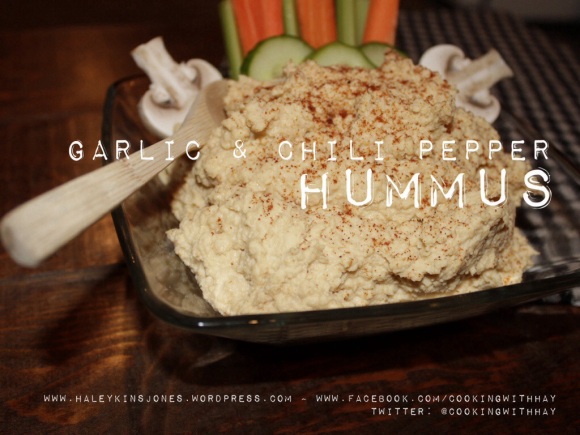
GARLIC & CHILI PEPPER HUMMUS

20140316-230143.jpg
GARLIC & CHILI PEPPER HUMMUS
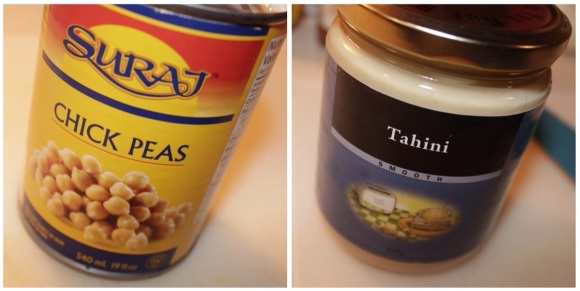
1 CAN CHICK PEAS, rinsed and drained
1/4 CUP TAHINI
2 TBSP. LEMON JUICE
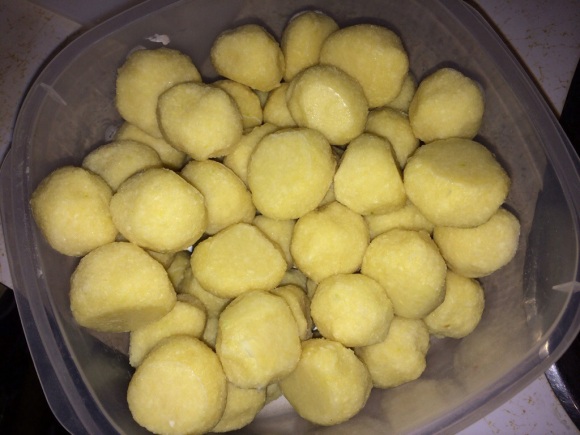
1 1/2 PRE MADE HOMEMADE GARLIC BALLS
2 TBSP. OLIVE OIL
WATER

I mix everything together in my food processor, except the olive oil. I once read that olive oil in a food process or more specifically, a blender, can turn the oil bitter and also cloud the bowl of the food processor. Well I love my food processor so I don’t take the chance. Once everything is smooth and creamy I transfer it to a mixing bowl and stir in the olive oil. Then if it’s thick, I add water until its’s the proper consistency.
20140316-230329.jpg
Of course, you can use as much or as little, garlic, as you want.
20140317-085957.jpg
Chopped up the remaining fresh veggies that I had in the crisper drawer to go with.
Actually, switch that around, I made the hummus so I had something to go with the veggies. As much as I love my breads, pita, naan, mmmmm naan…. this was a refreshing option.
20140316-230205.jpg
Kinda well needed after a not so healthy weekend. Ugh….
I wasn’t going to blog this one as I’m pretty sure most of you make hummus often, however, it just looked so nice and yummy, especially on the new surface prop Hubby made me! This is a classic dish and always a favorite. I do have some other Hummus recipes to show you. Some that are completely the opposite of classic. Hope you come back to visit. Stay tuned!
20140316-230221.jpg

❤️

Thanks for visiting, if you liked this blog please click LIKE below.
If you want to follow my blog please scroll to the bottom, click the FOLLOW button and enter in your email address.

Love Haleykins
20131230-210222.jpg

**Please click OLDER POSTS, {below} to see more**

❤️

Tagged , , , , , , , , , , , , , , , , , , , , , , , ,

ROTEL TOMATO & MOZZA GRILLED CHICKEN

I wasn’t feeling up to par today, but I wasn’t up for take out either so I opted for something extremely simple, quick and easy. Here it is. Butterflied chicken breasts seasoned with sea salt, fresh ground pepper and garlic. Grilled them on the bbq and topped them with mozzarella and some Rotel tomatoes and green chilies.
EASY! GOOD!
How cute are they, heart shaped and red!
20140316-215928.jpg

20140316-215938.jpg

❤️

Thanks for visiting, if you liked this blog please click LIKE below.
If you want to follow my blog please scroll to the bottom, click the FOLLOW button and enter in your email address.

Love Haleykins
20131230-210222.jpg

**Please click OLDER POSTS, {below} to see more**

❤️

Tagged , , , , , , , , , , , , , , , , , , ,

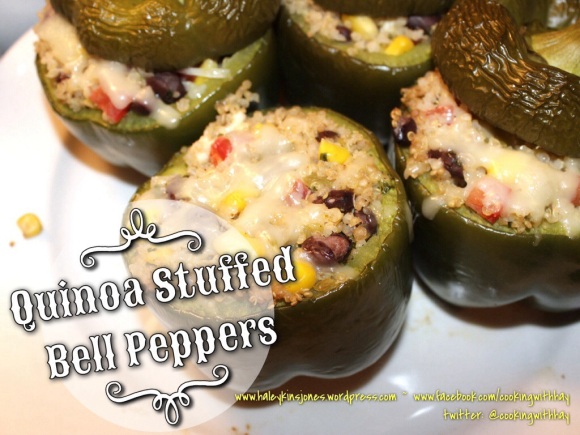
QUINOA STUFFED BELL PEPPERS

Have any of you made these before? I’ve seen them around for a few years now I think, but I had yet to try them. Or try quinoa for that matter. I wasn’t sure if I would like it or not or how to cook it so that I would like it. I came across this on one of my boards and immediately decided it was time. If you are a big quinoa fan please leave me a comment below this blog post or comment on the facebook post please. Turns out I do really like it and want to find more ways to make it.
20140312-004108.jpg
QUINOA STUFFED BELL PEPPERS
20 minutes to cook the quinoa
30 minutes to bake the stuffed peppers
Makes 6
Done in less than an hour! OH Yeah!

HERE’S WHAT YOU’LL NEED:
3 CUPS QUINOA, cooked
1 SMALL CAN DICED GREEN CHILIES
1 CUP CORN
1 CAN BLACK BEANS, drained and rinsed
1/2 CUP FINE DICED TOMATOES, remove the seeds,
1/2 CUP MONTERAY JACK CHEESE, grated
1/4 CUP LIGHT FETA CHEESE, crumbled
3 TBSP. FRESH CILANTRO, chopped
1 TSP. CUMIN
1 TSP. GARLIC POWDER
1/2 TSP. ONION POWDER
1/2 TSP. CHILI POWDER, or more to taste
GROUND SEA SALT to taste
GROUND FRESH PEPPER to taste

6 BELL PEPPERS, tops cut, stemmed and seeded

HERE’S WHAT YOU NEED TO DO:
Preheat oven to 350 degrees F.
1. Place parchment paper on the bottom of a shallow baking dish.
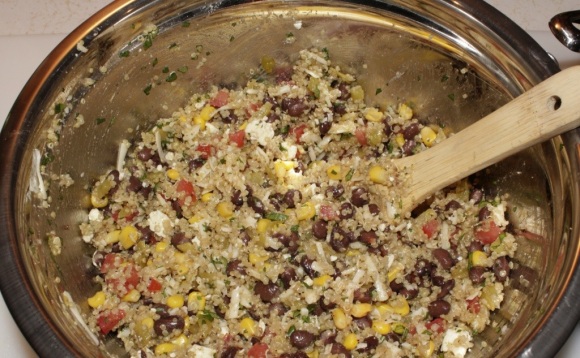
2. Mix all the ingredients gently in a big bowl, except for the peppers obviously.
3. Spoon the filling into the pepper bowls. Tap them on the counter to get everything to the bottom.
4. Gently stuff.
5. Place them in the parchment lined baking dish.
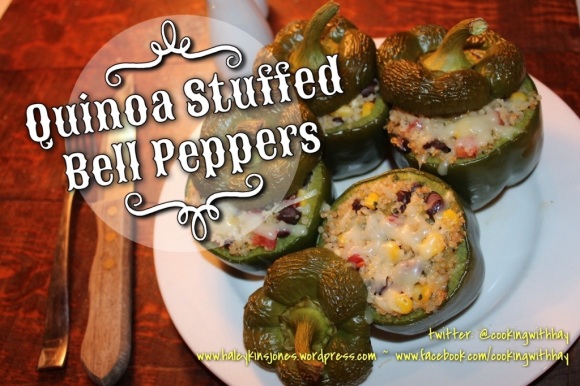
6. Bake for about 40 minutes. I baked mine with the “tops” on but as you can see in the pics, they wrinkled. Bake them without the tops until the filling is hot inside.
7. Eat em up right away!

Quinoa is usually found in the same section of the grocery store that the rice is found in.
20140312-205346.jpg
1 cup of uncooked quinoa will equal 3 cups after it’s cooked
For every 1 cup of uncooked quinoa use 1.5 cups water or chicken broth
Rinse and drain quinoa in a fine mesh strainer
Bring liquid to a boil, and add in the quinoa, give it a stir and then reduce the heat to a med-low temp. Put the lid on it and let it simmer for 15 minutes or until all the liquid is absorbed.
Put the lid back on it and remove it from the heat. Set it aside for 5 minutes.
Fluff it up with fork
20140312-181545.jpg
I recruited Hubby to help me out with the next 3 shots. It gets awfully challenging trying to hold that massive camera and operate a sharp knife. Here you want to cut the top portion of the peppers off to create the ‘tops’
Use a sharp knife and slice down the edge of the ribs of the pepper following down towards the base of the pepper but not cutting through!!
Pop out the seed pack in the middle and knock out any seeds.
Using that handy melon baller {I like it better than a spoon because it has sharper edges} scrape out the remaining bits of the ribs until you have some nice little pepper bowls!
20140312-004250.jpg
They are super cute. I think I can find other reasons to use this type of ‘vessel’ for dips and sides in the future.
20140312-004310.jpg
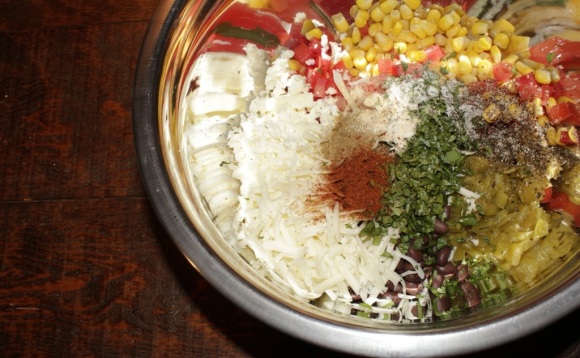
Ok mix up all those ingredient, minus the peppers, in a nice big mixing bowl. Toss it all together gently.
I think this is the first time I’m using feta cheese in something other than a greek meal. I find this highly intersting and can’t wait to see what it tastes like.
20140312-004331.jpg
Once you have the filling all together you can simply put it in a casserole dish with a lid on it and just bake it that way if you don’t want to go through the effort of the pepper. I think the next time I will omit the pepper bowl if it’s just Hubby and I, and maybe leave the quirky presentation to when I’m preparing it for guests. It’s just alot of pepper for us. I like my peppers much more tender. Too the point of fully softened mush. Mmmmmm nummy yummy
20140312-004336.jpg
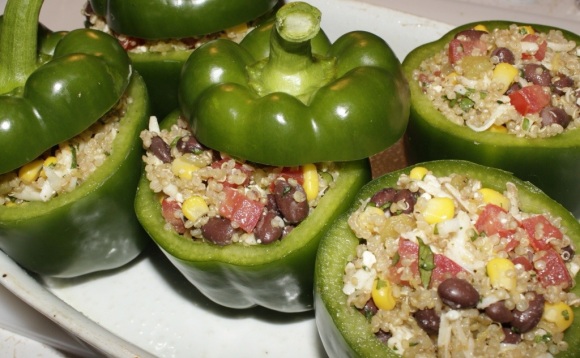
Here’s where you get to fill the pepper bowls up with that yum yum quinoa filling. I sprayed my baking dish as I ran out of parchment paper at christmas time and never replaced it. This caused my filled pepper bowls to slide around. I’m thinking the parchment would keep them in place better. Scoop and stuff the peppers and put them in the lined dish. The original recipe that I saw did not seem to bake the peppers with the “tops” on. I did and the “tops” came out quite wrinkled. I think for a better presentation, I would bake them without the “tops” and then just pop them on after you take them out of the oven. I also added a few shreds of the monteray cheese to the top of the filling before baking. gives them a nice finished look. Then I meant to sprinkle them with fresh chopped cilantro but I forgot and had already taken the pictures…. LOL #foodbloggerproblems haha.
20140312-004342.jpg
I baked these in a preheated 350 F oven for about 40 minutes. Check them at 30 minutes. You want the filling to be hot throughout. I think they look cute with the wrinkled tops, but not that cute, oh well. They were absolutely scrumptious! Even Hubby liked them.
20140312-004356.jpg
I served these with butterflied, grilled chicken breast. Seasoned them with sea salt, fresh ground pepper, garlic and a slight sprinkle of chili powder, with a side of a homemade chipotle dip {fat free sour cream, a wee bit of light mayo and as much chipotle puree as you can handle}
Yay for the second bbq this year! I just love the flavour that a bbq or grill can bring to the food and to the table 😉
Now I know it’s not a Green Egg bbq or anything like that or a nice old fashioned one but it does the job. It may actually need to be replaced this year. We’ve been saying this for the last 2 years so we’ll see.
20140312-004404.jpg

20140312-004421.jpg

And since I’m suffering from severe post vacay depression….. I’ve posted a small collection of pics from House Of Haley Photography, from our time in Mexico a few weeks ago. You can find them at the bottom of this post.

❤️

Thanks for visiting, if you liked this blog please click LIKE below.
If you want to follow my blog please scroll to the bottom, click the FOLLOW button and enter in your email address.

Love Haleykins
20131230-210222.jpg

❤️

**Please click OLDER POSTS, {below} to see more**
Find me on Facebook at http://www.facebook.com/cookingwithhay – Please LIKE my page.
Follow me on Twitter at @cookingwithhay

20140312-193443.jpg

20140312-193504.jpg

20140312-193510.jpg

Tagged , , , , , , , , , , , , , , , , , , , , , , , , , , , , , , , , , ,

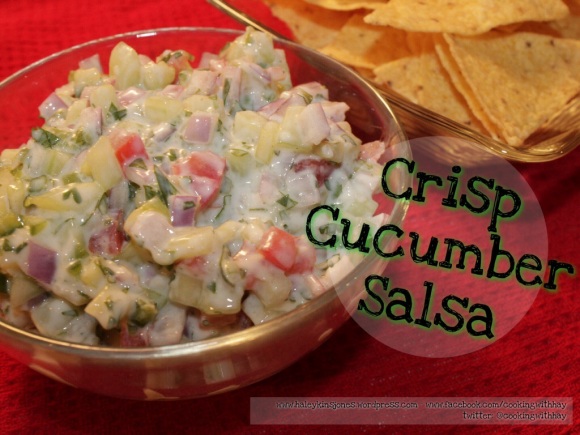
CRISP CUCUMBER SALSA

As promised yesterday, here is another super delicious recipe involving…. a cuke!
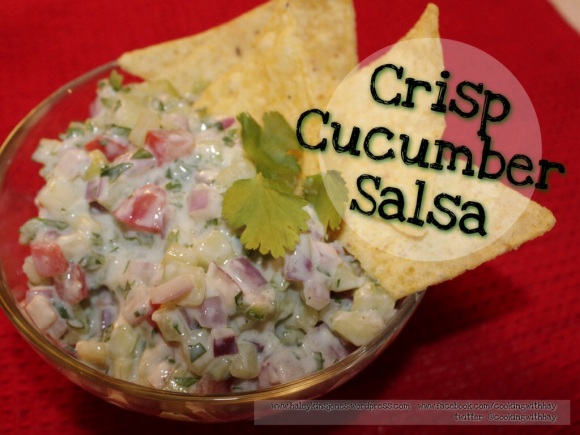
I saw this and it looked like a neat thing to try seeing as tho I just made a traditional salsa a few days ago. I already had all the ingredients needed in the fridge and I just love when that works out. Now, when I say, “this just may be the very best salsa in the world!” well, this is one of those times that you need to believe me! But you don’t have too. Give me just a few more minutes to tell you how to make it, then you give it a try and you be the judge. Seriously, if you like to cook or make stuff in the kitchen, heck ya you’re going to love it. If you’ve never made anything, then this is a perfect way to start. Regardless, please just try it.

Hubby had barely walked in the door yesterday and I had put it in front of him. He couldn’t stop eating it and he’s really not a big salsa guy. “Yes, success!”
20140310-214843.jpg
HERE’S WHAT YOU’RE GOING TO NEED:
2 CUPS CUCUMBER, PEELED, DESEEDED, FINE DICED
1/2 CUP ROMA TOMATOES, FINE DICED
1/4 CUP RED ONION, FINE DICED
1 JALAPENO PEPPER, DESEEDED, MINCED
4-1/2 TSP. MINCED CILANTRO
1/2 A SMALL PRE MADE HOMEMADE GARLIC BALL {or 1 clove minced garlic}
1/4 CUP FAT FREE SOUR CREAM
1-1/2 TSP. LEMON JUICE
1-1/2 TSP. LIME JUICE
1/4 TSP. CUMIN
1/4 TSP. SEASONING SALT
ORGANIC GLUTEN-FREE TORTILLA CHIPS, NO SALT

20140310-214934.jpg
HERE’S WHAT YOU’RE GOING TO DO:
In a mixing bowl add the cucumber, tomatoes, onion, jalapeno, cilantro and garlic.
In a seperate bowl combine the sour cream, lemon and lime juice, cumin and seasoning salt.
Add the sour cream mixture to the veggie mixture and gently toss to combine.
Enjoy with organic gluten-free tortilla chips.
20140310-214850.jpg
Last but not least, low sodium YO! The is mostly cucumber rather than tomatoes like a traditional salsa. Sure there’s seasoning salt in it but there is salt in traditional salsa also so this is definitely a win win.
Can’t wait for summer bbq’s with this one.

❤️

Thanks for visiting, if you liked this blog please click LIKE below.
If you want to follow my blog please scroll to the bottom, click the FOLLOW button and enter in your email address.

Love Haleykins
20131230-210222.jpg

**Please click OLDER POSTS, {below} to see more**

❤️

Tagged , , , , , , , , , , , , , , , , , , , , , , , , , , , , , , ,

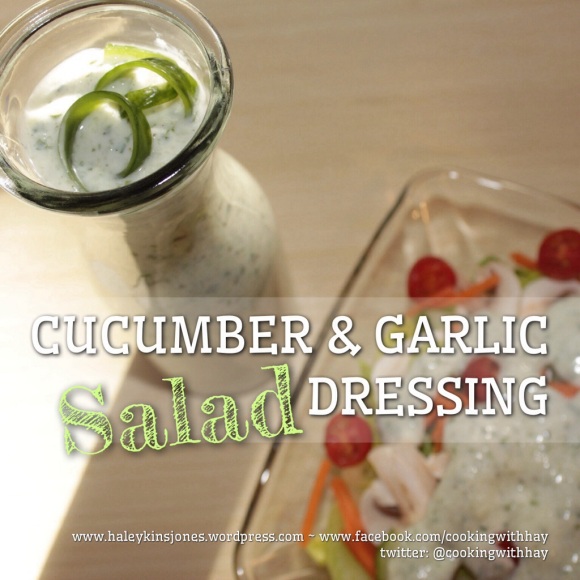
CUCUMBER & GARLIC SALAD DRESSING

Oh so many wonderful things you can do with a cucumber…… 😊
Head out of the gutter!
Here is 1 fun thing, and tomorrow I’ll share another! Thanks for visiting and please help me out by clicking LIKE and SHARE on Facebook

20140310-185918.jpg

WHAT YOU’LL NEED:
2 CUCUMBERS {PEELED, DESEEDED AND PUREED, I used my food processor, and include the juice from the cucumbers}
1/4 CUP CHOPPED PARSLEY
1/4 CUP CHOPPED CHIVES
1/2 PRE MADE HOMEMADE GARLIC BALL {or 2 cloves minced garlic}
1 CUP FAT FREE SOUR CREAM
1/2 TSP. SEA SALT
1 1/2 TSP. GROUND PEPPER
WATER OR MILK TO THIN {optional}

WHAT TO DO:
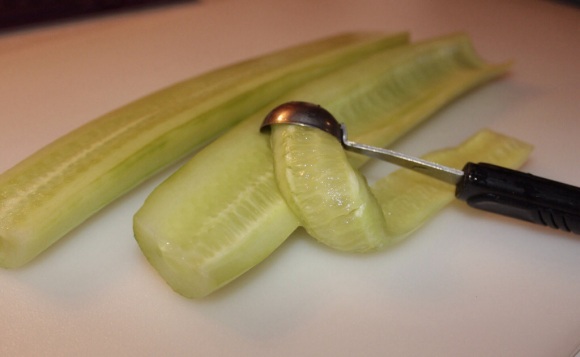
I use a melon baller to deseed cucumbers but you can use a small teaspoon if you don’t have a melon baller. I then pureed the cucumbers in my food processor. Dump the pureed cukes and it’s juice into a mixing bowl.
20140310-185947.jpg
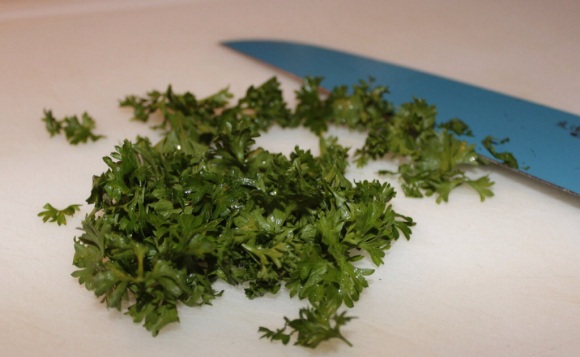
Add in the chopped herbs. Now if you’re like me and still learning to cook…. you might not use chives all that often. I bought freeze dried chives so that I don’t waste anything. Once you add them in they will soften and be just the same as if they were fresh so not to worry.
20140310-185956.jpg
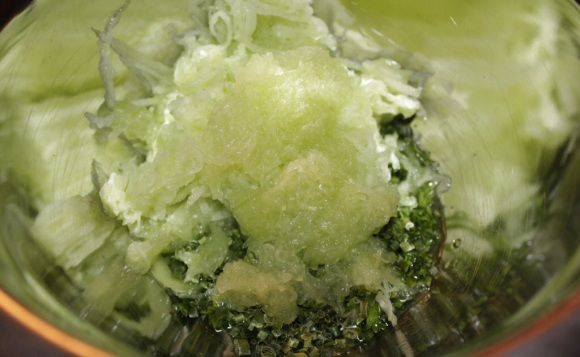
Add the garlic to the mixing bowl. Cucumber, parsley, chives, and garlic. Starting to look like something the dog puked up? K then we’re on the right track. LOL
20140310-190007.jpg
Stir in the sour cream, salt and fresh ground pepper.
20140310-190034.jpg
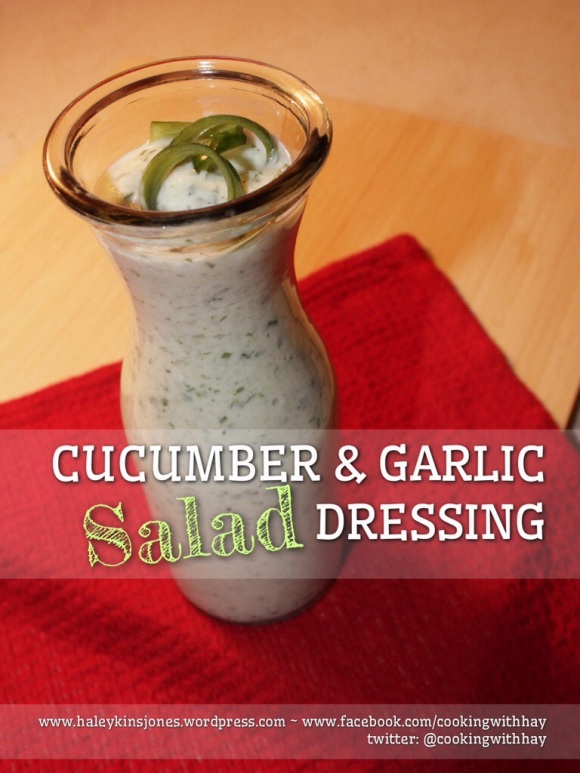
Using a funnel and a rubber spatula, {how did I ever live without a funnel?} pour/scrape every drop of this easy, healthy homemade salad dressing into some type of pretty decanter. I picked up this glass beauty from my local $ store. 🙂 Garnished it with a cucumber peel twist 🙂
20140310-191026.jpg
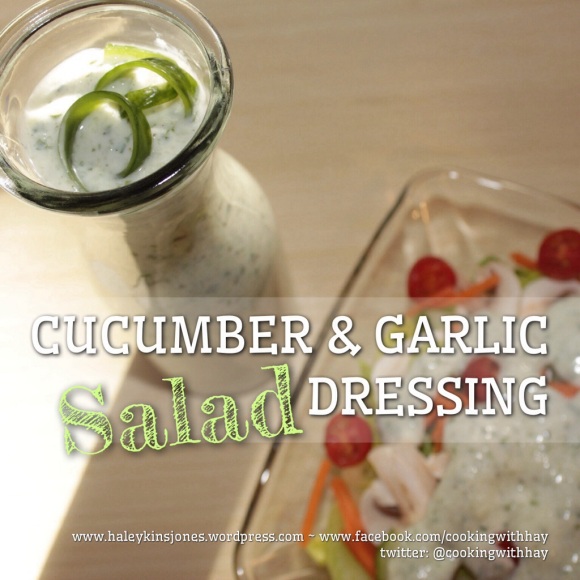
Now, whip up a fresh salad with all those leftover veggies you have in the crisper drawer before they spoil and Hubby scowls at you….. not that that happens here or anything…. 🙂 JUST MAKE SURE TO USE UP ALL YOUR VEGGIES. I made up a great salad with romaine lettuce, mushrooms, cucumbers, celery, carrots, tomatoes and peppers.
20140310-190044.jpg
Serve this after it’s chilled up a little bit in the refrigerator. Then, sit back and enjoy clean eating and healthy living. Between my Chipotle Southwest Dressing and my Mom’s, MARIANNE’S HOMEMADE CAESAR SALAD DRESSING I doubt I will ever buy salad dressing again. Knowing exactly what we are putting into our bodies is comforting when it’s food like this.

I’m going to be completely honest and maybe a little vain but I am smiling…. I’m smiling because I’m proud of the change we are making. We were always conscious of the crap food we would eat but we let our tastebuds make the decisions. We can do this, we can continue this.
Today this blog passed 7000 views. I just can’t believe that it’s been looked at over 7000 times. Today my Facebook page, Cooking With Hay, reached a new high as well. Over 100 people have kindly LIKEd my FB page. Thank you Thank you Thank you. The higher these numbers grow, the more inspired and eager I get. I’m constantly browsing for new things to try and yet they are things that are quite basic, fairly common, and well, really good. But it’ real food for real people. When I start whipping up Crown Roasts….
20140310-200754.jpg
…then it’s a whole different kinda ballgame. {Although I hear they aren’t as hard as they look… 🙂 }
20140310-190051.jpg

This dressing came out with a thicker consistancy that most salad dressings. We like it this way but it was pretty thick. You can thin it with a little bit of water or skim milk if it’s too heavy for you. I’m going to leave mine as is and use it as a dip for the rest of the remaining veggies, as it’s just the perfect consistancy for a dip as well.

Found on Pinterest from Taste Of Home

❤️

Thanks for visiting, if you liked this blog please click LIKE below.
If you want to follow my blog please scroll to the bottom, click the FOLLOW button and enter in your email address.

Love Haleykins
20131230-210222.jpg

**Please click OLDER POSTS, {below} to see more**

❤️

Tagged , , , , , , , , , , , , , , , , , , , , , , , , , , , , , , , , , , , , ,

NOOCH POPCORN ~ Butter-Free Goodness

All my life I’ve loved popcorn. Just the smell of it alone can make me smile. I know alot of you feel this way too. Walking into the theatre and you get hit with a wave of buttery yummyness. Ok, nevermind the theather, it hits you when get to the parking lot.
However, a night at the movies has been a thing of the past around here. We simply can’t go see the newest flick and NOT have that buttery-fresh-hot-mouthwatering-tongue dribbling, popcorn. So we choose not to go. I’ve ordered it without butter and that just doesn’t go over very well. Plus then you get so thirsty that water doesn’t cut it…. blah blah blah… then I came across a blogger who was writing about butter-free popcorn and her and her friends were addicted and since it uses….. NUTRITIONAL YEAST, they call it NOOCH POPCORN. I like it. I like it alot. The name and the snack.
Some of you may think we are a bit crazy but these are the sort of sacrifices WE need to make it life. Healthy eating, healthy body, healthy happy people. We feel better for doing it, and when those “I don’t care I want it” nights come about… and they do….. then we don’t feel so guilty.

This last christmas, one of my sisters gave me some natural items to try. Bee Pollen and Nutritional Yeast. Both are outstanding healthy products, in fact they are said to be superfoods. This recipe today features the nutritional yeast. So if you like your popcorn and you want to try something that isn’t terrible for you, or perhaps you’re a vegan…. no butter here 🙂 then check this out. I had never heard of nutritional yeast on popcorn before and yes I know that some of you have known forever, so please bear with me while I explore these new avenues in our quest for healthier eats.

20140309-202605.jpg
WHAT YOU’LL NEED:
1/2 TBSP. OIL {high heat oil – coconut oil, grapeseed oil, canola oil, etc.} see below for more info!
1/4 CUP POPCORN KERNELS
2 TBSP. NUTRITIONAL YEAST {adjust to your tastebuds}
1-2 TSP. SALT
OLIVE OIL SPRAY
CAYENNE PEPPER {totally optional of course and only a little… burn your lips off}

WHAT TO DO:
Heat the oil in a large pot over high heat.
When the oil is warm, add the kernels.
Shake the pan so that they form a single layer on the bottom of the pot.
Put a lid on it.
Shake it every 15-30 seconds until there is no more popping.
Remove from heat.
Spritz with olive oil spray.
Sprinkle with yeast and salt and if you feel brave, a tiny dash of cayenne.
Put the lid back on and shake it up.
Put it in a clean bowl.
Put the butter-free goodness in your belly!

20140309-215942.jpg
I did some digging on what the best oil to use on popcorn and here’s what I found on realsimple.com

*Coconut or palm oil gives you the taste of movie popcorn, since those cholesterol-raising oils are what theaters used exclusively until 1994. That’s when the Center for Science in the Public Interest blew the lid on the movie corn’s fat content―about 80 grams of fat for a large tub. For something less artery-clogging, try canola oil. Its mild, clean taste doesn’t overwhelm popcorn’s natural flavor, and it has a medium to high smoking point, so there’s little chance of scorching. It’s also inexpensive. Most important, canola oil is low in saturated fat and high in monosaturated fat, which helps reduce levels of (bad) LDL cholesterol. You might want to try olive oil, a nutritional equivalent of canola oil, because it is high in good monosaturated fat and gives popcorn a richer flavor, but olive oil has a low smoking point and tends to burn quickly. Corn and other vegetable oils don’t offer the same nutritional advantages as olive or canola.*

❤️

Thanks for visiting, if you liked this blog please click LIKE below.
If you want to follow my blog please scroll to the bottom, click the FOLLOW button and enter in your email address.

Love Haleykins
20131230-210222.jpg
❤️

**Please click OLDER POSTS, {below} to see more**

20140309-215942.jpg

Tagged , , , , , , , , , , , , , , , , , ,

GRILLED CHICKEN FAJITA SKEWERS WITH CILANTRO AND LIME

In keeping with the spirit of Mexico, how about another easy meal idea using some of that homemade Fajita Seasoning we made last month?
I will never buy a store bought packet after using this simple recipe. The seasoning is very mild, feel free to tip the chili powder shaker a little more if your tongue likes to dance as much as mine. Make this up and then carry on below for the Grilled Chicken Skewers with Cilantro and Lime recipe.

🌵

FAJITA SEASONING
2 tablespoons – cornstarch
4 teaspoons – chili powder
2 teaspoons – salt
2 teaspoons – paprika
2 teaspoons – sugar
1.5 teaspoons – chicken bouillon crushed
1 teaspoon – onion powder
1/2 teaspoon – garlic powder
1/2 teaspoon – cayenne powder
1/2 teaspoon – cumin

Mix it all together and keep it in a dry container.

Approximately 2 tablespoons of this mixture equals a packet of that store bought stuff.
This recipe made just over 6.5 Tablespoons.

This will save you money too as those packets can start to add up after a while.

Please give it a try!
If you do make it, please leave me a comment below and let me know what you think.
Click here to see my previous blog post for FAJITA SEASONING

🌵

20140307-181409.jpg
The great thing is that there is no oil or butter used in this one, therefore super healthy. Wooooo Hooooo Anything to keep the waistline from growing. Don’t fret, these are so good you’d never know they weren’t drizzled in expensive olive oil or dipped in seasoned butter. You can thank me later, no worries 😉

Here’s what you’re going to need:
1 green pepper
1 yellow pepper
3 roma tomatoes
1/4 onion
cilantro
lime
Fajita Seasoning

20140307-180601.jpg
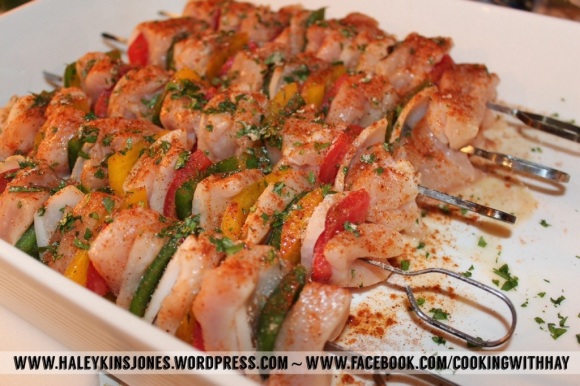
For the 5 skewers I used 4 chicken breasts. I cut the breasts in half so they were thinner then sliced those up to make bite sized pieces. The thinner the pieces the faster the will cook. You don’t want to completely burn your veggies on the bbq while you’re waiting for the chicken to cook. Does this make sense. Some of the chicken pieces were ultra thin so I stacke 3 pieces together. This make for juicy chicken bites. I hope this make sense. Look at the pic above to understand.
20140307-191515.jpg
Remove the ribs and seeds from the peppers. This is how I do it. Flip the pepper onto it’s stem and slice down the lovely pepper lumps. Check it out! 🙂 This leaves the ribs and seeds intact, less mess and less work for you.
Slice the tomatoes in half lengthwise and scoop out the seeds and rib stuff with a spoon. I like the tomatoes to be very thin. I used a sharp knife and sort of fillet the tomatoes. For the onions pull off some of the wider outer layers. Cut them up the same size as everything else. My pieces were about 1″ x 1″. Layer the veggies and the chicken, alternating as you go. Push them together real tight and you’ll have less burny bits. 🙂
20140307-180611.jpg
Lay your skewers in a nice big dish. I made these up early so they were going to be going in the fridge….. be sure to make room in the fridge before hand if this is your situation. Nothing worse than having your hands full with an oversize tray of something and no where to put it and no hands free to move things about. Or don’t, and then bitch about it later like I do almost everytime.
Sprinkle on some of the homemade Fajita Seasoning that you made up earlier…. if you didn’t make it, I suppose you could use a store bought packet. I won’t tell anyone…..
Flip the skewers over and sprinkle the other side. This was enough for us but like I said way up there at the top, the seasoning is quite mild for my tastebuds. You could sprinkle more on the other 2 sides if you want more. This was just nice and light and allowed for the veggie flavour to come through.
20140307-180625.jpg
Chop up some fresh cilantro or don’t if you get your knickers in a knot over it 🙂 Now squeeze on some fresh lime juice
20140307-180638.jpg
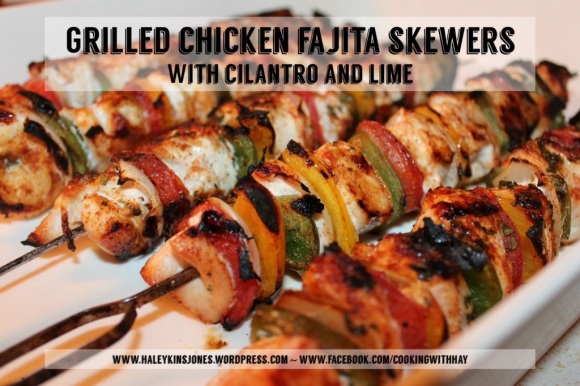
Grill these babies on med-high I did 8 minutes then flipped and did 3 minutes then flipped to one of the other sides and did 3 minutes. They were cooked thru by this time and I took them off. But you could put the last side on for a couple of minutes if you wanted.
20140307-184139.jpg
Here’s a “Visual Summary” I made this for Pinterest 😉 😉 Wham, Bam, Thank You, Ma’am!
20140307-180650.jpg
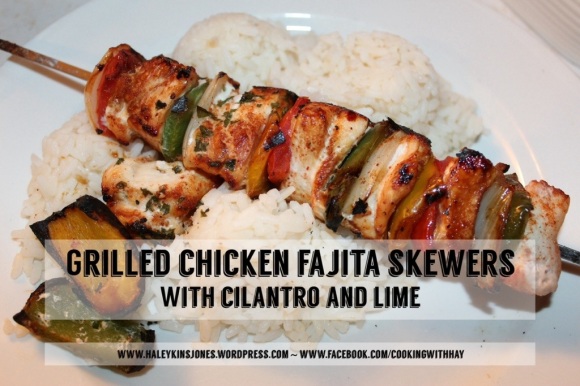
We served this up with some light and fluffy rice. That’s it that’s all. Clean eating is best and still so tasty. I use a rice cooker that my sister gave me years ago. However I created my own directions because everytime I did as I was told the rice was hard and not yet done. So I don’t know what I do wrong but it never ever turned out so here’s what I do now. I measure 2 cups of dry rice and rinse under cold water in a strainer for close to 5 minutes. This removes alot of the starch and then when it cooks you won’t get that browned or scortched bottom. Although I was reading up on some Dominican cuisine and it said that some rice dishes are delberately cooked to have that type of browned bottom. I was intrigued. Here read up for yourself My Dominican Food Drain the rinsed rice and dump it in the rice cooker. Then I add twice as much cold water. So 4.5 cups…. ya, weird right…. the directions all say equal? Or at least mine does. How do you make your rice?
20140307-205543.jpg
As you can see, Hubby enjoyed. I too enjoyed and even though it was cold and rainy out on the deck manning the bbq like a boss…. I knew it was much milder here than my friends weather back east. So I mustered up my big girl panties and put on some boots. Yup that’s it some booty shorts and boots, oh and well a hoodie (I refuse to cover up these tanned legs while they are still tanned legs) and grilled those babies to Hubby’s preference. Hope you enjoy them like we did.
PS this is a beautiful christmas gift from mom! My Gordon Ramsay Rectangular Roaster/Dish from the Royal Doutlon Collection!!! EEEeeeeek It’s massive and I love love love it.
20140307-212621.jpg

🌵

Thanks for visiting, if you liked this blog please click LIKE below.
If you want to follow my blog please scroll to the bottom, click the FOLLOW button and enter in your email address.

Love Haleykins
20131230-210222.jpg

**Please click OLDER POSTS, {below} to see more**
Tagged , , , , , , , , , , , , , , , , , , , , , , , , , , , , ,

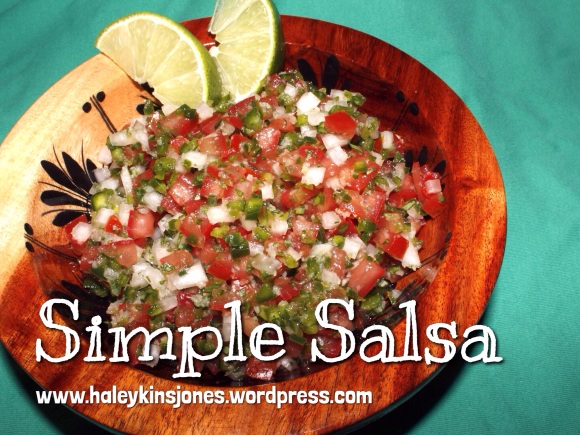
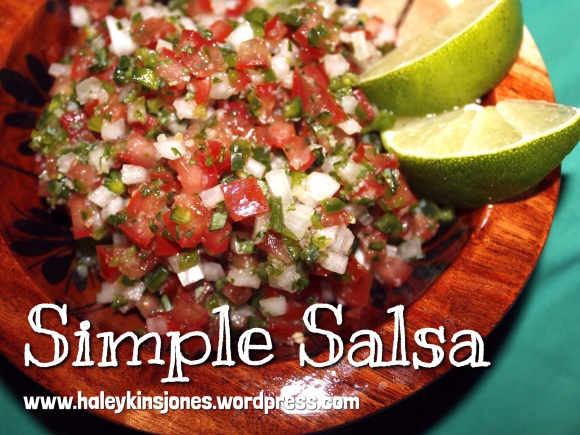
SIMPLE SALSA

Hello Everyone!! It’s been quite a while since I did a post. I apologize for the hiatus, my mind has been preoccupied with my trip to Mexico. Ok let’s be real. I spent some weeks going through the pantry and freezer putting together things, I had to create some meals…. It was time to clear out a bunch of those one off cans of who knows what mixed with a little of this and a little of that. Nothing pretty, a little weird, but it was food in the belly and that’s all that matters. Really tho my mind had been in the clouds counting down the days to our little vacation in the sun. We are home now and yet the spirit of Mexico lives on in our home. We purchased a wooden bowl set for salsa, guac, and chips and I just love them. I’ve wanted a set for a long time now. Ever since our first trip to Mexico back in 2011. I was so excited to pull them out of our suitcases that I hoped in the truck and took of to the market for supplies. Simple Salsa is up next.
20140306-154823.jpg

🌵 SIMPLE SALSA 🌵

3 ROMA TOMATOES (choose the harder ones over the soft ones)
1/4 WHITE ONION
1 SERRANO PEPPER
1 JALAPENO PEPPEER
1/2 LIME
1 PRE MADE HOMEMADE GARLIC BALL {or 4 minced cloves of garlic}
CILANTRO
SEA SALT
20140306-193406.jpgStart with the tomatoes, hard roma tomatoes work best. I cut them in half lengthwise and then cut those in half lengthwise again. Scrape out all the seeds and juice. Dice them up really fine. Smaller bits are easier to scoop up.
20140306-195757.jpg
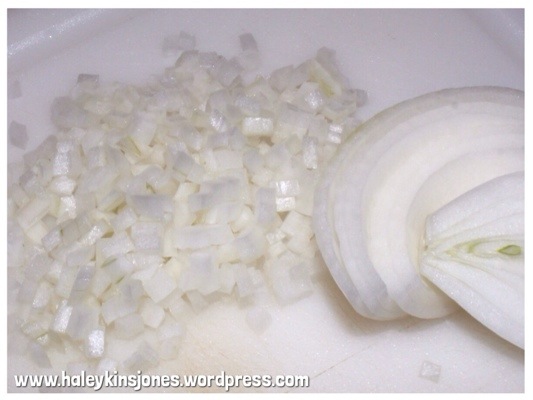
Dice up the onion really fine as well. Same size as you did the tomatoes.
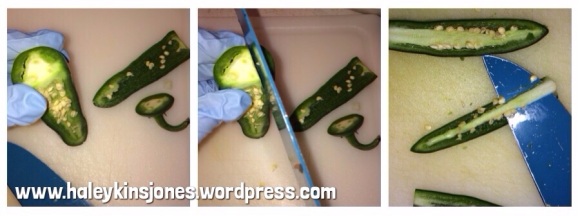
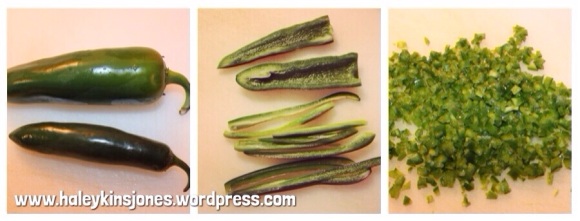
20140306-154853.jpgWhen chopping up peppers be sure to wear gloves. Bell peppers, you’ll be fine but these hot peppers require gloves. I burnt my left thumb with burns from these peppers once before and lets just say I’ve learned my lesson. My fingerprint is not the same as it once was. These are the best ways to cut up peppers like these ones. For Jalapeno’s, cut off the top part with the stem and slice off the parts not attached to the ribs. See the first 2 pictures above. For Serrano’s, since these ones are even thinner, cut of the top part again with the stem and then cut the pepper in half lengthwise. With the tip of a sharp knife, carefully run it under the ribs of the pepper, removing them in one clean cut. Take a look at the 3rd picture above.
20140306-154859.jpgOnce again, dice up the peppers nice and fine…. I like these to be very very tiny. Mince them. That’s a more appropriate word.
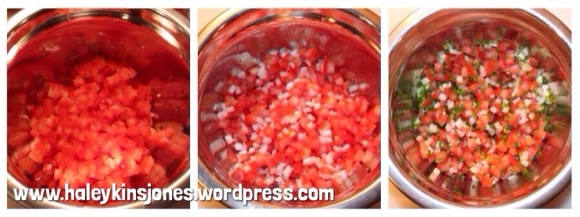
20140306-154926.jpgSqueeze the juice from half a lime into the bowl and let the very merry tomato marinating party begin. Add in the thawed PRE MADE HOMEMADE GARLIC BALL
20140306-154933.jpgChop up a few fresh cilantro leaves or if you are one of those people that says “I don’t like cilantro” that I shake my head at well then simply omit the cilantro from your Simple Salsa. Easy Breezy…
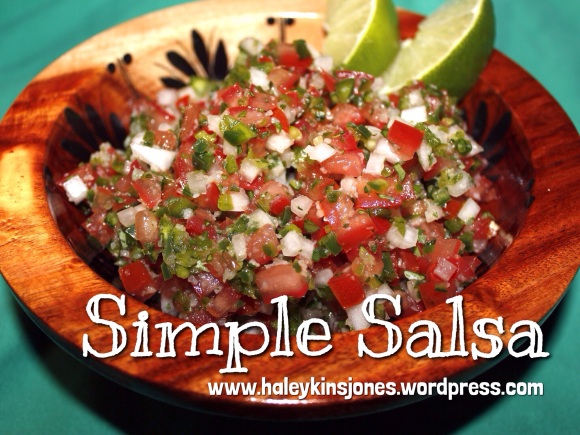
20140306-154941.jpgThe whole thing comes together all quite quickly and look it’s even the colours of the Mexican flag.
20140306-154950.jpgLet this marinade together for at least a few hours in the fridge before serving in and airtight container. Don’t worry about it not being to ‘wet’ as the salt will draw out the liquids in the tomatoes, onions and peppers and mix with the lime juice. It’s to die for delicious and worth the wait.
20140306-154956.jpgWe opted for organic tortilla chips, gluten free and that had the lowest calorie content. Que Paso chips from the organic section of the grocery store. I just love how it looks in the new mexican salsa bowl we brought home.
Scarf it up and imagine a mariachi band playing, the ocean waves crashing and the sun beaming down warming your skin.
20140306-205547.jpg
Ahhh Mexico, we love and miss you already.
20140306-210224.jpg
Thanks for visiting, if you liked this blog please click LIKE below.
If you want to follow my blog please scroll to the bottom, click the FOLLOW button and enter in your email address.

Love Haleykins
20140306-210052.jpg
**Please click OLDER POSTS, {below} to see more**
Tagged , , , , , , , , , , , , , , , , , , , , , , , , , , , , ,