Tag Archives: salt

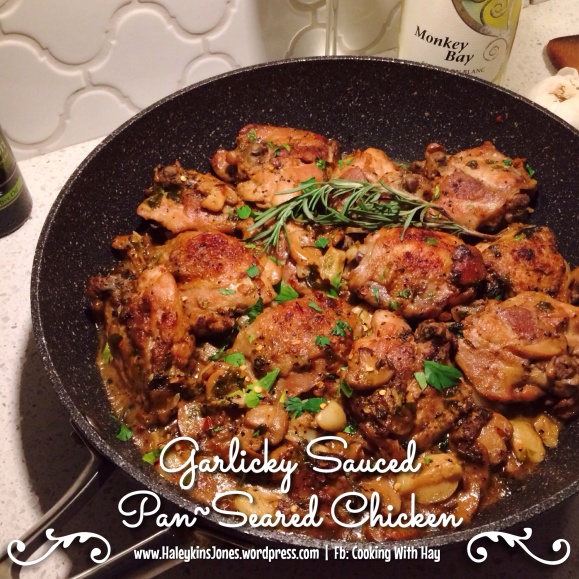
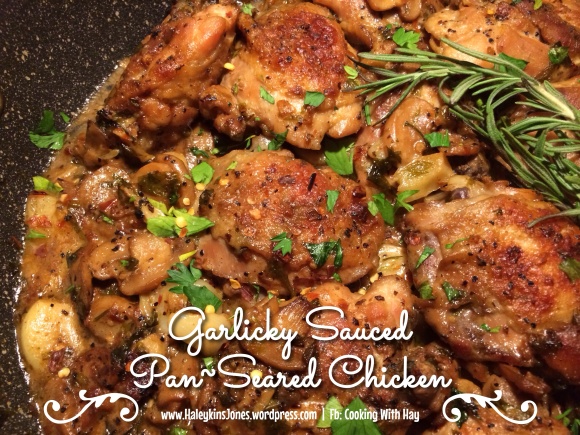
GARLICKY SAUCED PAN~SEARED CHICKEN

image


GARLICKY SAUCED PAN~SEARED CHICKEN

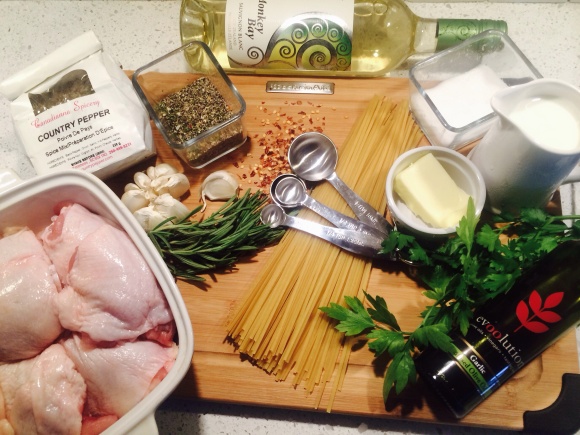
INGREDIENTS
♥ 4 T. OLIVE OIL
♥ 1 LARGE PACK OF CHICKEN THIGHS
♥ ½ TSP. SALT
♥ ½ TSP. PEPPER
♥ 2 CUPS SLICED FRESH MUSHROOMS
♥ 1 T. CHILI PEPPER FLAKES
♥ 1½ FISTS OF GARLIC
♥ 2½ CUPS SAUVIGNON BLANC WHITE WINE
♥ ¼ CUP MILK
♥ 2 T. BUTTER
♥ ¼ CUP FRESH CHOPPED PARSLEY
♥ 2 SPRIGS FRESH ROSEMARY

DIRECTIONS
PREHEAT OVEN TO 375°F

HEAT THE OIL IN A DEEP DISH PAN ON YOUR STOVE TOP. (OR LARGE DUTCH OVEN OR CAST IRON POT) CAST IRON WORKS BEST I THINK AND THE DEEPER THE BETTER, YOUR APPLIANCE WILL THANK YOU LATER. SPLASHY GREASE BLAH.

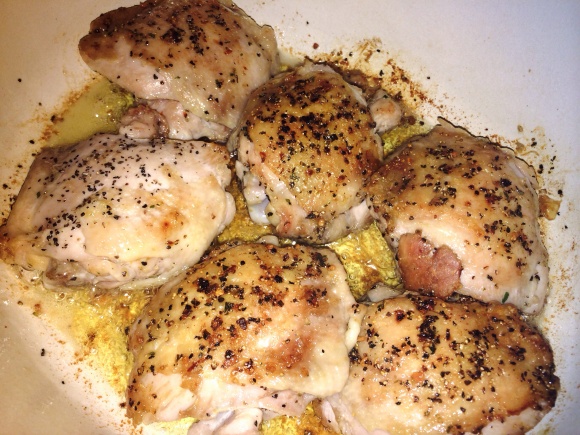
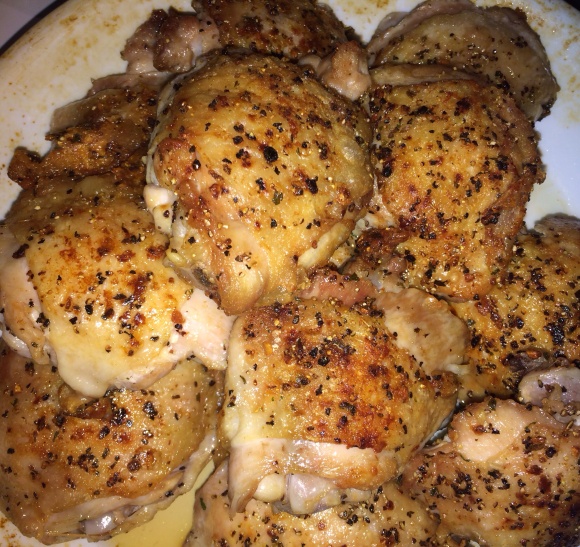
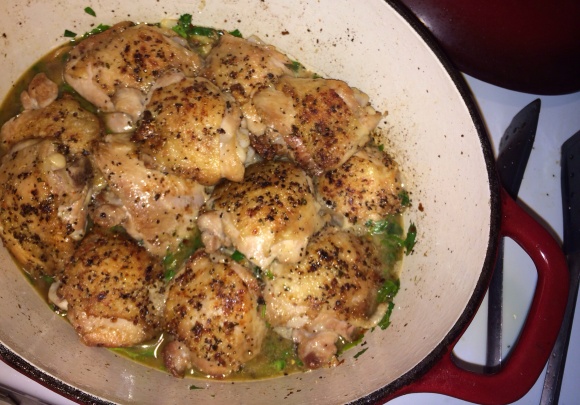
SEASON THE CHICKEN THIGHS WITH SALT AND PEPPER AND PLACE CHICKEN IN THE PAN. SEAR THESE BAD BOYS UP UNTIL GOLDEN AND THE JUICES JUST RUN CLEAR. THEY WILL COOK MORE IN THE SAUCE.

REMOVE THE SEARED CHICKEN FROM THE PAN AND SET ASIDE.

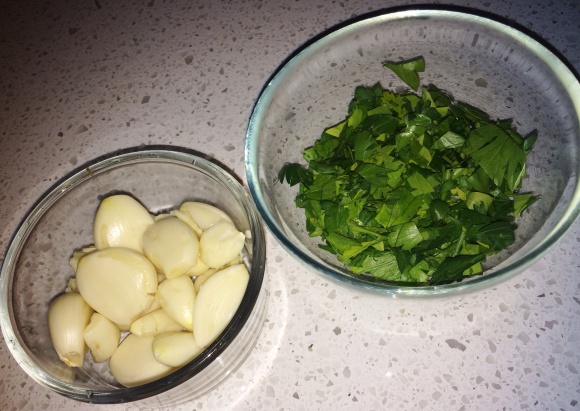
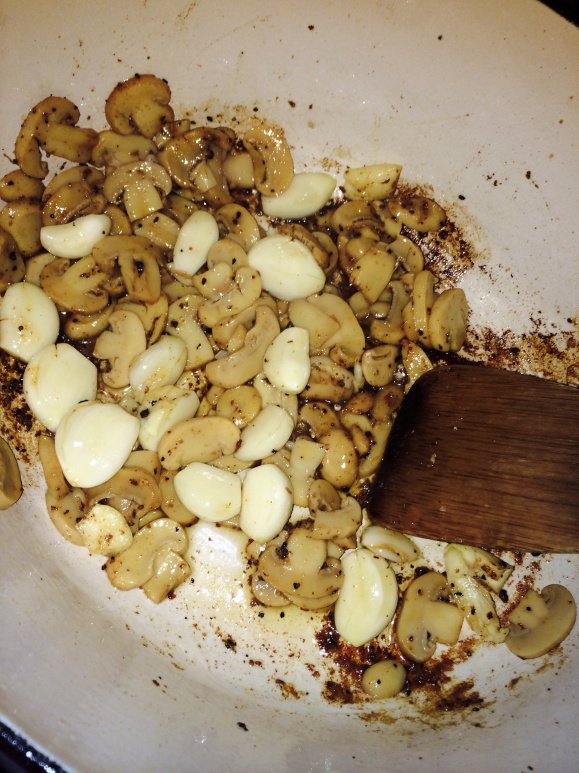
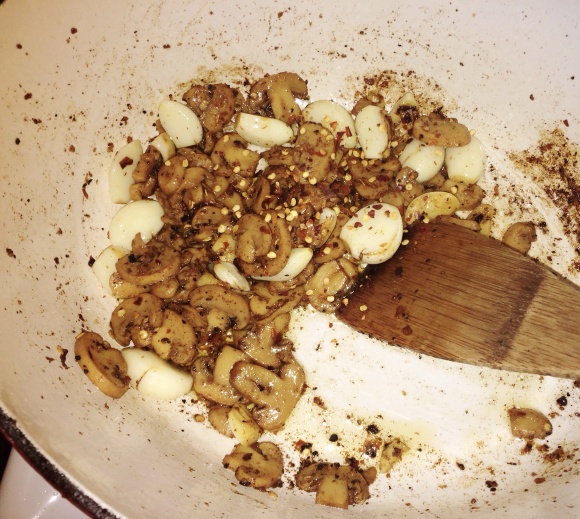
SEPARATE THE GARLIC CLOVES AND PEEL THEM. ADD THE MUSHROOMS, PEPPER FLAKES AND GARLIC CLOVES TO THE CHICKEN PAN AND IT’S LEFTOVER LIQUIDS.

SAUTE UNTIL TENDER AND GOLDEN, BUT MAKE CERTAIN NOT TO BURN THE GARLIC. TILL JUST GOLDEN. GARLIC GOES QUITE BITTER WHEN OVERCOOKED.

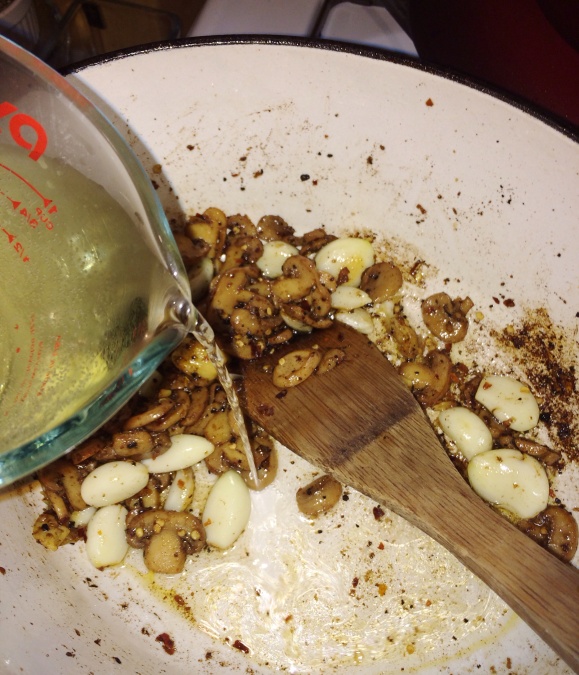
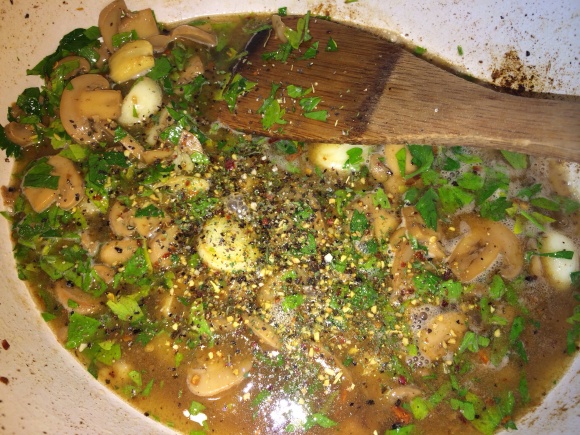
ADD THE WINE, MILK, BUTTER AND STIR IN THE PARSLEY.

GENTLY ADD THE CHICKEN BACK TO THE PAN.

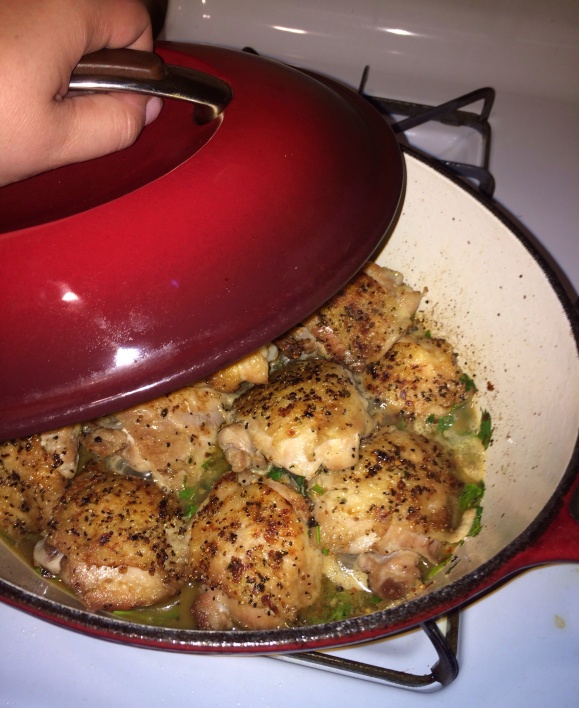
ADD THE ROSEMARY SPRIGS AND COVER.

PLACE IN PREHEATED OVEN. BAKE FOR 20-30 MINUTES. TURNING THE CHICKEN OVER HALF WAY THROUGH.

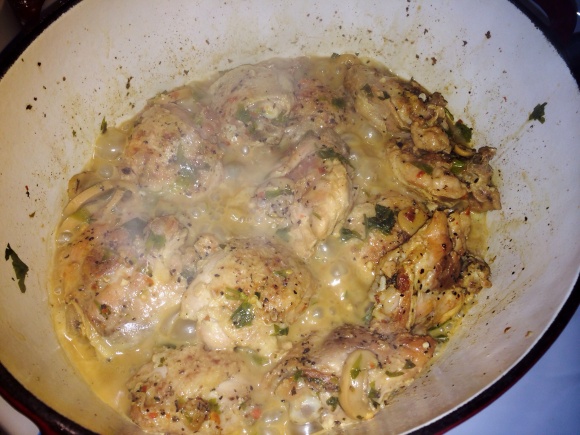
REMOVE FROM OVEN WHEN THE SAUCE STARTS TO REDUCE AND THICKEN UP.

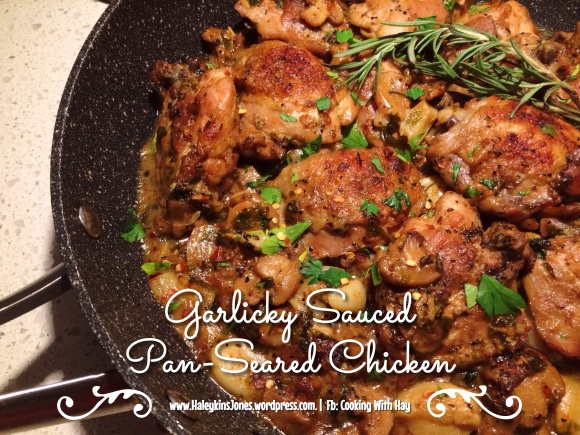
I TRANSFERRED ALL OF THIS TO A HOT FRYING PAN FOR APPEARANCE PURPOSES FOR THIS BLOG BUT YOU CAN CERTAINLY FINISH IT UP IN THE OVEN IF YOU CHOOSE. LESS MESS. HOWEVER IF THE SAUCE IS TOO DRY YOU MAY WANT TO ADD MORE WINE AND LET IT SIMMER A BIT LONGER. THIS WAS DEFINITELY EASIER TO DO ON THE STOVE TOP.

SPOON THE GARLICKY SAUCE OVER THE CHICKEN AND SPRINKLE WITH A LITTLE MORE FRESH PARSLEY AND CHILI PEPPER FLAKES.

SERVED SEARING HOT OVER LINGUINE NOODLES.


I am needing a large tripod and to get my amazing Canon Rebel T3i camera up and running to do these blog photos now that the “Cooking With Hay” Kitchen is nearing completion!

At the time of making this dish I had cabinets, counters and some lighting in. Oh and the backsplash tile was added but had just been grouted. No appliances, no running water, just a much more appealing place for a food blog photo set.

Regardless, it’s all a vast improvement from the basement temp. kitchen, 2×4 studding and insulation backdrops seen in previous blog photos.

image

Is ‘garlicky’ even a word ? ? ?

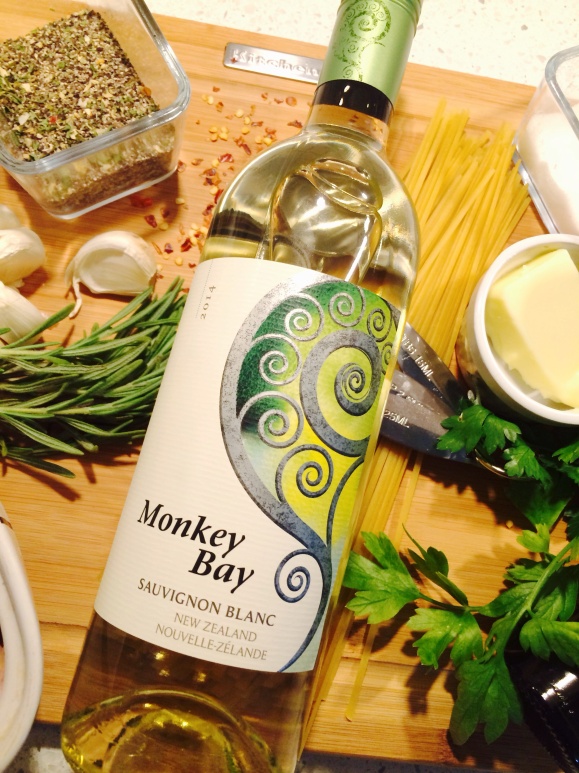
The recipe I was using called for white wine… I have drank wine in the past but by any means, don’t consider myself a wine drinker.

However… GalPal is!

She came to my rescue with some suggestions after I let her know my ingredients and what I was making.

Monkey Bay Sauvigon Blanc from New Zealand was the perfect wine, as this dish was phenomenal. Not too sweet, not to dry. I’m not even going to bother experimenting with other wines.

The bottle… as GalPal mentioned, coordinated nicely with the ingredients needed to make this dish. Thanks for the help Amber!! Guess I should make this for you now hey?!

image
This pepper tho! Gift from Mother-In-Law and I’ve become quite addicted to it. I use it on my sunny side up eggs in the morning to grilled salmon and everything in between. It’s made just a few hours from my house in Keremeos BC. It’s pepper, onions garlic and herbs and is a great change-up to the regular black pepper or fresh ground peppercorns.

Season the chicken thighs with a little salt and sprinkle of pepper. There is enough flavour coming in the garlic and wine and parsley that not much seasonings are needed on the chicken.

I assure you. This dish packs a savory garlic KA-POW with a mix of fragrant herbs. Absolutely delish my gosh!

image

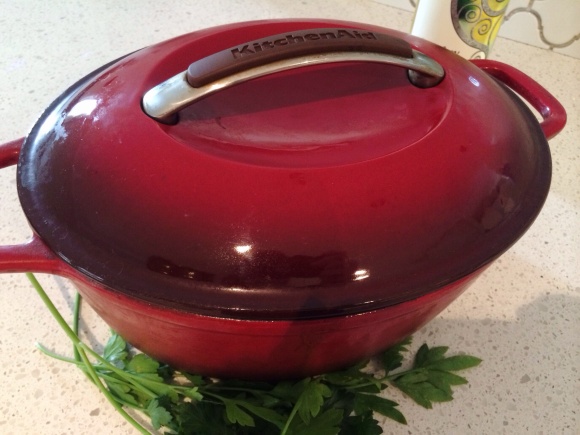
My mom is a wonderful cook, and I’ve used many of her recipes to get me into cooking. She got me this gorgeous glazed cast iron KitchenAid dish and this is what I used to pan~sear my chicken thighs. Keeps even heat and kept the splatter in the dish rather than on my stove-top.

image

I used this dish on the stove top to brown the chicken and saute the mushrooms, chili pepper flakes and the garlic. It also has a lid to cover so this same dish was what I used to baked it up into the perfect saucy chicken while in the oven. From Canadian Tire and I definitely recommend one for your cooking adventures also.

image

After transferring the chicken, there was a fair amount of liquids, chicken grease and juices, left in the bottom of the pan. I removed most of it and left just a small amount in the bottom to saute the mushrooms and garlic in. Your choice.

image

Now on the bottom of this dish was a dark golden layer from the chicken juices etc. searing up. Don’t be alarmed… I was thinking to myself… Oh shit, did I ruin this whole thing? Is everything now going to stick and burn?

image

But the mushrooms and garlic seemed to soften it up and cook together and created such a rich flavourful sauce.

image

I couldn’t have been more pleased. It is really a good day when things work out for me, haha. I’m sure you’d feel the same. Yay for good cooking. Go me Go. Feel free to do a little booty shakin touchdown dance when things like this happen. It’s all about the simple things in life am I right My Lovelies?! LOL

image

Adding wine to things like this also acts as a de-glazer for your well cooked pans. Don’t waste that seared liquid. That’s your concentrated flavour right there. Just the same as the bottom of your roaster from your roasts and hams make the best gravies and soup broths.

In this case it’s our deglazer and the base for this sauce. I am not a wino so I will admit that I have always been apprehensive about dishes that are made with wine. If someone made this for me and I ate the whole thing… I don’t think I would have even known it was made with wine. I’m serious! So so so so so so good!

image

**NOTE: Milk is added for volume. This will help create that thicker fuller sauce to coat the chicken. If you wanted a more concentrated demi-glaze like sauce, you can omit the milk completely. As mentioned in the recipe, you may need to add more wine if you find the sauce to dry when you turn over the chicken half way through cooking.**

image

Time for the fun! Let’s bring it all together. Gently add the chicken back in once you’ve mixed in the wine, milk, butter and parsley.

Nestle it down in that fragrant garlic bath. Time for these thighs to tantalize.

image

Cover it with a tight-fitting lid and place it in a preheated oven and bake it up so the sauce can thicken up.

image

Don’t forget to check it half way through and flip that chicken over. Keep it saucy!

It will look soupy at first. As it continues to cook the sauce will get darker and richer in colour and of course flavour.

Be patient and wait for it. It will look ‘blah’ before it looks ‘ta da’

image

There it is! TA DA!!!

image

As mentioned in my recipe, I then transferred my contents of my kitchen aid glazed cast iron dutch oven to a pan for appearance purposes for this blog. LOL

Got to love dirty dishes! LMAO

This pan is worthy of a few photos though. Another splendid purchase from Canadian Tire. I think I’ve gotten every single one of my pans from Canadian Tire over my years. They always have good deals on cookware FYI. Watch the flyers. This is a Heritage Rock Forged Non Stick Pan. It’s got a big capital ‘H’ on the stunning stainless steel handle. My name, being Haley… thus…H-Town bitches…. hahah. Nah my Mommy has one and I used it while at my parents place this spring and of course I fell in love. It having a big ole ‘H’ on it for ‘Cooking With Hay’ is just an added perk. I love this pan so much that I don’t really use any other pans besides The H Rock, this KitchenAid glazed dutch oven or my cast iron dutch oven and griller.

image

This will be a regular meal cooked in my kitchen. Please give it a try guys! Feedback is always appreciated. As is your SHARES and LIKES on Facebook, Pinterest, Twitter, etc…. Sharing is Caring and it would really help expand my page! Love you all! Thanks for your support.

There you have it. Garlicky Sauced Pan~Seared Chicken ♥

♥♥ Thanks for visiting, if you liked this blog please click LIKE below. If you want to follow my blog please scroll to the bottom, click the FOLLOW button and enter in your email address.
Love Haleykins♥♥

**Please click “OLDER POSTS” button, (bottom of the page)
or the “COOKING WITH HAY” tab (top of the page) to see more**

Tagged , , , , , , , , , , , , , , , , , , , , , , , , , , , , , , , , , , , , , , , , , , , , , , , , , , , , , , , , ,

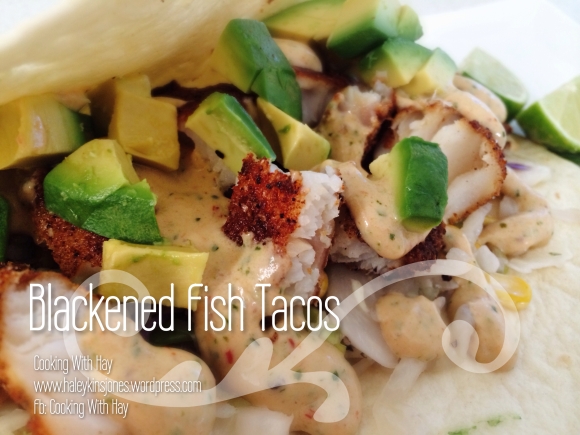
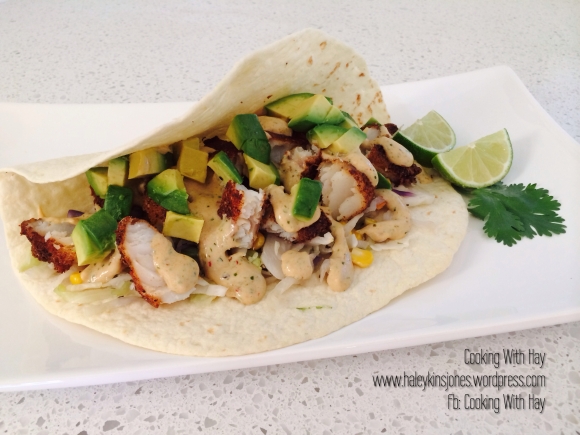
Blackened Fish Tacos with Chipotle Cilantro Dressing (salmon or cod or whichever fish you want)

Finally, this post is done. I still consider myself a beginner food blogger even though this blog has recently had it’s 3rd anniversary. Blogging recipes takes work. Writing an accurate recipe takes work. It’s work but it’s work I enjoy. I just wish I could do nothing but cook, take pics, and blog… Haha True story.


Been talking about these a lot, I know, I apologize for the redundancy. Finally got all the components together….

You’re going to need to check out my last 2 posts!

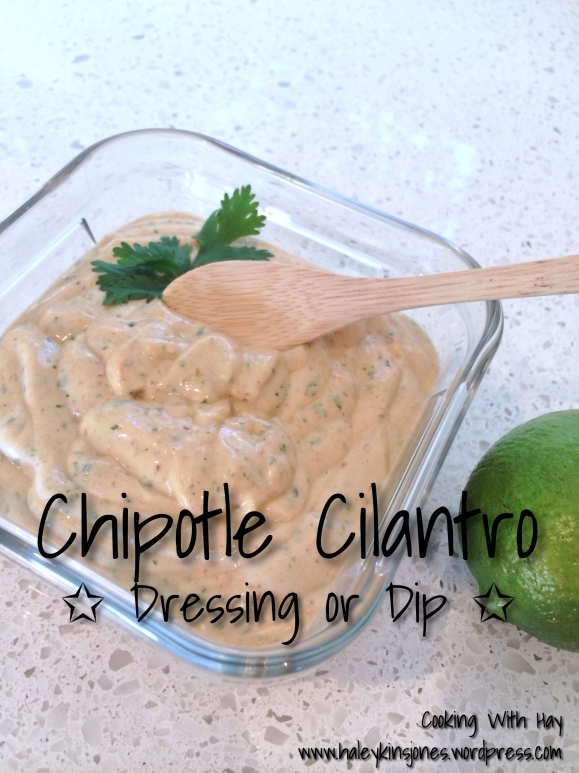
Click this photo to get this recipe!

Click on the photo to the left to get this yummy Chipotle Cilantro Dressing recipe for these Blackened Fish Tacos that we’re about to make.

Click this photo to get this recipe!

Click this photo to see the ingredients needed to make the Blackened Seasoning that will crispify (is that a word?)the fish to a nice golden crunch on the outside and give it a deep savory flavour.


BLACKENED FISH TACOS
♥ 2 BAGS COLESLAW
♥ 1½ C. CORN KERNELS
♥ SALT + PEPPER
♥ FLOUR TORTILLAS
♥ 1 BIG SALMON FILET or 4 LARGE COD FILETS
♥ HIGH SMOKE POINT OIL FOR FRYING (i used Canola Oil)
1 BATCH OF BLACKENED SEASONING
1 BATCH OF CHIPOTLE CILANTRO DRESSING
♥ AVOCADO, FRESH, CHOPPED
♥ CILANTRO + LIME FOR GARNISH

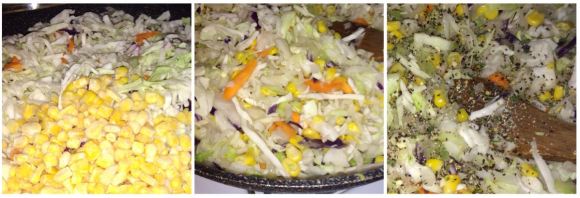
Saute the coleslaw and corn with salt and pepper until just tender.
Set aside, but keep warm.
Heat oven to low temp and slowly warm the tortillas. I like em just before they get toasted.
Cut salmon or fish into large pieces suitable for frying.
Heat oil, just above medium, not too hot or the fish won’t cook thoroughly and not too cold or the fish will soak up to much oil and become soggy.
Fry till dark and golden on each side.
If you’re using salmon you may have to do the ends too. Use tongs. They work best.
When they are done gently remove from hot oil onto a papertowel lined dish to remove excess oil.
Let cool for about 5 minutes and break into good chunks.

THE ASSEMBLY
Warmed Tortilla
Sauteed slaw and corn
Blackened fish
Drizzle with some Chipotle Cilantro Dressing
Top with chopped fresh avocado, cilantro and a squeeze of fresh lime juice


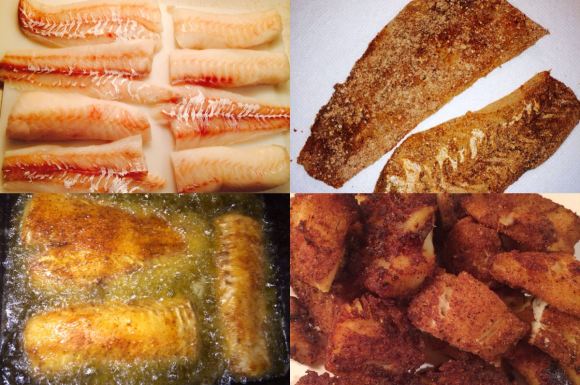
Place the Blackened Seasoning in a shallow flat bottom container of some sort so you can press the fish into it.  Coating every inch of it.  The better it’s coated the better the crisp.

You don’t want to over cook the cabbage, or it will lose all it’s structure.  You want to saute it till it just starts to wilt.  Keeping it warm will also allow it to keep cooking so with the pan on medium heat, just keep an eye on it.
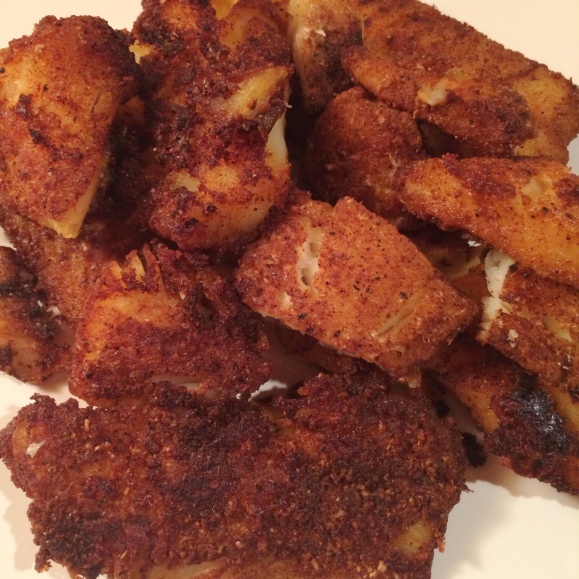
This is the cod I used last night.  Seasoned all over every surface of fish with the Blackened Seasoning.

Fried in some oil till golden and delicious. I use a large cast iron flat bottom deep dish for frying. Allows maximum room for the fish to fry properly without over crowding the pan.   The heavy duty cast iron can withstand the high temperatures and will maintain it’s heat better when you drop in the fish.

I fried the fish in 2 batches to ensure it cooked evenly and properly. Or you can use a deep fryer but I’ve only used one once and I didn’t like it…. it was too small for what I needed and I don’t want a big greasy appliance kicking around here. I fry as little as possible.
Frying foods took a lot of practice for me over the years.  So many times chicken or potatoes or whatever it was I was cooking, was either undercooked or well well well done. Practice makes perfect.

Frying can be very unhealthy if done incorrectly.  When done the right way you are using the least amount of oil to get that desired crunch and crispiness.

✰ Oil thats too hot will scortch the food on the outside while leaving it raw inside. ✰

✰ Oil that isn’t hot enough won’t seal the food as it should when you drop it in. ✰

(Rather it will sit and soak up the oil.  This results in that drippy soggy mess we’ve gagged on one too many times.

The first time I made these I used some fresh plump salmon and they were to die for! This time around i used cod. I preferred the salmon over any white fish but both were really good.


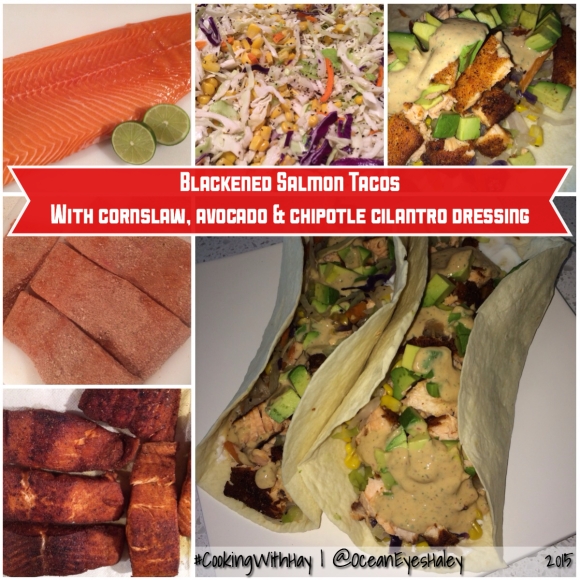
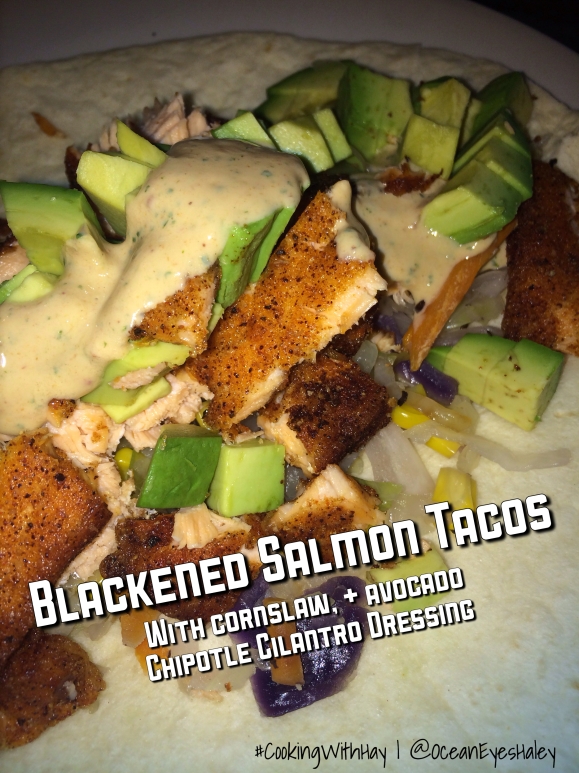
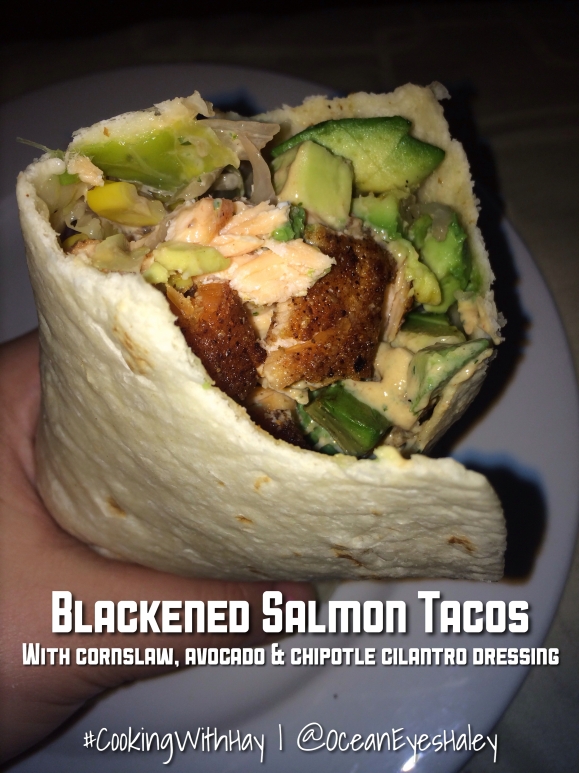
BLACKENED SALMON TACOS

Here are some pics from the salmon ones I made last week!  These ones were my favourite!

Since the photos were taken down in my temporary basement dungeon kitchen they aren’t of the greatest quality.  We can only go up from here my friends ☺

1603

❤️ Thanks for visiting, if you liked this blog please click LIKE below. If you want to follow my blog please scroll to the bottom, click the FOLLOW button and enter in your email address.
Love Haleykins❤️
**Please click “OLDER POSTS” button, (bottom of the page)
or the “COOKING WITH HAY” tab (top of the page) to see more**
Tagged , , , , , , , , , , , , , , , , , , , , , , , , , , , , , , , , , , , , , , , , , , , , , , , , , , , , , , ,

Blackened Seasoning

Hi guys, I posted some pics of the Blackened Salmon and Blackened Fish Tacos to my Cooking With Hay Facebook page, and the requests came in for the recipe. As well as the request for me as your personal chef. Thank you for that! It actually is much easier to make the food than to blog the recipe… just in case you were curious. LOL so much time spent running a photoshoot and a kitchen at the same time. I love it tho and anxious to spend more time doing it. The balance between stoning the front of the fireplace and installing bathroom sinks… or blogging…. its a tough one….

I’m quite pleased with the photos from recent photoshoots. I’m working partially upstairs while I can get the good natural daylight and partially still down in the dungeon, errr, I mean, basement. Natural daylight makes for much more appetizing food pics. Less shadows and more true to life colouring of these meals. After all, we taste with our eyes and our noses before the food even hits our tongue or tummies.


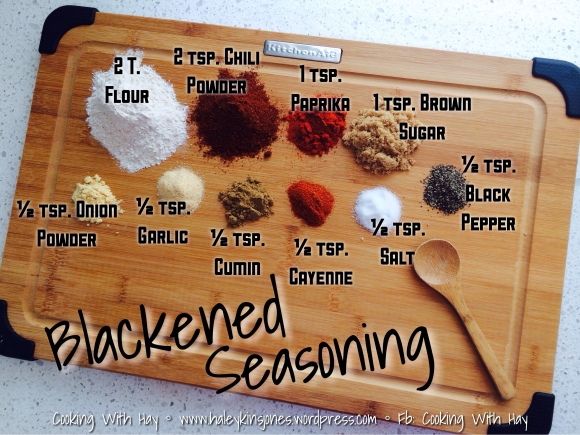
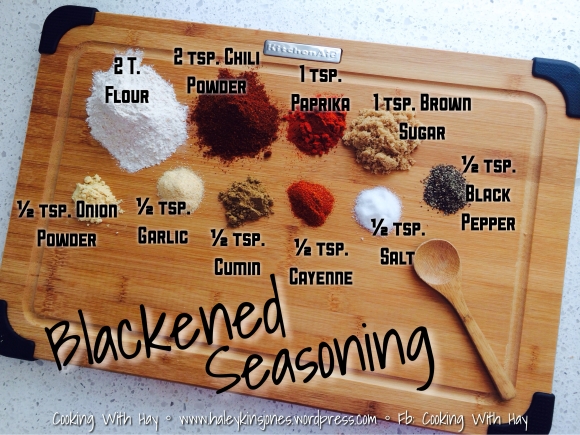
I’ve laid out all the ingredients that I used to make the Blackened Seasoning, on this fancy bamboo KitchenAid cutting board that Hubby came home with for me! *SMILES* This is the seasoning for the Blackened Salmon Tacos and Blackened Fish Tacos that I’ve been mentioning. (Blog posts to follow guys!)

I pulled this from a website a while back, I haven’t altered anything except that I use whole wheat flour instead of white flour. It actually just adds to the crispy factor we’re going for here! Yummy


Don’t confuse T (tablespoon) for TSP (teaspoon)!!
Oh come on, like you haven’t done that before.

The original image said 2 T. Chili Powder… LOL its got to be 2 TSP. Teaspoons
I made the same error when I first made Butter Chicken. That was a hot hot hot meal. Great tho. Just a real kicker that’s for sure.

BLACKENED SEASONING

♥ 2 T. FLOUR (I use whole wheat)
♥ 2 TSP. CHILI POWDER
♥ 1 TSP. PAPRIKA
♥ 1 TSP. BROWN SUGAR
♥ ½ TSP. ONION POWDER
♥ ½ TSP. GRANULATED GARLIC
♥ ½ TSP. CUMIN
♥ ½ TSP. CAYENNE
♥ ½ TSP. SALT
♥ ½ TSP. PEPPER

Mix together well. Store in an air tight container.


↓ This made enough to do a big slab of salmon or 4 large cod fillets. If you’re doing more you may want to double this recipe. Or to save you some prep time on the next go around, make up a big batch now.

↑ I made one batch of this seasoning and mixed it in this shallow plastic container. All ready to go so I can just lay the piece of fish or meat or whatever it is that you’re going to use, onto the seasoning.
This works great for everything, even prawns and scallops. Try it out and I hope you like it.  I’ve made it 3 times this July.  Cuz it’s that good.  LOL yum!


Blog Post with recipe and pics COMING SOON!

Blog Post with recipe and pics COMING SOON!

Blog Post with recipe and pics COMING SOON!

Blog Post with recipe and pics COMING SOON!

Blog Post with recipe and pics COMING SOON!

Blog Post with recipe and pics COMING SOON!


❤️ Thanks for visiting, if you liked this blog please click LIKE below. If you want to follow my blog please scroll to the bottom, click the FOLLOW button and enter in your email address.
Love Haleykins❤️


**Please click “OLDER POSTS” button, (bottom of the page)
or the “COOKING WITH HAY” tab (top of the page) to see more**


Tagged , , , , , , , , , , , , , , , , , , , , , , , , , , , , , , , , ,

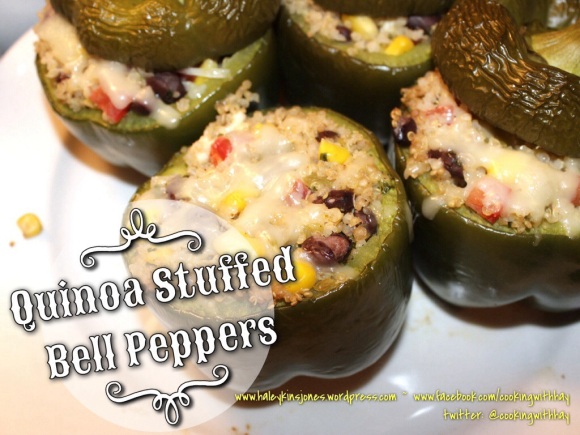
QUINOA STUFFED BELL PEPPERS

Have any of you made these before? I’ve seen them around for a few years now I think, but I had yet to try them. Or try quinoa for that matter. I wasn’t sure if I would like it or not or how to cook it so that I would like it. I came across this on one of my boards and immediately decided it was time. If you are a big quinoa fan please leave me a comment below this blog post or comment on the facebook post please. Turns out I do really like it and want to find more ways to make it.
20140312-004108.jpg
QUINOA STUFFED BELL PEPPERS
20 minutes to cook the quinoa
30 minutes to bake the stuffed peppers
Makes 6
Done in less than an hour! OH Yeah!

HERE’S WHAT YOU’LL NEED:
3 CUPS QUINOA, cooked
1 SMALL CAN DICED GREEN CHILIES
1 CUP CORN
1 CAN BLACK BEANS, drained and rinsed
1/2 CUP FINE DICED TOMATOES, remove the seeds,
1/2 CUP MONTERAY JACK CHEESE, grated
1/4 CUP LIGHT FETA CHEESE, crumbled
3 TBSP. FRESH CILANTRO, chopped
1 TSP. CUMIN
1 TSP. GARLIC POWDER
1/2 TSP. ONION POWDER
1/2 TSP. CHILI POWDER, or more to taste
GROUND SEA SALT to taste
GROUND FRESH PEPPER to taste

6 BELL PEPPERS, tops cut, stemmed and seeded

HERE’S WHAT YOU NEED TO DO:
Preheat oven to 350 degrees F.
1. Place parchment paper on the bottom of a shallow baking dish.
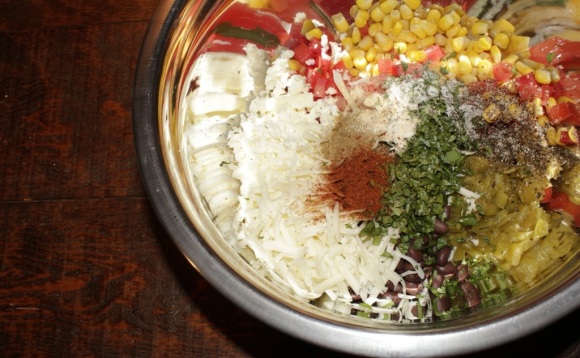
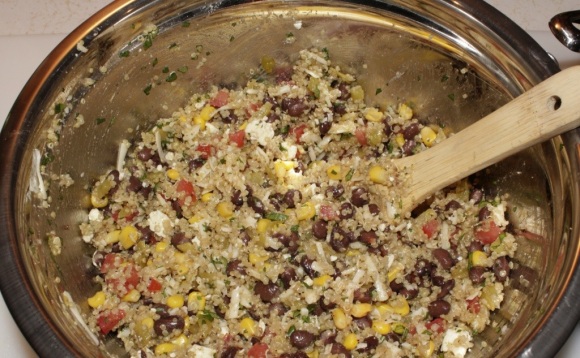
2. Mix all the ingredients gently in a big bowl, except for the peppers obviously.
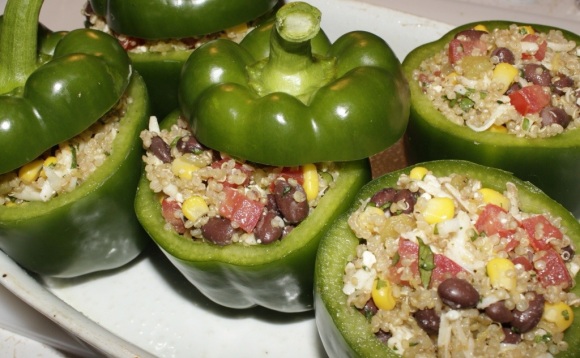
3. Spoon the filling into the pepper bowls. Tap them on the counter to get everything to the bottom.
4. Gently stuff.
5. Place them in the parchment lined baking dish.
6. Bake for about 40 minutes. I baked mine with the “tops” on but as you can see in the pics, they wrinkled. Bake them without the tops until the filling is hot inside.
7. Eat em up right away!

Quinoa is usually found in the same section of the grocery store that the rice is found in.
20140312-205346.jpg
1 cup of uncooked quinoa will equal 3 cups after it’s cooked
For every 1 cup of uncooked quinoa use 1.5 cups water or chicken broth
Rinse and drain quinoa in a fine mesh strainer
Bring liquid to a boil, and add in the quinoa, give it a stir and then reduce the heat to a med-low temp. Put the lid on it and let it simmer for 15 minutes or until all the liquid is absorbed.
Put the lid back on it and remove it from the heat. Set it aside for 5 minutes.
Fluff it up with fork
20140312-181545.jpg
I recruited Hubby to help me out with the next 3 shots. It gets awfully challenging trying to hold that massive camera and operate a sharp knife. Here you want to cut the top portion of the peppers off to create the ‘tops’
Use a sharp knife and slice down the edge of the ribs of the pepper following down towards the base of the pepper but not cutting through!!
Pop out the seed pack in the middle and knock out any seeds.
Using that handy melon baller {I like it better than a spoon because it has sharper edges} scrape out the remaining bits of the ribs until you have some nice little pepper bowls!
20140312-004250.jpg
They are super cute. I think I can find other reasons to use this type of ‘vessel’ for dips and sides in the future.
20140312-004310.jpg
Ok mix up all those ingredient, minus the peppers, in a nice big mixing bowl. Toss it all together gently.
I think this is the first time I’m using feta cheese in something other than a greek meal. I find this highly intersting and can’t wait to see what it tastes like.
20140312-004331.jpg
Once you have the filling all together you can simply put it in a casserole dish with a lid on it and just bake it that way if you don’t want to go through the effort of the pepper. I think the next time I will omit the pepper bowl if it’s just Hubby and I, and maybe leave the quirky presentation to when I’m preparing it for guests. It’s just alot of pepper for us. I like my peppers much more tender. Too the point of fully softened mush. Mmmmmm nummy yummy
20140312-004336.jpg
Here’s where you get to fill the pepper bowls up with that yum yum quinoa filling. I sprayed my baking dish as I ran out of parchment paper at christmas time and never replaced it. This caused my filled pepper bowls to slide around. I’m thinking the parchment would keep them in place better. Scoop and stuff the peppers and put them in the lined dish. The original recipe that I saw did not seem to bake the peppers with the “tops” on. I did and the “tops” came out quite wrinkled. I think for a better presentation, I would bake them without the “tops” and then just pop them on after you take them out of the oven. I also added a few shreds of the monteray cheese to the top of the filling before baking. gives them a nice finished look. Then I meant to sprinkle them with fresh chopped cilantro but I forgot and had already taken the pictures…. LOL #foodbloggerproblems haha.
20140312-004342.jpg
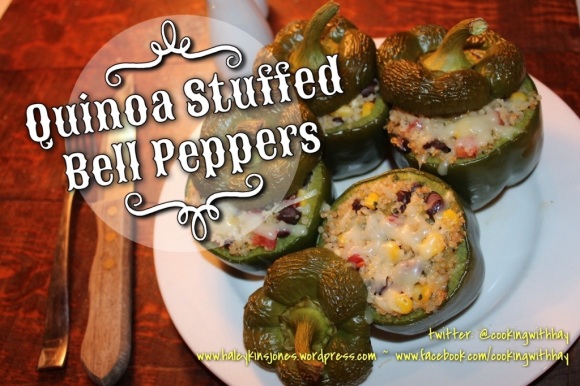
I baked these in a preheated 350 F oven for about 40 minutes. Check them at 30 minutes. You want the filling to be hot throughout. I think they look cute with the wrinkled tops, but not that cute, oh well. They were absolutely scrumptious! Even Hubby liked them.
20140312-004356.jpg
I served these with butterflied, grilled chicken breast. Seasoned them with sea salt, fresh ground pepper, garlic and a slight sprinkle of chili powder, with a side of a homemade chipotle dip {fat free sour cream, a wee bit of light mayo and as much chipotle puree as you can handle}
Yay for the second bbq this year! I just love the flavour that a bbq or grill can bring to the food and to the table 😉
Now I know it’s not a Green Egg bbq or anything like that or a nice old fashioned one but it does the job. It may actually need to be replaced this year. We’ve been saying this for the last 2 years so we’ll see.
20140312-004404.jpg

20140312-004421.jpg

And since I’m suffering from severe post vacay depression….. I’ve posted a small collection of pics from House Of Haley Photography, from our time in Mexico a few weeks ago. You can find them at the bottom of this post.

❤️

Thanks for visiting, if you liked this blog please click LIKE below.
If you want to follow my blog please scroll to the bottom, click the FOLLOW button and enter in your email address.

Love Haleykins
20131230-210222.jpg

❤️

**Please click OLDER POSTS, {below} to see more**
Find me on Facebook at http://www.facebook.com/cookingwithhay – Please LIKE my page.
Follow me on Twitter at @cookingwithhay

20140312-193443.jpg

20140312-193504.jpg

20140312-193510.jpg

Tagged , , , , , , , , , , , , , , , , , , , , , , , , , , , , , , , , , ,

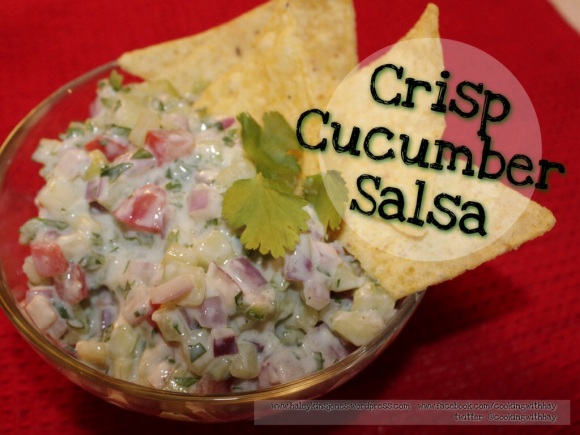
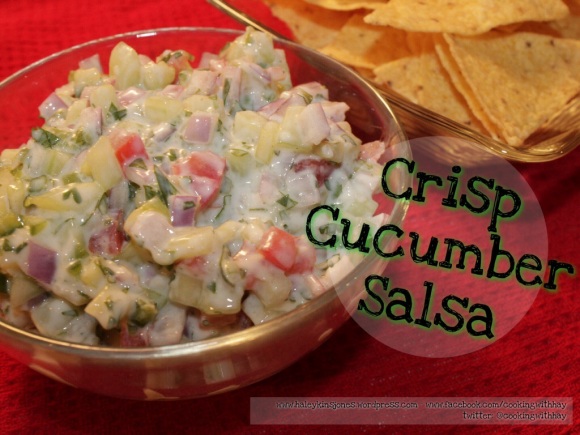
CRISP CUCUMBER SALSA

As promised yesterday, here is another super delicious recipe involving…. a cuke!
I saw this and it looked like a neat thing to try seeing as tho I just made a traditional salsa a few days ago. I already had all the ingredients needed in the fridge and I just love when that works out. Now, when I say, “this just may be the very best salsa in the world!” well, this is one of those times that you need to believe me! But you don’t have too. Give me just a few more minutes to tell you how to make it, then you give it a try and you be the judge. Seriously, if you like to cook or make stuff in the kitchen, heck ya you’re going to love it. If you’ve never made anything, then this is a perfect way to start. Regardless, please just try it.

Hubby had barely walked in the door yesterday and I had put it in front of him. He couldn’t stop eating it and he’s really not a big salsa guy. “Yes, success!”
20140310-214843.jpg
HERE’S WHAT YOU’RE GOING TO NEED:
2 CUPS CUCUMBER, PEELED, DESEEDED, FINE DICED
1/2 CUP ROMA TOMATOES, FINE DICED
1/4 CUP RED ONION, FINE DICED
1 JALAPENO PEPPER, DESEEDED, MINCED
4-1/2 TSP. MINCED CILANTRO
1/2 A SMALL PRE MADE HOMEMADE GARLIC BALL {or 1 clove minced garlic}
1/4 CUP FAT FREE SOUR CREAM
1-1/2 TSP. LEMON JUICE
1-1/2 TSP. LIME JUICE
1/4 TSP. CUMIN
1/4 TSP. SEASONING SALT
ORGANIC GLUTEN-FREE TORTILLA CHIPS, NO SALT

20140310-214934.jpg
HERE’S WHAT YOU’RE GOING TO DO:
In a mixing bowl add the cucumber, tomatoes, onion, jalapeno, cilantro and garlic.
In a seperate bowl combine the sour cream, lemon and lime juice, cumin and seasoning salt.
Add the sour cream mixture to the veggie mixture and gently toss to combine.
Enjoy with organic gluten-free tortilla chips.
20140310-214850.jpg
Last but not least, low sodium YO! The is mostly cucumber rather than tomatoes like a traditional salsa. Sure there’s seasoning salt in it but there is salt in traditional salsa also so this is definitely a win win.
Can’t wait for summer bbq’s with this one.

❤️

Thanks for visiting, if you liked this blog please click LIKE below.
If you want to follow my blog please scroll to the bottom, click the FOLLOW button and enter in your email address.

Love Haleykins
20131230-210222.jpg

**Please click OLDER POSTS, {below} to see more**

❤️

Tagged , , , , , , , , , , , , , , , , , , , , , , , , , , , , , , ,

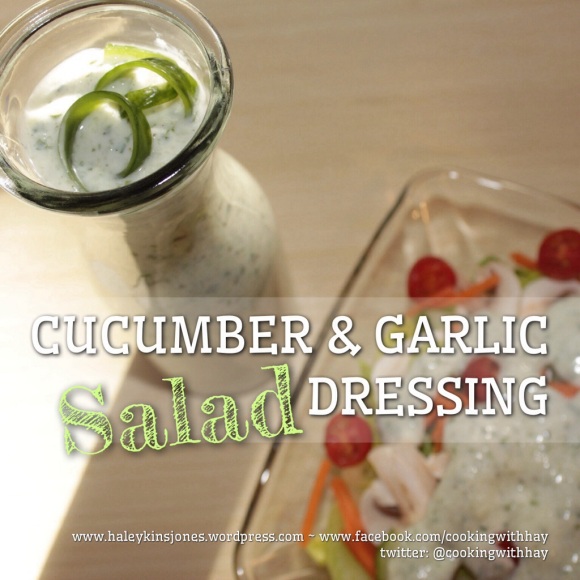
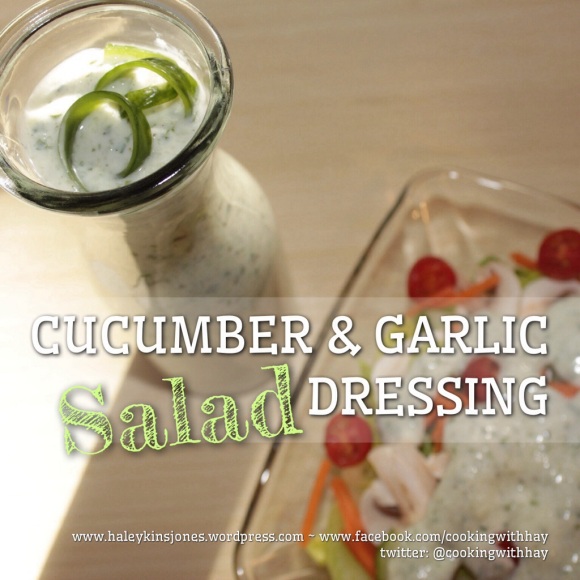
CUCUMBER & GARLIC SALAD DRESSING

Oh so many wonderful things you can do with a cucumber…… 😊
Head out of the gutter!
Here is 1 fun thing, and tomorrow I’ll share another! Thanks for visiting and please help me out by clicking LIKE and SHARE on Facebook

20140310-185918.jpg

WHAT YOU’LL NEED:
2 CUCUMBERS {PEELED, DESEEDED AND PUREED, I used my food processor, and include the juice from the cucumbers}
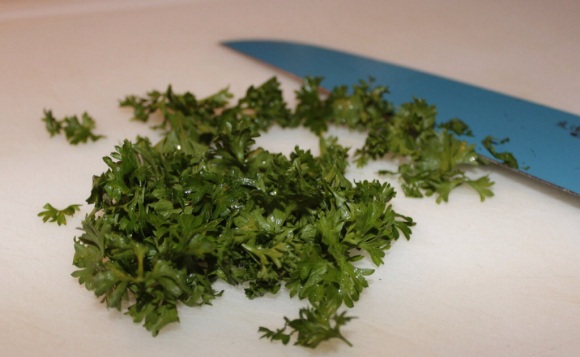
1/4 CUP CHOPPED PARSLEY
1/4 CUP CHOPPED CHIVES
1/2 PRE MADE HOMEMADE GARLIC BALL {or 2 cloves minced garlic}
1 CUP FAT FREE SOUR CREAM
1/2 TSP. SEA SALT
1 1/2 TSP. GROUND PEPPER
WATER OR MILK TO THIN {optional}

WHAT TO DO:
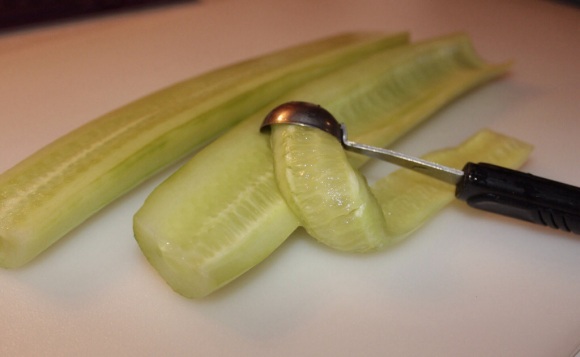
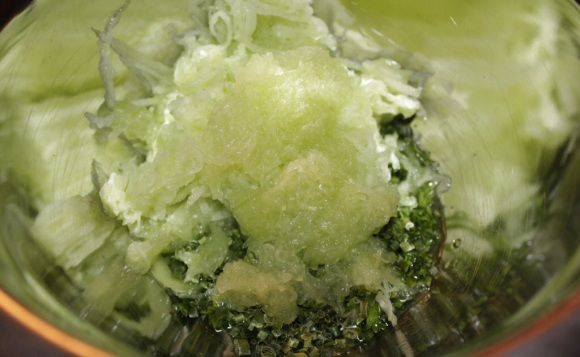
I use a melon baller to deseed cucumbers but you can use a small teaspoon if you don’t have a melon baller. I then pureed the cucumbers in my food processor. Dump the pureed cukes and it’s juice into a mixing bowl.
20140310-185947.jpg
Add in the chopped herbs. Now if you’re like me and still learning to cook…. you might not use chives all that often. I bought freeze dried chives so that I don’t waste anything. Once you add them in they will soften and be just the same as if they were fresh so not to worry.
20140310-185956.jpg
Add the garlic to the mixing bowl. Cucumber, parsley, chives, and garlic. Starting to look like something the dog puked up? K then we’re on the right track. LOL
20140310-190007.jpg
Stir in the sour cream, salt and fresh ground pepper.
20140310-190034.jpg
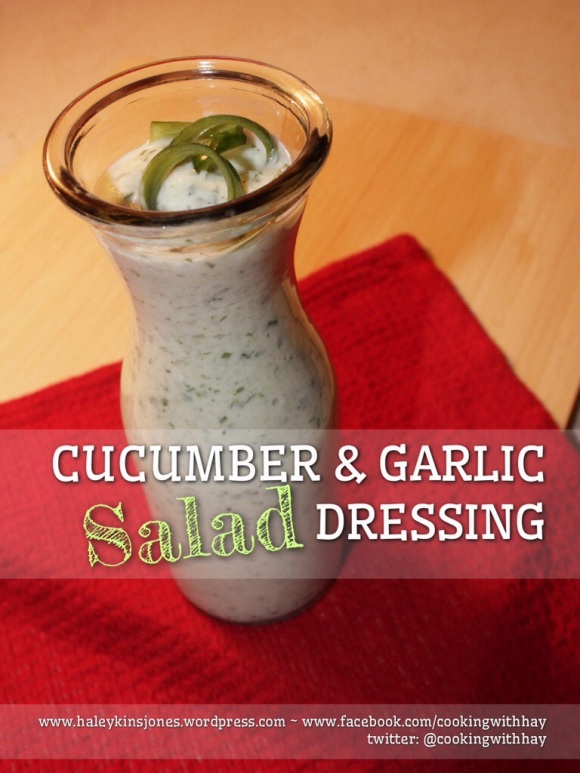
Using a funnel and a rubber spatula, {how did I ever live without a funnel?} pour/scrape every drop of this easy, healthy homemade salad dressing into some type of pretty decanter. I picked up this glass beauty from my local $ store. 🙂 Garnished it with a cucumber peel twist 🙂
20140310-191026.jpg
Now, whip up a fresh salad with all those leftover veggies you have in the crisper drawer before they spoil and Hubby scowls at you….. not that that happens here or anything…. 🙂 JUST MAKE SURE TO USE UP ALL YOUR VEGGIES. I made up a great salad with romaine lettuce, mushrooms, cucumbers, celery, carrots, tomatoes and peppers.
20140310-190044.jpg
Serve this after it’s chilled up a little bit in the refrigerator. Then, sit back and enjoy clean eating and healthy living. Between my Chipotle Southwest Dressing and my Mom’s, MARIANNE’S HOMEMADE CAESAR SALAD DRESSING I doubt I will ever buy salad dressing again. Knowing exactly what we are putting into our bodies is comforting when it’s food like this.

I’m going to be completely honest and maybe a little vain but I am smiling…. I’m smiling because I’m proud of the change we are making. We were always conscious of the crap food we would eat but we let our tastebuds make the decisions. We can do this, we can continue this.
Today this blog passed 7000 views. I just can’t believe that it’s been looked at over 7000 times. Today my Facebook page, Cooking With Hay, reached a new high as well. Over 100 people have kindly LIKEd my FB page. Thank you Thank you Thank you. The higher these numbers grow, the more inspired and eager I get. I’m constantly browsing for new things to try and yet they are things that are quite basic, fairly common, and well, really good. But it’ real food for real people. When I start whipping up Crown Roasts….
20140310-200754.jpg
…then it’s a whole different kinda ballgame. {Although I hear they aren’t as hard as they look… 🙂 }
20140310-190051.jpg

This dressing came out with a thicker consistancy that most salad dressings. We like it this way but it was pretty thick. You can thin it with a little bit of water or skim milk if it’s too heavy for you. I’m going to leave mine as is and use it as a dip for the rest of the remaining veggies, as it’s just the perfect consistancy for a dip as well.

Found on Pinterest from Taste Of Home

❤️

Thanks for visiting, if you liked this blog please click LIKE below.
If you want to follow my blog please scroll to the bottom, click the FOLLOW button and enter in your email address.

Love Haleykins
20131230-210222.jpg

**Please click OLDER POSTS, {below} to see more**
❤️

Tagged , , , , , , , , , , , , , , , , , , , , , , , , , , , , , , , , , , , , ,

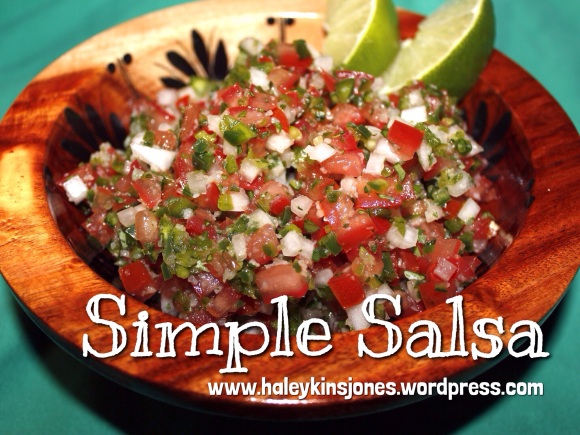
SIMPLE SALSA

Hello Everyone!! It’s been quite a while since I did a post. I apologize for the hiatus, my mind has been preoccupied with my trip to Mexico. Ok let’s be real. I spent some weeks going through the pantry and freezer putting together things, I had to create some meals…. It was time to clear out a bunch of those one off cans of who knows what mixed with a little of this and a little of that. Nothing pretty, a little weird, but it was food in the belly and that’s all that matters. Really tho my mind had been in the clouds counting down the days to our little vacation in the sun. We are home now and yet the spirit of Mexico lives on in our home. We purchased a wooden bowl set for salsa, guac, and chips and I just love them. I’ve wanted a set for a long time now. Ever since our first trip to Mexico back in 2011. I was so excited to pull them out of our suitcases that I hoped in the truck and took of to the market for supplies. Simple Salsa is up next.
20140306-154823.jpg

🌵 SIMPLE SALSA 🌵

3 ROMA TOMATOES (choose the harder ones over the soft ones)
1/4 WHITE ONION
1 SERRANO PEPPER
1 JALAPENO PEPPEER
1/2 LIME
1 PRE MADE HOMEMADE GARLIC BALL {or 4 minced cloves of garlic}
CILANTRO
SEA SALT
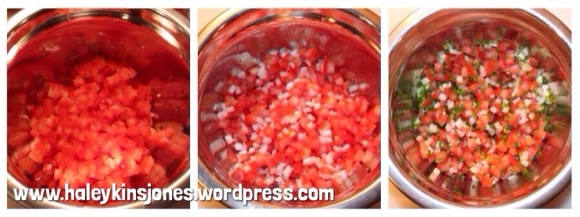
20140306-193406.jpgStart with the tomatoes, hard roma tomatoes work best. I cut them in half lengthwise and then cut those in half lengthwise again. Scrape out all the seeds and juice. Dice them up really fine. Smaller bits are easier to scoop up.
20140306-195757.jpg
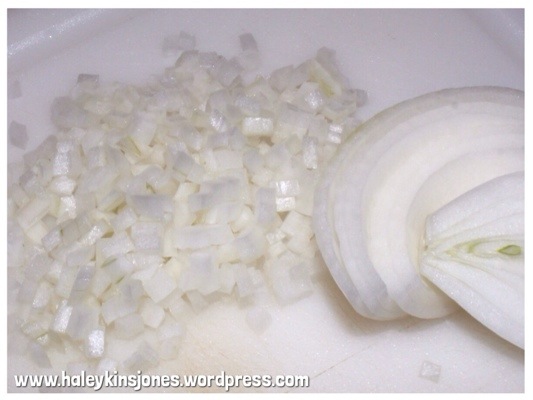
Dice up the onion really fine as well. Same size as you did the tomatoes.
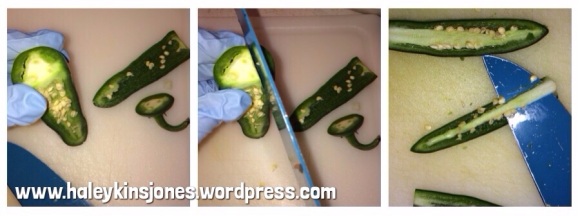
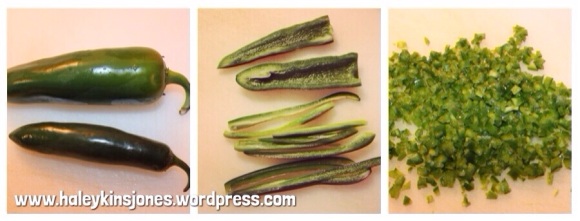
20140306-154853.jpgWhen chopping up peppers be sure to wear gloves. Bell peppers, you’ll be fine but these hot peppers require gloves. I burnt my left thumb with burns from these peppers once before and lets just say I’ve learned my lesson. My fingerprint is not the same as it once was. These are the best ways to cut up peppers like these ones. For Jalapeno’s, cut off the top part with the stem and slice off the parts not attached to the ribs. See the first 2 pictures above. For Serrano’s, since these ones are even thinner, cut of the top part again with the stem and then cut the pepper in half lengthwise. With the tip of a sharp knife, carefully run it under the ribs of the pepper, removing them in one clean cut. Take a look at the 3rd picture above.
20140306-154859.jpgOnce again, dice up the peppers nice and fine…. I like these to be very very tiny. Mince them. That’s a more appropriate word.
20140306-154926.jpgSqueeze the juice from half a lime into the bowl and let the very merry tomato marinating party begin. Add in the thawed PRE MADE HOMEMADE GARLIC BALL
20140306-154933.jpgChop up a few fresh cilantro leaves or if you are one of those people that says “I don’t like cilantro” that I shake my head at well then simply omit the cilantro from your Simple Salsa. Easy Breezy…
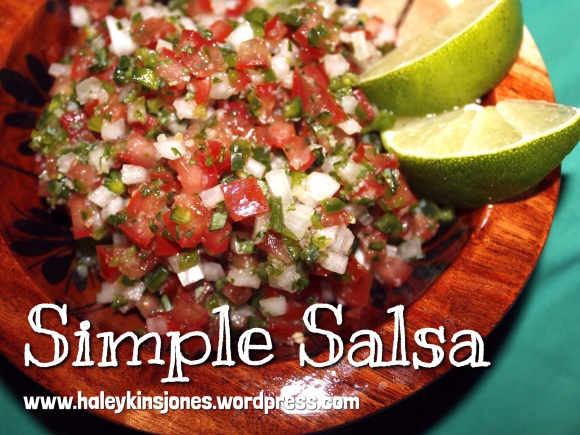
20140306-154941.jpgThe whole thing comes together all quite quickly and look it’s even the colours of the Mexican flag.
20140306-154950.jpgLet this marinade together for at least a few hours in the fridge before serving in and airtight container. Don’t worry about it not being to ‘wet’ as the salt will draw out the liquids in the tomatoes, onions and peppers and mix with the lime juice. It’s to die for delicious and worth the wait.
20140306-154956.jpgWe opted for organic tortilla chips, gluten free and that had the lowest calorie content. Que Paso chips from the organic section of the grocery store. I just love how it looks in the new mexican salsa bowl we brought home.
Scarf it up and imagine a mariachi band playing, the ocean waves crashing and the sun beaming down warming your skin.
20140306-205547.jpg
Ahhh Mexico, we love and miss you already.
20140306-210224.jpg
Thanks for visiting, if you liked this blog please click LIKE below.
If you want to follow my blog please scroll to the bottom, click the FOLLOW button and enter in your email address.

Love Haleykins
20140306-210052.jpg
**Please click OLDER POSTS, {below} to see more**

Tagged , , , , , , , , , , , , , , , , , , , , , , , , , , , , ,

Fajita Seasoning

Hey Guys!  I had been using a fajita seasoning mix recipe that I got a few years back.  I had posted about some yummy Chicken Fajita’s back in 2012 and I’ve been using this combo ever since.  I just came across one that sounds even better on Food.com.  In previous years I had used those Old El Paso packets when I made fajita’s and this one claims to be alot like it if not better.  I am making some fajita’s tomorrow night for dinner, shrimp ones, chicken ones and some steak ones.  Only because I can’t settle for just one kind.  I just made up a batch of this seasoning and I am going to give it a go tomorrow.  I have high faith that this is a keeper.
20140120-173223.jpg
Here’s the recipe!

FAJITA SEASONING
2 tablespoons – cornstarch
4 teaspoons – chili powder
2 teaspoons – salt
2 teaspoons – paprika
2 teaspoons – sugar
1.5 teaspoons – chicken bouillon crushed
1 teaspoon – onion powder
1/2 teaspoon – garlic powder
1/2 teaspoon – cayenne powder
1/2 teaspoon – cumin

Mix it all together and keep it in a dry container. 

Approximately 2 tablespoons of this mixture equals a packet of that store bought stuff. 
This recipe made just over 6.5 Tablespoons.

This will save you money too as those packets can start to add up after a while.

Please give it a try! 
If you do make it, please leave me a comment below and let me know what you think. 

I will be writing a new blog tomorrow after I make up these fajita’s so I’ll have a final verdict for you soon.

Thanks for visiting, if you liked this blog please click LIKE below.

If you want to follow my blog please scroll to the bottom, click the FOLLOW button and enter in your email address.

Love Haleykins
20131230-210222.jpg

Tagged , , , , , , , , , , , , , , , , , , , , , , , , , , ,

Saucy ‘n’ Savory TURKEY Crepes

** I apologize for the picture quality, dark and gloomy here and I’m working in the basement remember. thanks for understanding. **

For months now I’ve been dreaming of these Turkey Crepes that my Mommy used to make for dinner. I’ve only ever heard of people having fruit in their crepes and I can still taste the flavor of these ‘non-fruit crepes’ from my childhood. I got on my ipad and messaged mom for the recipe. Here is her response.
photo
Love it, I now know the basics to this dish. How to make the crepes, I still don’t know, but I can work with this. Strapping on my “Will Cook For Bling” apron and into my temporary basement dwelling kitchen I go.
20130928-232757.jpg

Saucy ‘n’ Savory TURKEY Crepes

TURKEY:
1/2 TBSP. BUTTER
2 (1 lb) TURKEY BREAST, skin removed
SEASONED WITH SALT, PEPPER, DRIED OREGANO, DRIED PARSLEY & GARLIC
Bake the turkey breast in a covered dish until internal temp is 185F, approx 30-35 minutes.

CREPES:
4 EGGS
1.5 CUPS MILK
1 CUP FLOUR
1.5 TSP. DRIED PARSLEY
Whisk together eggs and milk.
Slowly add in the flour, mix until smooth, no clumps.
Add the parsley.
Cover it with Saran and keep it in the fridge for about 30 minutes for it to set up.
TO COOK:
Spray frying pan with cooking spray, medium heat.
1/4 cup of the mixture into the center of the hot pan, roll it around until it’s thin and round.
Once the bottom is golden and the top is firm, flip it gently with a spatula, brown the other side for about 30 seconds.
Repeat process, spraying the pan each time with cooking spray.
Stack on a plate, prepare to serve.

FILLING:
2 TBSP. BUTTER
1.5 CUPS ONION, DICED
2 CUPS CELERY, DICED
2 CUPS MUSHROOMS SLICED
TURKEY BREAST, COOKED AND CHOPPED
1 TSP. POULTRY SEASONING
SALT & PEPPER
1/2 OF THE BÉCHAMEL
Sauté the onions,celery and mushrooms in the butter.
Season with poultry seasoning, salt and pepper
Add in the cooked, chopped turkey
Before serving add half the hot béchamel sauce to the filling and mix until evenly coated.
Reserve the remaining béchamel to drizzle on top.

BÉCHAMEL:
4 TBSP. BUTTER
2 TBSP. FLOUR
2 CUPS HOT MILK
4 TSP. DIJON MUSTARD
SALT & PEPPER
Melt the butter in a saucepan, stir in the flour and cook for about a minute.
Slowly add the milk, then add the mustard, salt and pepper and cook until thickened, about 5-8 minutes.

20130928-233032.jpg
Bake the turkey breasts in a covered dish until internal temp is 185F, approx 30-35 minutes per pound. I used my Kitchen Aid, 4 quart, covered, cast iron oval casserole dish. This thing was a gift from my wonderful mommy a few years ago and it’s the best dish I have in my kitchen for cooking and roasting! Canadian Tire has them and usually on sale before the holidays. While the meat is cooking, continue on with the next steps.
20130929-103425.jpg
**I’ve discovered that writing a recipe is different from writing the method of procedure for the recipe. Everything is going on at the same time but yet at slightly different times. Broken up and here and there, good luck on following this one. I’ll do my best.**
20130928-234817.jpg
Whisk together eggs and milk. Slowly add in the flour, mix until smooth, no clumps. Add the parsley.
Cover it with Saran and keep it in the fridge for about 30 minutes for it to set up.
20130928-233242.jpg
Chop up your veggies!
20130928-233358.jpg
20130928-233426.jpg
20130928-233546.jpg
Sauté the onions,celery and mushrooms in the butter.
Season with poultry seasoning, salt and pepper
20130928-233636.jpg
The meat is done when it reaches an internal temp of 185F. I think mine was in a 325C oven for 1hour and 15 minutes. I used my meat thermometer to determine the temp. Love this kitchen gadget. How do you ensure properly cooked meat without one?
20130928-233656.jpg
The meat will be too hot to handle right after it’s cooked so let it rest for a few minutes, I’m sure you have some dishes to do.
20130928-233722.jpg
Remove any bones from the turkey breast and chop it up, dice it up!
20130928-233901.jpg
Add in the cooked, chopped turkey to the seasoned, sautéed veggies.
20130928-234424.jpg
To make the Béchamel Sauce (white sauce), melt the butter in a saucepan, stir in the flour and cook for about a minute.
Slowly add the milk, then add the mustard, salt and pepper and cook until thickened, about 5-8 minutes.
20130928-234439.jpg
Before serving add half the hot béchamel sauce to the filling and mix until evenly coated.
20130928-234552.jpg
Mmmmm this is what makes this dish “Saucy ‘n’ Savory”.
At this point, I could just skip the crepes and grab a fork!!! I may have done that, but then you would stop reading and all my hard work would be half in the trash. Please continue on and put the fork down. All good things come to those who wait.
20130928-234606.jpg
Spray frying pan with cooking spray, medium heat.
1/4 cup of the mixture into the center of the hot pan, roll it around until it’s thin and round.
20130928-234613.jpg
Once the bottom is golden and the top is firm, flip it gently with a spatula, brown the other side for about 30 seconds.
Repeat process, spraying the pan each time with cooking spray.
Stack on a plate, prepare to serve.
20130928-234638.jpg
Lay out the crepe on a plate and spoon some of the filling into the center of the crepe, in a horizontal line.
Fold in the sides and then fold up the bottom. Then fold the top down. Like a cute little envelope with a precious little package inside. A “Saucy ‘n’ Savory” package that is! Drizzle them with the remaining Béchamel.
I have a friend that actually mailed a plastic wrapped cupcake across the country as a joke. Needless to say it did not look like a cupcake when it arrived in Nova Scotia. Please don’t mail these little packages. Just eat them!
20130928-234656.jpg
And there you have it! A new recipe under my belt. I hope you try them and enjoy them!
20130928-234701.jpg
As I had mentioned in the beginning, hard. to. write. So please do let me know if you find errors or editing that needs to be done. Once I look at these blog html codings for so long I get wonky eyes and can’t see anything wrong. I have a feeling this one will need an edit.
20130928-234708.jpg

Thanks for visiting, if you liked this blog please click LIKE below.
If you want to follow my blog please scroll to the bottom, click the FOLLOW button and enter in your email address.

Love Haleykins
20130919-203639.jpg

Tagged , , , , , , , , , , , , , , , , , , , , , , , , , , , , , , , , , , , , ,

Crunchy Fiesta Chicken Wraps

Mexico, oh how I miss Mexico. It does not seem like we were there in Feb/Mar, but we were. Forever ago. I love that place, the sights, the sand, the seas, the people and of course, the food. We have done all inclusive in Mexico and we have gone to local restaurants out on the town. Please take my advice and DON’T do all inclusive. Enjoy the real food, the fresh food, the food that is cooked when it’s needed not cooked, shipped, stored, reheated, put out in the buffet and then with whats left it gets reheated….. And well,you get where I’m going with this, right.

Last time I was at the grocery store I picked up some wraps, thinking it had been far too long since we had something of this variety. That was a few days ago and those wraps sat untouched, on the counter, whispering to me.

As I had mentioned in a past post, similar to this one, wraps just make everything that extra bit more awesomesauce. As well there was rice in the fridge from the Butter Chicken recipe I made the other night. Seemed like a win win. Plus, a slow cooker is a dream. It does the the work and makes for super yummy-licious juicy shredded chicken!!!

Hubby likes foods that are juicy and yet still crunchy, I look forward to his reaction with this one. I intend to fulfill both. LOL

20130923-224837.jpg

CRUNCHY FIESTA CHICKEN WRAPS

INGREDIENTS:
4 LARGE CHICKEN BREASTS (boneless, skinless)
1/2 ONION, FINE DICED
1 SMALL CAN ZESTY ROTEL TOMATO SAUCE (tomatoes & green chilies)
3-4 TABLESPOONS HOT SAUCE (Franks, Sriracha, Habanero – adjust to your taste, start with less then add more)
1 TEASPOON SALT
2 TEASPOONS CUMIN
1+1/2 TEASPOON CHILI POWDER
1 PREMADE HOMEMADE GARLIC BALL, or 4 cloves, minced
1/4 CUP RED PEPPER, DICED
1/4 CUP BLACK BEANS (rinsed & drained)
1/4 CUP CORN, (drained)
2 CUPS GRATED CHEDDAR CHEESE
1 CUP SOUR CREAM
2 CUPS RICE, COOKED
8-10 FLOUR TORTILLAS (wraps)
2 TABLESPOONS OIL
CILANTRO & HOT SAUCE FOR GARNISH

DIRECTIONS:
Place chicken breasts in the bottom of your slow cooker
Toss in the onions
Add the Zesty Rotel Tomato Sauce
Then add the hot sauce of your choosing
Add in the salt, cumin, chili powder and garlic
I cooked this on high in my slow cooker for 4 hours
Stirring once or twice
At the 3:30 hour mark, shred the chicken with 2 forks and let it continue to cook

ASSEMBLY:
Mix shredded chicken, rice, beans, corn,and peppers in a separate bowl, set aside
Heat the oil in a frying pan over medium heat
Sprinkle cheese on the tortillas and add the sour cream
Spoon on the chicken & rice mixture down the center of the tortilla
Add a squirt of hot sauce if you so choose
Roll em up
Place 2 assembled wraps, seam side down in the hot oiled pan
Flip them when golden brown and slightly crunchy on the bottom, they only need a few minutes
Let them rest on a cutting board for about 3-4 minutes.
Slice in half and garnish with cilantro and hot sauce

HERE’S HOW IT ALL WENT DOWN:
20130923-224137.jpg
Place chicken breasts in the bottom of your slow cooker
Toss in the onions
20130923-224145.jpg
Add the Zesty Rotel Tomato Sauce
20130923-225054.jpg
Then add the hot sauce of your choosing
20130923-224224.jpg
20130923-224230.jpg
Add in the salt, cumin, chili powder and garlic
20130923-224511.jpg
I cooked this on high in my slow cooker for 4 hours
Stirring once or twice
20130923-224538.jpg
At the 3:30 hour mark, shred the chicken with 2 forks and let it continue to cook
20130923-224241.jpg
20130923-224340.jpg
20130923-224417.jpg
20130923-224424.jpg
20130923-234948.jpg
20130923-224524.jpg
20130923-224530.jpg
20130923-224543.jpg
20130923-224549.jpg
Mix shredded chicken, rice, beans, corn,and peppers in a separate bowl, set aside
20130923-224559.jpg
Sprinkle cheese on the tortillas and add the sour cream
20130923-224606.jpg
Spoon on the chicken & rice mixture down the center of the tortilla
Add a squirt of hot sauce if you so choose
Roll em up
Place 2 assembled wraps, seam side down in the hot oiled pan
20130923-224611.jpg
Flip them when golden brown and slightly crunchy on the bottom, they only need a few minutes
20130923-224724.jpg
Oh my goodness! YUMMY
Let them rest on a cutting board for about 3-4 minutes.
Slice in half and garnish with cilantro and hot sauce
20130923-224733.jpg
20130923-224738.jpg
20130923-224759.jpg
20130923-224751.jpg

Thanks for visiting, if you liked this blog please click LIKE below.
If you want to follow my blog please scroll to the bottom, click the FOLLOW button and enter in your email address.

Love Haleykins
20130919-203639.jpg

Tagged , , , , , , , , , , , , , , , , , , , , , , , , , , , , , , , , , , , , , , , , , , , , , , , , , ,