Tag Archives: photos

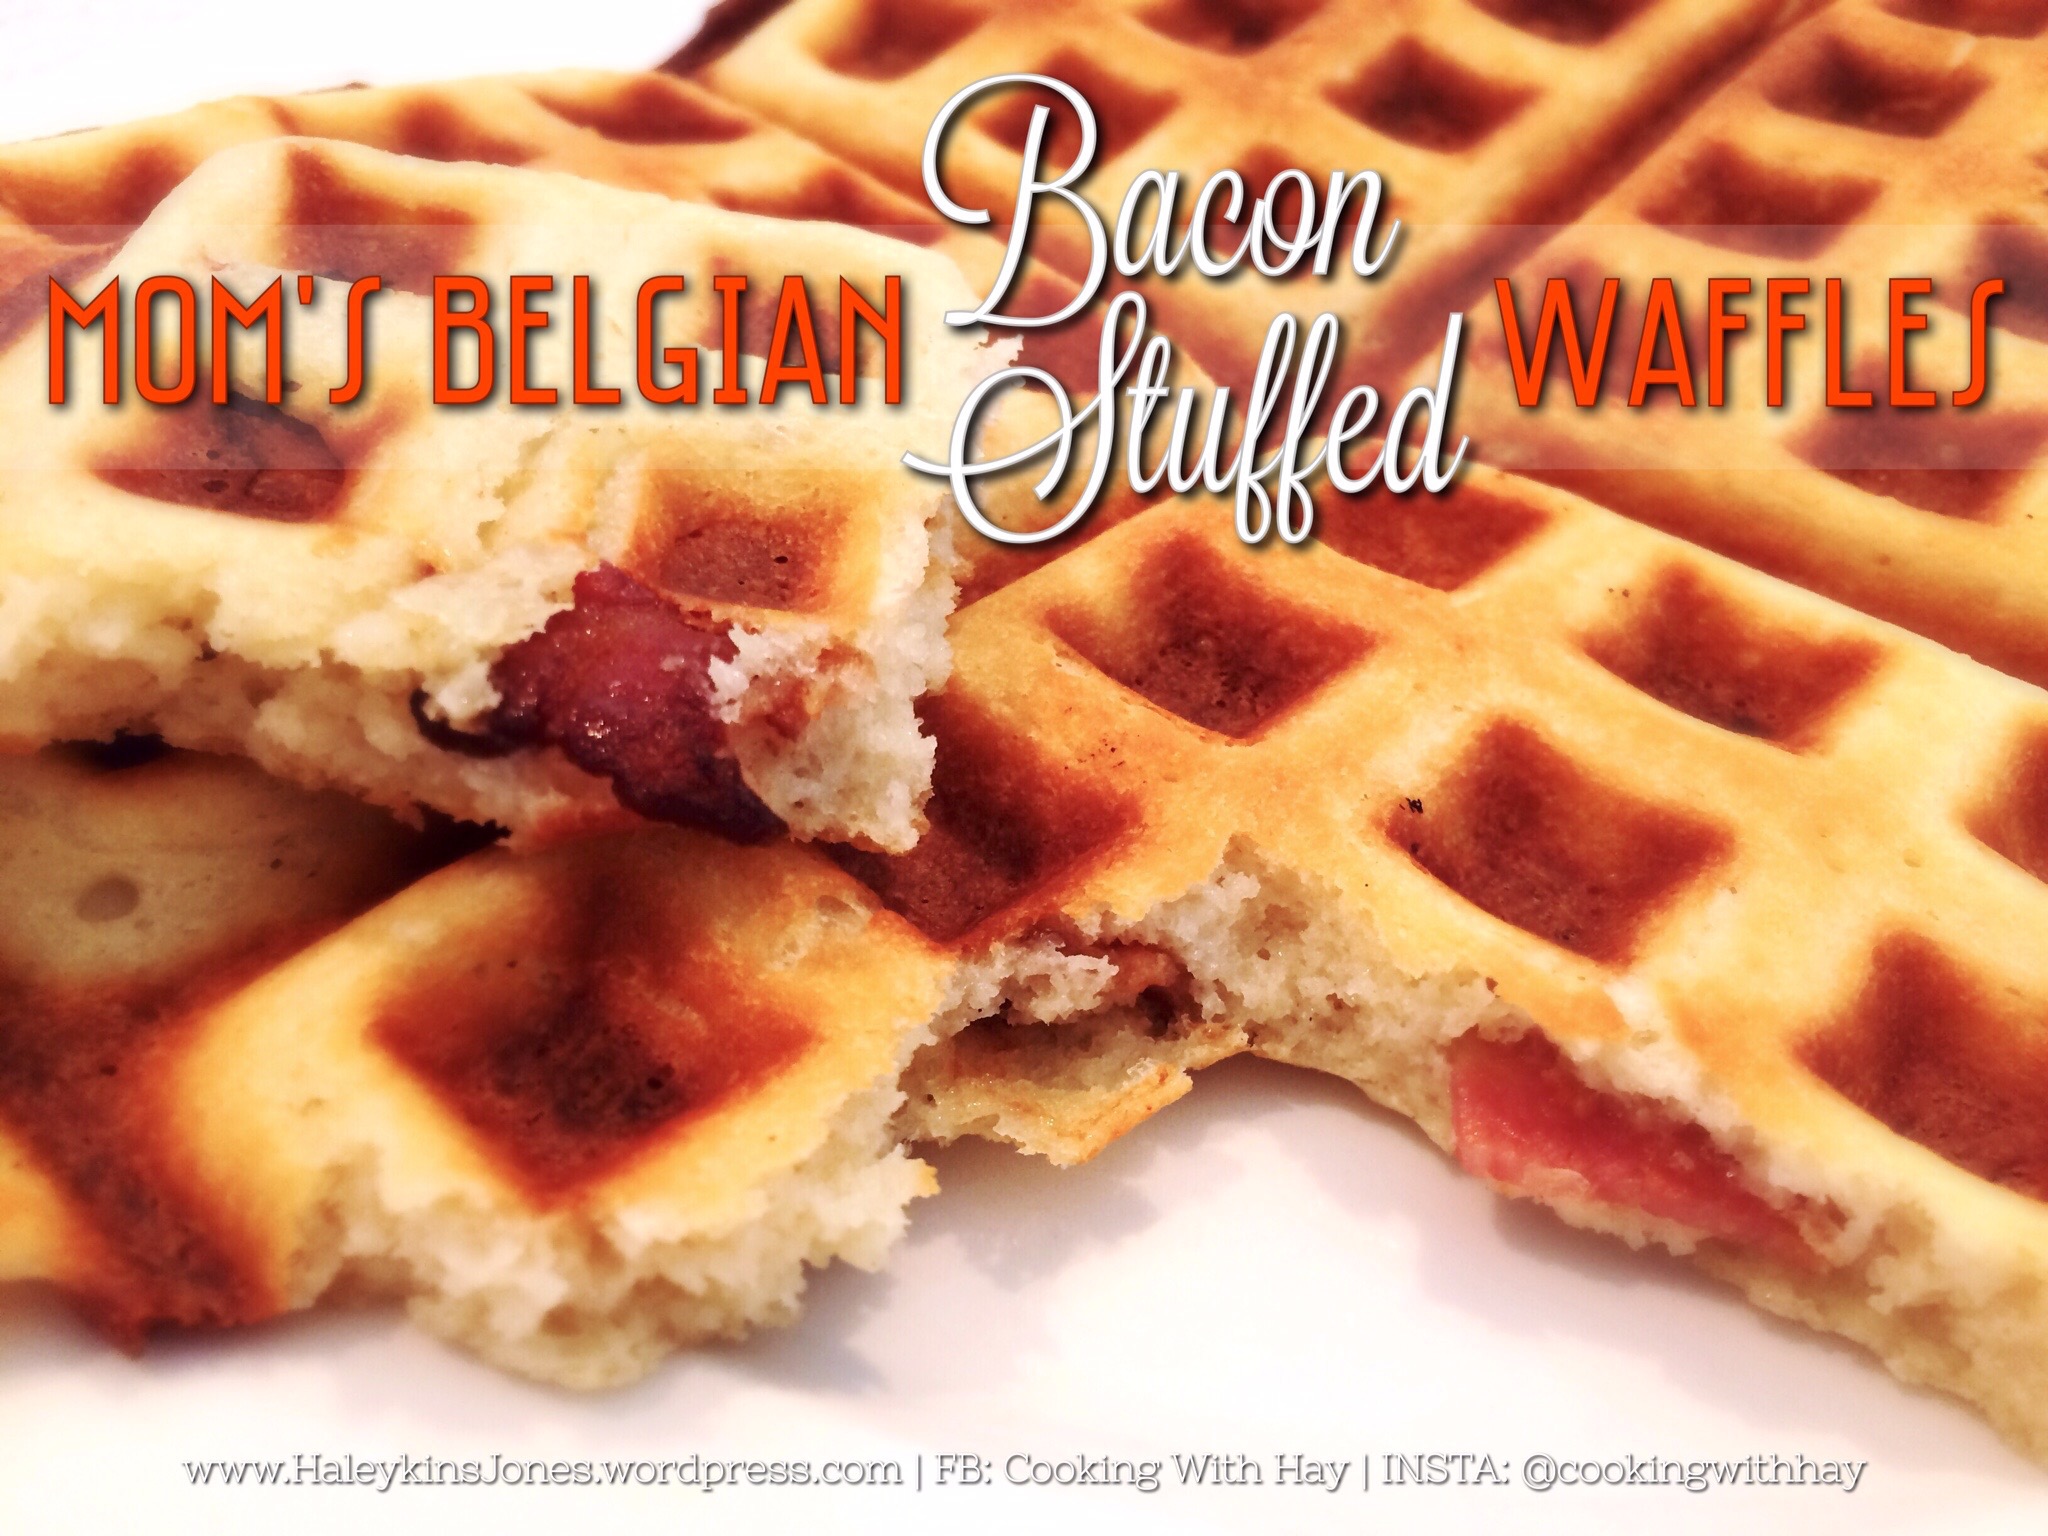
Mom’s Belgian BACON STUFFED Waffles

Waffles vs. pancakes… pancakes vs. Waffles. If this question came up 5 years ago I would have said pancakes.  Easily!  For sure pancakes. Even if someone would have asked me a year or 6 months ago… Pancakes for the win!  And then my whole world changed!

I was visiting my fam back home this spring.  I had just spent the day hanging with my little sister while she worked at The Dragonfly Cafe.  (I shouldn’t say I spent it ‘visiting’ because it really was spent drinking far too many of the best iced coffees and eating the most scrumptious, seriously to-die-for, Panini.  I walked back to my parents place, back to my second favorite kitchen, MOMS’s, and it was a busy place.  Waffle iron steaming away. The house smelled so good sausage and vanilla and oh wow just heavenly.  (I was no longer full from previously mentioned ‘to-die-for panini)

Niece and Neph., we’re there and if I remember right,  Dad was drooling, he loves breakfasts, especially for dinner.  I think Niece was pouting at the table, a typical dinner time predicament for her.  Cutest pout ever though; and Mom was helping Nephew operate the coolest waffle iron I’d ever seen.  It’s like a real waffle iron. Like the ones that u flip.  Flipping waffles half way through cooking… perfection!  The bottom side really gets the best golden look and crispy shell, so flipping them gives them that even golden crisp on BOTH sides!  Very cool!

I think I said I wasn’t hungry, but mom gave me a plate and said “too bad” so I dove in head first!  “Oh sweet baby jesus!”  I was not expecting this!  What was I eating?!?!?  This waffle, and may I mention that I eat them plain.  No syrup, peanut butter, honey, jam or even butter for that matter and don’t u dare ask me about that…. ughhh, Nutella. Never in my life will I eat that stuff. Hahaha. I just can’t even fathom it. I mean, no offence, Hubby acts like its gold so there s big jar in this house, but I won’t go near it.  Plain waffles…..

So this amazing flavour that was rocking every tastebud in my mouth was nothing but straight up pure oral pleasure. LOL.

If anything ever was….  this was!

The perfect combination of a crispy outer shell and fluffy interior.  They were so wonderfully sweet yet savory all at the same time and they didn’t even have any bacon stuffed inside.  Mmmm a little vanilla, salt, some butter….  Just too easy and I can’t tell you enough how good the flavour is.  I will never ever buy a store bought product again or Betty Crocker or any kind of mix again.

I love this recipe so much I might frame it and hang it right here on a newly finished wall.  With a big ole hammer and nail.  Nah…. Hubby would lose his shit!   He’s spend so much time making these old walls as perfect as he can.  Haha. If I dare bring out a hammer I’m likely to lose my whole arm all together.

First time I had bacon stuffed waffles was at Hash House A Go Go in Las Vegas.  It comes with sage fried chicken and syrup on top speared with a steak knife LOL. If u haven’t gone….. GO!

I just made these a couple weeks ago as well.  They were the first breakfast in the “Cooking With Hay” Kitchen.  I even served Hubs as he sat on a bar stool at the island.  As long as everyone follows the rules no one will get hurt.  He stays on his side of the island, and I stay on mine.  All will be good.😊

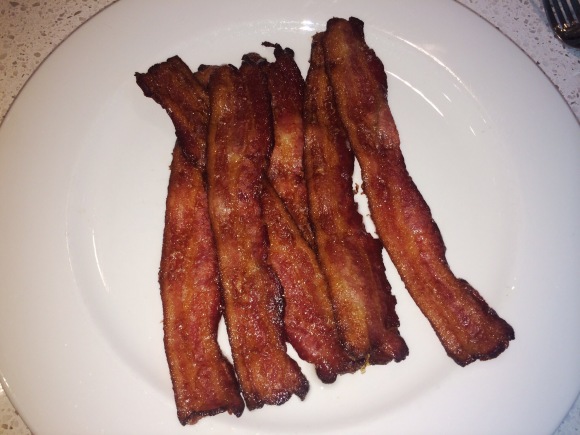
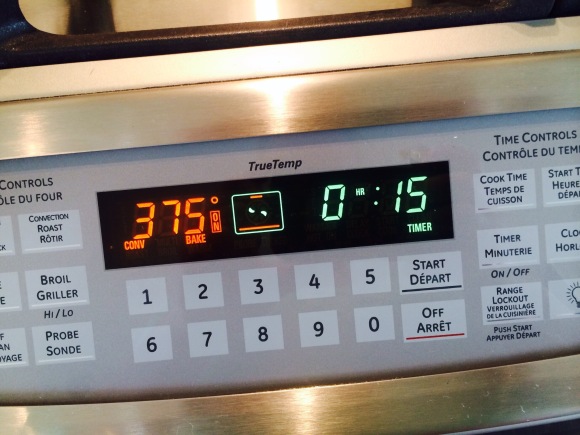
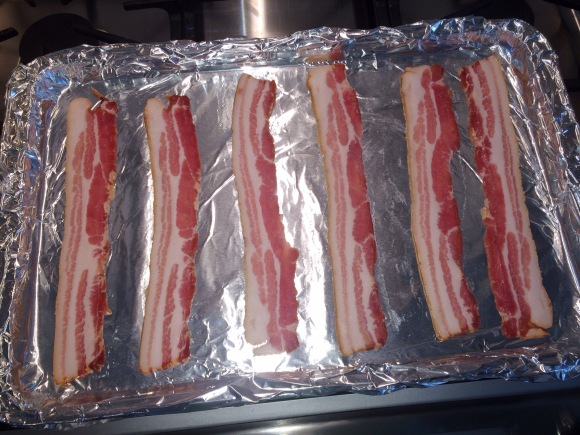
I have been cooking my bacon in the oven for over a year now.  Best way ever. Stays flat and no splatter or greasy mess to deal with.  Preheat your oven to 375 and you’ll need a timer set on 15 minutes once u place the pan in the oven.

Line a baking sheet with foi and place your uncooked bacon. It’s going to shrink up. You can line em up and fit quite a few on a sheet obviously.  I just make sure they don’t touch.

Now start that 15 minute timer.

When the timer goes off they may not be quite done. They may need a minute more or a few more.   Keep in mind they will continue to cook a tiny bit more after u take them out of the oven.

Remove from the oven and lay them on a paper towel to soak up some of that excess grease.  Beautiful bacon!

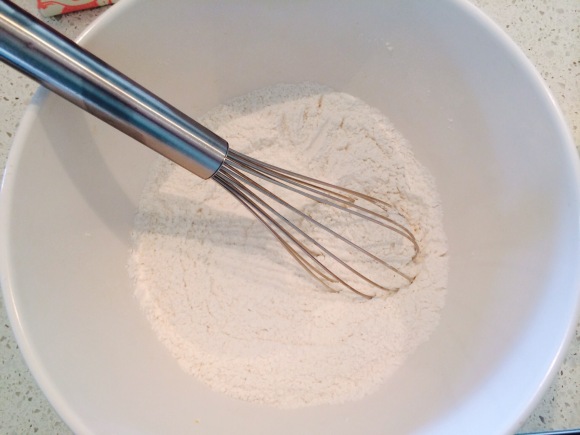
For the waffle batter mix up the dry ingredients in a bowl.

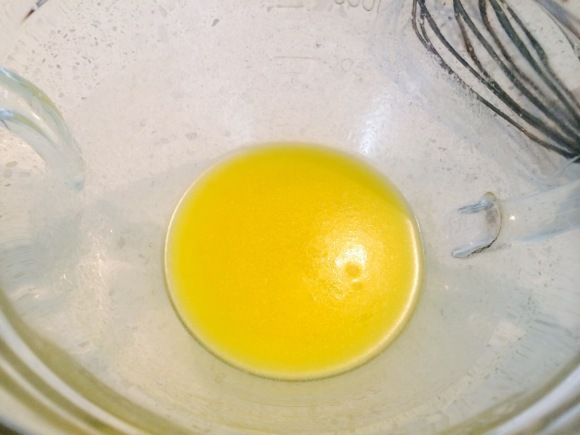
In a large glass microwaveable bowl melt the butter. Few seconds at a time.


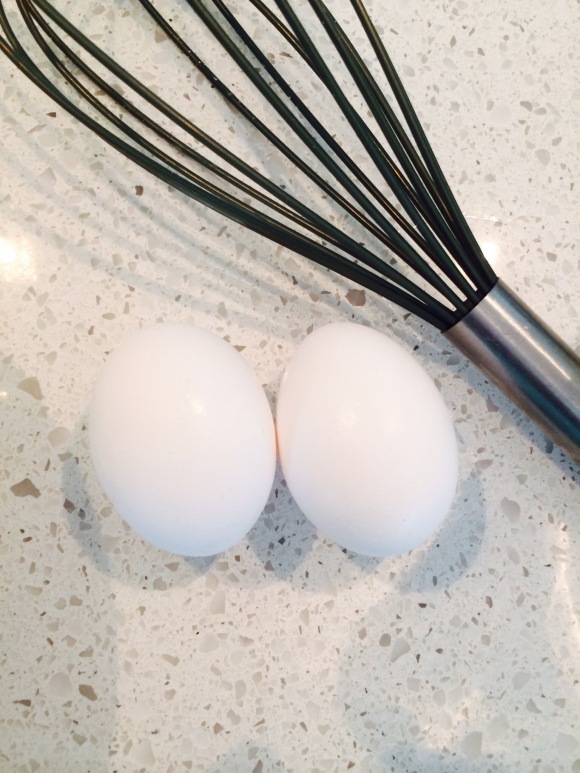
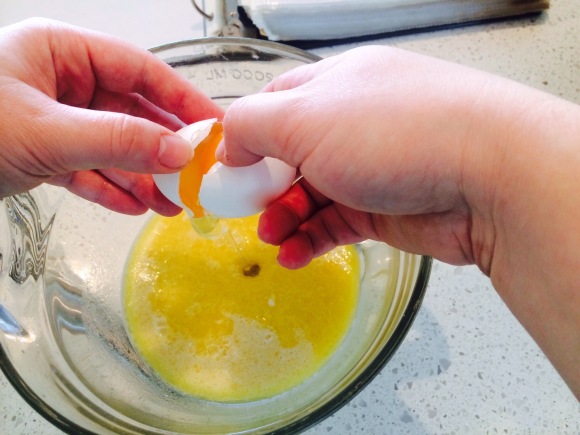
Add in the eggs the milk and the vanilla.

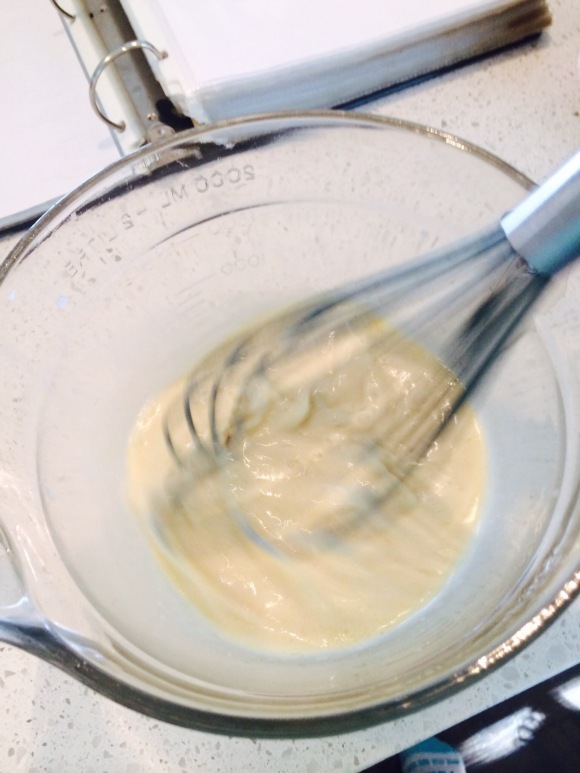
Whisk that up real good. Work it good.

🎵Look at that flick of the wrist…  LOL🎵

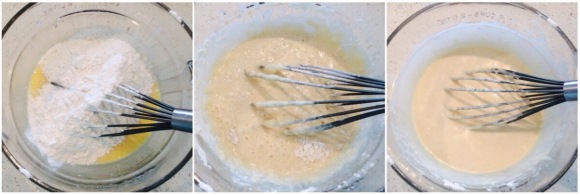
I then added the dry mixture to the wet mixture and gently whisked it until it was just smooth. Don’t over mix the batter.  Once it comes together just mix it until and lumps of flour are gone and the batter is smooth.

I like to let my batter rest for a few minutes.  Makes for a super good fluffy waffle.

I have a Cuisinart Griller. It’s like a panini press, a Griller and a waffle maker with all the plates that it uses. It’s fantastic. It was the only thing on my Christmas wish list a few years ago and Santa…. Aka Mom, came through for me!  It goes to work for me about twice a week!

Preheat it, follow your waffle makers instructions.   And spray it with cooking spray so the waffles don’t stick.

Chop up that super fabulous, oh-so-sexy, crispy, crunchy, heavenly BACON!!!

Mmmmmm I love BACON!  Can u smell it wafting in the air?  Taste it’s salty bite on your tongue?  Hahaha. Sorry just playing. I know u want some bacon too!

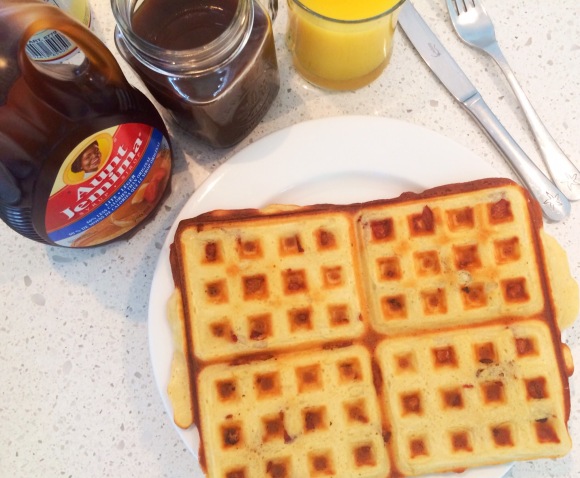
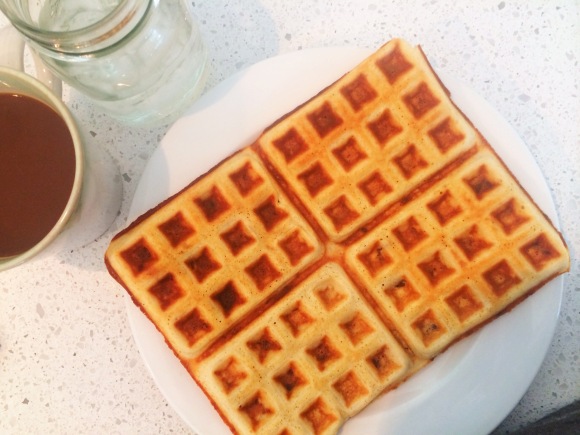
This is what they look like from the top, once they are all done.

All the bacon peeking out and waving to us saying “EAT ME”

What do you put on your waffles?  Hubbster usually smothers them in crunchy peanut butter and then drowns them in syrup.

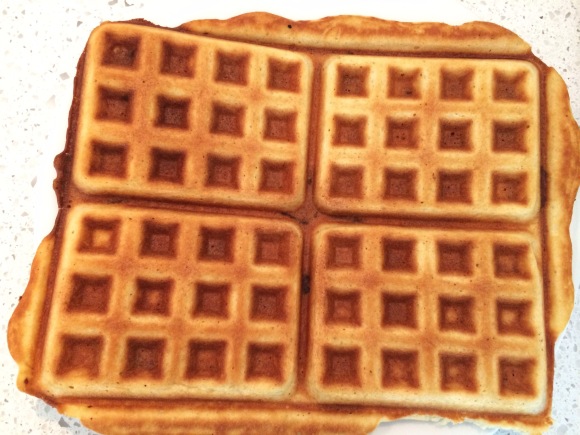
Like I mentioned before. My waffle iron doesn’t flip so the bottom side has that perfect golden waffle appearance you would expect, however no bacon can be seen…. that’s just BORING.

Or it’s a good way to surprise your house guests…”Good Morning, here’s a boring waffle” LOL  And then wait for their mouth to drop once they bite inside. The smell of bacon cooking before hand and none appearing on their plate, may make them think you’re bit of selfish.   They’ll get over it once they take a bite though😋


Mom’s Belgian BACON STUFFED Waffles
Makes 4 Belgian Style Waffles
INGREDIENTS
♥ 1 3/4 CUPS FLOUR
♥ 1 T. BAKING POWDER
♥ 1/2 TSP. SALT
♥ 1 3/4 CUPS MILK
♥ 2 LARGE EGGS
♥ 1/2 CUP MELTED BUTTER
♥ 1 TSP. VANILLA

DIRECTIONS
Preheat waffle iron.
Whisk the flour, baking powder and salt together in a medium bowl.
In a microwave glass bowl melt the butter, beat in the eggs, milk and vanilla.
Combine the wet and dry mixtures and stir until just combined.
Let it sit for a few minutes to develop
Pour the waffle batter into the iron and add the bacon pieces as you like.
Close the lid and be patient.
Mine take almost 10 minutes to cook. I’m going to play with my settings a bit.
Enjoy with your fav waffle condiments


♥♥ Thanks for visiting, if you liked this blog please click LIKE below. If you want to follow my blog please scroll to the bottom, click the FOLLOW button and enter in your email address.
Love Haleykins♥♥


**Please click “OLDER POSTS” button, (bottom of the page)
or the “COOKING WITH HAY” tab (top of the page) to see more**

Tagged , , , , , , , , , , , , , , , , , , , , , , , , , , ,

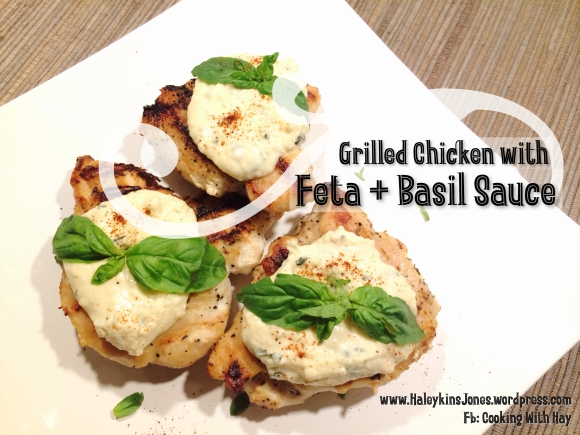
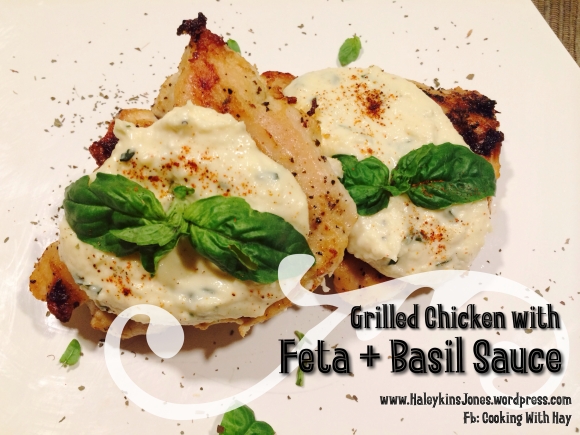
Grilled Chicken with FETA + BASIL SAUCE

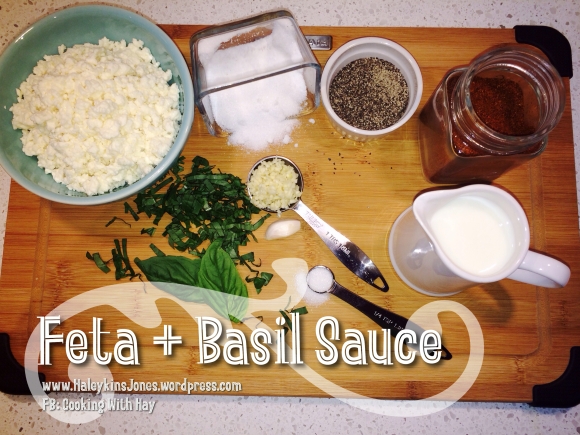
FETA + BASIL SAUCE

♥  2 C. FETA CHEESE, crumbled
♥  2 T. FRESH BASIL, chopped
♥  1 HEAPING T. GARLIC, fresh and minced
♥  ½ C. MILK
♥  ½ TSP. CHILI POWDER
♥  ½ TSP. SUGAR
♥  ½ TSP. PEPPER

Boil a couple inches of water in a double boiler, reduce to med-high.

(or set up a small pot with water and bring it to a boil and have all your ingredients in a heatproof glass bowl larger than the pot.  Place the bowl over the pot.  Make sure it doesn’t touch the water, needs to be above the water)

Combine all the ingredients to the upper pot of your double boiler or into your glass bowl.  Mixing and stirring until creamy and fairly smooth.

You may need more milk if it’s too thick.  This is a thicker type of sauce so it’s not going to be thin and runny…  You want to dollop it on top of your grilled chicken.

Who doesn’t love a dollop of anything?  LOL

I have a large square cast iron dutch oven and the lid for it has grills on the underside so lately I’ve been using this heavy duty thing for everything.  I flipped the lid over and heated up the grills and grilled the chicken.

My go to staple is frozen boneless skinless chicken breast.  I buy them in 4 kg boxes or bags whenever they go on sale and usually have 4-5 packs in my deep freeze at any one time.  Chicken breast is high in protein and low in fat.

Season them with a little olive oil and some salt and pepper and grill to perfection.

When cooking chicken without skin, I always baste with a brushing of olive oil.  This will help seal in the natural juices of the meat and keep your dinner from going dry.  Have the grills or your pan preheated to med-high before adding the chicken.  Avoiding moving the chicken once you place it on the grills.  It will stick at first and you know you’ll be tempted to try and move it and “un-stuck it” but don’t!  It will pull away from the heat source on it’s own when it’s ready.  Well for the most part… just be patient alright.  This way you’ll get the perfect sear and grill marks.  Also, avoid turning and turning pieces of meat.  The raw juices cook on one side and then when you flip the piece of meat you allow the cook juices to run down through the rest of the meat helping cook that side through.  Flipping prematurely and back and forth might withhold some of those raw chicken juices and leave the center raw.  RAW!!!!  Don’t want that.

I heard this along time ago.  I only assume it’s true but it makes sense.  So I try to be as patient as I can and cook evenly and properly per side.

The image above includes salt. However my recipe does not.  When I made this, I added salt and found it to be incredibly too salty.  The feta gives this creamy topping enough salt…
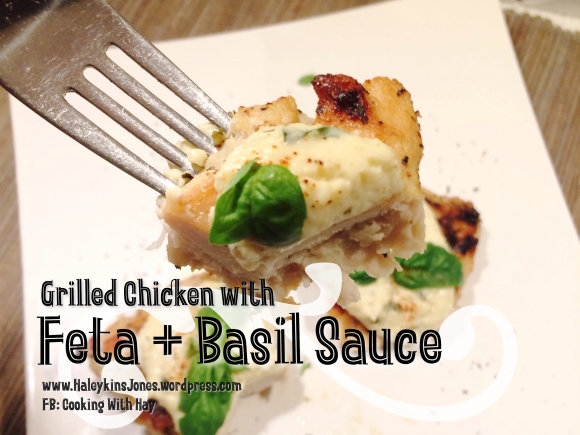
Yum!  Look at it in all it’s feta and basil goodness.  I find I don’t cook with a lot of cheese, but feta can be used in so many ways!  I’m loving it.
Now #getinmybelly!

Give this one a whirl guys, it’s super easy and delicious too!


♥♥ Thanks for visiting, if you liked this blog please click LIKE below. If you want to follow my blog please scroll to the bottom, click the FOLLOW button and enter in your email address.
Love Haleykins♥♥
**Please click “OLDER POSTS” button, (bottom of the page)
or the “COOKING WITH HAY” tab (top of the page) to see more**
Tagged , , , , , , , , , , , , , , , , , , , , , , ,

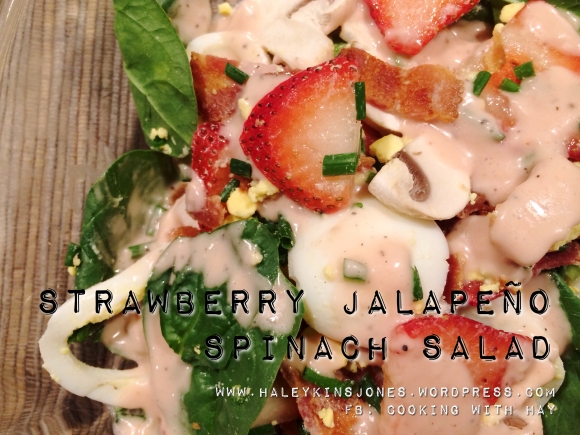
STRAWBERRY JALAPENO SPINACH SALAD with a very special dressing too!

We can’t always explain why we are the way that we are.  We can’t usually find reasons to explain our behavior…. Some  days are good, some are not as good and some are just not good.  It happens.  Well, at least it does to me.  When I get like that it’s no ones problem but my own so I have to find a soloution.  To the kitchen we go….

Something new, summery, and delicious, found it’s way into my menu tonight.  For years I’ve enjoyed my Mommy’s awesome Spinach Salad.  I’ve made it many times and I’ve blogged it here before.  I needed some fresh basil and feta for another dish so I was racing to the grocery store for probably my 3rd trip this week (my organization skills blow chunks)  I walk in and all the fruit was glorious AND….. on sale!  Strawberries were calling my name as were the glorious BC cherries.  KIWIS!! oh and 3 bananas and seriously, these are the largest grapes I’ve seen in my life!!  How lucky to live in such a great place with so much healthy crisp produce. Woooo Hooooo.  Who wants to come visit me??  I’ll feed you!

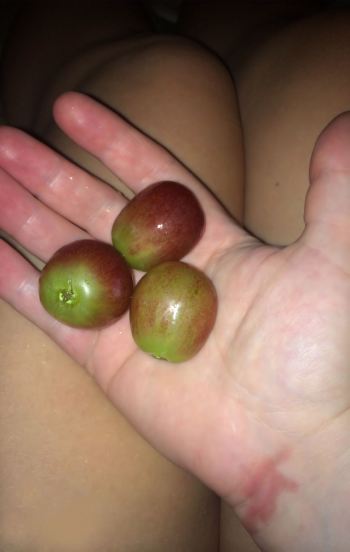
juicy giant grapes. I am not a lion!!! Big right!

juicy giant grapes. I am not a lion!!! Big right!

With a cart full of fruit and the rest of the stuff I needed, homeward bound.  I’ve always wanted to add strawberries to a spinach salad but never had the push to do it.  Well its go time now and I’m super excited.  Then the flavour profile I’ve been desiring came to me!  Oh but wait.  I don’t have what I need and I just got back!!!  In a grocery store, I am easily distracted.  Always sure to forget something or things, so I make lists… and even then I fail.  I’m not going back…. so after begging Hubby to go once, twice, 4 or 5 times.. pouted around for a bit…. he put down his tools and ran to the market to get me some Jalapenos.

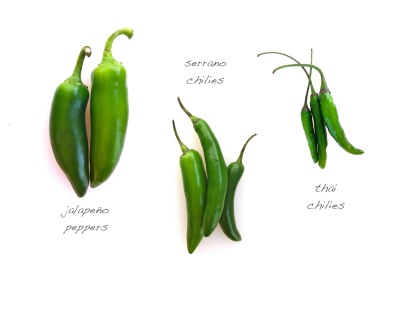
K so maybe you know your peppers, and you’ve looked at the pics from this post and you know those are not jalapenos in my photos.  Well the little market up the street didn’t have good looking jalapenos…. they were old and wrinkled and worthy mind you but for photos… nope.    Serranos are a great sub for jalapenos but 3 times hotter FYI….

Serrano Chili Peppers are the thinner of the 2, where as a Jalapeno Pepper is the girthy one. *wink wink*

Ladies, I mean chefs…. pick your preference… haha

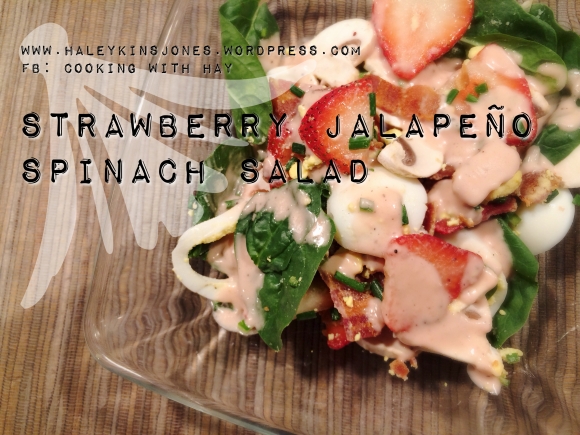
The idea in my head comes to life and I’m very pleased with how it turned out.  Photos by me, House Of Haley Photography

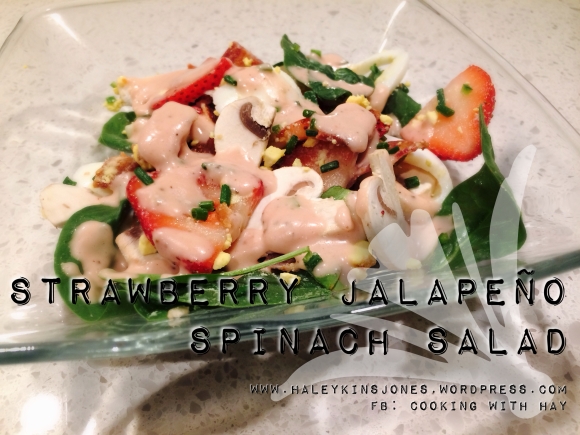
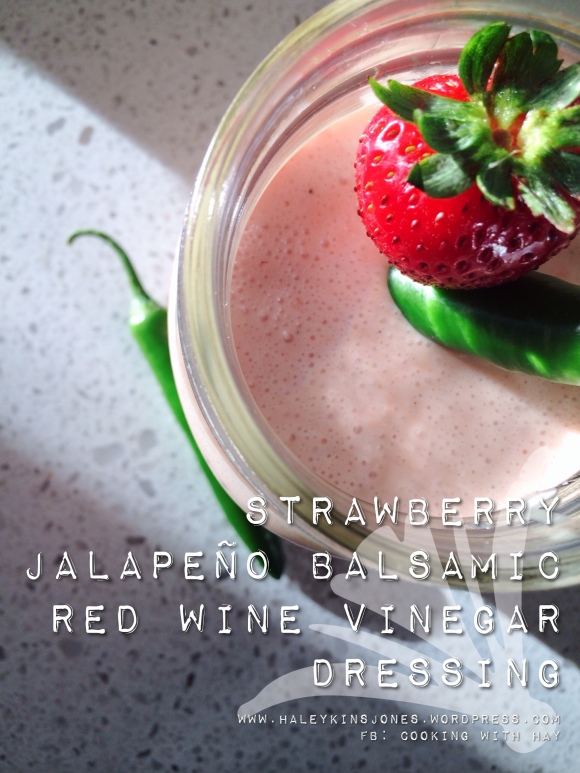
Here is my Strawberry Jalapeno Spinach Salad with a very special dressing.  Strawberry Jalapeno Balsamic Red Wine Vinegar Dressing.  Try saying that after a few glass of wine… or bottles for some of you.  Hey, I don’t judge, you do you, its cool!

I’m pretty sure I could have come up with a much more simple name but when I’m looking for a recipe or when i’m wanting to make something it frustrates me having to read through a recipe to try and figure out the flavour profile from it.  The title says it all!

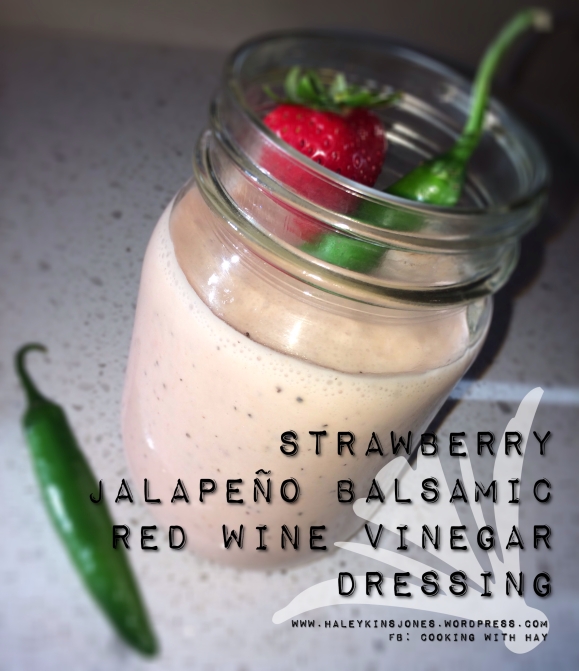
And here is the dressing.  Almost as cute as Strawberry Shortcake LOL.   Seriously made him go to the store for the pepper for this shot.  Let me add in another “LOL”  OMG i’m howling, I’m sorry if that’s not as funny to any of you as it is to me!  Thanks Hubs
STRAWBERRY JALAPENO BALSAMIC RED WINE VINEGAR DRESSING

♥ 2 CLOVES GARLIC
♥ 1 C. RED WINE VINEGAR
♥ 2 T. JALAPENO WHITE BALSAMIC VINEGAR
♥ ½ C. OLIVE OIL
♥ 1 TSP. SALT
♥ 1 TSP. SUGAR
♥ 1 TSP. GRAINY MUSTARD
♥ ½ TSP. GROUND BLACK PEPPER
♥ 1 WHOLE STRAWBERRY

Combine and blend/pulse for just a few seconds till the garlic is no longer whole and vinegars and oil have blended. DO NOT OVER DO IT. Trust me….. Just for a few seconds.

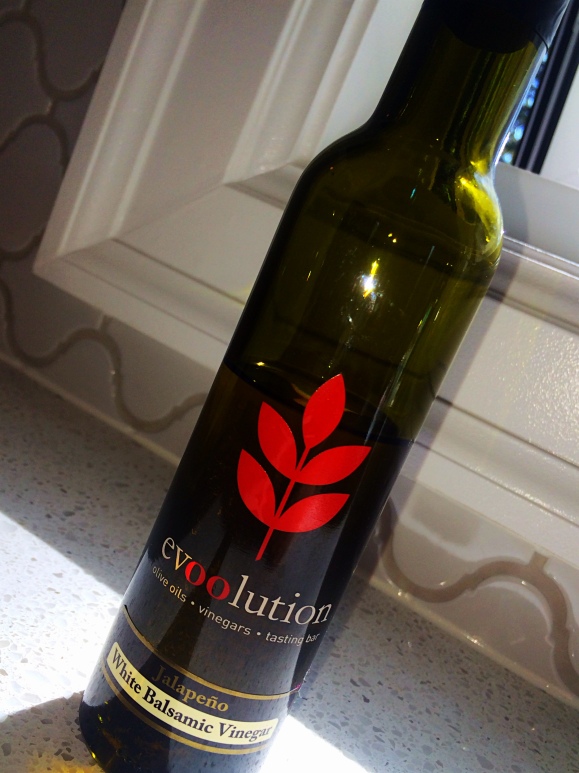
The Jalapeno White Balsamic Vinegar was a Christmas gift from Sister In-Law and it’s a great addition to many meals.  I use it mostly when I do any type of roasted potatoes.  With the right seasonings, its a great way to brighten up the flavours.

vinegar

I certainly don’t expect you to have this Jalapeno White Balsamic Vinegar, nor do I expect you to go out and buy some.  Althought, it’s totally recommended for your pantry fo sho!  This one is from Evoolution out of Edmonton, Alberta, CA.

Let’s get to it shall we!

Words can’t explain what it’s like to cook upstairs…. renos are coming along… thats all i can say.   So cool!  Look at the way that natural daylight casts across all that divine good-for-you food up there.  haha  It’s the simple things in life.

dressingI’m a hardcore #clasher Clash of Clans junkie… game always on… always creepin.  LOL

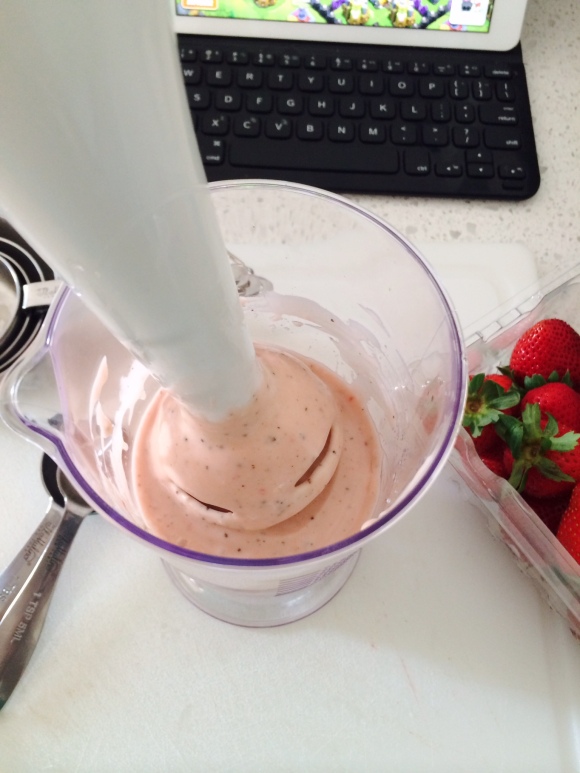
Again I’m using my new immersion hand blender and the mixing vessel it came with to make this.  You can use a blender but you’ll end up with most of it on the sides.  Use a battery operated whisk or just chop up the strawberry and garlic before you make the dressing, put it all in a jar and shake the crap out of it.

I peeled 2 cloves of fresh garlic.  Its hard for me to use such a little amount, but 2 cloves is just right.

Add in the vinegar’s and then the oil.  If you find after it’s all done that it’s too thick… add in some more vinegar and whisk it up.  If you over blend this you’ll end up with a strawberry like mayonnaise.

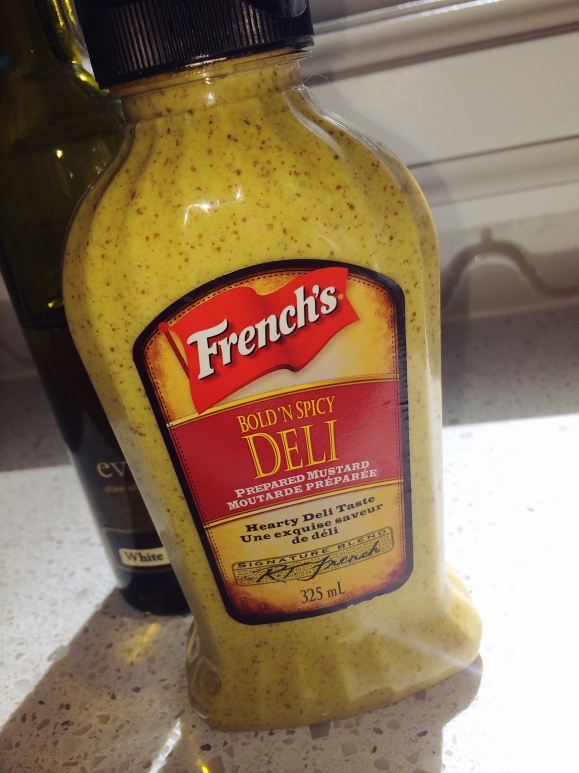
Next add in the S+P, sugar and mustard.  The mustard is crucial to the flavour of this dressing.  I’ve used mustard powder before but I find French’s Bold & Spicy Deli Mustard to be the perfect one.  I’m actually addicted to this mustard.  So so so good I could eat it with a spoon.

Now blend.  I’m going to be straight up honest here… I bombed this the first time, hence my warnings…. DO NOT OVER BLEND hahaha.  Pulse a few times, The strawberry is obviously going to thicken it up quite a bit.  I’ve increased the amounts of vinegar to hopefully compensate.  This is why I say recipe blogging is tricky.  So as always, make it your own.  Do what you feel is right and adjust to your liking.  We are all different.

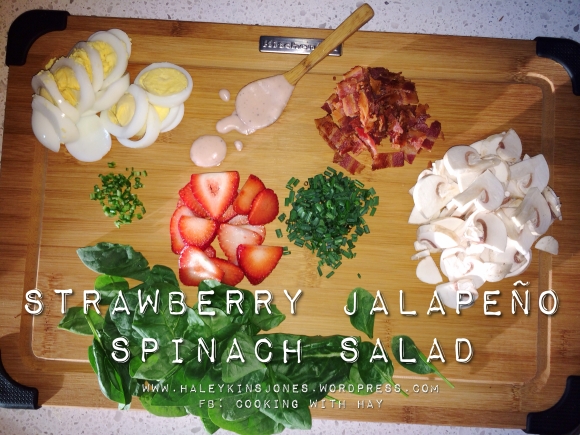
STRAWBERRY JALAPENO SPINACH SALAD

♥ 1 BAG BABY SPINACH, FRESH AND WASHED
♥ HARD BOILED EGGS, COOLED AND SLICED (1 PER PERSON)
♥ MUSHROOMS, FRESH AND SLICED
♥ STRAWBERRIES, SLICED AND SLICED
♥ BACON, COOKED AND CRUMBLED
♥ 2 T. GREEN ONIONS, FINELY CHOPPED
♥ 2 TSP. JALAPENO OR SERRANO PEPPER, FRESH AND DICED

Make this salad up just before you’re ready to eat. Plate it per person rather than in a large salad bowl. I find that the ingredients are at such different weights that you don’t get a proper serving. Person 1 will get all spinach and egg, while the last person gets all the bacon onion and pepper. LOL Just my opinion.

This is where you get to do your fancy…. BE FANCY Plate it up per person, make it pretty, show you care. Then you can give yourself those extra slices of strawberries and bacon. Haha shhhhhhhh….

Use about a handful of spinach leaves per person. Layer in individual salad bowls or plates and drizzle with a little of our Strawberry Jalapeno Dressing from up above.

It was delicious to eat.  Looks pretty cool too.  Each bite held a yummy little mouthful.

♥♥ Thanks for visiting, if you liked this blog please click LIKE below. If you want to follow my blog please scroll to the bottom, click the FOLLOW button and enter in your email address.
Love Haleykins♥♥
**Please click “OLDER POSTS” button, (bottom of the page)
or the “COOKING WITH HAY” tab (top of the page) to see more**
Tagged , , , , , , , , , , , , , , , , , , , , , , , , , , , , , , , ,

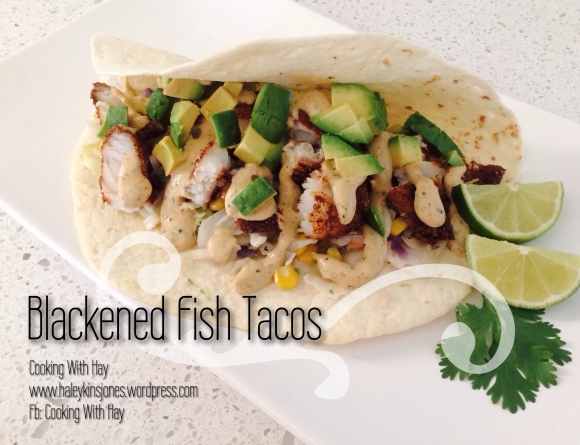
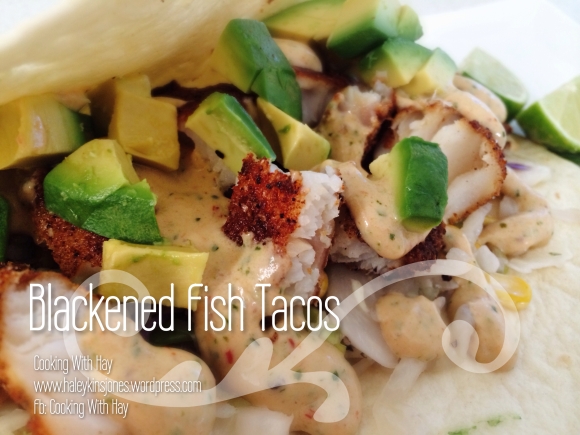
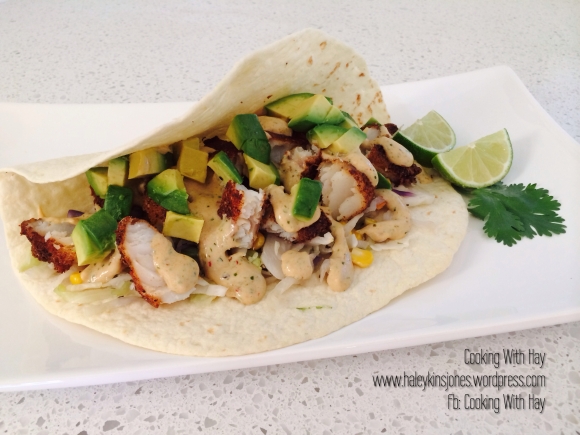
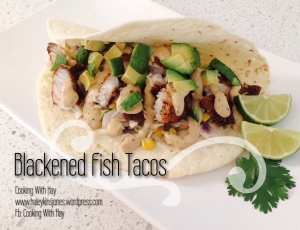
Blackened Fish Tacos with Chipotle Cilantro Dressing (salmon or cod or whichever fish you want)

Finally, this post is done. I still consider myself a beginner food blogger even though this blog has recently had it’s 3rd anniversary. Blogging recipes takes work. Writing an accurate recipe takes work. It’s work but it’s work I enjoy. I just wish I could do nothing but cook, take pics, and blog… Haha True story.


Been talking about these a lot, I know, I apologize for the redundancy. Finally got all the components together….

You’re going to need to check out my last 2 posts!

Click this photo to get this recipe!

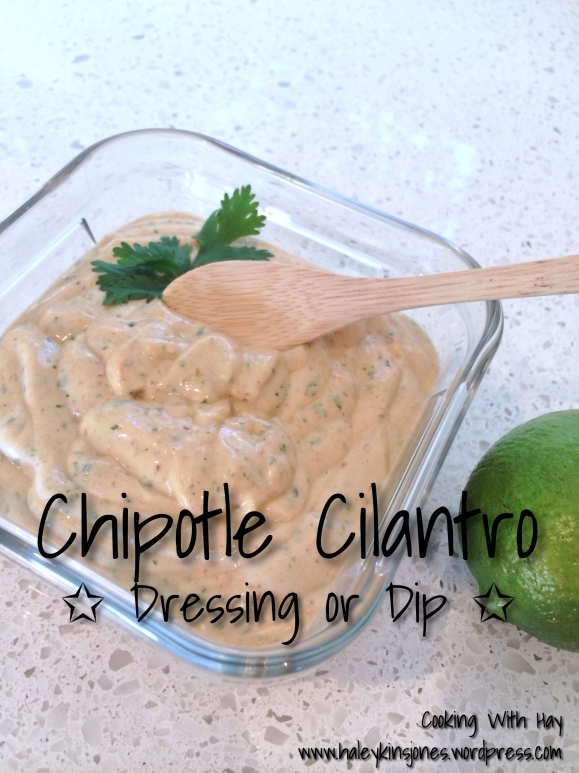
Click on the photo to the left to get this yummy Chipotle Cilantro Dressing recipe for these Blackened Fish Tacos that we’re about to make.

Click this photo to get this recipe!

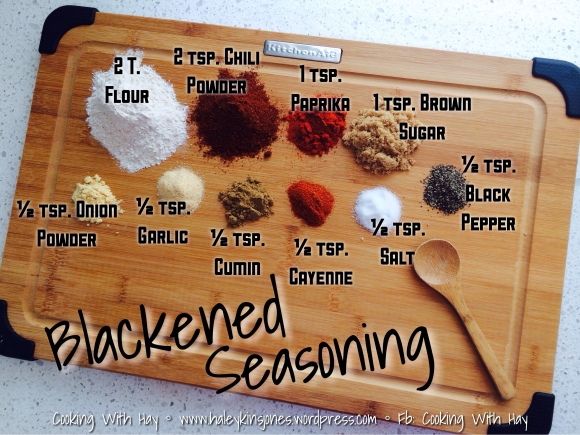
Click this photo to see the ingredients needed to make the Blackened Seasoning that will crispify (is that a word?)the fish to a nice golden crunch on the outside and give it a deep savory flavour.


BLACKENED FISH TACOS
♥ 2 BAGS COLESLAW
♥ 1½ C. CORN KERNELS
♥ SALT + PEPPER
♥ FLOUR TORTILLAS
♥ 1 BIG SALMON FILET or 4 LARGE COD FILETS
♥ HIGH SMOKE POINT OIL FOR FRYING (i used Canola Oil)
1 BATCH OF BLACKENED SEASONING
1 BATCH OF CHIPOTLE CILANTRO DRESSING
♥ AVOCADO, FRESH, CHOPPED
♥ CILANTRO + LIME FOR GARNISH

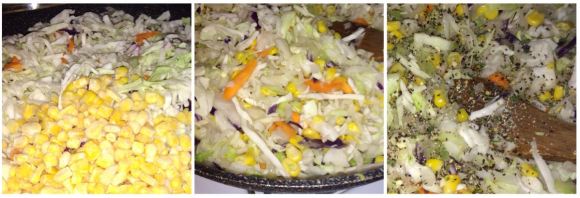
Saute the coleslaw and corn with salt and pepper until just tender.
Set aside, but keep warm.
Heat oven to low temp and slowly warm the tortillas. I like em just before they get toasted.
Cut salmon or fish into large pieces suitable for frying.
Heat oil, just above medium, not too hot or the fish won’t cook thoroughly and not too cold or the fish will soak up to much oil and become soggy.
Fry till dark and golden on each side.
If you’re using salmon you may have to do the ends too. Use tongs. They work best.
When they are done gently remove from hot oil onto a papertowel lined dish to remove excess oil.
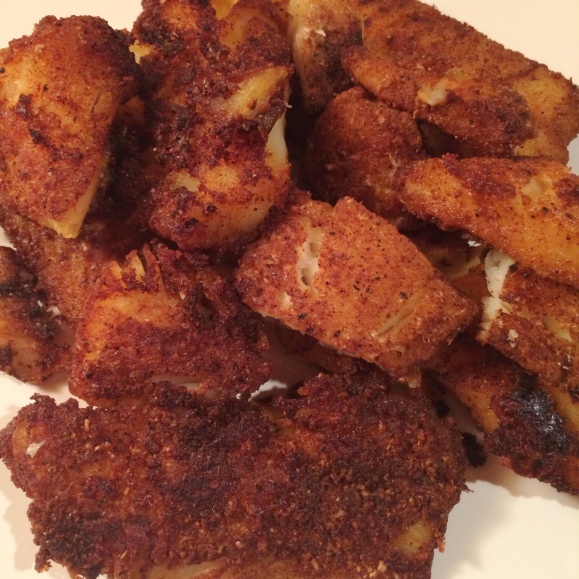
Let cool for about 5 minutes and break into good chunks.

THE ASSEMBLY
Warmed Tortilla
Sauteed slaw and corn
Blackened fish
Drizzle with some Chipotle Cilantro Dressing
Top with chopped fresh avocado, cilantro and a squeeze of fresh lime juice


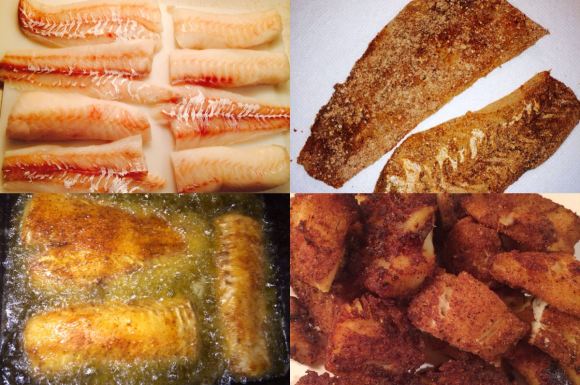
Place the Blackened Seasoning in a shallow flat bottom container of some sort so you can press the fish into it.  Coating every inch of it.  The better it’s coated the better the crisp.

You don’t want to over cook the cabbage, or it will lose all it’s structure.  You want to saute it till it just starts to wilt.  Keeping it warm will also allow it to keep cooking so with the pan on medium heat, just keep an eye on it.
This is the cod I used last night.  Seasoned all over every surface of fish with the Blackened Seasoning.

Fried in some oil till golden and delicious. I use a large cast iron flat bottom deep dish for frying. Allows maximum room for the fish to fry properly without over crowding the pan.   The heavy duty cast iron can withstand the high temperatures and will maintain it’s heat better when you drop in the fish.

I fried the fish in 2 batches to ensure it cooked evenly and properly. Or you can use a deep fryer but I’ve only used one once and I didn’t like it…. it was too small for what I needed and I don’t want a big greasy appliance kicking around here. I fry as little as possible.
Frying foods took a lot of practice for me over the years.  So many times chicken or potatoes or whatever it was I was cooking, was either undercooked or well well well done. Practice makes perfect.

Frying can be very unhealthy if done incorrectly.  When done the right way you are using the least amount of oil to get that desired crunch and crispiness.

✰ Oil thats too hot will scortch the food on the outside while leaving it raw inside. ✰

✰ Oil that isn’t hot enough won’t seal the food as it should when you drop it in. ✰

(Rather it will sit and soak up the oil.  This results in that drippy soggy mess we’ve gagged on one too many times.

The first time I made these I used some fresh plump salmon and they were to die for! This time around i used cod. I preferred the salmon over any white fish but both were really good.


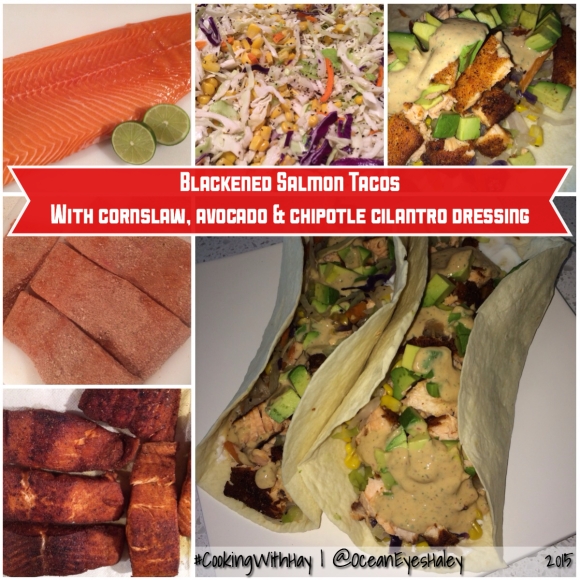
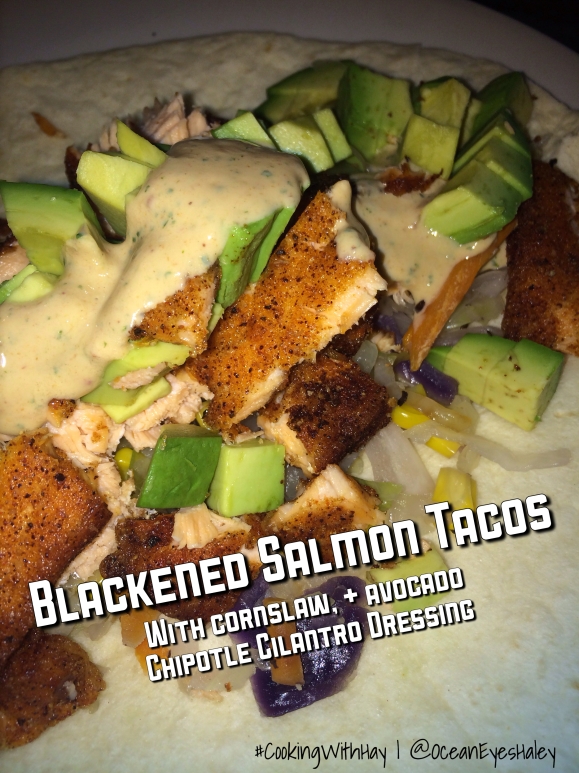
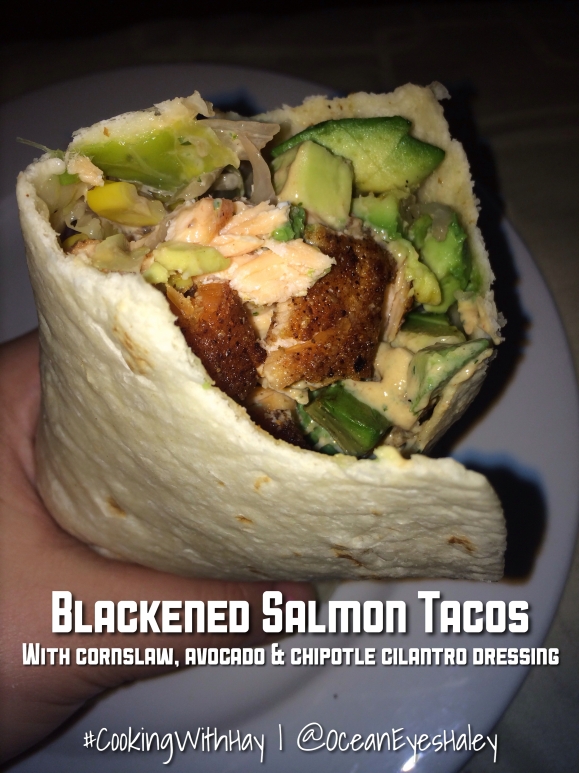
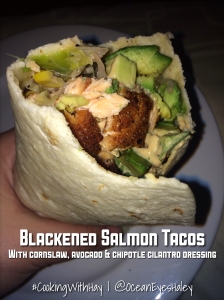
BLACKENED SALMON TACOS

Here are some pics from the salmon ones I made last week!  These ones were my favourite!

Since the photos were taken down in my temporary basement dungeon kitchen they aren’t of the greatest quality.  We can only go up from here my friends ☺

1603

❤️ Thanks for visiting, if you liked this blog please click LIKE below. If you want to follow my blog please scroll to the bottom, click the FOLLOW button and enter in your email address.
Love Haleykins❤️
**Please click “OLDER POSTS” button, (bottom of the page)
or the “COOKING WITH HAY” tab (top of the page) to see more**
Tagged , , , , , , , , , , , , , , , , , , , , , , , , , , , , , , , , , , , , , , , , , , , , , , , , , , , , , , ,

Blackened Seasoning

Hi guys, I posted some pics of the Blackened Salmon and Blackened Fish Tacos to my Cooking With Hay Facebook page, and the requests came in for the recipe. As well as the request for me as your personal chef. Thank you for that! It actually is much easier to make the food than to blog the recipe… just in case you were curious. LOL so much time spent running a photoshoot and a kitchen at the same time. I love it tho and anxious to spend more time doing it. The balance between stoning the front of the fireplace and installing bathroom sinks… or blogging…. its a tough one….

I’m quite pleased with the photos from recent photoshoots. I’m working partially upstairs while I can get the good natural daylight and partially still down in the dungeon, errr, I mean, basement. Natural daylight makes for much more appetizing food pics. Less shadows and more true to life colouring of these meals. After all, we taste with our eyes and our noses before the food even hits our tongue or tummies.


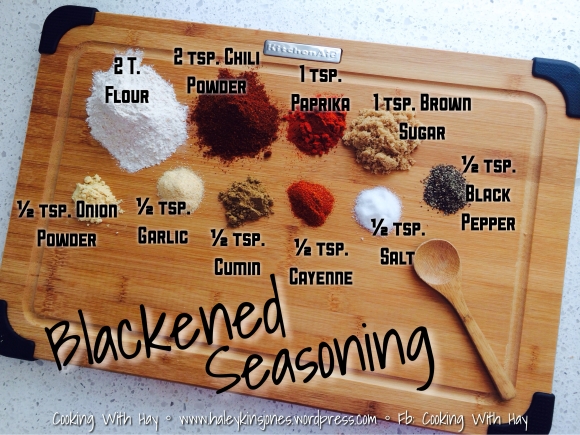
I’ve laid out all the ingredients that I used to make the Blackened Seasoning, on this fancy bamboo KitchenAid cutting board that Hubby came home with for me! *SMILES* This is the seasoning for the Blackened Salmon Tacos and Blackened Fish Tacos that I’ve been mentioning. (Blog posts to follow guys!)

I pulled this from a website a while back, I haven’t altered anything except that I use whole wheat flour instead of white flour. It actually just adds to the crispy factor we’re going for here! Yummy


Don’t confuse T (tablespoon) for TSP (teaspoon)!!
Oh come on, like you haven’t done that before.

The original image said 2 T. Chili Powder… LOL its got to be 2 TSP. Teaspoons
I made the same error when I first made Butter Chicken. That was a hot hot hot meal. Great tho. Just a real kicker that’s for sure.

BLACKENED SEASONING

♥ 2 T. FLOUR (I use whole wheat)
♥ 2 TSP. CHILI POWDER
♥ 1 TSP. PAPRIKA
♥ 1 TSP. BROWN SUGAR
♥ ½ TSP. ONION POWDER
♥ ½ TSP. GRANULATED GARLIC
♥ ½ TSP. CUMIN
♥ ½ TSP. CAYENNE
♥ ½ TSP. SALT
♥ ½ TSP. PEPPER

Mix together well. Store in an air tight container.


↓ This made enough to do a big slab of salmon or 4 large cod fillets. If you’re doing more you may want to double this recipe. Or to save you some prep time on the next go around, make up a big batch now.

↑ I made one batch of this seasoning and mixed it in this shallow plastic container. All ready to go so I can just lay the piece of fish or meat or whatever it is that you’re going to use, onto the seasoning.
This works great for everything, even prawns and scallops. Try it out and I hope you like it.  I’ve made it 3 times this July.  Cuz it’s that good.  LOL yum!


Blog Post with recipe and pics COMING SOON!

Blog Post with recipe and pics COMING SOON!

Blog Post with recipe and pics COMING SOON!

Blog Post with recipe and pics COMING SOON!

Blog Post with recipe and pics COMING SOON!

Blog Post with recipe and pics COMING SOON!


❤️ Thanks for visiting, if you liked this blog please click LIKE below. If you want to follow my blog please scroll to the bottom, click the FOLLOW button and enter in your email address.
Love Haleykins❤️


**Please click “OLDER POSTS” button, (bottom of the page)
or the “COOKING WITH HAY” tab (top of the page) to see more**


Tagged , , , , , , , , , , , , , , , , , , , , , , , , , , , , , , , , ,

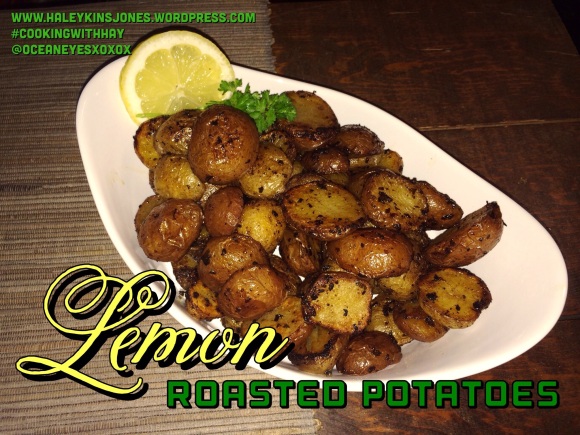
🍋LEMON ROASTED POTATOES

Spending time with my Mommy in her kitchen is always great.  I pick up some good recipes and get inspired to get in there and get cookin things of my own.  Potatoes are my favourite food.  I wish I could live off of their starchy goodness.  She made these taters to go along side a fabulous greek salad.  So it’s only natural that I do the same.  She used russets and made wedges out of her potatoes but I had this variety bag of baby potatoes to use up.  They were awesome but mine turned out a little less crispy than hers which was unfortunate but still delicious and they still had crunch, just had to keep em in a little longer.  Find her recipe for these yummy Lemon Roasted Potatoes below and stay tuned for a great Greek salad and dressing recipe from my moms kitchen😉                                                              I cut my baby potatoes in half and had them soaking in heavily salted cold water for a few hours to draw out some of their natural moisture and in the end you will achieve a more crunchier potato.
________________________________________

LEMON ROASTED POTATOES

INGREDIENTS

• 1/4 OIL

• 1/3 CUP LEMON JUICE

• 1 TEASPOON OREGANO

• 1 TABLESPOON FRESH PARSLEY, chopped

• 3-4 CLOVES GARLIC, CHOPPED, chunky is best

• 1 TEASPOON KOSHER SALT

• 1 TEASPOON FRESH GROUND BLACK PEPPER

• 1/2 CUP CHICKEN STOCK

• 4-5 RUSSET POTATOES, cut in wedges lengthwise OR A BAG OF BABY POTATOES, cut in half

DIRECTIONS

*Preheat oven to 400 degrees

1. Combine oil, lemon juice, oregano, parsley, garlic, salt and pepper in a dish

2. Layer potatoes in a single layer in a baking dish.

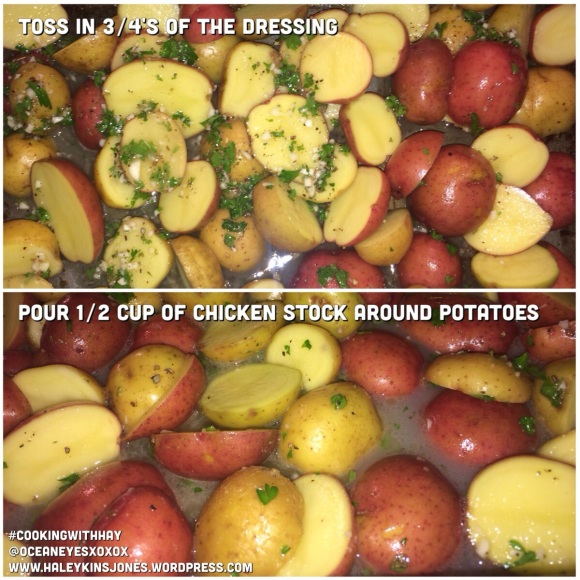
3. Pour just 3/4 of the dressing over the potatoes and give them a toss

4. Pour chicken stock around the potatoes.  This will be soaked up in the potatoes making them super tender and moist on the inside.

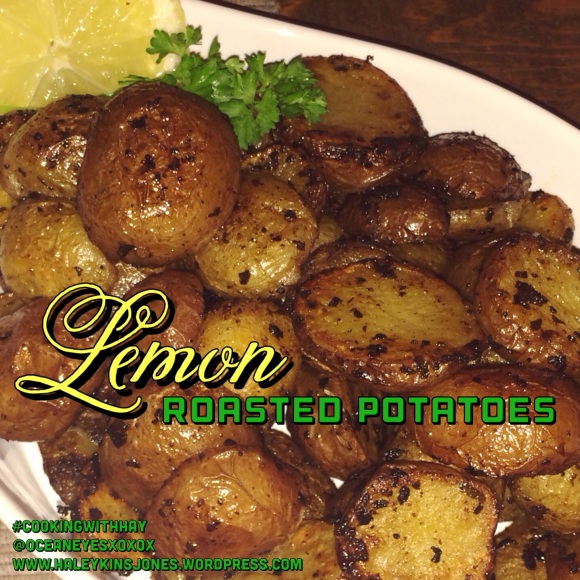
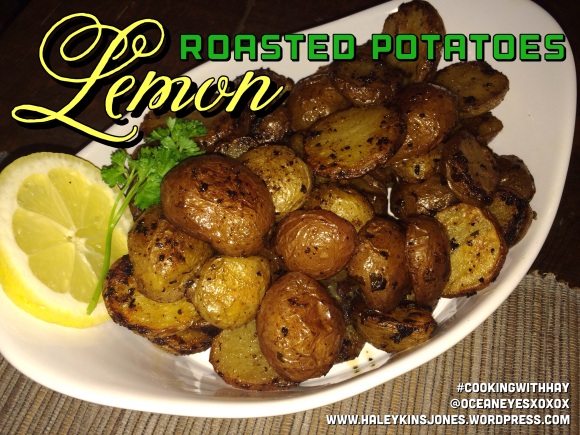
5. Bake for about an hour, giving them a quick toss every 10 minutes, until they are crispy crunchy and golden brown.  

6. Pour remaining dressing over the “hot out of the oven” taters and serve.  

I was a little alarmed that perhaps I added too much chicken stock but after 10 minute in the oven I could see that the liquids wouldn’t last for long and they would then crisp up, so not to worry!  I just love the chunky garlic and parsley on these potatoes.  The lemon flavour isn’t overpowering at all and the chicken stock keeps them moist.    I took these pictures before I poured over the remaining dressing… . so they are missing the yummy fresh parsley and chunky fresh garlic but at least I remembered before I served them😜  Top them with a little dollop of sour cream and more fresh parsley.  
I grilled up some chicken breast in made some more of that yummy marinade from the salad I made a few days ago.  I just added in the juice of half a lemon and let them chill in the fridge for a few hours.  Then grilled them on the bbq and drizzled them with a bit of the Apple Cider Vinagrette from the salad that I had in the fridge.  No point in that going to waste.   

I’m going to do wedges next time with some russet potatoes.  Will make for better presentation.  But I did enjoy these lil lemon gems🍋

______________________________________________________ 

❤️ Thanks for visiting, if you liked this blog please click LIKE below. If you want to follow my blog please scroll to the bottom, click the FOLLOW button and enter in your email address. 

Love Haleykins 20131230-210222.jpg

**Please click OLDER POSTS, {below} to see more** ❤️

Tagged , , , , , , , , , , , , , , , , , , ,

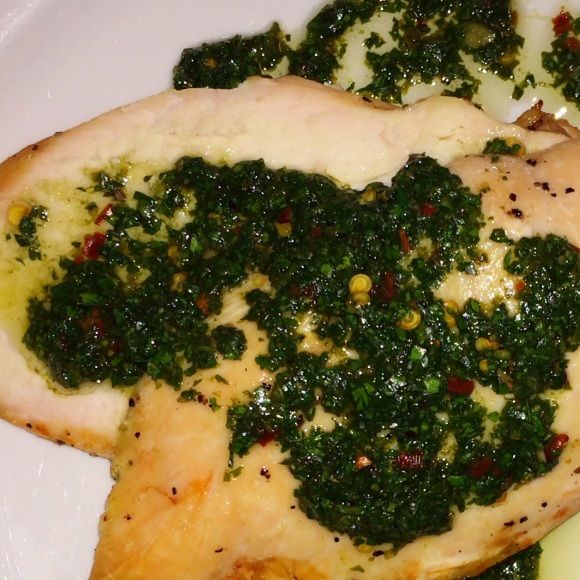
Chimichurri Chicken

Chimichurri… where has this been all my life? Chimichurri is an Argentinean sauce similar to a pesto with many variations for sure.  Make it your own😉

🌿I’m telling you, amazingly good and I can’t even believe how much I love it.  I had it in Jamaica and had to try it at home.  Fan-freakin-tastic.  I also made it with my Mom a few weeks ago.  We had it on some bbq’d pork chops… Hello melt in my mouth delicious!  I’m already checking the calendar to see when I can make it again!  On steak next time I think… 😊 INGREDIENTS

• 1 CUP FIRMLY PACKED FRESH FLAT LEAF PARSLEY

• 1/2 CUP FIRMLY PACKED FRESH CILANTRO

• 2 TABLESPOONS FRESH OREGANO LEAVES (or you can use 2 teaspoons of dried oregano)

• 4 GARLIC CLOVES

• 1/2 CUP OLIVE OIL

• 2 TABLESPOONS WINE VINEGAR (red or white, I used white)

• 1 TEASPOONS SEA SALT OR KOSHER SALT**

• 1/4 TEASPOON GROUND BLACK PEPPER

• 1/2 TEASPOON CHILI PEPPER FLAKES

DIRECTIONS

1. Pulse the parsley, cilantro, fresh oregano, and garlic in a food processor until it’s a coarse consistancy

2. Scrape down the food processor and get all that good green out into a nice little glass dish

3. Gently stir in olive oil, vinegar, salt, pepper, and chili pepper flakes. 

💡Adjust your seasonings to your liking.  If you won’t be using all the sauce the first night, any chili pepper flakes will continue to make the sauce hotter as they marinate in the oil… Sometimes hotter is better💡

4. Serve immediately or refrigerate. Bring to room temperature before serving. 

________________________________________

❤️ Thanks for visiting, if you liked this blog please click LIKE below. If you want to follow my blog please scroll to the bottom, click the FOLLOW button and enter in your email address. 

Love Haleykins 20131230-210222.jpg

**Please click OLDER POSTS, {below} to see more** ❤️

Tagged , , , , , , , , , , , , , , , , , , , , , , , , , , , , ,

CHICKEN SATAY WITH COCONUT PEANUT THAI SAUCE


I was on vacation in Jamaica🌍 a few weeks ago and we stayed at a fabulous resort; Secrets Wild Orchid.🌴  I was impressed with all the food that we had during our week long stay.🍴  Everything felt and tasted well made, light and never heavy or greasy if you know what I mean.  Everything looked fresh and made to order; it was delicious.  While I enjoyed Jerk Chicken and Jamaican spiced patties usually for lunch😋… in the evenings we enjoyed the fare from most of their specialty restaurants.  

After the pool bar it was up to the room to primping and get dolled up for the evening fun.👠👗  My favourite part of these vacations is suprisingly the evenings.  As much as I love the sunshine and the ocean, pool bar fun and all….  there is nothing better than getting dolled up in the carribean at a fancy shmancy resort, eating and drinking with friends that we’ve known for 8 years and that we only get to see for 1 week a year.☺️ Call Don and Laurie’s room and meet them down at the lobby bar for Pre-Cocks (pre drinks/cocktails😜, and yes non alcholic for me, 34 weeks today without a drop of booze. #noboozejustshoes)  From there we would wander down restaurant lane, a cobblestone/brick swooping pathway through the resort and along the oceanfront with a gorgeous view of the jamaican hillside in the distance.  Hubby wants to move there, just for that evening view!!  I am so game!!  

As in most of these resorts, you get to choose your style of dinner from French to Italian, steak, seafood, or Asian cuisine.  One night we chose Asian and I had a Chicken Satay dish in a delectable peanut sauce, and I vowed to make this as soon as I got home.  And I did… and the recipe is below, but first, a few pics of Jamaica to share with you😘         

And now let’s get back to cooking shall we😜

________________________________________

MARINADE

1/2 CUP COCONUT MILK

1 CLOVE MINCED GARLIC

1 TEASPOON CURRY POWDER

1 1/2 TEASPOONS BROWN SUGAR

1/2 TEASPOON SALT

1/2 TEASPOON BLACK PEPPER

1/2 TEASPOON CHILI PEPPER FLAKE (OPTIONAL)

4 CHICKEN BREASTS (boneless & skinless, cut in 1 inch strips)

DIRECTIONS

1. Stir together the first 6 or 7 ingredients until the brown sugar has dissolved. (chili pepper flakes are optional)

2. Pour over chicken breasts in a sealable container

3. Marinate the chicken in the fridge for 4 or more hours

________________________________________

COCONUT PEANUT THAI SAUCE

1 CUP COCONUT MILK

1 TABLESPOON CURRY POWDER

1/2 CUP CREAMY PEANUT BUTTER

3/4 CUP CHICKEN STOCK

1/4 CUP BROWN SUGAR

1/2 TEASPOON CHILI PEPPER FLAKE (OPTIONAL)

2 TABLESPOONS LIME JUICE

1 TEASPOON SOY SAUCE

SALT TO TASTE

10 (6 INCH) WOODEN SKEWERS (soak them in water for a few hours before cooking, this will keep them from burning when on the grill.)

GARNISH

CHOPPED SALTED PEANUTS

THINLY SLICED GREEN ONIONS 

DIRECTIONS

1. Turn on your bbq or grill for medium-high heat.

2. Bring coconut milk, currey powder, peanut butter, chicken stock, brown sugar and optional chili pepper flake to a simmer in a saucepan over medium-high heat.

3. Simmer and stir constantly until it’s thickend up and smooth.

4. Remove from heat and stir in lime juice and the soy sauce.

5. Season to taste with salt

6.  Skewer marinated chicken slices onto presoaked, 6 inch, wooden skewers

7. Grill each skewer for about 4-5 minutes on each side or until cooked through.

8. Drizzle with some of the warm Coconut Peanut Thai Sauce, reserve the rest for dipping.

9. Garnish with chopped peanuts and sliced green onions

________________________________________


❤️ Thanks for visiting, if you liked this blog please click LIKE below. If you want to follow my blog please scroll to the bottom, click the FOLLOW button and enter in your email address. 

Love Haleykins 20131230-210222.jpg

**Please click OLDER POSTS, {below} to see more** ❤️

Tagged , , , , , , , , , , , , , , , , , , , ,

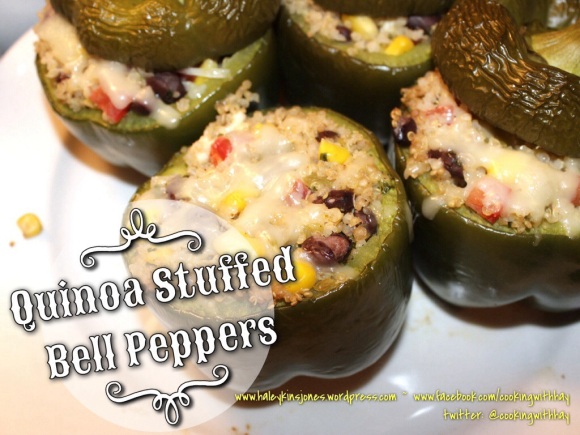
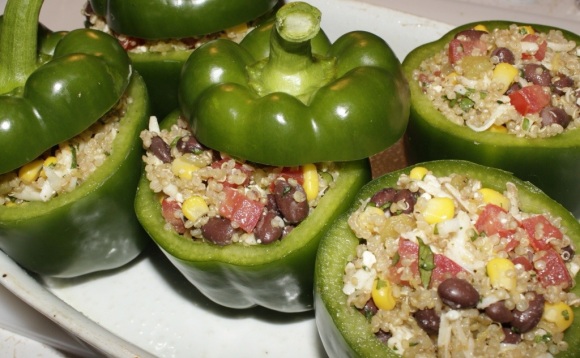
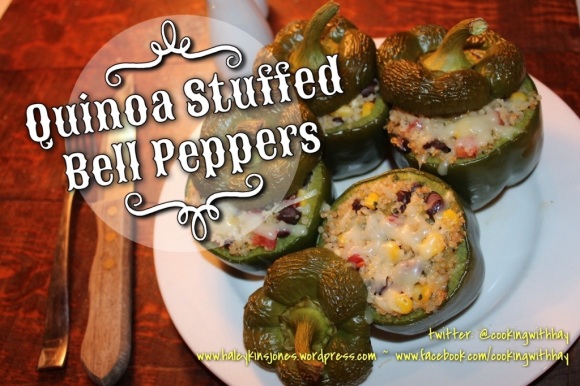
QUINOA STUFFED BELL PEPPERS

Have any of you made these before? I’ve seen them around for a few years now I think, but I had yet to try them. Or try quinoa for that matter. I wasn’t sure if I would like it or not or how to cook it so that I would like it. I came across this on one of my boards and immediately decided it was time. If you are a big quinoa fan please leave me a comment below this blog post or comment on the facebook post please. Turns out I do really like it and want to find more ways to make it.
20140312-004108.jpg
QUINOA STUFFED BELL PEPPERS
20 minutes to cook the quinoa
30 minutes to bake the stuffed peppers
Makes 6
Done in less than an hour! OH Yeah!

HERE’S WHAT YOU’LL NEED:
3 CUPS QUINOA, cooked
1 SMALL CAN DICED GREEN CHILIES
1 CUP CORN
1 CAN BLACK BEANS, drained and rinsed
1/2 CUP FINE DICED TOMATOES, remove the seeds,
1/2 CUP MONTERAY JACK CHEESE, grated
1/4 CUP LIGHT FETA CHEESE, crumbled
3 TBSP. FRESH CILANTRO, chopped
1 TSP. CUMIN
1 TSP. GARLIC POWDER
1/2 TSP. ONION POWDER
1/2 TSP. CHILI POWDER, or more to taste
GROUND SEA SALT to taste
GROUND FRESH PEPPER to taste

6 BELL PEPPERS, tops cut, stemmed and seeded

HERE’S WHAT YOU NEED TO DO:
Preheat oven to 350 degrees F.
1. Place parchment paper on the bottom of a shallow baking dish.
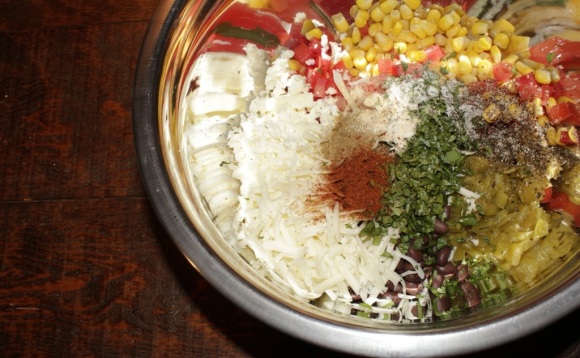
2. Mix all the ingredients gently in a big bowl, except for the peppers obviously.
3. Spoon the filling into the pepper bowls. Tap them on the counter to get everything to the bottom.
4. Gently stuff.
5. Place them in the parchment lined baking dish.
6. Bake for about 40 minutes. I baked mine with the “tops” on but as you can see in the pics, they wrinkled. Bake them without the tops until the filling is hot inside.
7. Eat em up right away!

Quinoa is usually found in the same section of the grocery store that the rice is found in.
20140312-205346.jpg
1 cup of uncooked quinoa will equal 3 cups after it’s cooked
For every 1 cup of uncooked quinoa use 1.5 cups water or chicken broth
Rinse and drain quinoa in a fine mesh strainer
Bring liquid to a boil, and add in the quinoa, give it a stir and then reduce the heat to a med-low temp. Put the lid on it and let it simmer for 15 minutes or until all the liquid is absorbed.
Put the lid back on it and remove it from the heat. Set it aside for 5 minutes.
Fluff it up with fork
20140312-181545.jpg
I recruited Hubby to help me out with the next 3 shots. It gets awfully challenging trying to hold that massive camera and operate a sharp knife. Here you want to cut the top portion of the peppers off to create the ‘tops’
Use a sharp knife and slice down the edge of the ribs of the pepper following down towards the base of the pepper but not cutting through!!
Pop out the seed pack in the middle and knock out any seeds.
Using that handy melon baller {I like it better than a spoon because it has sharper edges} scrape out the remaining bits of the ribs until you have some nice little pepper bowls!
20140312-004250.jpg
They are super cute. I think I can find other reasons to use this type of ‘vessel’ for dips and sides in the future.
20140312-004310.jpg
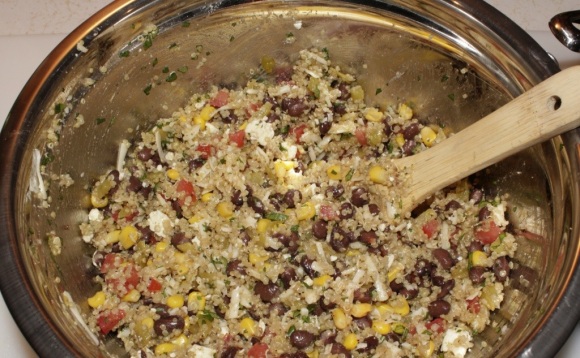
Ok mix up all those ingredient, minus the peppers, in a nice big mixing bowl. Toss it all together gently.
I think this is the first time I’m using feta cheese in something other than a greek meal. I find this highly intersting and can’t wait to see what it tastes like.
20140312-004331.jpg
Once you have the filling all together you can simply put it in a casserole dish with a lid on it and just bake it that way if you don’t want to go through the effort of the pepper. I think the next time I will omit the pepper bowl if it’s just Hubby and I, and maybe leave the quirky presentation to when I’m preparing it for guests. It’s just alot of pepper for us. I like my peppers much more tender. Too the point of fully softened mush. Mmmmmm nummy yummy
20140312-004336.jpg
Here’s where you get to fill the pepper bowls up with that yum yum quinoa filling. I sprayed my baking dish as I ran out of parchment paper at christmas time and never replaced it. This caused my filled pepper bowls to slide around. I’m thinking the parchment would keep them in place better. Scoop and stuff the peppers and put them in the lined dish. The original recipe that I saw did not seem to bake the peppers with the “tops” on. I did and the “tops” came out quite wrinkled. I think for a better presentation, I would bake them without the “tops” and then just pop them on after you take them out of the oven. I also added a few shreds of the monteray cheese to the top of the filling before baking. gives them a nice finished look. Then I meant to sprinkle them with fresh chopped cilantro but I forgot and had already taken the pictures…. LOL #foodbloggerproblems haha.
20140312-004342.jpg
I baked these in a preheated 350 F oven for about 40 minutes. Check them at 30 minutes. You want the filling to be hot throughout. I think they look cute with the wrinkled tops, but not that cute, oh well. They were absolutely scrumptious! Even Hubby liked them.
20140312-004356.jpg
I served these with butterflied, grilled chicken breast. Seasoned them with sea salt, fresh ground pepper, garlic and a slight sprinkle of chili powder, with a side of a homemade chipotle dip {fat free sour cream, a wee bit of light mayo and as much chipotle puree as you can handle}
Yay for the second bbq this year! I just love the flavour that a bbq or grill can bring to the food and to the table 😉
Now I know it’s not a Green Egg bbq or anything like that or a nice old fashioned one but it does the job. It may actually need to be replaced this year. We’ve been saying this for the last 2 years so we’ll see.
20140312-004404.jpg

20140312-004421.jpg

And since I’m suffering from severe post vacay depression….. I’ve posted a small collection of pics from House Of Haley Photography, from our time in Mexico a few weeks ago. You can find them at the bottom of this post.

❤️

Thanks for visiting, if you liked this blog please click LIKE below.
If you want to follow my blog please scroll to the bottom, click the FOLLOW button and enter in your email address.

Love Haleykins
20131230-210222.jpg

❤️

**Please click OLDER POSTS, {below} to see more**
Find me on Facebook at http://www.facebook.com/cookingwithhay – Please LIKE my page.
Follow me on Twitter at @cookingwithhay

20140312-193443.jpg

20140312-193504.jpg

20140312-193510.jpg

Tagged , , , , , , , , , , , , , , , , , , , , , , , , , , , , , , , , , ,

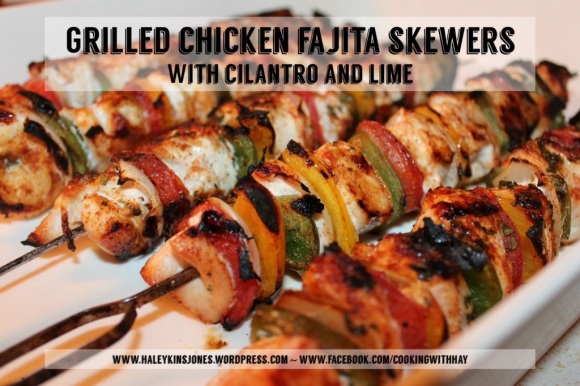
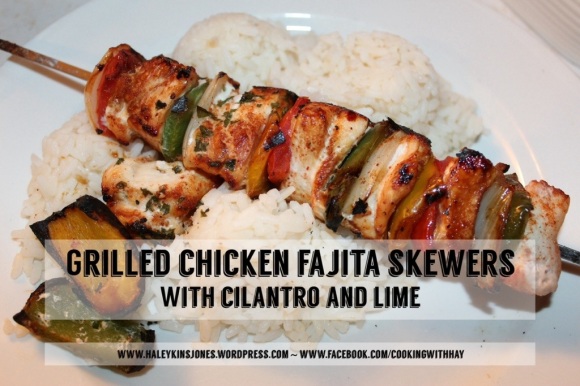
GRILLED CHICKEN FAJITA SKEWERS WITH CILANTRO AND LIME

In keeping with the spirit of Mexico, how about another easy meal idea using some of that homemade Fajita Seasoning we made last month?
I will never buy a store bought packet after using this simple recipe. The seasoning is very mild, feel free to tip the chili powder shaker a little more if your tongue likes to dance as much as mine. Make this up and then carry on below for the Grilled Chicken Skewers with Cilantro and Lime recipe.

🌵

FAJITA SEASONING
2 tablespoons – cornstarch
4 teaspoons – chili powder
2 teaspoons – salt
2 teaspoons – paprika
2 teaspoons – sugar
1.5 teaspoons – chicken bouillon crushed
1 teaspoon – onion powder
1/2 teaspoon – garlic powder
1/2 teaspoon – cayenne powder
1/2 teaspoon – cumin

Mix it all together and keep it in a dry container.

Approximately 2 tablespoons of this mixture equals a packet of that store bought stuff.
This recipe made just over 6.5 Tablespoons.

This will save you money too as those packets can start to add up after a while.

Please give it a try!
If you do make it, please leave me a comment below and let me know what you think.
Click here to see my previous blog post for FAJITA SEASONING

🌵

20140307-181409.jpg
The great thing is that there is no oil or butter used in this one, therefore super healthy. Wooooo Hooooo Anything to keep the waistline from growing. Don’t fret, these are so good you’d never know they weren’t drizzled in expensive olive oil or dipped in seasoned butter. You can thank me later, no worries 😉

Here’s what you’re going to need:
1 green pepper
1 yellow pepper
3 roma tomatoes
1/4 onion
cilantro
lime
Fajita Seasoning

20140307-180601.jpg
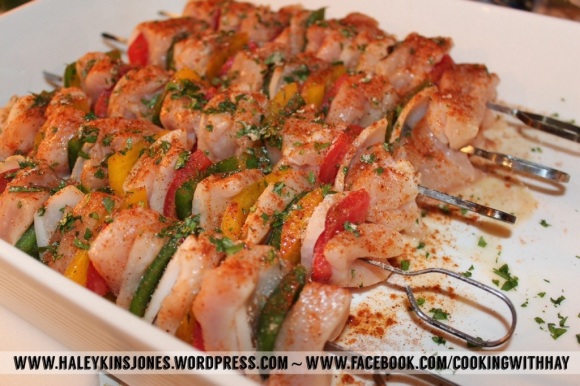
For the 5 skewers I used 4 chicken breasts. I cut the breasts in half so they were thinner then sliced those up to make bite sized pieces. The thinner the pieces the faster the will cook. You don’t want to completely burn your veggies on the bbq while you’re waiting for the chicken to cook. Does this make sense. Some of the chicken pieces were ultra thin so I stacke 3 pieces together. This make for juicy chicken bites. I hope this make sense. Look at the pic above to understand.
20140307-191515.jpg
Remove the ribs and seeds from the peppers. This is how I do it. Flip the pepper onto it’s stem and slice down the lovely pepper lumps. Check it out! 🙂 This leaves the ribs and seeds intact, less mess and less work for you.
Slice the tomatoes in half lengthwise and scoop out the seeds and rib stuff with a spoon. I like the tomatoes to be very thin. I used a sharp knife and sort of fillet the tomatoes. For the onions pull off some of the wider outer layers. Cut them up the same size as everything else. My pieces were about 1″ x 1″. Layer the veggies and the chicken, alternating as you go. Push them together real tight and you’ll have less burny bits. 🙂
20140307-180611.jpg
Lay your skewers in a nice big dish. I made these up early so they were going to be going in the fridge….. be sure to make room in the fridge before hand if this is your situation. Nothing worse than having your hands full with an oversize tray of something and no where to put it and no hands free to move things about. Or don’t, and then bitch about it later like I do almost everytime.
Sprinkle on some of the homemade Fajita Seasoning that you made up earlier…. if you didn’t make it, I suppose you could use a store bought packet. I won’t tell anyone…..
Flip the skewers over and sprinkle the other side. This was enough for us but like I said way up there at the top, the seasoning is quite mild for my tastebuds. You could sprinkle more on the other 2 sides if you want more. This was just nice and light and allowed for the veggie flavour to come through.
20140307-180625.jpg
Chop up some fresh cilantro or don’t if you get your knickers in a knot over it 🙂 Now squeeze on some fresh lime juice
20140307-180638.jpg
Grill these babies on med-high I did 8 minutes then flipped and did 3 minutes then flipped to one of the other sides and did 3 minutes. They were cooked thru by this time and I took them off. But you could put the last side on for a couple of minutes if you wanted.
20140307-184139.jpg
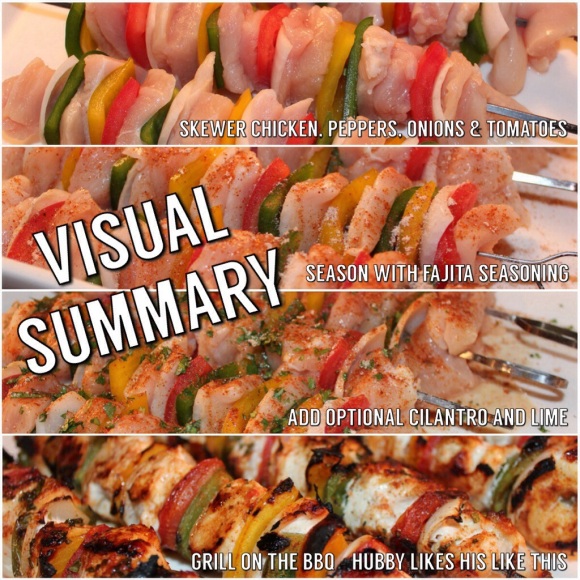
Here’s a “Visual Summary” I made this for Pinterest 😉 😉 Wham, Bam, Thank You, Ma’am!
20140307-180650.jpg
We served this up with some light and fluffy rice. That’s it that’s all. Clean eating is best and still so tasty. I use a rice cooker that my sister gave me years ago. However I created my own directions because everytime I did as I was told the rice was hard and not yet done. So I don’t know what I do wrong but it never ever turned out so here’s what I do now. I measure 2 cups of dry rice and rinse under cold water in a strainer for close to 5 minutes. This removes alot of the starch and then when it cooks you won’t get that browned or scortched bottom. Although I was reading up on some Dominican cuisine and it said that some rice dishes are delberately cooked to have that type of browned bottom. I was intrigued. Here read up for yourself My Dominican Food Drain the rinsed rice and dump it in the rice cooker. Then I add twice as much cold water. So 4.5 cups…. ya, weird right…. the directions all say equal? Or at least mine does. How do you make your rice?
20140307-205543.jpg
As you can see, Hubby enjoyed. I too enjoyed and even though it was cold and rainy out on the deck manning the bbq like a boss…. I knew it was much milder here than my friends weather back east. So I mustered up my big girl panties and put on some boots. Yup that’s it some booty shorts and boots, oh and well a hoodie (I refuse to cover up these tanned legs while they are still tanned legs) and grilled those babies to Hubby’s preference. Hope you enjoy them like we did.
PS this is a beautiful christmas gift from mom! My Gordon Ramsay Rectangular Roaster/Dish from the Royal Doutlon Collection!!! EEEeeeeek It’s massive and I love love love it.
20140307-212621.jpg

🌵

Thanks for visiting, if you liked this blog please click LIKE below.
If you want to follow my blog please scroll to the bottom, click the FOLLOW button and enter in your email address.

Love Haleykins
20131230-210222.jpg

**Please click OLDER POSTS, {below} to see more**

Tagged , , , , , , , , , , , , , , , , , , , , , , , , , , , , ,