Tag Archives: blog

HURRICANE HALEY’S HELL FIRE CHILI

So many exciting things happening guys!  I don’t even know where to begin.  There has been so much going on that I don’t know where to begin or how to keep track.  The main thing is this… I’ve been putting this brand new kitchen of mine to work, that’s what I’ve been doing!

I’ve pretty much got it all complete and organized and fully operational.  I say that one thing is my favourite, like my Inspiration Cabinet, (as seen in the photo above) and then I turn around and I’m overjoyed by another part of it.   A lot to take in and I’m just so appreciative.

I can’t wait to finally show it off!  You will be the first, I promise!  I’ll post all the reveal pics here before anywhere else

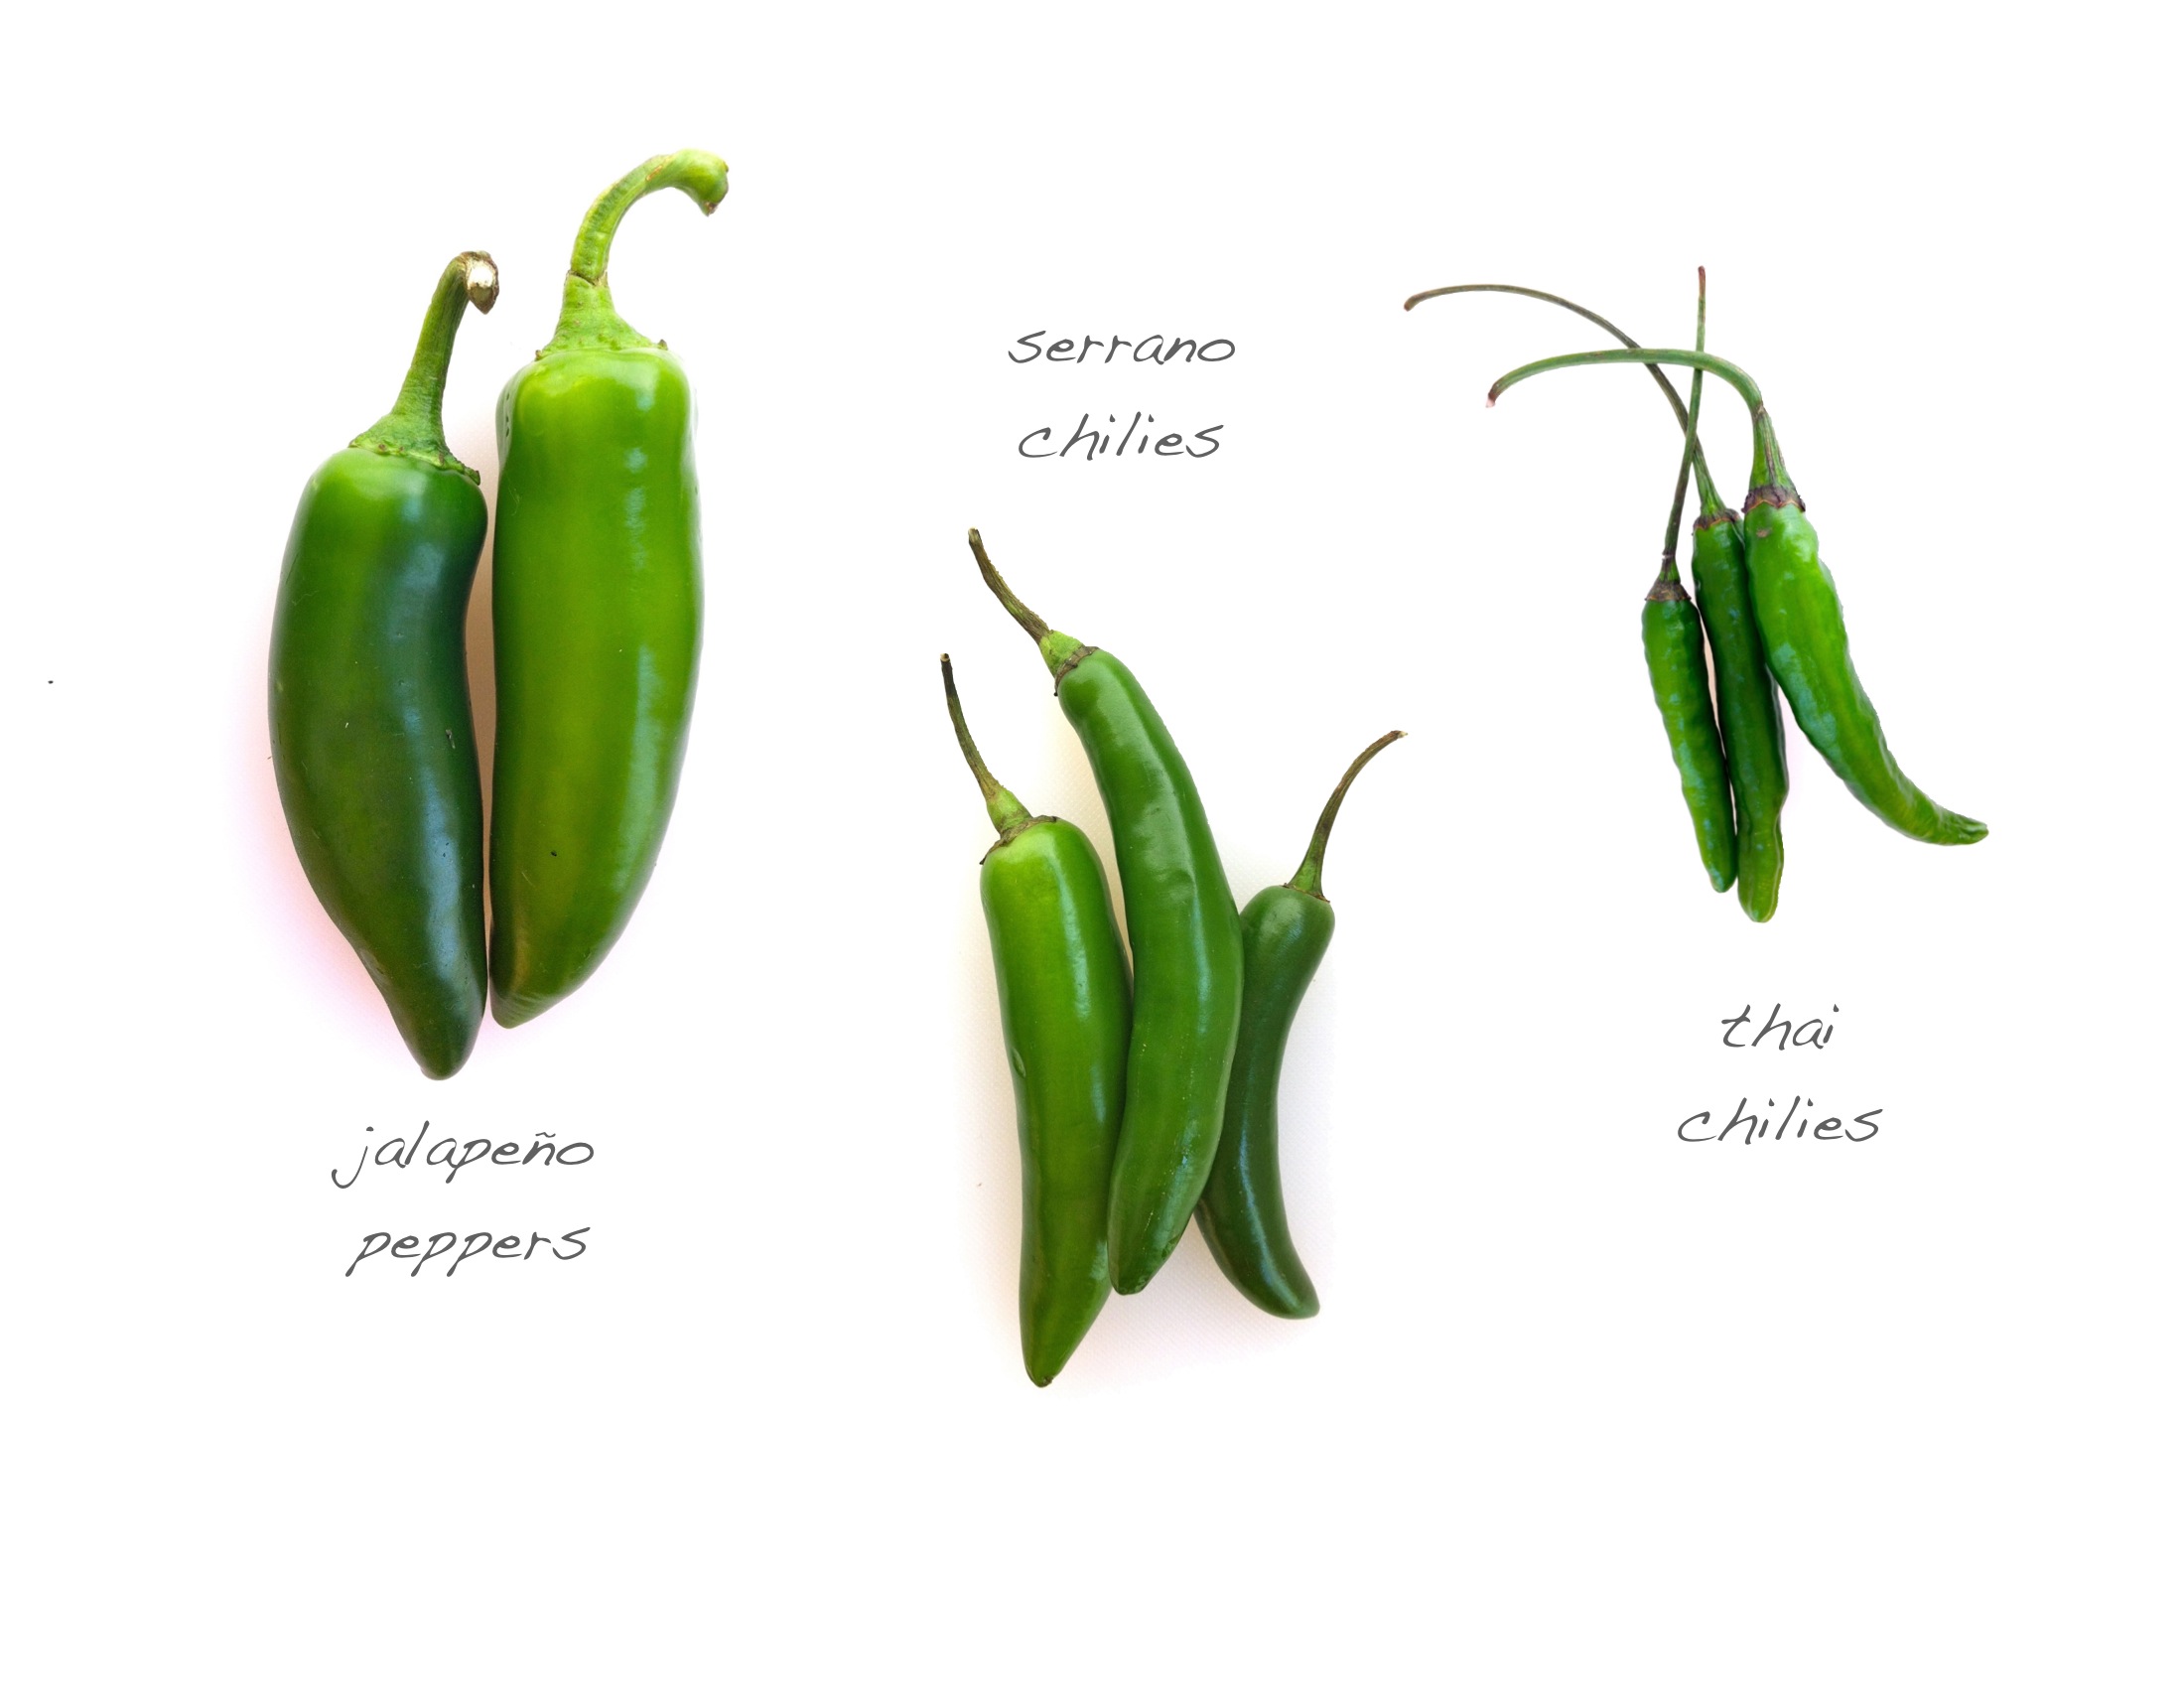
Do you ever just want to try something because it looks good?  Even if you might not even like it? Each grocery trip to Superstore I am enticed by the wall of peppers!  Red Thai chili peppers, Scotch Bonnets, Habaneros, all of them, GLORIOUS!  Can I even handle that kind of heat?  The Habanero sauce I buy in Mexico is so hot I only use a few drops on tacos and such….  I’ve never had a need to buy these cool peppers.  Easy problem to fix.  Create a need for them!  Spicy Chili seems just perfect for this autumn weather!

Time to get chopping.  Soothing, relaxing, therapy… chopping veg.  I know i’m weird.

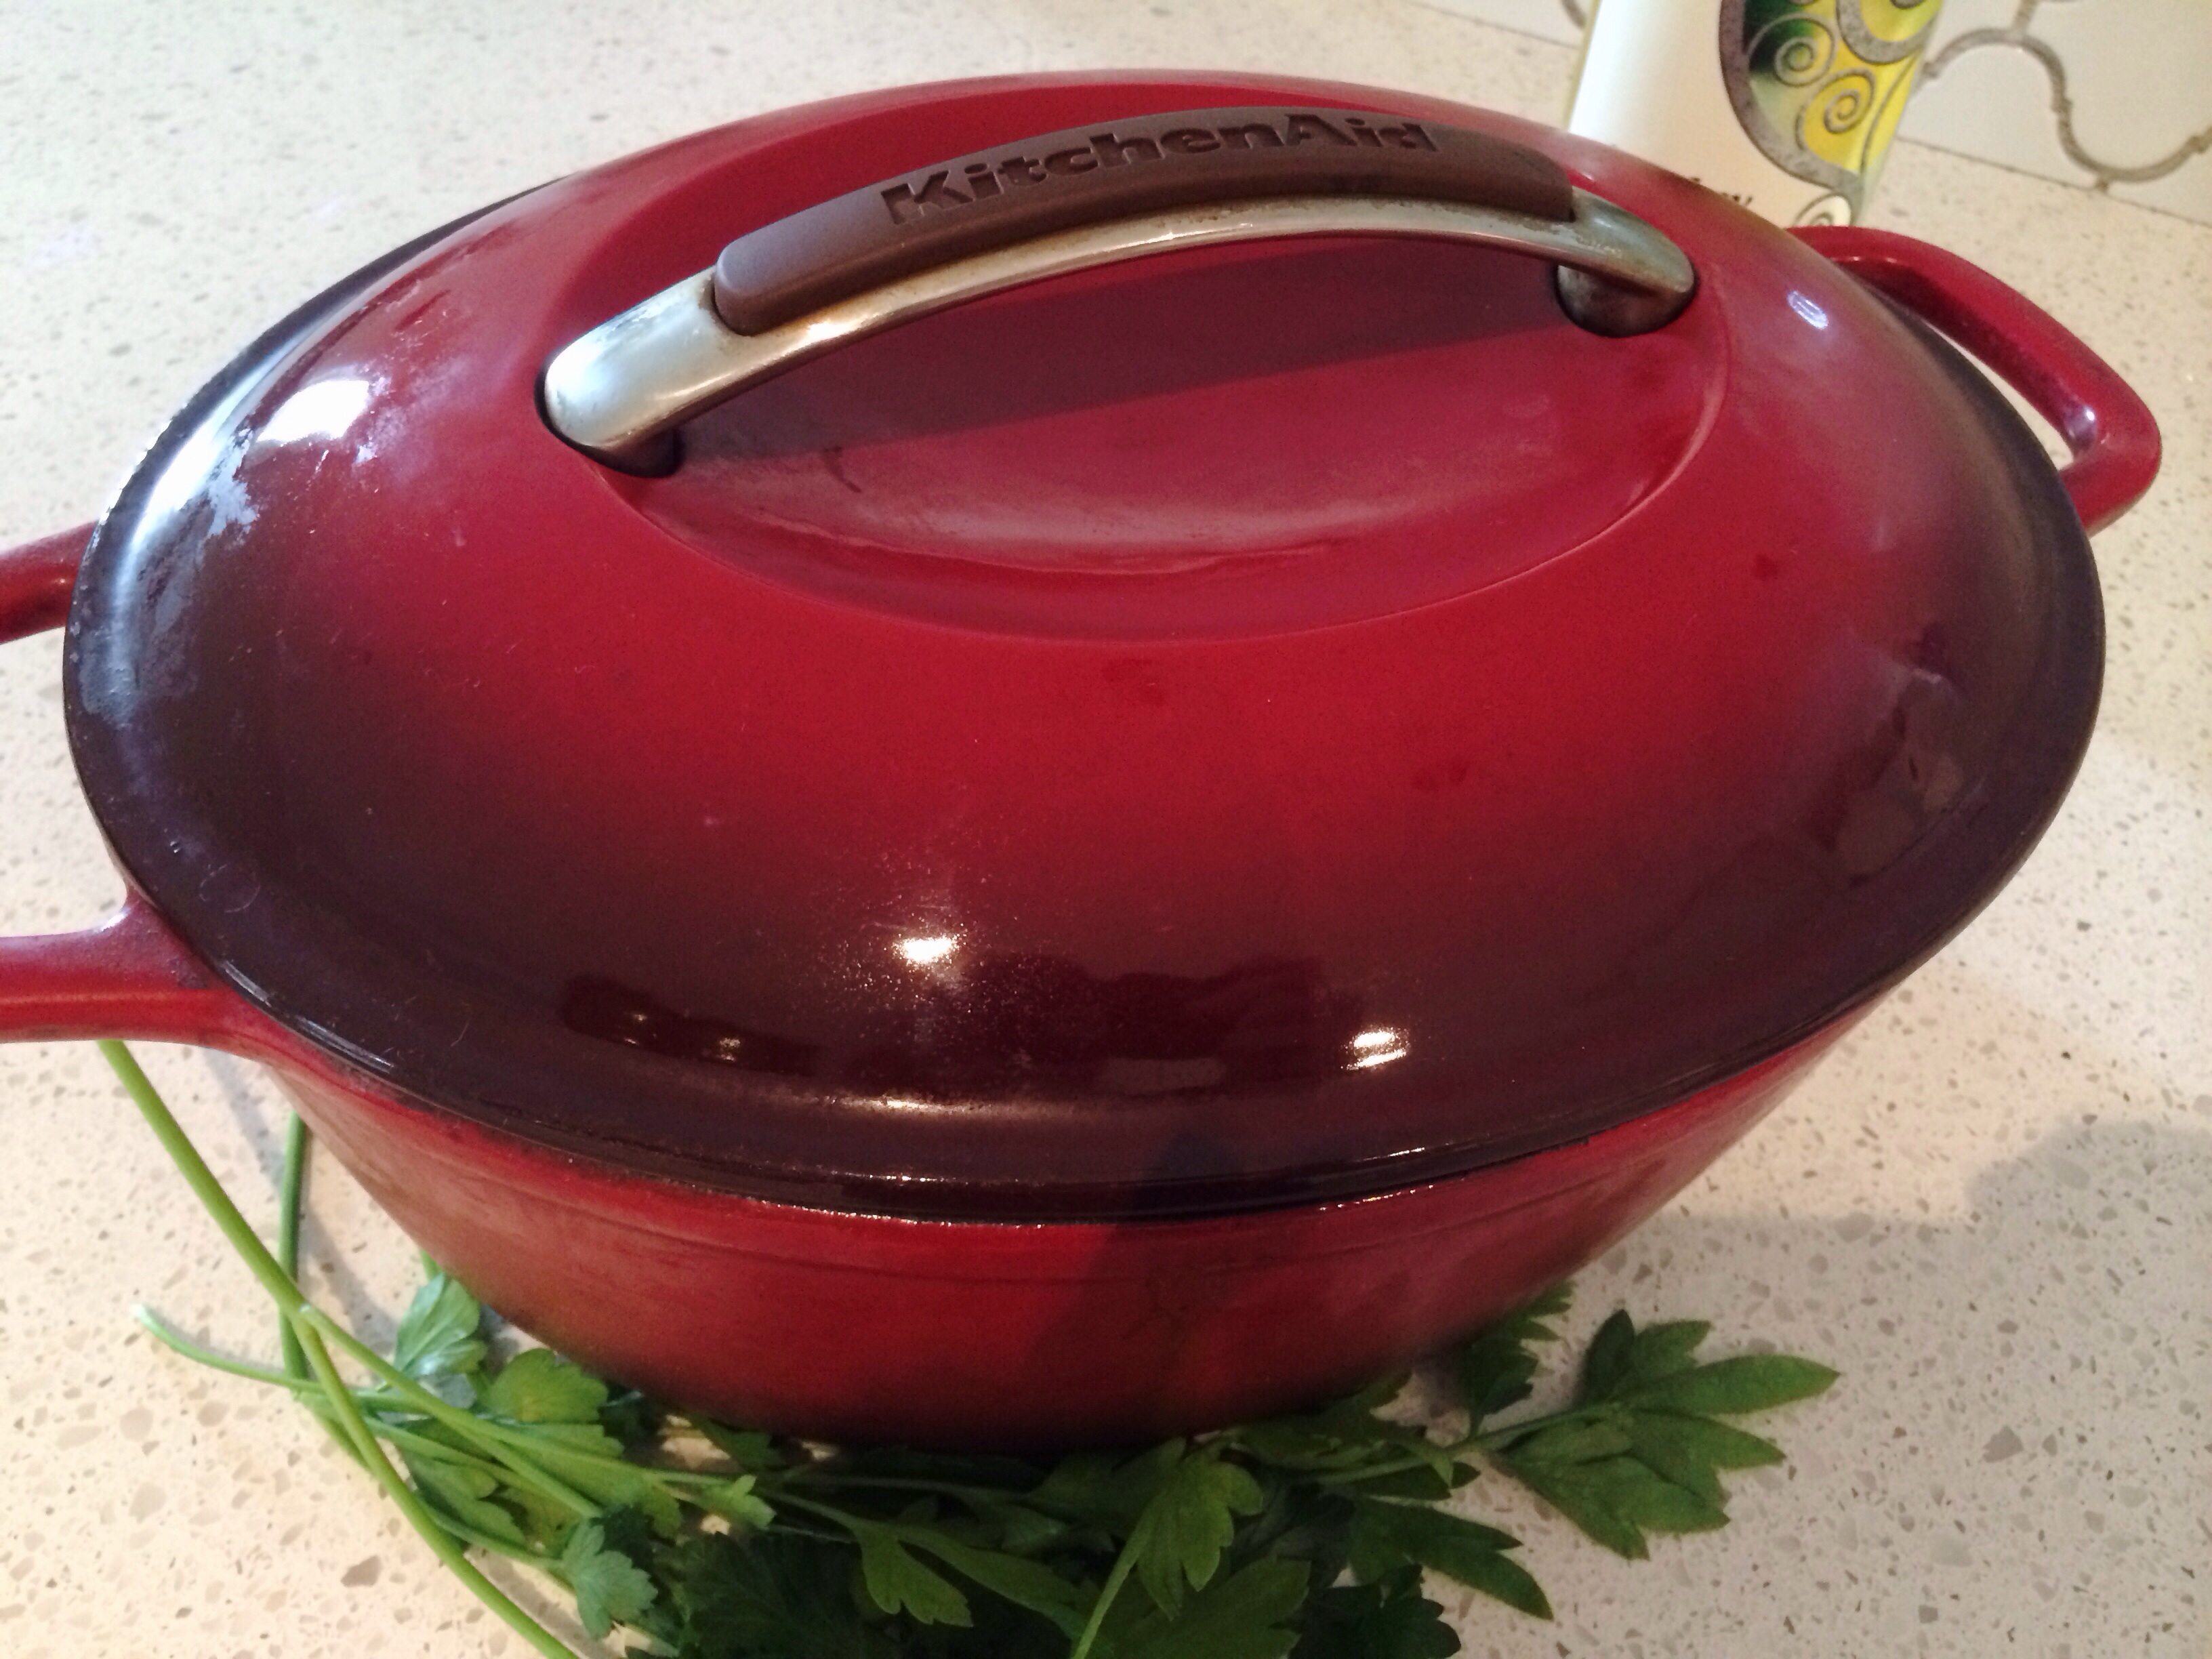
Start the base of this lean turkey chili, with some onion ang garlic.  Yes that’s right, it’s more ground turkey.  So much better for ya and you really wouldn’t know the difference.  This is one big stock pot loaded with tantalizing tongue flavours.

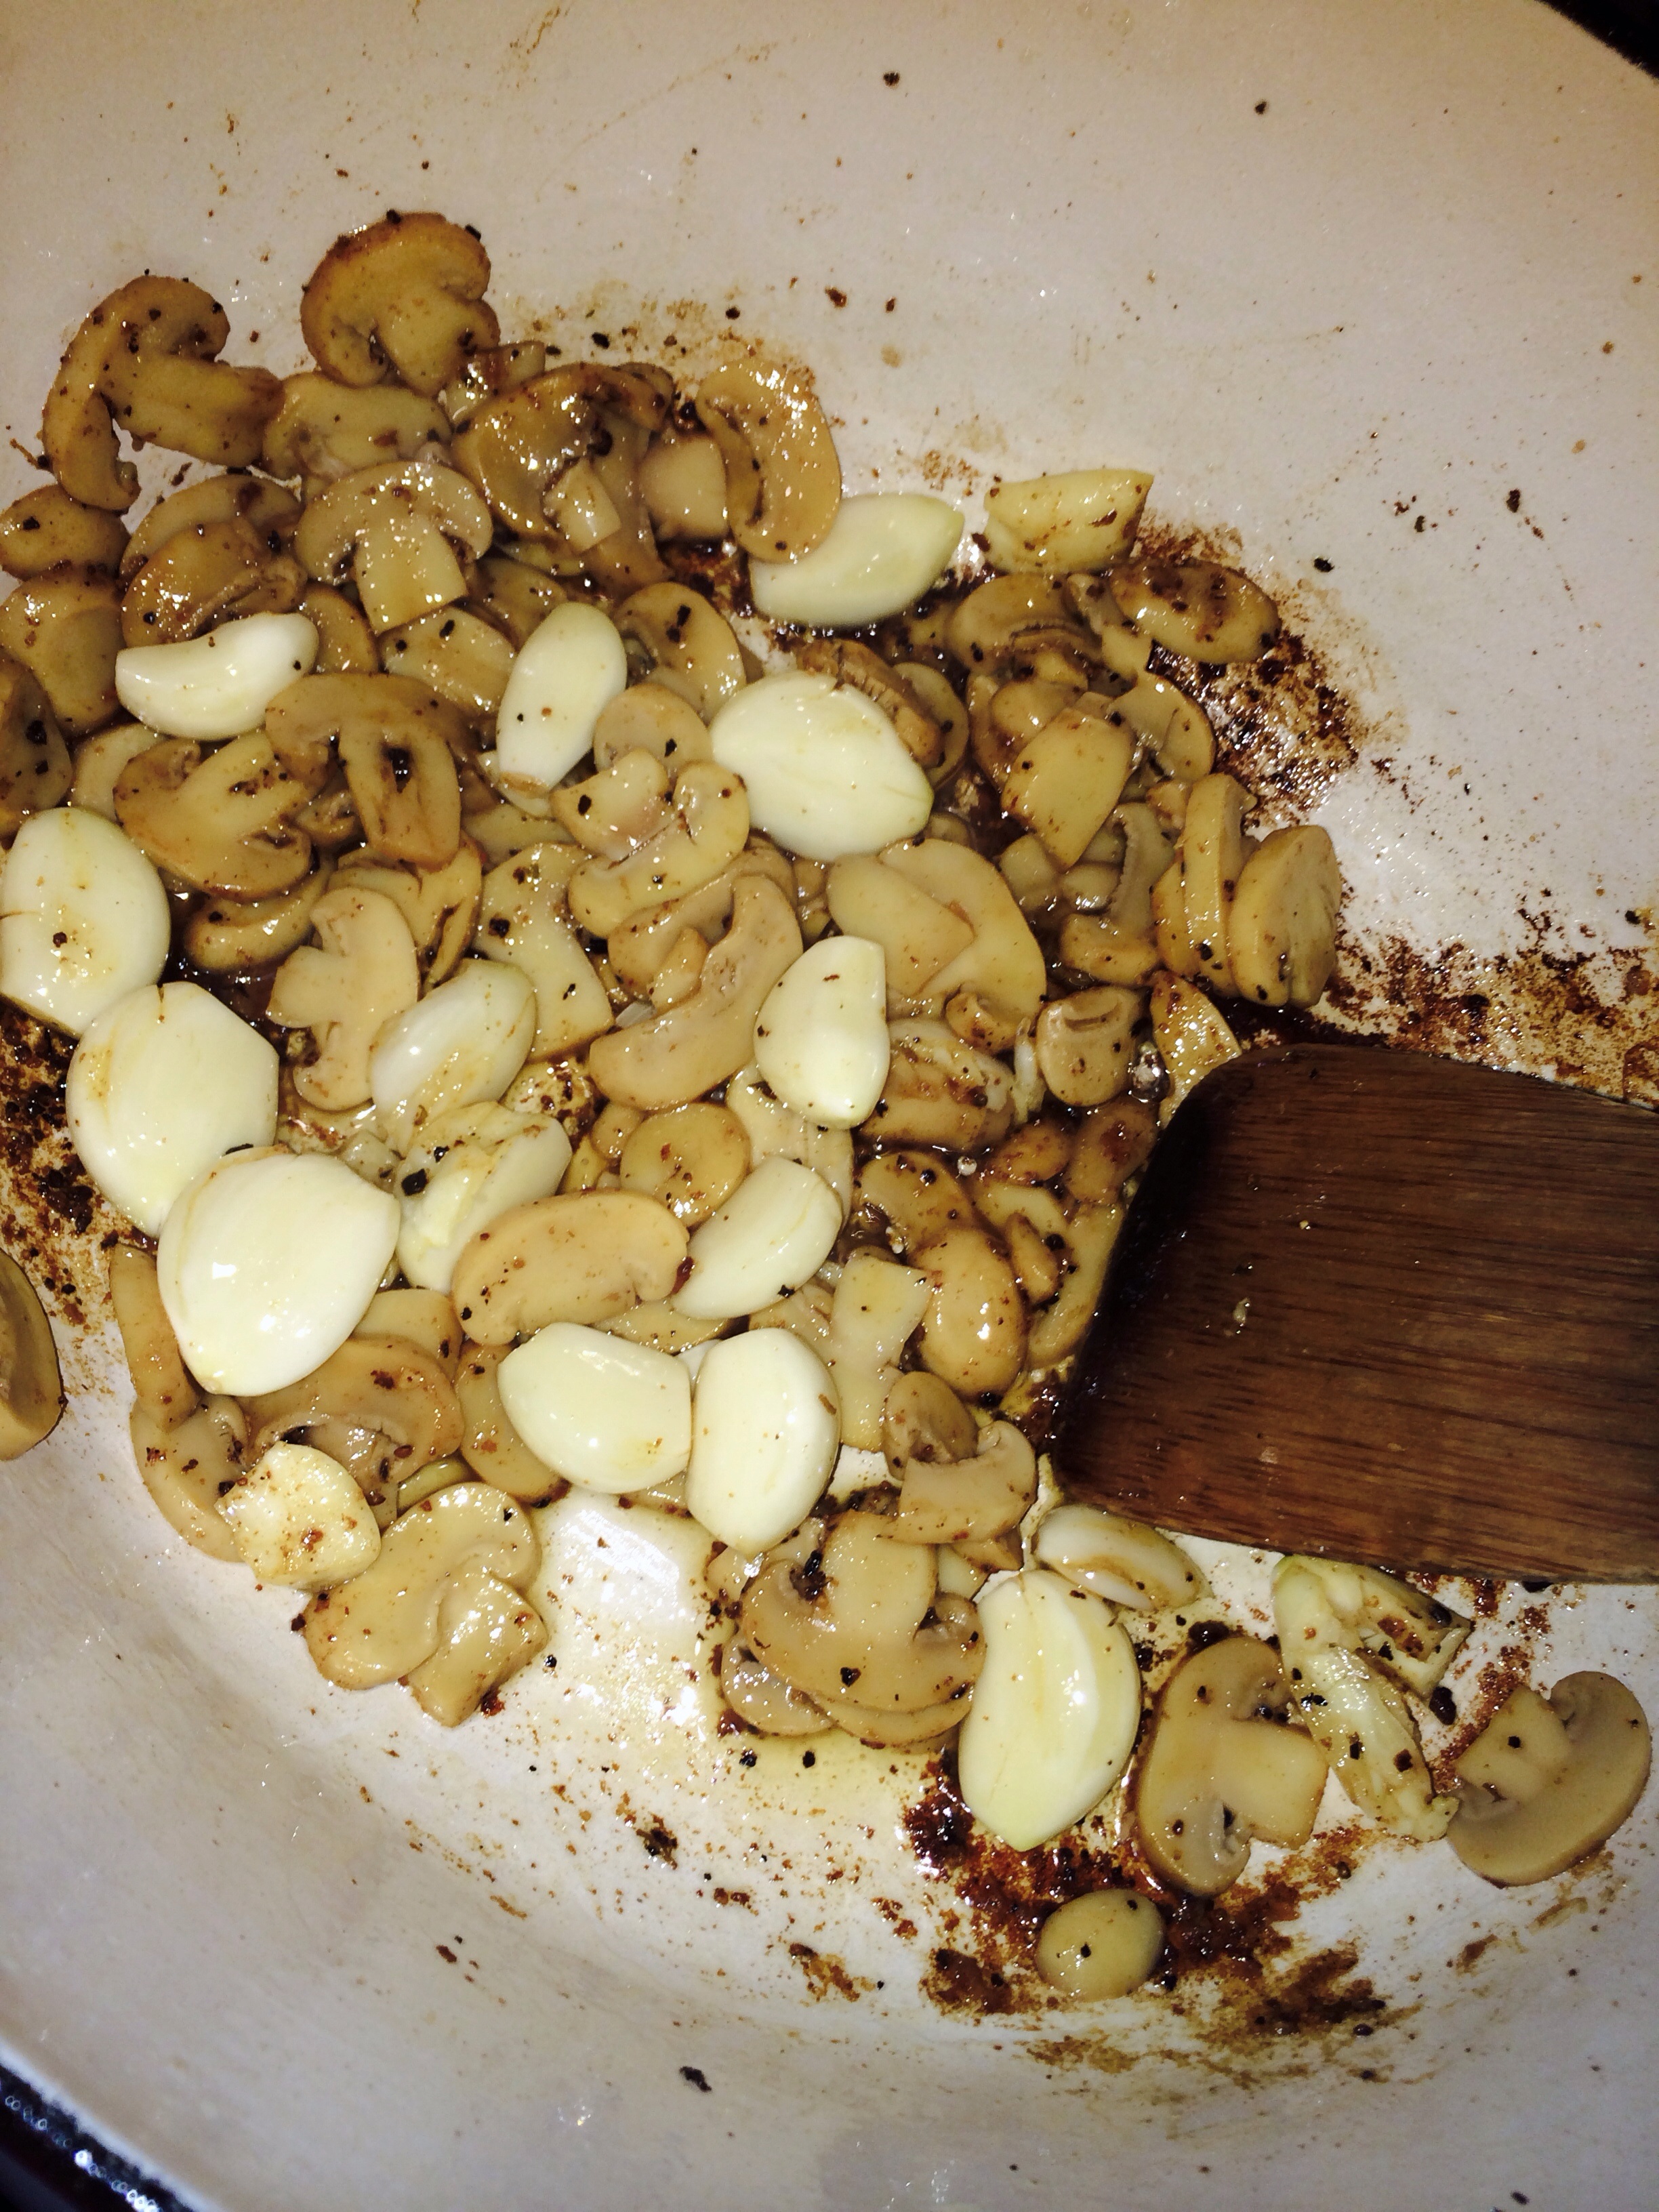
Add in the celery and the mushrooms and let it all cook until the celery is super tender and the mushrooms lose a lot of their moisture.

I would have used fresh mushrooms but one of the good purposes of chili is to use up some of that stuff that you bought a while ago, even tho it wasn’t on your shopping list. You bought it just cuz it was on sale…multiples of whatever it was?  Oh come on, I can’t be the only one who does this.  If they are staple products then it’s all good because they’ll get used.  Besides its way easier to shop in your pantry than it is to have to put a bra on and go to the grocery store, am I right?

Once you’ve sauteed the onions, garlic, celery and mushrooms add in the cooked ground turkey.

Ok I’m standing in front of all the magnificent colourful peppers in Superstore, trying to make my selection for this chili.

I opted for a package of 3 large Anaheim Peppers, which are mild-med on the hot scale and a package of hot habanero peppers to really give this a kick.

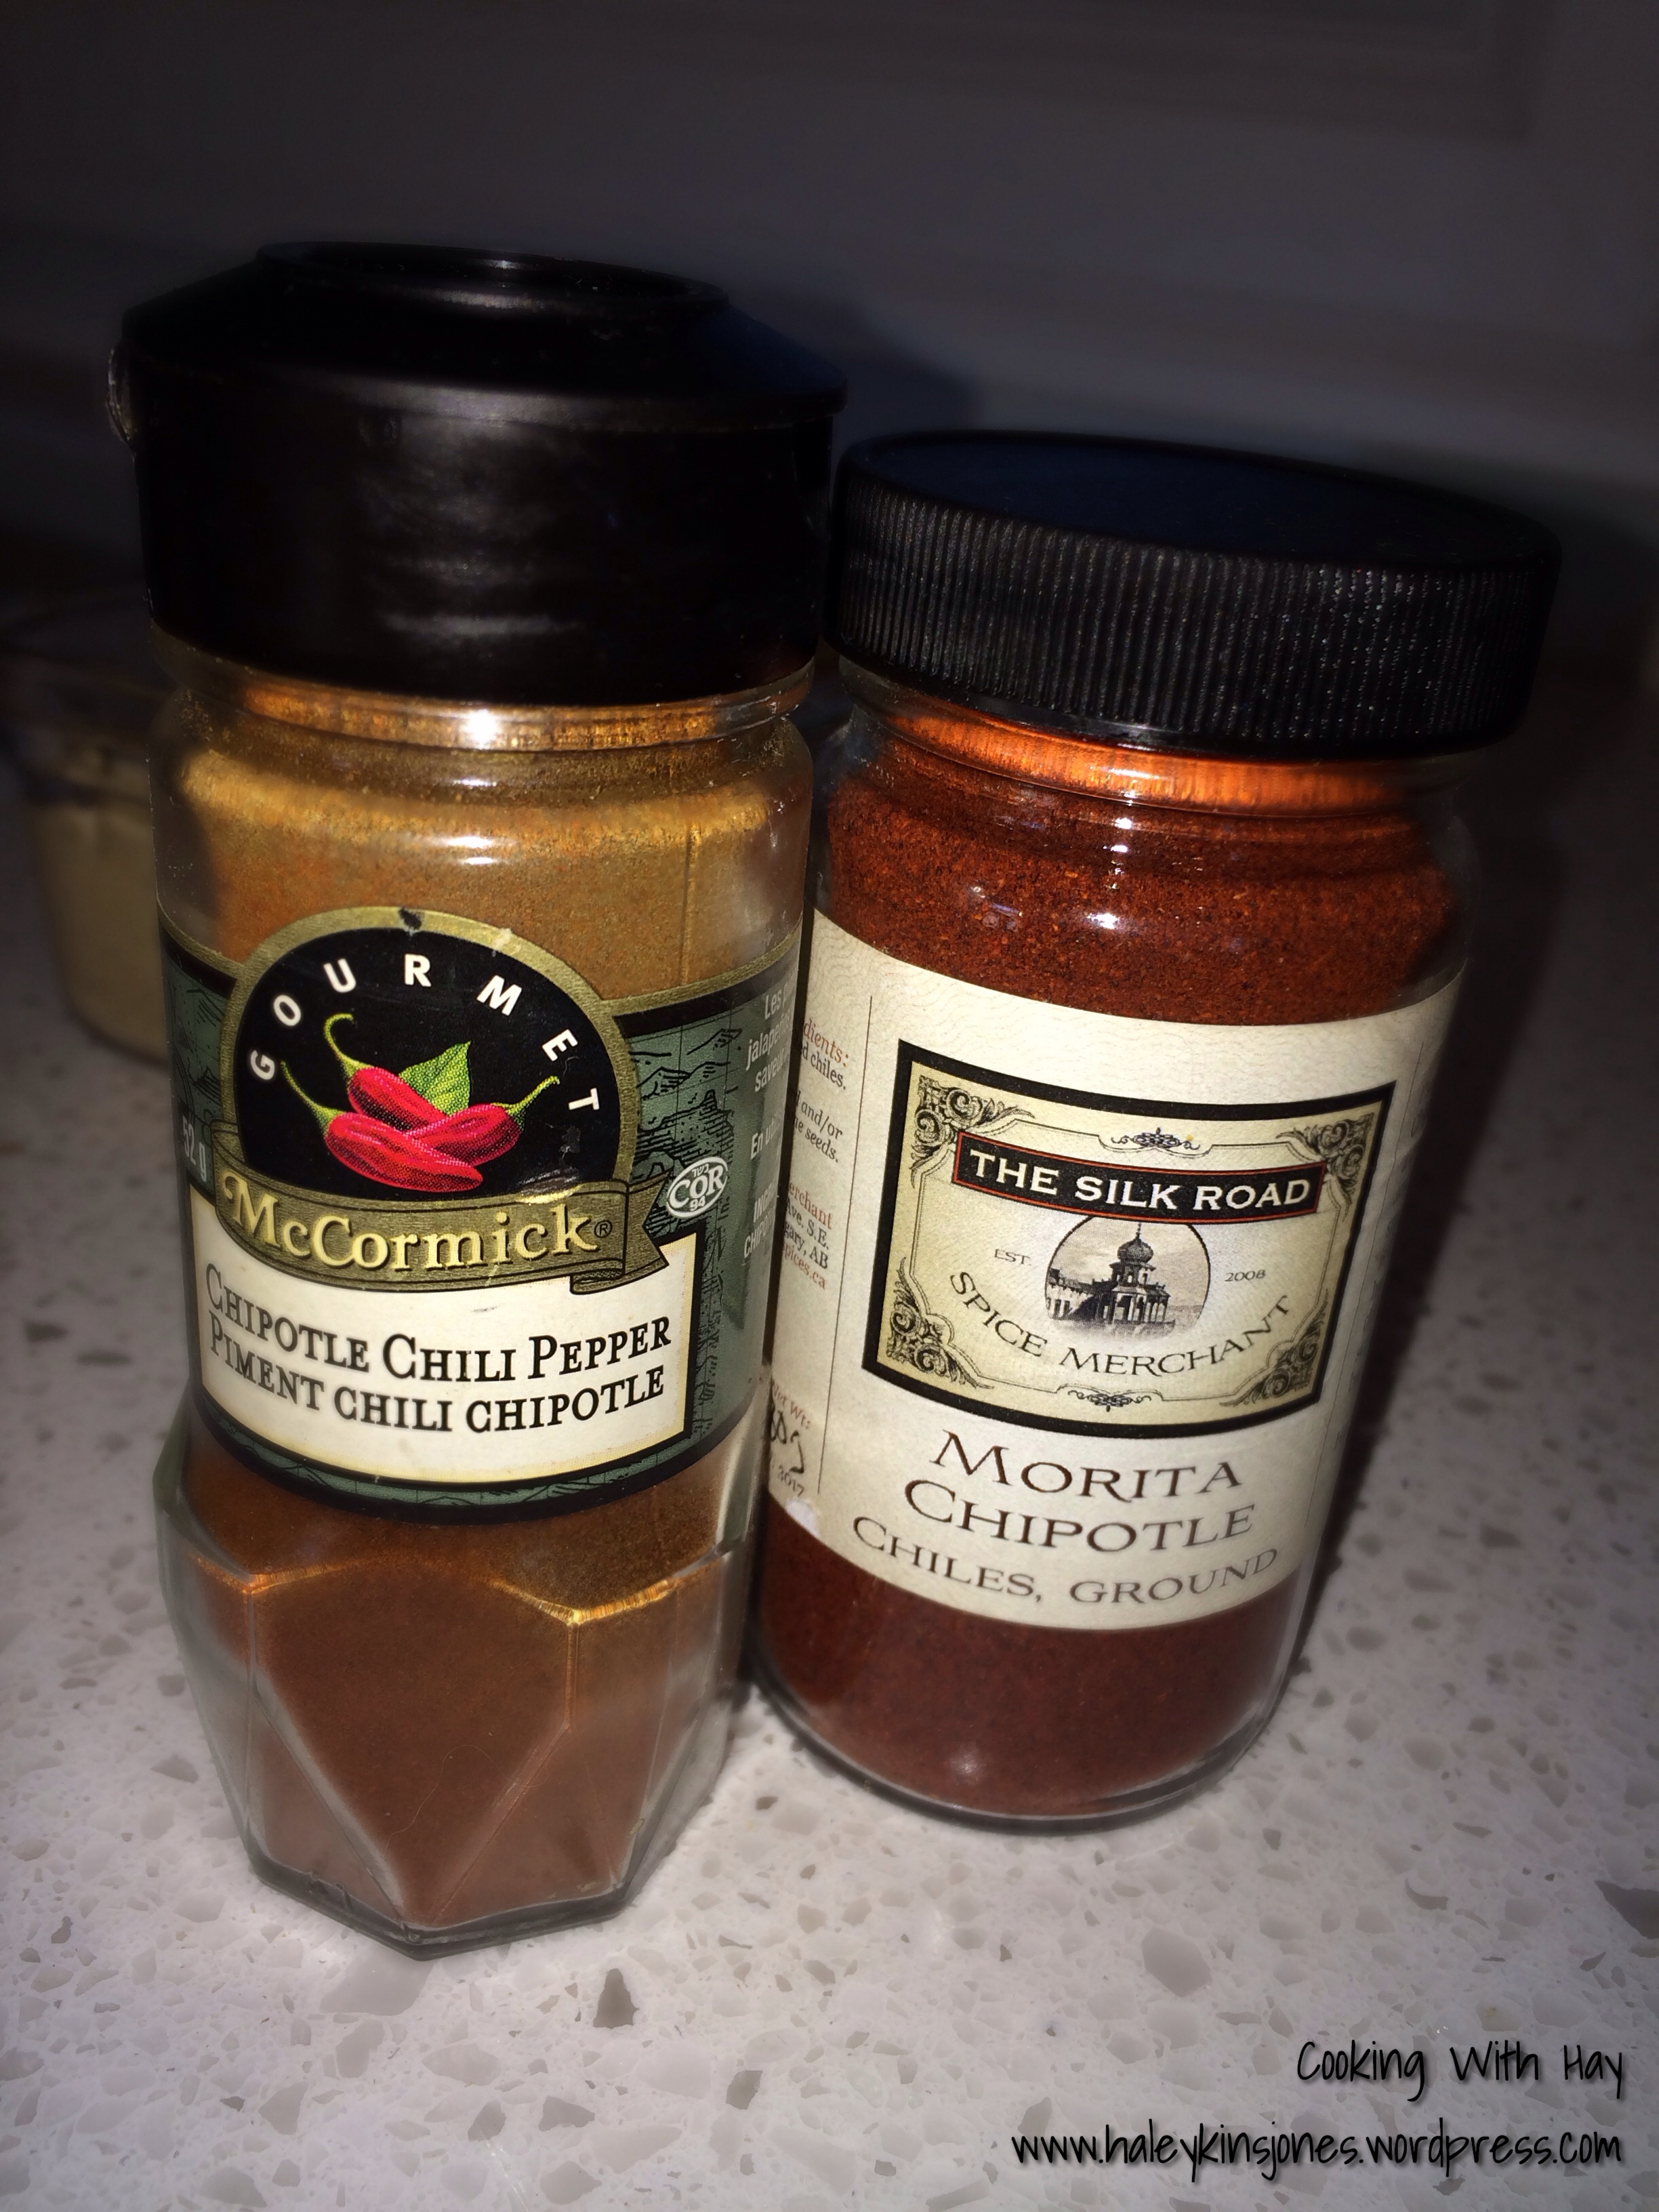
I assure you that yes this would be considered a chili that’s more spicy or hotter than most but I still don’t think it’s like HOT HOT.  I don’t know…. I’m writing this blog at 5:15am, about 7-8 hours after the chili finished cooking…. up all night due to drinking coffee while chef’n it up, perhaps the peppers infused more and I’ll find the chili too hot when I go for another bowl the next time… I’ll have to see, and chances are I still will be in the drafting phase of this post.  For sure will let you know what happens.  See, this is the fun part of trying out new things.  Experimenting, it’s like a little science project for me.  I know for fact that my chipotle dip I make for pizza and potatoes and chicken is way hotter the next day and even hotter the following.  The longer it sits, the more potent it gets.  Now that I’m typing this I’m almost sure it’s going to to be wowzers hot tonight.  hahaha.  Good, it will live up to it’s name.

K DO NOT TOUCH YOUR EYES!! I REPEAT, DO NOT TOUCH ANYTHING FOR THAT MATTER.

Wear gloves when handling these peppers.

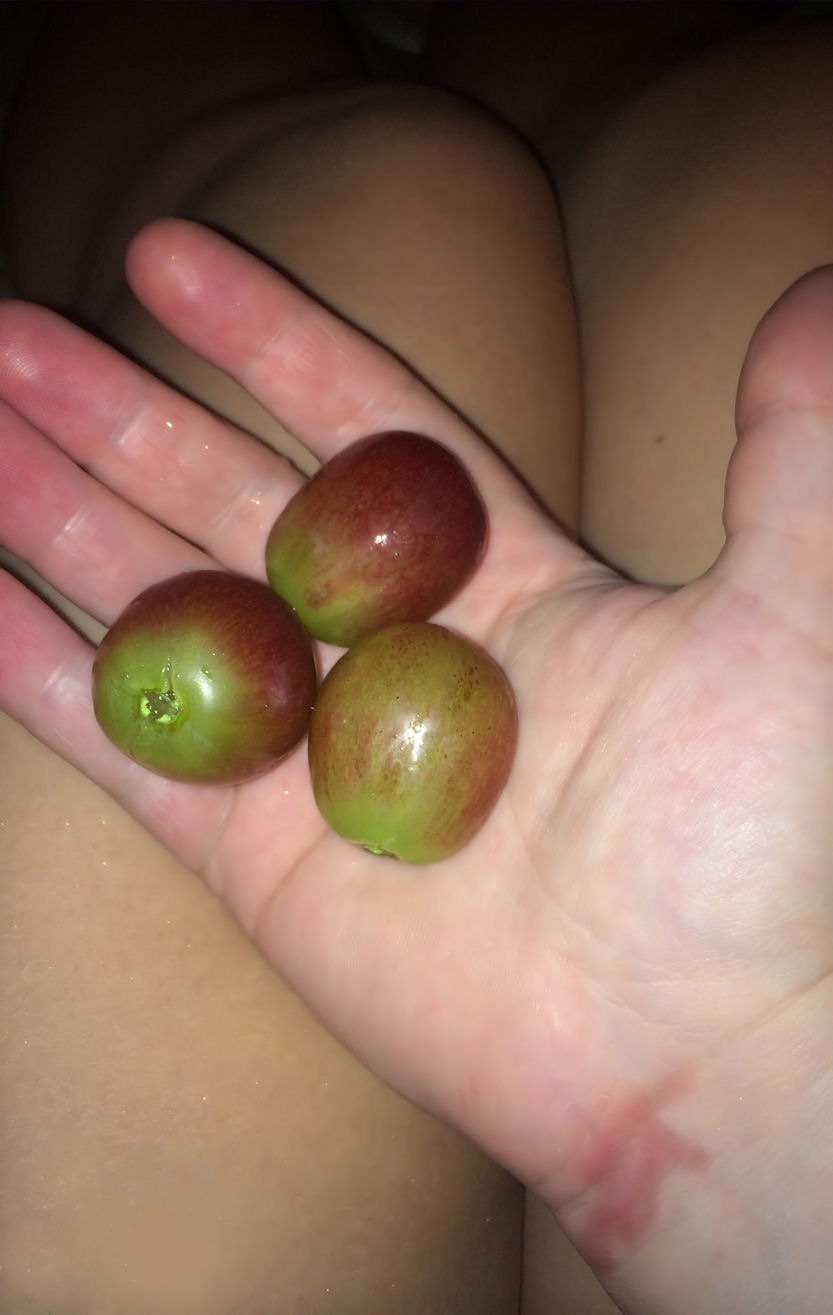
I’ve now burnt myself extremely bad for the second time while dealing with peppers like this.  You might think you’ll be ok or that you’ll be able to handle it but geez, if you’ve never had peppers burns, then just trust me.  Don’t touch!

The oils will get into your skin and no amount of soap and water really works, it’s been over a day since I prepped all this stuff and my hands are still burning even though I really only handled the outsides of the peppers.  I’ve gotten fairly decent at de-seeding and de-ribbing peppers.

I think I wiped down the counter and then rinsed the cloth under water and then the juices rinsed over my hands… Not too sure what happened.  But everything burned, my face got blotchy and swelled up, and I still light my tongue on fire if I suck on one of my fingers to try to soothe the pain… UGH!  How did I let this happen to me again….?

I even used another really cool kitchen gadget.  I’ve had these little do-dad, thing-a-ma-jigs for years now but since I was packed up and working out of that damn temp. kitchen, I wasn’t able to see things.  And lord knows I’m a visual person.

Everything up here in the new kitchen… the “Cooking With Hay” kitchen, has a home and is easy to find and easy to get to.  Convenience!!! I feel like I’m always in a commercial or an actual cooking show.  I’ve had no drawers to put utensils or knives or anything for that matter into.  Haha, oh #firstworldproblems, shut up Haley.

Check out the Typhoon, it’s a dual curved blade with 2 handles, so you rock it back in forth and it minced my habanero peppers into such a fine chop, I was more than pleased.  Although, I’m not really sure if chopping hot things really fine makes the dish more hot than if they were in bigger pieces, you know?

IMG_0067

No culinary school for me.  I’d like to go to learn the basics and fundamentals of cooking.  Whats right and whats wrong.  More so just to inspire me to do more.  Try more.  Be more brave to try newer things and to use some new techniques or more challenging skills.

Always hungry for more, food and knowledge, yet also so dysfunctional that the thought of it all makes me shiver.  Where was I…. chili… right…

From the pantry, I found a can of sliced jalapenos, and a can of diced green chilies.  I also used a whole sweet green pepper.  All 3 of those beautiful Anaheim peppers and about 5 habanero peppers.

Now, remember, REMOVE the seeds and the white ribs, WHILE wearing gloves, AND not touching anything.

I calculated exactly how much of everything I used for spices and what not and the flavour and spicy factor was spot on so unless you want your face to sweat off, stick to this.  If you want the heat that you’ll feel the next day… maybe add 1 or 2 more habanero peps, you bad bad thing you!

You can also increase the chili powder or cayenne as well, if you want it hotter, but the point to this chili is the 4 different types of beans used and the 5 different varieties of peppers.

And OH BOY does it ever look good all mixed together.  the colours of the beans and peppers!  Wooo HOOO!  I love it!

K enough talking about them.  Add them to the onion turkey mixture.  I hope you’re using a big pot as this will make a fair amount.

Don’t forget to add in the best ones!!!!  Eeeek  so excited. I only added this one spoon of habanero at first…. I’ll be honest.  I wanted to test the waters.  I eventually added it all in ha ha yassss!

Mix up the dry spices and add them to the pot.  Again it may not look like much but I swear, the flavour is there and then some.  I added a small amount of beef soup mix to give it some depth because ground turkey can be quite bland and not very exciting.

Foods like turkey breast, that are high in protein, help you feel fuller longer and help maintain healthy muscles.  Please note I said turkey breast, just because it’s turkey doesn’t mean it’s healthier than a beef burger or something like that.  It all depends on how much dark turkey meat is included.  I like to use strictly ground turkey breast.

Stir it all up and let it simmer on low for about 10 minutes, stirring every so often.  This will start to draw out the juices of the peppers and infuse all that nice spice into the meat.

Emptying out my cupboards for this dish… I had 2 large cans of diced tomatoes and a large can of Italian San Marzano tomatoes. I put all 3 cans into my food processor and let it go until it was a nice smooth tomato sauce.


Now pour that into the pot, stir in a small can of tomato paste and give it a good stir.

Bring it gently to a slow boil.

Then reduce the heat back down to medium to simmer.

Mom adds in a can of baked beans to her chili and I copied her.  Add in all 4 types of beans.  The dark red Kidney beans, the white Cannellini beans,  Pinto beans and a can of baked beans.


Again, mix it up and bring it up to a boil.

Reduce heat and let it simmer for about an hour

Voila!!

I couldn’t help myself and dug a spoon into this right away… And then again and again.

Whatever, don’t judge me.  It was for me anyways, I had no houseguest.

Serve with a dollop of sour cream and a sprinkle of cheese and please enjoy some Hurricane Haley’s Hell Fire Chili.  Turkey Chili made with 4 types of beans and 5 types of peppers!  Hell yes!


HURRICANE HALEY’S HELL FIRE CHILI

INGREDIENTS
♥ 4 T. OLIVE OIL
♥ 1 LRG. ONION, DICED
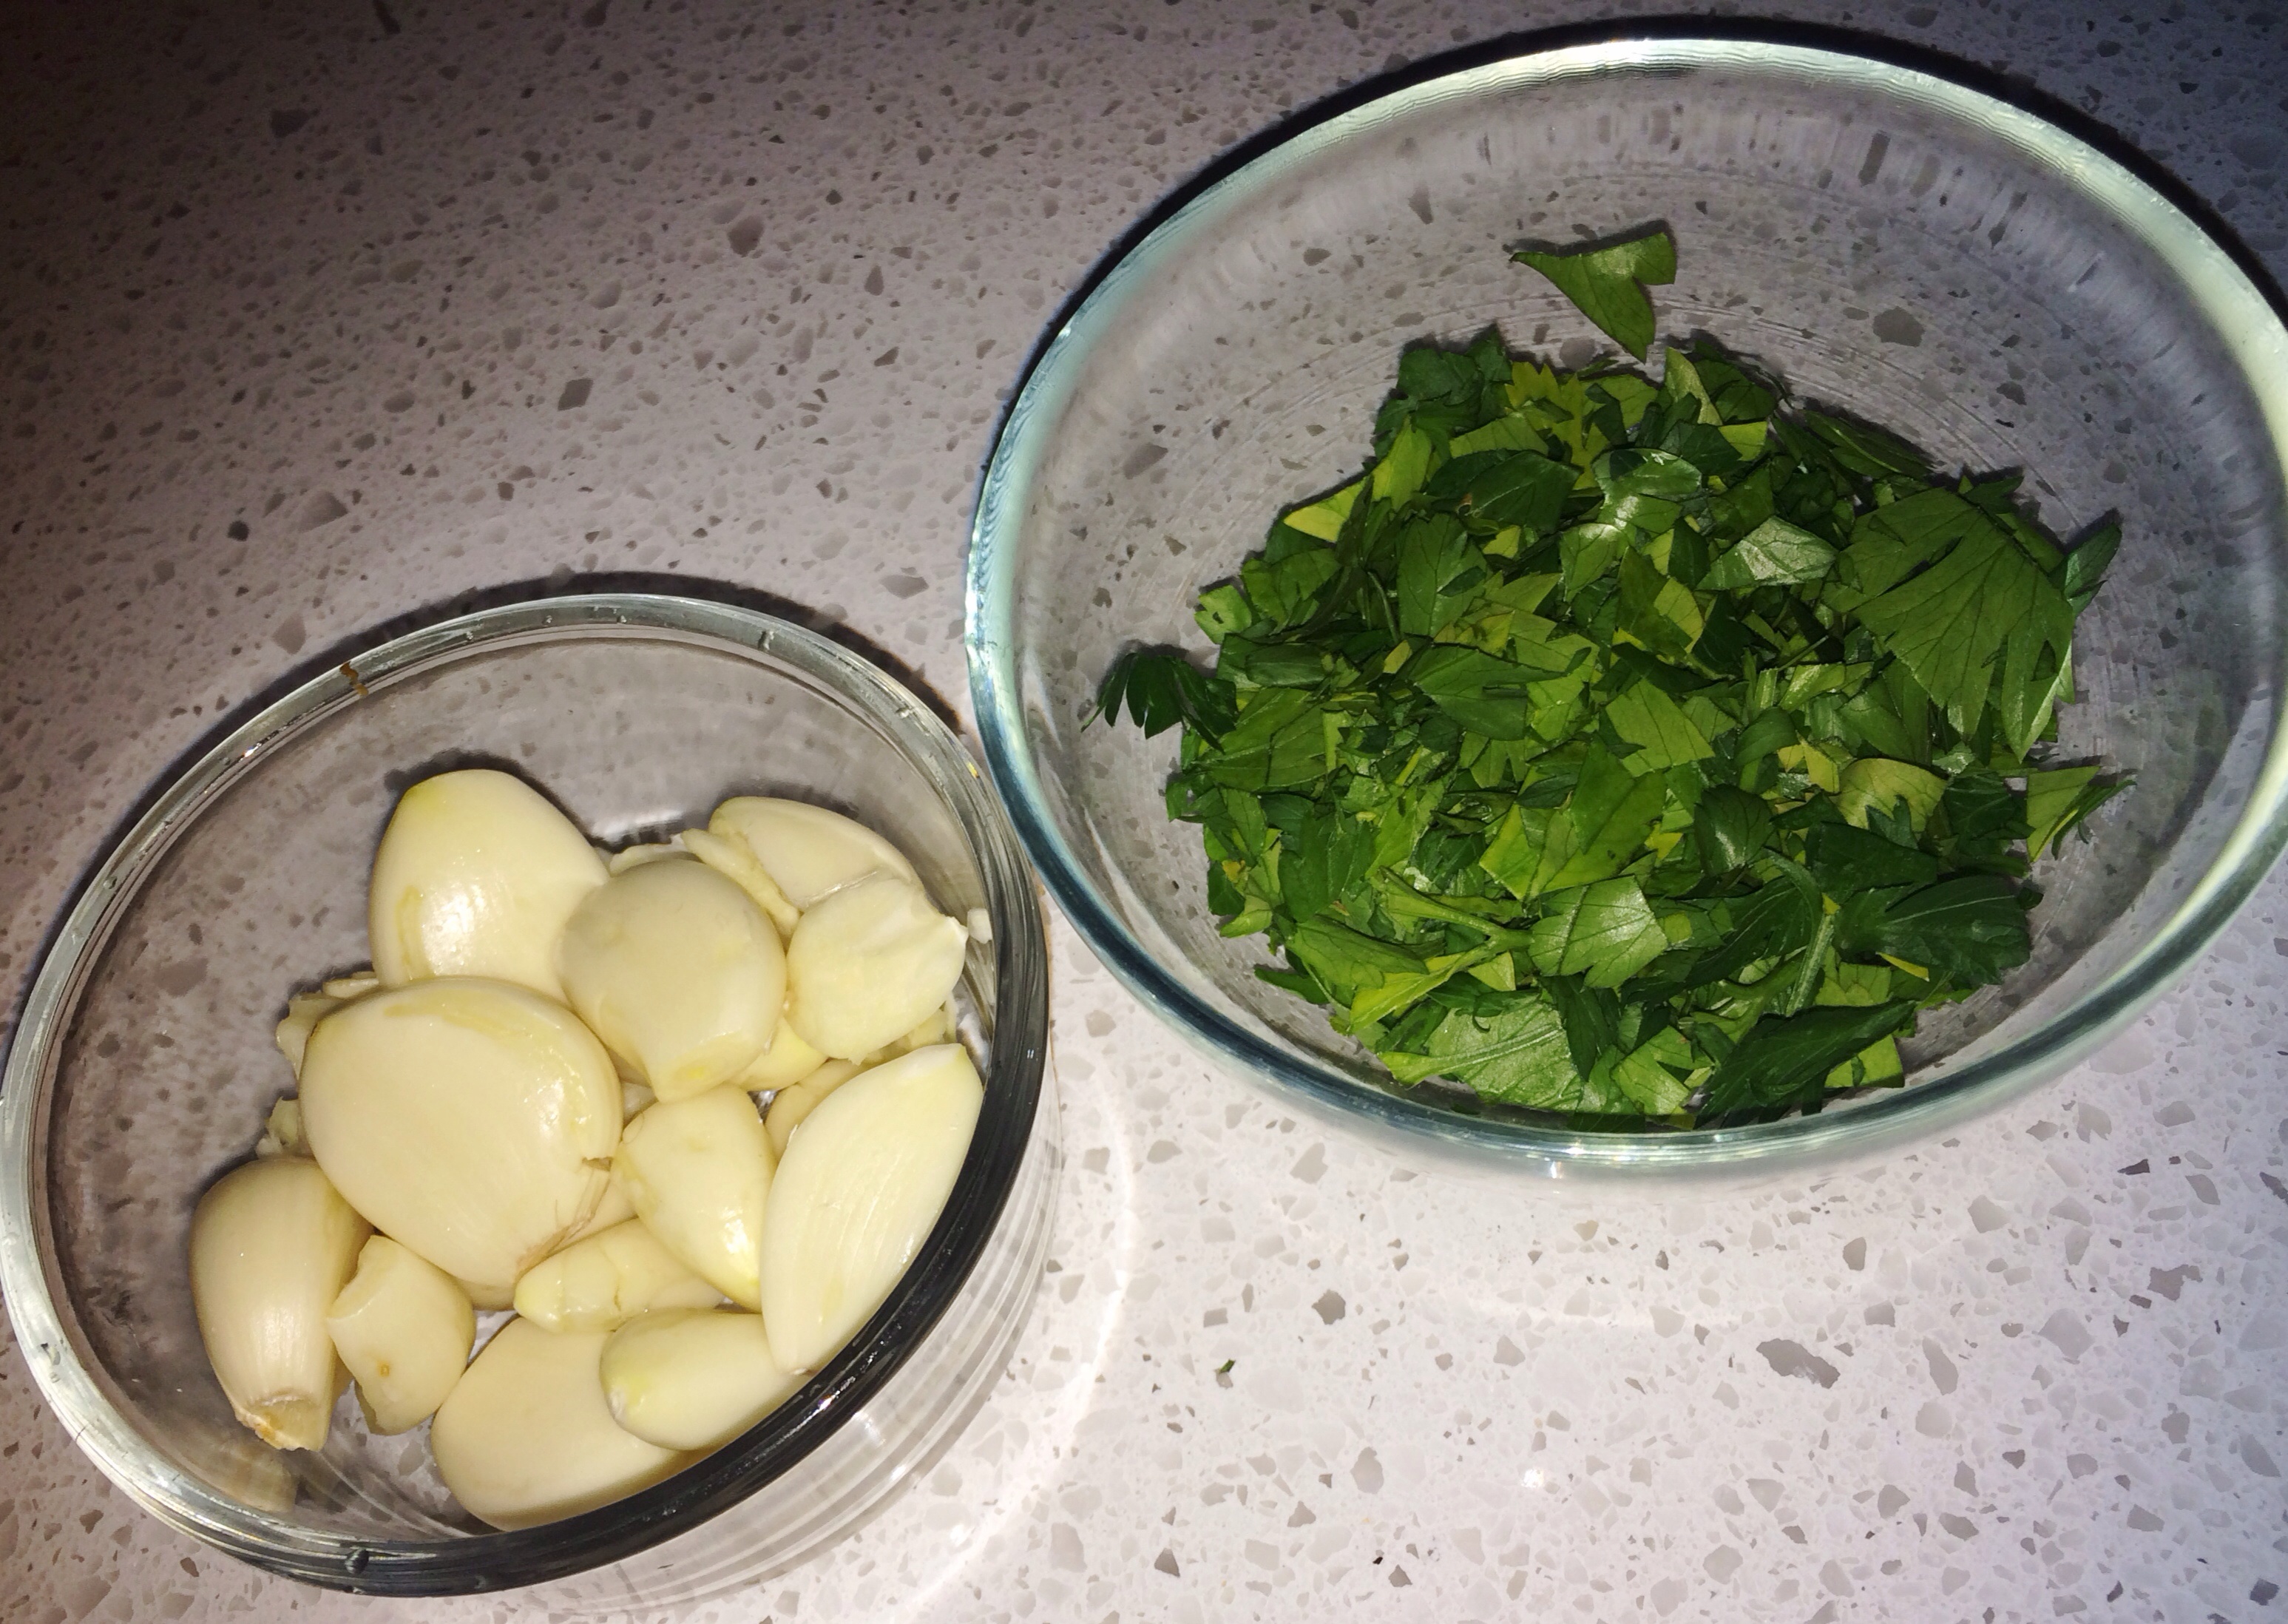
♥ 4 CLOVES OF GARLIC, MINCED
♥ 2 CANS SLICED MUSHROOMS
♥ 4 STALKS CELERY, THINLY SLICED
♥ 2 LBS. LEAN GROUND TURKEY BREAST
♥ 1 SWEET GREEN PEPPER, CHOPPED
♥ 3 LRG. ANAHEIM PEPPERS,
♥ 5 HABANERO PEPPERS, MINCED
♥ 1 SM. CAN SLICED JALAPEÑOS, DICED
♥ 1 SM. CAN DICED GREEN CHILIES
♥ 3 T. CHILI POWDER
♥ 1 TSP. CUMIN
♥ 1 TSP. OREGANO
♥ 1 TSP. SALT
♥ 1/2 TSP. SUGAR
♥ 1/2 TSP. GARLIC POWDER
♥ 1/2 TSP. BEEF SOUP MIX
♥ 1/4 TSP. CAYENNE
♥ 1/4 TSP. PAPRIKA
♥ 1 SM. CAN TOMATO PASTE
♥ 3 LRG. CANS DICED TOMATOES, BLENDED IN FOOD PROCESSOR
♥ 2 CANS RED KIDNEY BEANS
♥ 1 CAN CANNELLINI BEANS
♥ 1 CAN PINTO BEANS
♥ 1 CAN BAKED BEANS IN BROWN SUGAR

DIRECTIONS
IN A LARGE STOCK POT HEAT 3 TBS. OF THE OIL OVER MED-HIGH HEAT
SAUTE ONIONS AND GARLIC
ADD IN CELERY AND MUSHROOMS AND SAUTÉ TILL TENDER
IN A SKILLET HEAT THE REMAINING 1 TBS. OF OIL AND COOK THE GROUND TURKEY
ADD TURKEY TO ONION MIXTURE
ADD IN THE PEPPERS AND THE SEASONINGS
GENTLY COMBINE AND LET SIMMER OVER LOW HEAT FOR ABOUT 10 MINUTES, STIRRING OFTEN
ADD IN TOMATO PASTE AND BLENDED TOMATOES
BRING UP TO A GENTLE BOIL AND THEN REDUCE HEAT
ADD IN THE BEANS AND MIX IT UP
ONCE AGAIN, BRING UP TO A GENTLE BOIL AND THEN REDUCE HEAT
SIMMER FOR ABOUT AN HOUR OVER LOW HEAT. STIRRING OFTEN


♥♥ Thanks for visiting, if you liked this blog please click LIKE below. If you want to follow my blog please scroll to the bottom, click the FOLLOW button and enter in your email address.
Love Haleykins♥♥


**Please click “OLDER POSTS” button, (bottom of the page)
or the “COOKING WITH HAY” tab (top of the page) to see more**

Tagged , , , , , , , , , , , , , , , , , , , , , , , , ,

GARLICKY SAUCED PAN~SEARED CHICKEN

image


GARLICKY SAUCED PAN~SEARED CHICKEN

INGREDIENTS
♥ 4 T. OLIVE OIL
♥ 1 LARGE PACK OF CHICKEN THIGHS
♥ ½ TSP. SALT
♥ ½ TSP. PEPPER
♥ 2 CUPS SLICED FRESH MUSHROOMS
♥ 1 T. CHILI PEPPER FLAKES
♥ 1½ FISTS OF GARLIC
♥ 2½ CUPS SAUVIGNON BLANC WHITE WINE
♥ ¼ CUP MILK
♥ 2 T. BUTTER
♥ ¼ CUP FRESH CHOPPED PARSLEY
♥ 2 SPRIGS FRESH ROSEMARY

DIRECTIONS
PREHEAT OVEN TO 375°F

HEAT THE OIL IN A DEEP DISH PAN ON YOUR STOVE TOP. (OR LARGE DUTCH OVEN OR CAST IRON POT) CAST IRON WORKS BEST I THINK AND THE DEEPER THE BETTER, YOUR APPLIANCE WILL THANK YOU LATER. SPLASHY GREASE BLAH.

SEASON THE CHICKEN THIGHS WITH SALT AND PEPPER AND PLACE CHICKEN IN THE PAN. SEAR THESE BAD BOYS UP UNTIL GOLDEN AND THE JUICES JUST RUN CLEAR. THEY WILL COOK MORE IN THE SAUCE.

REMOVE THE SEARED CHICKEN FROM THE PAN AND SET ASIDE.

SEPARATE THE GARLIC CLOVES AND PEEL THEM. ADD THE MUSHROOMS, PEPPER FLAKES AND GARLIC CLOVES TO THE CHICKEN PAN AND IT’S LEFTOVER LIQUIDS.

SAUTE UNTIL TENDER AND GOLDEN, BUT MAKE CERTAIN NOT TO BURN THE GARLIC. TILL JUST GOLDEN. GARLIC GOES QUITE BITTER WHEN OVERCOOKED.

ADD THE WINE, MILK, BUTTER AND STIR IN THE PARSLEY.

GENTLY ADD THE CHICKEN BACK TO THE PAN.

ADD THE ROSEMARY SPRIGS AND COVER.

PLACE IN PREHEATED OVEN. BAKE FOR 20-30 MINUTES. TURNING THE CHICKEN OVER HALF WAY THROUGH.

REMOVE FROM OVEN WHEN THE SAUCE STARTS TO REDUCE AND THICKEN UP.

I TRANSFERRED ALL OF THIS TO A HOT FRYING PAN FOR APPEARANCE PURPOSES FOR THIS BLOG BUT YOU CAN CERTAINLY FINISH IT UP IN THE OVEN IF YOU CHOOSE. LESS MESS. HOWEVER IF THE SAUCE IS TOO DRY YOU MAY WANT TO ADD MORE WINE AND LET IT SIMMER A BIT LONGER. THIS WAS DEFINITELY EASIER TO DO ON THE STOVE TOP.

SPOON THE GARLICKY SAUCE OVER THE CHICKEN AND SPRINKLE WITH A LITTLE MORE FRESH PARSLEY AND CHILI PEPPER FLAKES.

SERVED SEARING HOT OVER LINGUINE NOODLES.


I am needing a large tripod and to get my amazing Canon Rebel T3i camera up and running to do these blog photos now that the “Cooking With Hay” Kitchen is nearing completion!

At the time of making this dish I had cabinets, counters and some lighting in. Oh and the backsplash tile was added but had just been grouted. No appliances, no running water, just a much more appealing place for a food blog photo set.

Regardless, it’s all a vast improvement from the basement temp. kitchen, 2×4 studding and insulation backdrops seen in previous blog photos.

image

Is ‘garlicky’ even a word ? ? ?

The recipe I was using called for white wine… I have drank wine in the past but by any means, don’t consider myself a wine drinker.

However… GalPal is!

She came to my rescue with some suggestions after I let her know my ingredients and what I was making.

Monkey Bay Sauvigon Blanc from New Zealand was the perfect wine, as this dish was phenomenal. Not too sweet, not to dry. I’m not even going to bother experimenting with other wines.

The bottle… as GalPal mentioned, coordinated nicely with the ingredients needed to make this dish. Thanks for the help Amber!! Guess I should make this for you now hey?!

image
This pepper tho! Gift from Mother-In-Law and I’ve become quite addicted to it. I use it on my sunny side up eggs in the morning to grilled salmon and everything in between. It’s made just a few hours from my house in Keremeos BC. It’s pepper, onions garlic and herbs and is a great change-up to the regular black pepper or fresh ground peppercorns.

Season the chicken thighs with a little salt and sprinkle of pepper. There is enough flavour coming in the garlic and wine and parsley that not much seasonings are needed on the chicken.

I assure you. This dish packs a savory garlic KA-POW with a mix of fragrant herbs. Absolutely delish my gosh!

image

My mom is a wonderful cook, and I’ve used many of her recipes to get me into cooking. She got me this gorgeous glazed cast iron KitchenAid dish and this is what I used to pan~sear my chicken thighs. Keeps even heat and kept the splatter in the dish rather than on my stove-top.

image

I used this dish on the stove top to brown the chicken and saute the mushrooms, chili pepper flakes and the garlic. It also has a lid to cover so this same dish was what I used to baked it up into the perfect saucy chicken while in the oven. From Canadian Tire and I definitely recommend one for your cooking adventures also.

image

After transferring the chicken, there was a fair amount of liquids, chicken grease and juices, left in the bottom of the pan. I removed most of it and left just a small amount in the bottom to saute the mushrooms and garlic in. Your choice.

image

Now on the bottom of this dish was a dark golden layer from the chicken juices etc. searing up. Don’t be alarmed… I was thinking to myself… Oh shit, did I ruin this whole thing? Is everything now going to stick and burn?

image

But the mushrooms and garlic seemed to soften it up and cook together and created such a rich flavourful sauce.

image

I couldn’t have been more pleased. It is really a good day when things work out for me, haha. I’m sure you’d feel the same. Yay for good cooking. Go me Go. Feel free to do a little booty shakin touchdown dance when things like this happen. It’s all about the simple things in life am I right My Lovelies?! LOL

image

Adding wine to things like this also acts as a de-glazer for your well cooked pans. Don’t waste that seared liquid. That’s your concentrated flavour right there. Just the same as the bottom of your roaster from your roasts and hams make the best gravies and soup broths.

In this case it’s our deglazer and the base for this sauce. I am not a wino so I will admit that I have always been apprehensive about dishes that are made with wine. If someone made this for me and I ate the whole thing… I don’t think I would have even known it was made with wine. I’m serious! So so so so so so good!

image

**NOTE: Milk is added for volume. This will help create that thicker fuller sauce to coat the chicken. If you wanted a more concentrated demi-glaze like sauce, you can omit the milk completely. As mentioned in the recipe, you may need to add more wine if you find the sauce to dry when you turn over the chicken half way through cooking.**

image

Time for the fun! Let’s bring it all together. Gently add the chicken back in once you’ve mixed in the wine, milk, butter and parsley.

Nestle it down in that fragrant garlic bath. Time for these thighs to tantalize.

image

Cover it with a tight-fitting lid and place it in a preheated oven and bake it up so the sauce can thicken up.

image

Don’t forget to check it half way through and flip that chicken over. Keep it saucy!

It will look soupy at first. As it continues to cook the sauce will get darker and richer in colour and of course flavour.

Be patient and wait for it. It will look ‘blah’ before it looks ‘ta da’

image

There it is! TA DA!!!

image

As mentioned in my recipe, I then transferred my contents of my kitchen aid glazed cast iron dutch oven to a pan for appearance purposes for this blog. LOL

Got to love dirty dishes! LMAO

This pan is worthy of a few photos though. Another splendid purchase from Canadian Tire. I think I’ve gotten every single one of my pans from Canadian Tire over my years. They always have good deals on cookware FYI. Watch the flyers. This is a Heritage Rock Forged Non Stick Pan. It’s got a big capital ‘H’ on the stunning stainless steel handle. My name, being Haley… thus…H-Town bitches…. hahah. Nah my Mommy has one and I used it while at my parents place this spring and of course I fell in love. It having a big ole ‘H’ on it for ‘Cooking With Hay’ is just an added perk. I love this pan so much that I don’t really use any other pans besides The H Rock, this KitchenAid glazed dutch oven or my cast iron dutch oven and griller.

image

This will be a regular meal cooked in my kitchen. Please give it a try guys! Feedback is always appreciated. As is your SHARES and LIKES on Facebook, Pinterest, Twitter, etc…. Sharing is Caring and it would really help expand my page! Love you all! Thanks for your support.

There you have it. Garlicky Sauced Pan~Seared Chicken ♥

♥♥ Thanks for visiting, if you liked this blog please click LIKE below. If you want to follow my blog please scroll to the bottom, click the FOLLOW button and enter in your email address.
Love Haleykins♥♥

**Please click “OLDER POSTS” button, (bottom of the page)
or the “COOKING WITH HAY” tab (top of the page) to see more**

Tagged , , , , , , , , , , , , , , , , , , , , , , , , , , , , , , , , , , , , , , , , , , , , , , , , , , , , , , , , ,

Grilled Chicken with FETA + BASIL SAUCE

FETA + BASIL SAUCE

♥  2 C. FETA CHEESE, crumbled
♥  2 T. FRESH BASIL, chopped
♥  1 HEAPING T. GARLIC, fresh and minced
♥  ½ C. MILK
♥  ½ TSP. CHILI POWDER
♥  ½ TSP. SUGAR
♥  ½ TSP. PEPPER

Boil a couple inches of water in a double boiler, reduce to med-high.

(or set up a small pot with water and bring it to a boil and have all your ingredients in a heatproof glass bowl larger than the pot.  Place the bowl over the pot.  Make sure it doesn’t touch the water, needs to be above the water)

Combine all the ingredients to the upper pot of your double boiler or into your glass bowl.  Mixing and stirring until creamy and fairly smooth.

You may need more milk if it’s too thick.  This is a thicker type of sauce so it’s not going to be thin and runny…  You want to dollop it on top of your grilled chicken.

Who doesn’t love a dollop of anything?  LOL

I have a large square cast iron dutch oven and the lid for it has grills on the underside so lately I’ve been using this heavy duty thing for everything.  I flipped the lid over and heated up the grills and grilled the chicken.

My go to staple is frozen boneless skinless chicken breast.  I buy them in 4 kg boxes or bags whenever they go on sale and usually have 4-5 packs in my deep freeze at any one time.  Chicken breast is high in protein and low in fat.

Season them with a little olive oil and some salt and pepper and grill to perfection.

When cooking chicken without skin, I always baste with a brushing of olive oil.  This will help seal in the natural juices of the meat and keep your dinner from going dry.  Have the grills or your pan preheated to med-high before adding the chicken.  Avoiding moving the chicken once you place it on the grills.  It will stick at first and you know you’ll be tempted to try and move it and “un-stuck it” but don’t!  It will pull away from the heat source on it’s own when it’s ready.  Well for the most part… just be patient alright.  This way you’ll get the perfect sear and grill marks.  Also, avoid turning and turning pieces of meat.  The raw juices cook on one side and then when you flip the piece of meat you allow the cook juices to run down through the rest of the meat helping cook that side through.  Flipping prematurely and back and forth might withhold some of those raw chicken juices and leave the center raw.  RAW!!!!  Don’t want that.

I heard this along time ago.  I only assume it’s true but it makes sense.  So I try to be as patient as I can and cook evenly and properly per side.

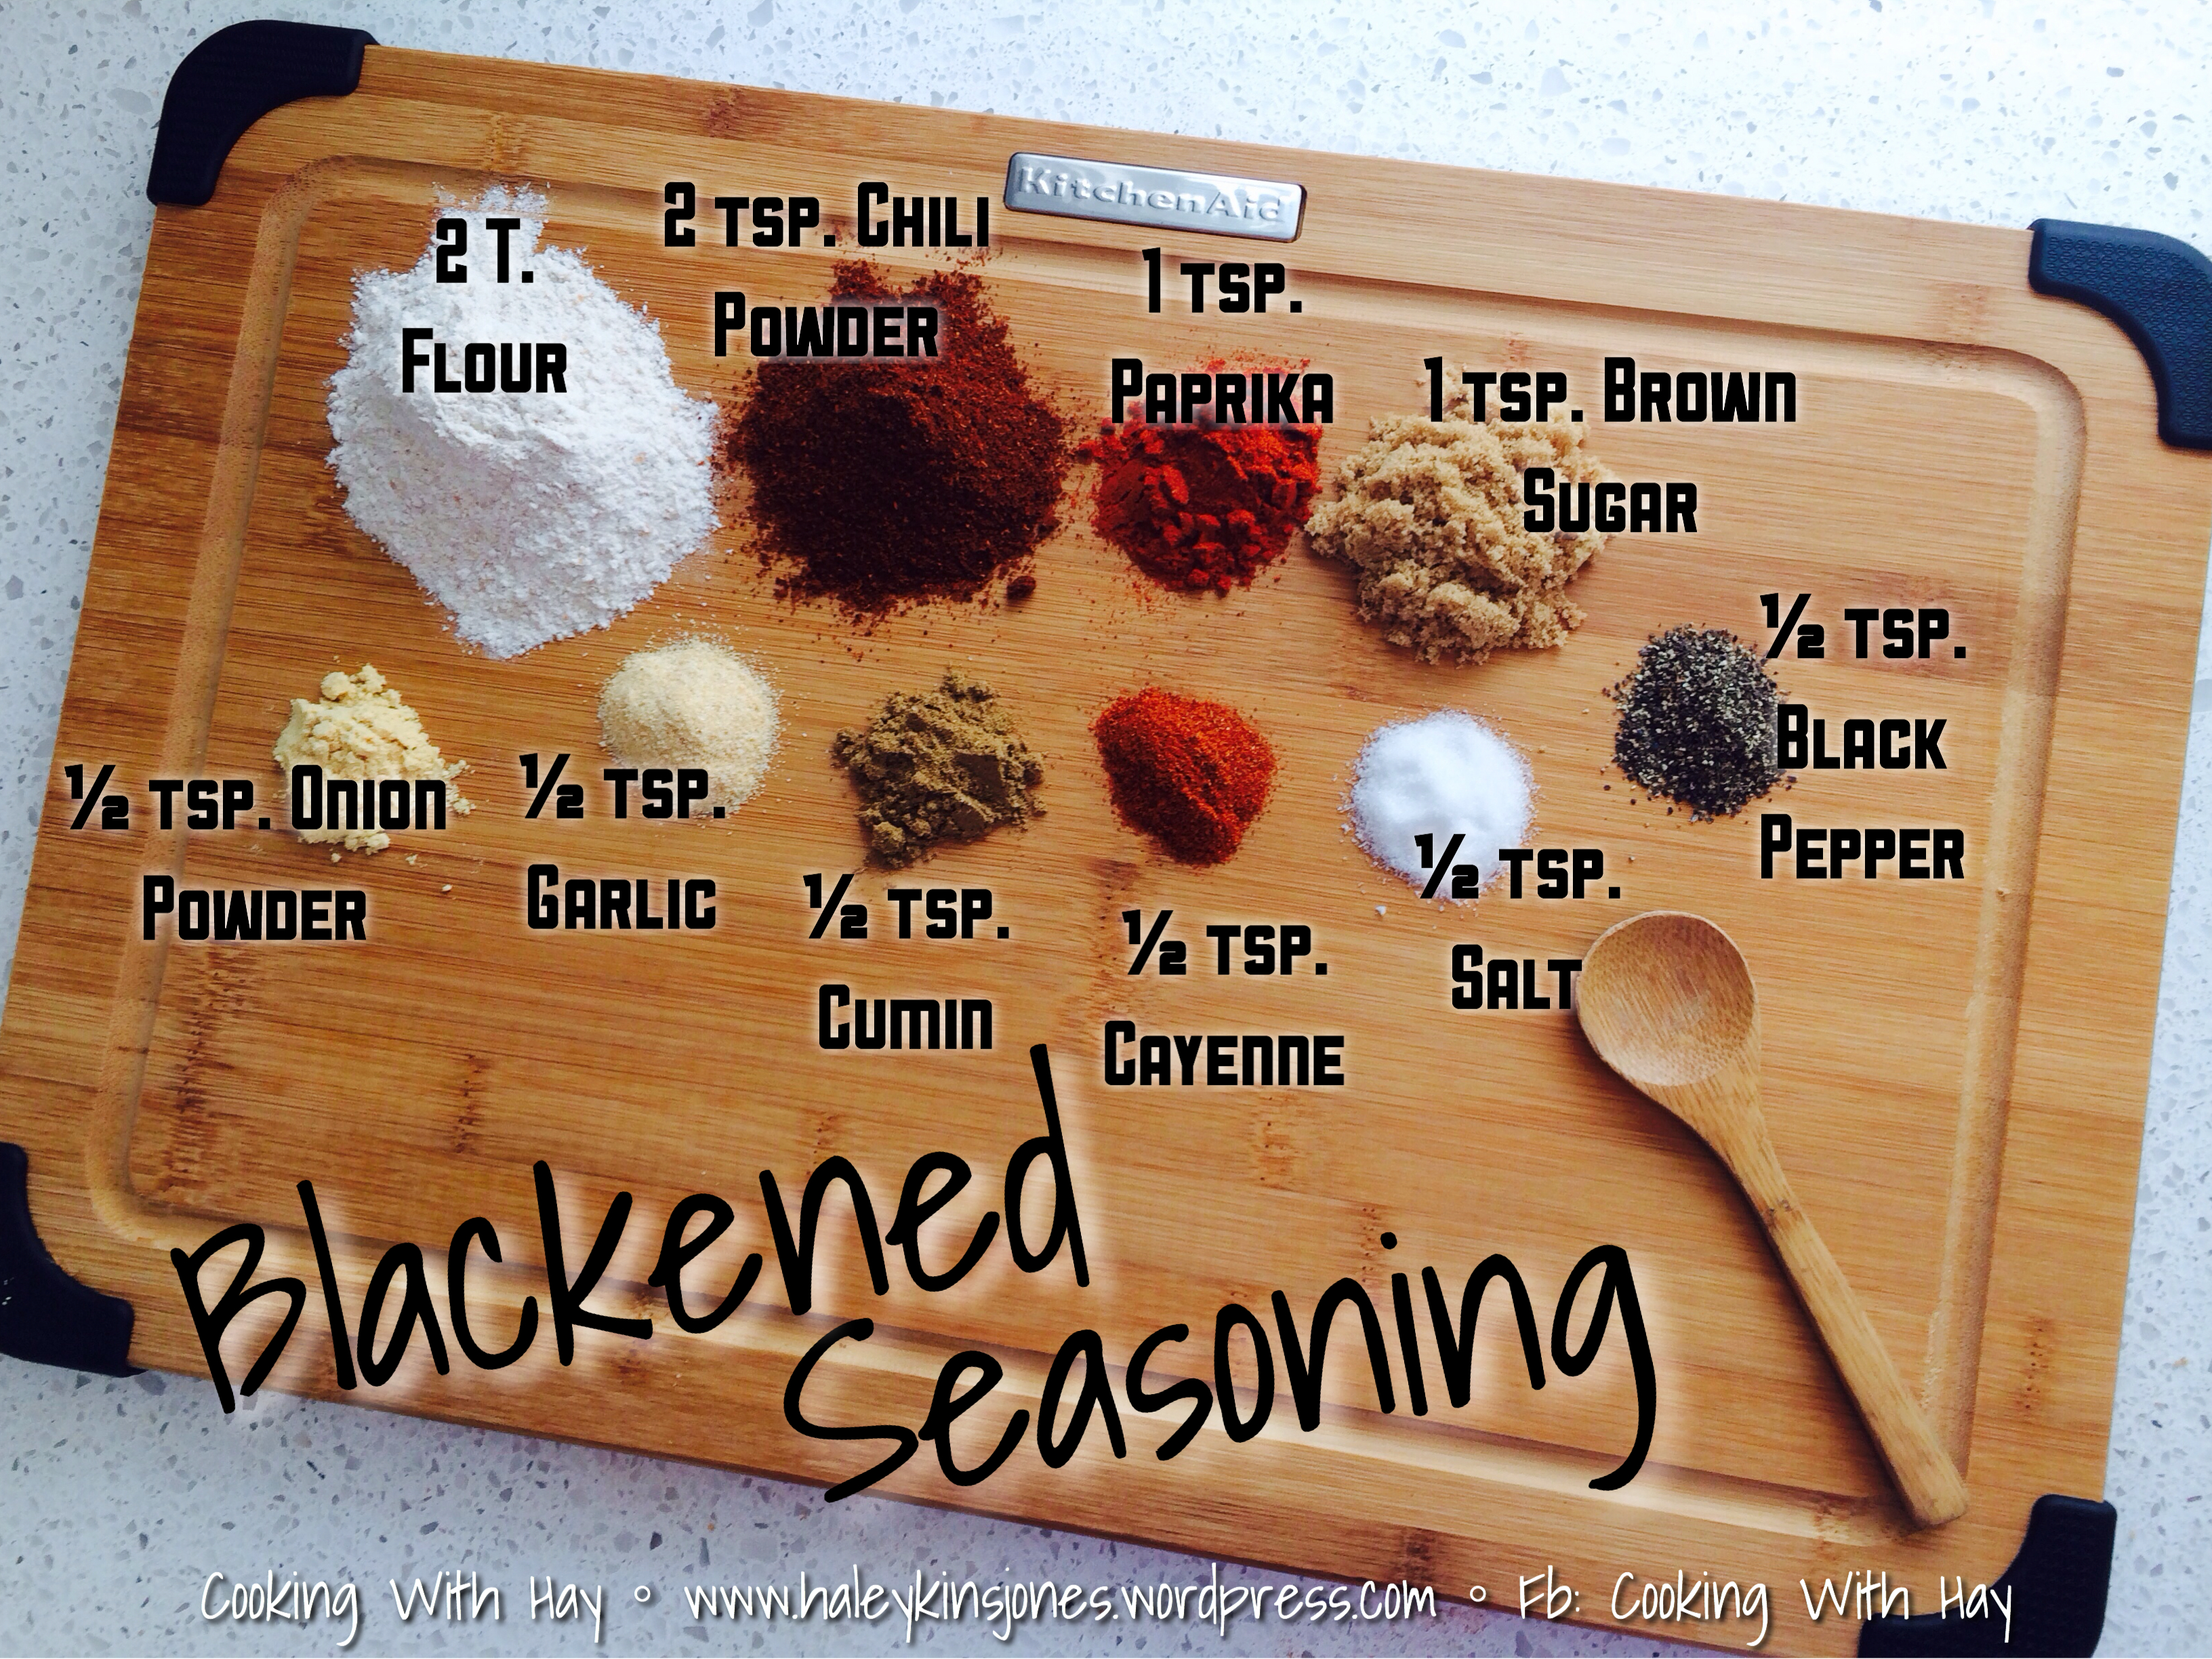
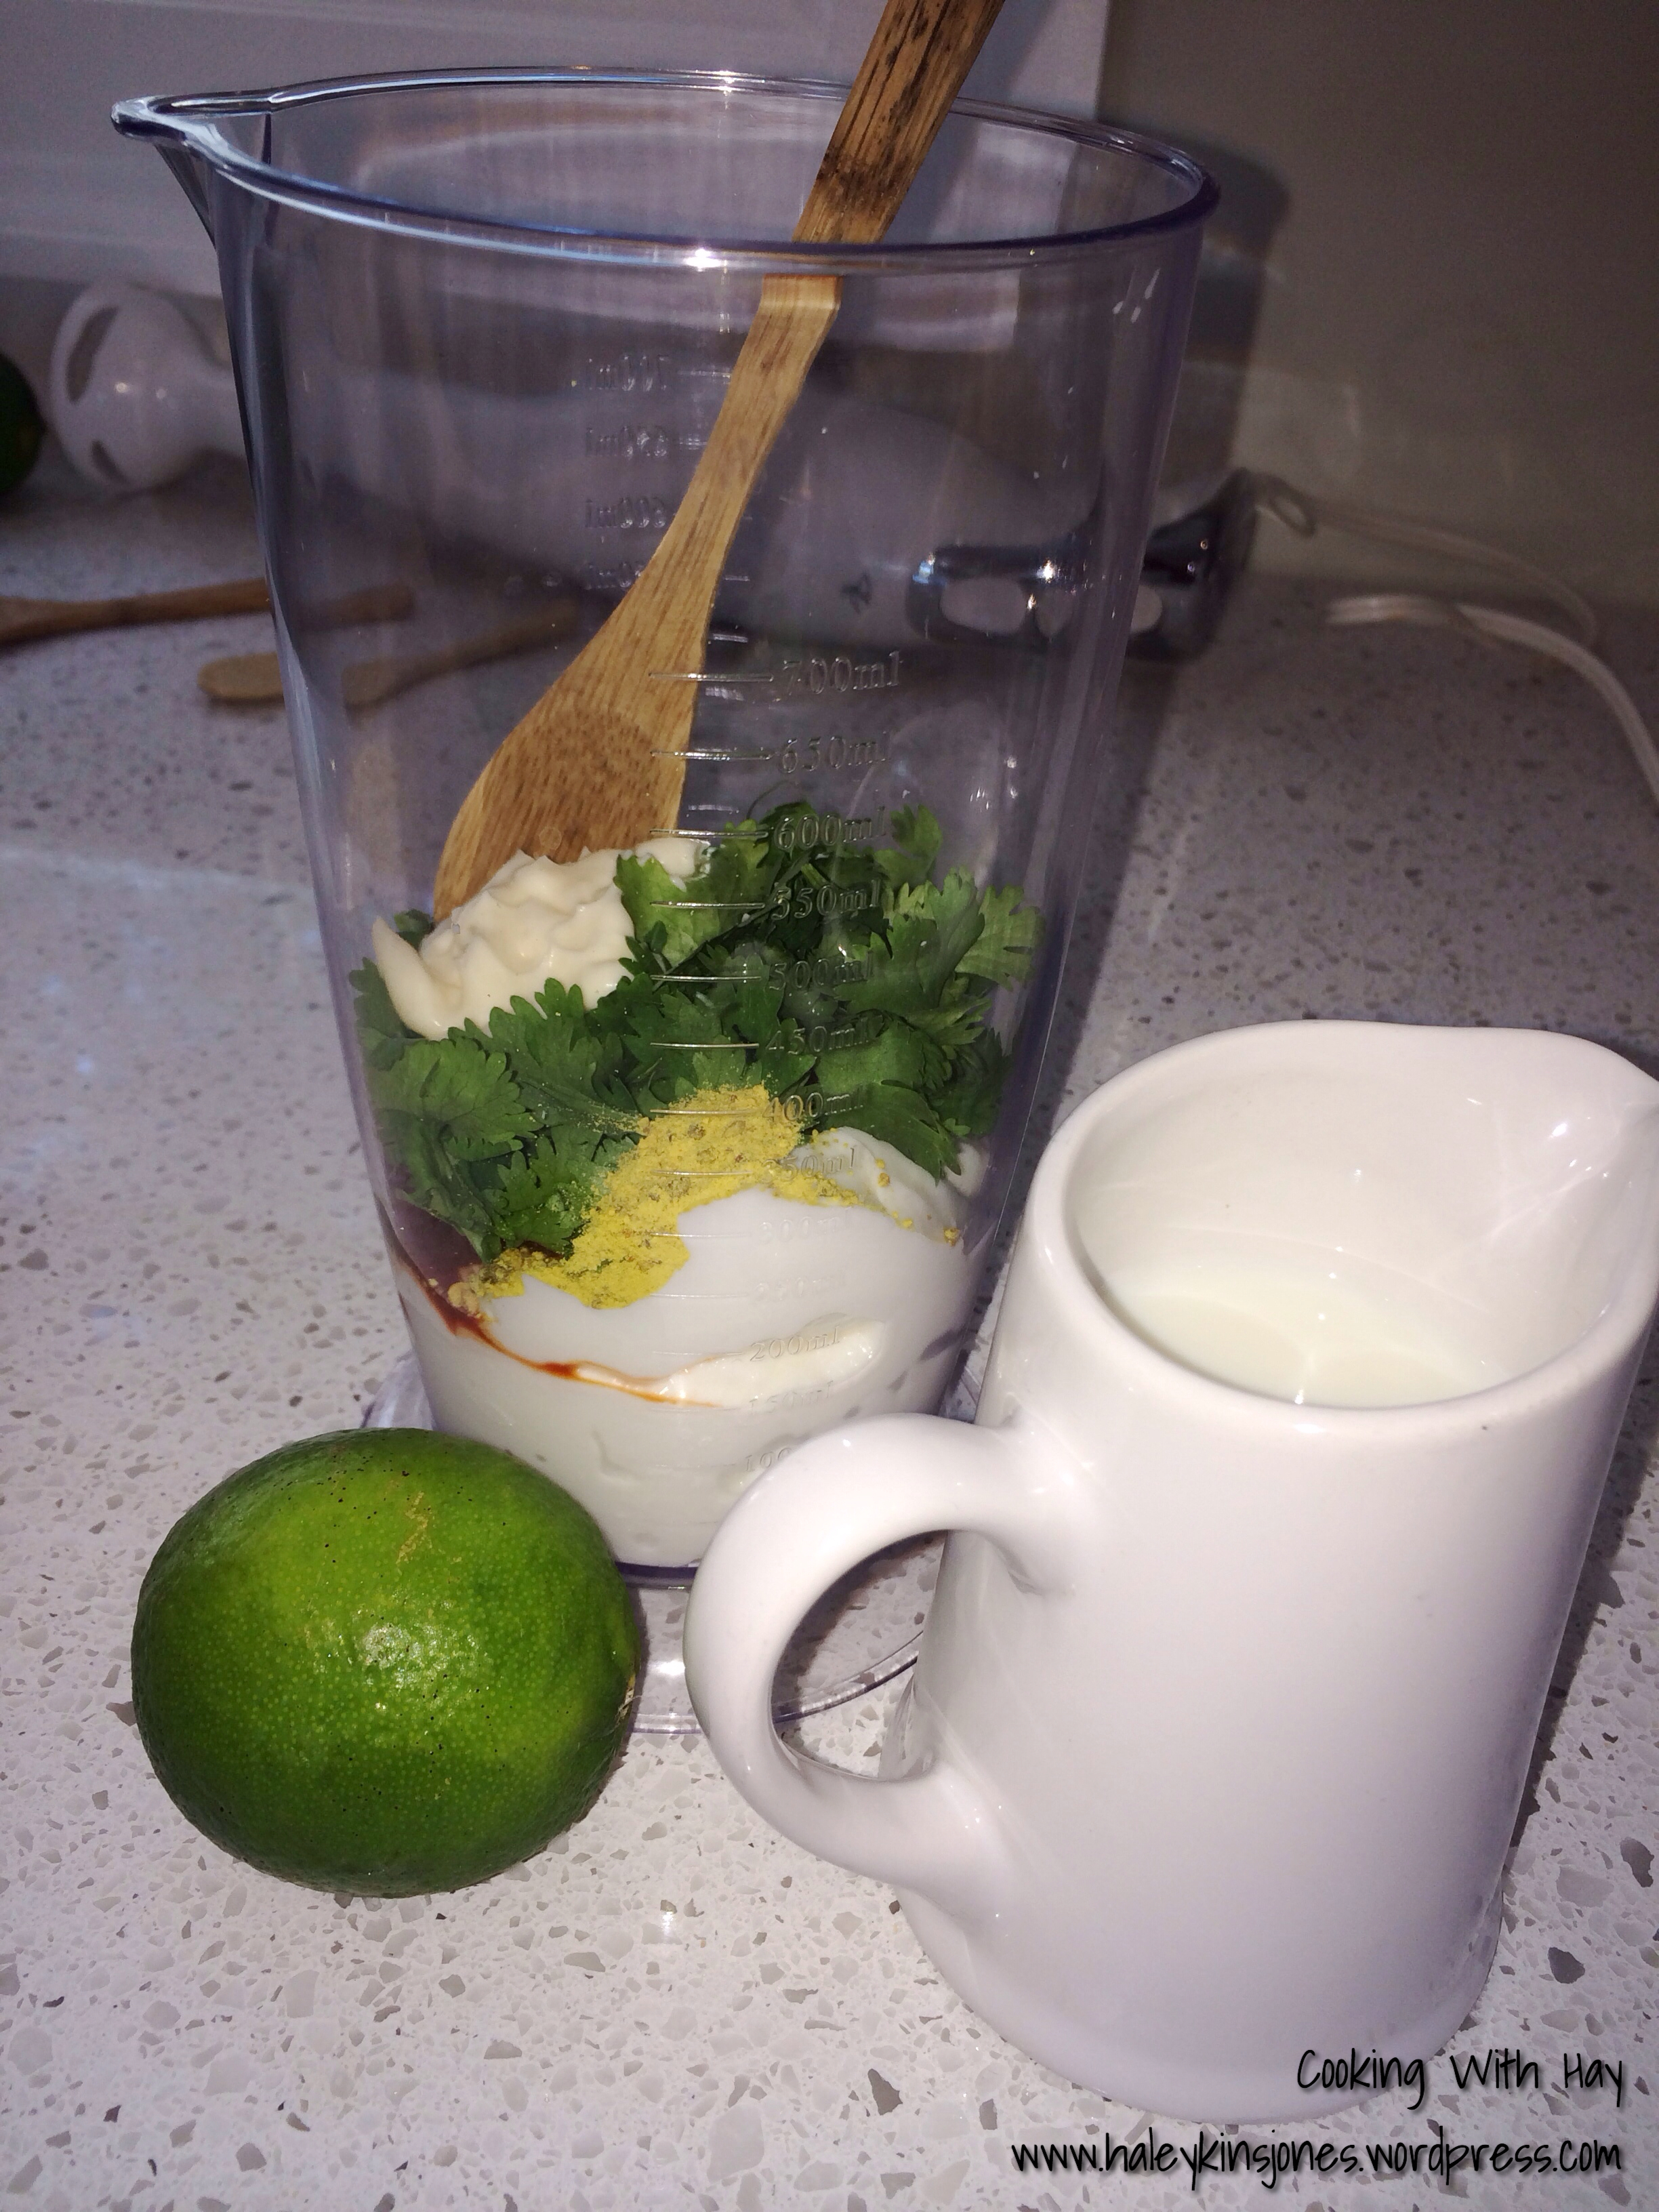
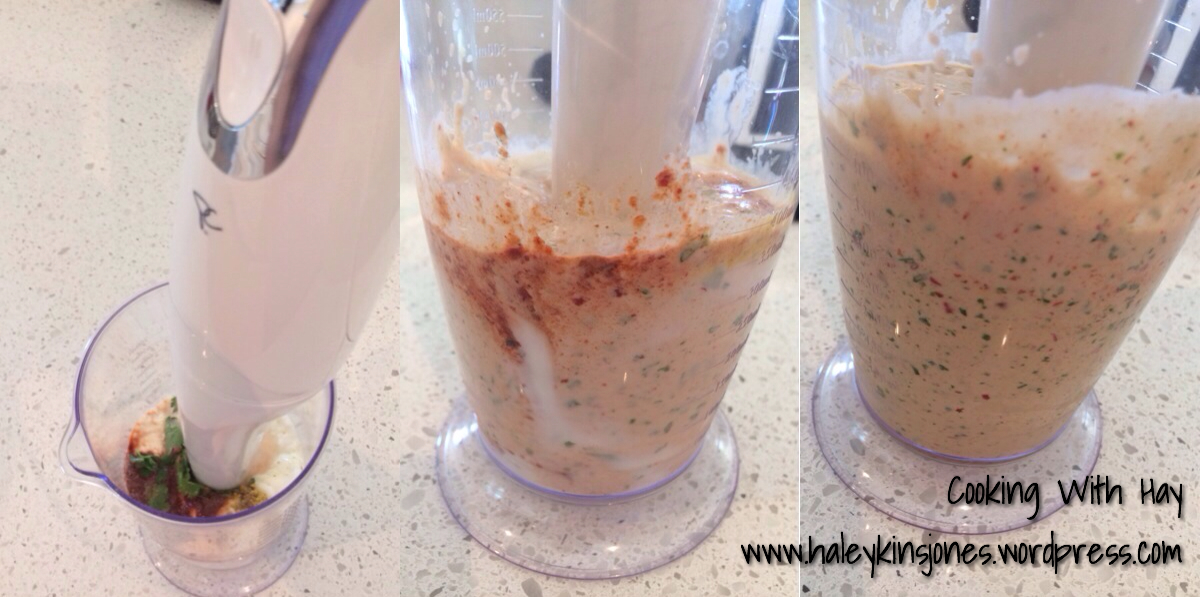
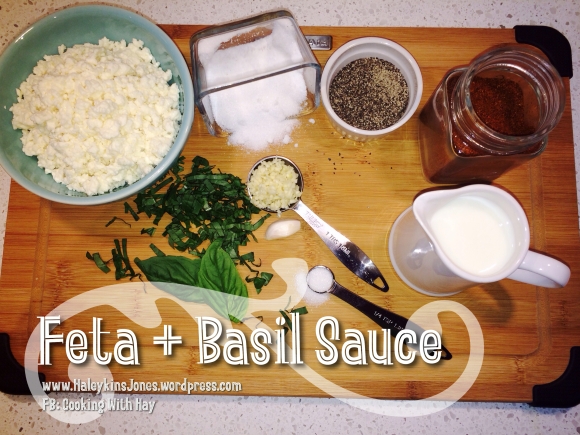
The image above includes salt. However my recipe does not.  When I made this, I added salt and found it to be incredibly too salty.  The feta gives this creamy topping enough salt…
Yum!  Look at it in all it’s feta and basil goodness.  I find I don’t cook with a lot of cheese, but feta can be used in so many ways!  I’m loving it.
Now #getinmybelly!

Give this one a whirl guys, it’s super easy and delicious too!


♥♥ Thanks for visiting, if you liked this blog please click LIKE below. If you want to follow my blog please scroll to the bottom, click the FOLLOW button and enter in your email address.
Love Haleykins♥♥
**Please click “OLDER POSTS” button, (bottom of the page)
or the “COOKING WITH HAY” tab (top of the page) to see more**

Tagged , , , , , , , , , , , , , , , , , , , , , , ,

STRAWBERRY JALAPENO SPINACH SALAD with a very special dressing too!

We can’t always explain why we are the way that we are.  We can’t usually find reasons to explain our behavior…. Some  days are good, some are not as good and some are just not good.  It happens.  Well, at least it does to me.  When I get like that it’s no ones problem but my own so I have to find a soloution.  To the kitchen we go….

Something new, summery, and delicious, found it’s way into my menu tonight.  For years I’ve enjoyed my Mommy’s awesome Spinach Salad.  I’ve made it many times and I’ve blogged it here before.  I needed some fresh basil and feta for another dish so I was racing to the grocery store for probably my 3rd trip this week (my organization skills blow chunks)  I walk in and all the fruit was glorious AND….. on sale!  Strawberries were calling my name as were the glorious BC cherries.  KIWIS!! oh and 3 bananas and seriously, these are the largest grapes I’ve seen in my life!!  How lucky to live in such a great place with so much healthy crisp produce. Woooo Hooooo.  Who wants to come visit me??  I’ll feed you!

juicy giant grapes. I am not a lion!!! Big right!

juicy giant grapes. I am not a lion!!! Big right!

With a cart full of fruit and the rest of the stuff I needed, homeward bound.  I’ve always wanted to add strawberries to a spinach salad but never had the push to do it.  Well its go time now and I’m super excited.  Then the flavour profile I’ve been desiring came to me!  Oh but wait.  I don’t have what I need and I just got back!!!  In a grocery store, I am easily distracted.  Always sure to forget something or things, so I make lists… and even then I fail.  I’m not going back…. so after begging Hubby to go once, twice, 4 or 5 times.. pouted around for a bit…. he put down his tools and ran to the market to get me some Jalapenos.

K so maybe you know your peppers, and you’ve looked at the pics from this post and you know those are not jalapenos in my photos.  Well the little market up the street didn’t have good looking jalapenos…. they were old and wrinkled and worthy mind you but for photos… nope.    Serranos are a great sub for jalapenos but 3 times hotter FYI….

Serrano Chili Peppers are the thinner of the 2, where as a Jalapeno Pepper is the girthy one. *wink wink*

Ladies, I mean chefs…. pick your preference… haha

The idea in my head comes to life and I’m very pleased with how it turned out.  Photos by me, House Of Haley Photography

Here is my Strawberry Jalapeno Spinach Salad with a very special dressing.  Strawberry Jalapeno Balsamic Red Wine Vinegar Dressing.  Try saying that after a few glass of wine… or bottles for some of you.  Hey, I don’t judge, you do you, its cool!

I’m pretty sure I could have come up with a much more simple name but when I’m looking for a recipe or when i’m wanting to make something it frustrates me having to read through a recipe to try and figure out the flavour profile from it.  The title says it all!

And here is the dressing.  Almost as cute as Strawberry Shortcake LOL.   Seriously made him go to the store for the pepper for this shot.  Let me add in another “LOL”  OMG i’m howling, I’m sorry if that’s not as funny to any of you as it is to me!  Thanks Hubs
STRAWBERRY JALAPENO BALSAMIC RED WINE VINEGAR DRESSING

♥ 2 CLOVES GARLIC
♥ 1 C. RED WINE VINEGAR
♥ 2 T. JALAPENO WHITE BALSAMIC VINEGAR
♥ ½ C. OLIVE OIL
♥ 1 TSP. SALT
♥ 1 TSP. SUGAR
♥ 1 TSP. GRAINY MUSTARD
♥ ½ TSP. GROUND BLACK PEPPER
♥ 1 WHOLE STRAWBERRY

Combine and blend/pulse for just a few seconds till the garlic is no longer whole and vinegars and oil have blended. DO NOT OVER DO IT. Trust me….. Just for a few seconds.

The Jalapeno White Balsamic Vinegar was a Christmas gift from Sister In-Law and it’s a great addition to many meals.  I use it mostly when I do any type of roasted potatoes.  With the right seasonings, its a great way to brighten up the flavours.

vinegar

I certainly don’t expect you to have this Jalapeno White Balsamic Vinegar, nor do I expect you to go out and buy some.  Althought, it’s totally recommended for your pantry fo sho!  This one is from Evoolution out of Edmonton, Alberta, CA.

Let’s get to it shall we!

Words can’t explain what it’s like to cook upstairs…. renos are coming along… thats all i can say.   So cool!  Look at the way that natural daylight casts across all that divine good-for-you food up there.  haha  It’s the simple things in life.

dressingI’m a hardcore #clasher Clash of Clans junkie… game always on… always creepin.  LOL

Again I’m using my new immersion hand blender and the mixing vessel it came with to make this.  You can use a blender but you’ll end up with most of it on the sides.  Use a battery operated whisk or just chop up the strawberry and garlic before you make the dressing, put it all in a jar and shake the crap out of it.

I peeled 2 cloves of fresh garlic.  Its hard for me to use such a little amount, but 2 cloves is just right.

Add in the vinegar’s and then the oil.  If you find after it’s all done that it’s too thick… add in some more vinegar and whisk it up.  If you over blend this you’ll end up with a strawberry like mayonnaise.

Next add in the S+P, sugar and mustard.  The mustard is crucial to the flavour of this dressing.  I’ve used mustard powder before but I find French’s Bold & Spicy Deli Mustard to be the perfect one.  I’m actually addicted to this mustard.  So so so good I could eat it with a spoon.

Now blend.  I’m going to be straight up honest here… I bombed this the first time, hence my warnings…. DO NOT OVER BLEND hahaha.  Pulse a few times, The strawberry is obviously going to thicken it up quite a bit.  I’ve increased the amounts of vinegar to hopefully compensate.  This is why I say recipe blogging is tricky.  So as always, make it your own.  Do what you feel is right and adjust to your liking.  We are all different.

STRAWBERRY JALAPENO SPINACH SALAD

♥ 1 BAG BABY SPINACH, FRESH AND WASHED
♥ HARD BOILED EGGS, COOLED AND SLICED (1 PER PERSON)
♥ MUSHROOMS, FRESH AND SLICED
♥ STRAWBERRIES, SLICED AND SLICED
♥ BACON, COOKED AND CRUMBLED
♥ 2 T. GREEN ONIONS, FINELY CHOPPED
♥ 2 TSP. JALAPENO OR SERRANO PEPPER, FRESH AND DICED

Make this salad up just before you’re ready to eat. Plate it per person rather than in a large salad bowl. I find that the ingredients are at such different weights that you don’t get a proper serving. Person 1 will get all spinach and egg, while the last person gets all the bacon onion and pepper. LOL Just my opinion.

This is where you get to do your fancy…. BE FANCY Plate it up per person, make it pretty, show you care. Then you can give yourself those extra slices of strawberries and bacon. Haha shhhhhhhh….

Use about a handful of spinach leaves per person. Layer in individual salad bowls or plates and drizzle with a little of our Strawberry Jalapeno Dressing from up above.

It was delicious to eat.  Looks pretty cool too.  Each bite held a yummy little mouthful.

♥♥ Thanks for visiting, if you liked this blog please click LIKE below. If you want to follow my blog please scroll to the bottom, click the FOLLOW button and enter in your email address.
Love Haleykins♥♥
**Please click “OLDER POSTS” button, (bottom of the page)
or the “COOKING WITH HAY” tab (top of the page) to see more**
Tagged , , , , , , , , , , , , , , , , , , , , , , , , , , , , , , , ,

Blackened Fish Tacos with Chipotle Cilantro Dressing (salmon or cod or whichever fish you want)

Finally, this post is done. I still consider myself a beginner food blogger even though this blog has recently had it’s 3rd anniversary. Blogging recipes takes work. Writing an accurate recipe takes work. It’s work but it’s work I enjoy. I just wish I could do nothing but cook, take pics, and blog… Haha True story.


Been talking about these a lot, I know, I apologize for the redundancy. Finally got all the components together….

You’re going to need to check out my last 2 posts!

Click this photo to get this recipe!

Click on the photo to the left to get this yummy Chipotle Cilantro Dressing recipe for these Blackened Fish Tacos that we’re about to make.

Click this photo to get this recipe!

Click this photo to see the ingredients needed to make the Blackened Seasoning that will crispify (is that a word?)the fish to a nice golden crunch on the outside and give it a deep savory flavour.


BLACKENED FISH TACOS
♥ 2 BAGS COLESLAW
♥ 1½ C. CORN KERNELS
♥ SALT + PEPPER
♥ FLOUR TORTILLAS
♥ 1 BIG SALMON FILET or 4 LARGE COD FILETS
♥ HIGH SMOKE POINT OIL FOR FRYING (i used Canola Oil)
1 BATCH OF BLACKENED SEASONING
1 BATCH OF CHIPOTLE CILANTRO DRESSING
♥ AVOCADO, FRESH, CHOPPED
♥ CILANTRO + LIME FOR GARNISH

Saute the coleslaw and corn with salt and pepper until just tender.
Set aside, but keep warm.
Heat oven to low temp and slowly warm the tortillas. I like em just before they get toasted.
Cut salmon or fish into large pieces suitable for frying.
Heat oil, just above medium, not too hot or the fish won’t cook thoroughly and not too cold or the fish will soak up to much oil and become soggy.
Fry till dark and golden on each side.
If you’re using salmon you may have to do the ends too. Use tongs. They work best.
When they are done gently remove from hot oil onto a papertowel lined dish to remove excess oil.
Let cool for about 5 minutes and break into good chunks.

THE ASSEMBLY
Warmed Tortilla
Sauteed slaw and corn
Blackened fish
Drizzle with some Chipotle Cilantro Dressing
Top with chopped fresh avocado, cilantro and a squeeze of fresh lime juice


Place the Blackened Seasoning in a shallow flat bottom container of some sort so you can press the fish into it.  Coating every inch of it.  The better it’s coated the better the crisp.

You don’t want to over cook the cabbage, or it will lose all it’s structure.  You want to saute it till it just starts to wilt.  Keeping it warm will also allow it to keep cooking so with the pan on medium heat, just keep an eye on it.
This is the cod I used last night.  Seasoned all over every surface of fish with the Blackened Seasoning.

Fried in some oil till golden and delicious. I use a large cast iron flat bottom deep dish for frying. Allows maximum room for the fish to fry properly without over crowding the pan.   The heavy duty cast iron can withstand the high temperatures and will maintain it’s heat better when you drop in the fish.

I fried the fish in 2 batches to ensure it cooked evenly and properly. Or you can use a deep fryer but I’ve only used one once and I didn’t like it…. it was too small for what I needed and I don’t want a big greasy appliance kicking around here. I fry as little as possible.
Frying foods took a lot of practice for me over the years.  So many times chicken or potatoes or whatever it was I was cooking, was either undercooked or well well well done. Practice makes perfect.

Frying can be very unhealthy if done incorrectly.  When done the right way you are using the least amount of oil to get that desired crunch and crispiness.

✰ Oil thats too hot will scortch the food on the outside while leaving it raw inside. ✰

✰ Oil that isn’t hot enough won’t seal the food as it should when you drop it in. ✰

(Rather it will sit and soak up the oil.  This results in that drippy soggy mess we’ve gagged on one too many times.

The first time I made these I used some fresh plump salmon and they were to die for! This time around i used cod. I preferred the salmon over any white fish but both were really good.


BLACKENED SALMON TACOS

Here are some pics from the salmon ones I made last week!  These ones were my favourite!

Since the photos were taken down in my temporary basement dungeon kitchen they aren’t of the greatest quality.  We can only go up from here my friends ☺

1603

❤️ Thanks for visiting, if you liked this blog please click LIKE below. If you want to follow my blog please scroll to the bottom, click the FOLLOW button and enter in your email address.
Love Haleykins❤️
**Please click “OLDER POSTS” button, (bottom of the page)
or the “COOKING WITH HAY” tab (top of the page) to see more**
Tagged , , , , , , , , , , , , , , , , , , , , , , , , , , , , , , , , , , , , , , , , , , , , , , , , , , , , , , ,

Blackened Seasoning

Hi guys, I posted some pics of the Blackened Salmon and Blackened Fish Tacos to my Cooking With Hay Facebook page, and the requests came in for the recipe. As well as the request for me as your personal chef. Thank you for that! It actually is much easier to make the food than to blog the recipe… just in case you were curious. LOL so much time spent running a photoshoot and a kitchen at the same time. I love it tho and anxious to spend more time doing it. The balance between stoning the front of the fireplace and installing bathroom sinks… or blogging…. its a tough one….

I’m quite pleased with the photos from recent photoshoots. I’m working partially upstairs while I can get the good natural daylight and partially still down in the dungeon, errr, I mean, basement. Natural daylight makes for much more appetizing food pics. Less shadows and more true to life colouring of these meals. After all, we taste with our eyes and our noses before the food even hits our tongue or tummies.


I’ve laid out all the ingredients that I used to make the Blackened Seasoning, on this fancy bamboo KitchenAid cutting board that Hubby came home with for me! *SMILES* This is the seasoning for the Blackened Salmon Tacos and Blackened Fish Tacos that I’ve been mentioning. (Blog posts to follow guys!)

I pulled this from a website a while back, I haven’t altered anything except that I use whole wheat flour instead of white flour. It actually just adds to the crispy factor we’re going for here! Yummy


Don’t confuse T (tablespoon) for TSP (teaspoon)!!
Oh come on, like you haven’t done that before.

The original image said 2 T. Chili Powder… LOL its got to be 2 TSP. Teaspoons
I made the same error when I first made Butter Chicken. That was a hot hot hot meal. Great tho. Just a real kicker that’s for sure.

BLACKENED SEASONING

♥ 2 T. FLOUR (I use whole wheat)
♥ 2 TSP. CHILI POWDER
♥ 1 TSP. PAPRIKA
♥ 1 TSP. BROWN SUGAR
♥ ½ TSP. ONION POWDER
♥ ½ TSP. GRANULATED GARLIC
♥ ½ TSP. CUMIN
♥ ½ TSP. CAYENNE
♥ ½ TSP. SALT
♥ ½ TSP. PEPPER

Mix together well. Store in an air tight container.


↓ This made enough to do a big slab of salmon or 4 large cod fillets. If you’re doing more you may want to double this recipe. Or to save you some prep time on the next go around, make up a big batch now.

↑ I made one batch of this seasoning and mixed it in this shallow plastic container. All ready to go so I can just lay the piece of fish or meat or whatever it is that you’re going to use, onto the seasoning.
This works great for everything, even prawns and scallops. Try it out and I hope you like it.  I’ve made it 3 times this July.  Cuz it’s that good.  LOL yum!


Blog Post with recipe and pics COMING SOON!

Blog Post with recipe and pics COMING SOON!

Blog Post with recipe and pics COMING SOON!

Blog Post with recipe and pics COMING SOON!

Blog Post with recipe and pics COMING SOON!

Blog Post with recipe and pics COMING SOON!


❤️ Thanks for visiting, if you liked this blog please click LIKE below. If you want to follow my blog please scroll to the bottom, click the FOLLOW button and enter in your email address.
Love Haleykins❤️


**Please click “OLDER POSTS” button, (bottom of the page)
or the “COOKING WITH HAY” tab (top of the page) to see more**


Tagged , , , , , , , , , , , , , , , , , , , , , , , , , , , , , , , , ,

CHIPOTLE CILANTRO DRESSING or dip

Hi Guys, How is summer???  EEEEEK I’m super excited.  As many of you know my house is still under reno’s and just recently got my new Caesarstone counter-tops installed.  I’m ecstatic!  They are flawless and beautiful and exactly what i’ve wanted for oh so long now.  Now my foodblog pics have a higher quality look to them.  I’m so pleased.  Time to fine tune my Canon Rebel T3i camera and get to work!

Last week I made some Blackened Salmon Tacos.  There are no words for this easy recipe and there was also no room…. no room to eat as much as I could have, that’s for sure!  Wow, great way to enjoy some tender flaky juicy fish this summer. The recipe for the Blackening Seasoning will be my next blog post.  This is the dressing that I always make and it was great on the fish tacos.

Hope you like!


CHIPOTLE CILANTRO DRESSING OR DIP

♥ 1½ C FAT FREE SOUR CREAM
♥ 1 T LIGHT MAYO
♥ 1 T MILK
♥ 1 T CHIPOTLE PUREE
♥ 1 TSP CUMIN
♥ ½ TSP CRUSHED BEE POLLEN
♥ HANDFUL FRESH CILANTRO
♥ JUICE OF ONE LIME

Blend together using an Immersion/Hand Blender or a Food Processor.
Chill in the fridge until its time to serve.


↑ I love me some chipotle! I buy chipotle peppers in small cans in adobo sauce and puree them with a hand blender or food processor. Chipotles pack a punch let me tell ya. The heat from these peppers is potent and smoky and is great for everything.
**If you don’t do heat. Use a very small amount, like 1-2 teaspoons of pureed chipotle for this recipe instead of the requested amount.**

↑ If you don’t have canned chipotles in adobo sauce then you can certainly use a dry powder version, there are many out there. I have these 2 in my pantry. Remember that the longer the dressing sets for the more the flavour is enhanced, and therefore making it much much much hotter the longer it sits.

↑ My Immersion Blender came with this cool mixing vessel. What I love about this machine compared to a hand mixer or hand beater is that it will stand up inside the vessel and not topple over. Flat bottom makes it easy to leave it standing and use both hands to if you need to pause to get an ingredient or whatever. Anything to help keep the counters less messy.

↑ Bee Pollen is one of Mother Natures little goodies. I add a little to every salad dressing I make. You can add it to anything though; soups, sauces, whatever you like. The flavour is like a flower. Its got a floral taste when it hits your tongue. It comes in the natural foods section of your grocery store and looks like little gold nuggets. I grind them down with a mortar and pestle. I have a small one that I use for spices and such. Another inexpensive way to make your kitchen/cooking life a little easier.

Here’s some info on Bee Pollen I picked up from http://www.mercola.com

What Is Pollen?
Pollen is the male seed of flowers. It is required for the fertilization of the plant. The tiny particles consist of 50/1,000-millimeter corpuscles, formed at the free end of the stamen in the heart of the blossom. Every variety of flower in the universe puts forth a dusting of pollen. Many orchard fruits and agricultural food crops do, too.

Bee pollen is the food of the young bee and it is approximately 40% protein. It is considered one of nature’s most completely nourishing foods. It contains nearly all nutrients required by humans. About half of its protein is in the form of free amino acids that are ready to be used directly by the body. Such highly assimilable protein can contribute significantly to one’s protein needs.

To view the full article, please click here.

↑ Place all the ingredients into the mixing vessel and blend away. Lift the machine up and down to get it good and blended. Oh so easy I want to blend everything in sight.

photo 9

↑ ❤ Immersion Hand Blender! ❤ NEW TOY! LOL ❤

↑ COMING UP NEXT → Blackened Fish Tacos, using this dressing!
Stay Tuned and if you’d like…. FOLLOW MY BLOG

❤️ Thanks for visiting, if you liked this blog please click LIKE below. If you want to follow my blog please scroll to the bottom, click the FOLLOW button and enter in your email address.
Love Haleykins❤️
**Please click OLDER POSTS, (bottom of the page)
or the RECIPES tab (top of the page) to see more**
Tagged , , , , , , , , , , , , , , , , , , , , , , , , , , , , , , , , , , , , ,

Szechwan Chicken with Toasted Chick Peas

Good Morning Friends and Followers. I hope the snow has all melted in your neck of the woods and summer has shown her face. I know it was a long winter for some. Here, it has been a very long spring. A long spring of BBQing outside on the patio and doing things around the house. Hence why there has been a lack of blogs from me lately. Got to keep an eye on our BBQ as it’s a rickety crispy old thing that was well on its last legs 3 summers ago. No time to take pictures and write. BBQ food practically gets inhaled so fast over her that again, no time for pictures. I apologize for the absence. Since we live here on the West Coast, this ultimately means lots of rain. While the sunshine is great, we have been getting a lot of the wet stuff in between. Our patio is covered but when it’s raining sideways I stand no chance and I fear: me, in a plastic poncho, beside my crispy old rickity BBQ….. not a good plan…. So where does that leave me? Back down into the basement temp kitchen… #temporarynottemporary haha. {See what I did there?! LOL. Look, I’m in a dungeon and rarely even know if it’s daytime or nighttime out there. My humour is going to be lacking and lame… just go with it, please… for my sake 😊 thank you}

Yesterday I hit up the market and came home forgetting so many things and as well a couple of items for dinner as planned. Ok, let’s wing it. No baby corns, no nuts, no problem. The end result was very good, and I got to try something new like toasted chick peas? Who does that? #dopeopledothat

Szechwan Chicken and Toasted Chick Peas

20140526-092530-33930060.jpg

This is a quick fix meal and does not involve a whole lot of ingredients. It does however require the main seasoning for this dish, which you may not have on hand and most likely won’t have everything needed to make it from scratch. So be sure to grab some from the market. I used Simply Asia Spicy Szechwan 5 Spice Seasoning blend and depending on how much you use it can have a wee bit of bite to it! This Szechwan seasoning is made up of Szechwan peppercorns, red pepper flake, ginger, paprika, garlic, cinnamon and clove, anise, brown sugar and sea salt…. pretty sure that’s more than 5 but it tastes good so whatever.

3 good things:
-The chunky texture, it’s not a powder. Flavour power!
-Very colourful, foods that look good, must taste good!
-It was cheap. Got it from costco.

20140527-085857-32337794.jpg

See what I mean!? Tell me that doesn’t look like it’s going to taste great. All that garlic and red pepper flakes.

As per the usual, this will be a ‘half assed’ recipe. 😜. I don’t follow recipes exactly and you shouldn’t either. Get the idea and give it a go yourself. Adjust, tweak, tinker, make it your own. You know what to do.

I wanted to top my meal off with some toasted nuts…. I like crunch and different textures. I must have used all my almonds in my Heavenly Chicken meal… {I need to blog this one} do I skip it. Well I probably would have except that I wanted to add some baby corns to this meal as well but I can’t see any of those in my pantry either. {seriously so frustrating as I just got back from the store!!!!?}. My eyes scan chickpeas.. Friggin chick peas that I bought for hummus but bought more chick peas when I went to make the hummus. “What do I do? Just peppers, onions and snow peas with the chicken and rice? Ya do that, that should be fine…” This is me talking to myself, hands on my knees searching my pantry shelves for a solution to my first world problems. “But it certainly isn’t going to be very interesting…”
Final though, snatched the can of chick peas, opened, rinsed, drained those big peas and into a hot pan seasoned with some coconut oil they go. Added some of that Szechwan seasoning and tossed em round for a bit until they were golden and slightly crispy. Put them in a warm shallow dish, lined with a piece of paper towel to absorb any oils. Set aside.
20140525-195346-71626257.jpg
So very, very cool!

The next part happens fast as well. “Easy breezy” as Toby would say.

2 hot pans on the stove; one with coconut oil a and one with sesame oil.

Add sliced white onion, sliced red peppers, and snow peas to the coconut oil. Add in Sezechwan seasoning and sauté till they get a bit soft. Simmer in some chicken stock.

In a bowl, toss sliced raw chicken breast with some Szechwan seasoning. Add it to the 2nd pan. The one with the sesame oil. Grill it up fast, till cooked through and slightly golden. Sprinkle with some brown sugar and continue cooking for a few minutes until the sugar starts to caramelize. Deglaze the pan with a small amount of chicken stock and simmer for another minute. Remove from the pan. Done.

I made up a sauce basically by heating a very small slurry of flour and stock in a pan and added in lots of Szechwan seasoning. You want it thin to drizzle over top and remember it will thicken as it cooks and cools and depending on the amount of flour as well. Hubby likes everything saucy 😉 and great for reheats aka leftovers.

Hot fluffy rice on a plate. Add the veggies, top with the chicken, a drizzle of extra sauce for Hubby and top with the way cool, toasted chick peas.

Scarf down rather quickly.

Remember to take a few photos first lol…
Mmmmmm spicy!
20140526-092018-33618680.jpg
And there you have it friends, my easy breezy Szechwan Chicken dish topped with toasted chick peas.
20140526-092530-33930060.jpg
Thanks for visiting, if you liked this blog please click LIKE below.
If you want to follow my blog please scroll to the bottom, click the FOLLOW button and enter in your email address.

Love Haleykins
20131230-210222.jpg

**Please click OLDER POSTS, {below} to see more**

Tagged , , , , , , , , , , , , ,

GRILLED CHICKEN SPINACH SALAD with RED WINE VINEGAR DRESSING

My mommy has always made a spinach salad and it is THE BEST! When we have it, we can’t get enough of it. It has bacon in it and when you get a bite it literally is a tongue tantalizer. Normally we will have this with a steak and potato but how can I make this fabulous little tongue pleaser more of a meal. So it’s easy. Make a salad with lots of fresh spinach, green onions and mushrooms, some grated hard boiled egg and then…… grilled bbq’d chicken chopped on top. Heck yes! Let’s do it up. A big plate full of this goodness!

20140405-210622.jpg

GRILLED CHICKEN SPINACH SALAD with RED WINE VINEGAR DRESSING

Here’s what you’ll NEED:
Lots of fresh baby spinach
Lots of sliced fresh mushrooms
Lots of chopped green onions
6 cooked eggs, hard yolks (see below)
6 boneless skinless chicken breasts
1/2 cup red wine vinegar
1/3 cup extra virgin olive oil
1/2 tsp.pepper
1/2 PRE MADE HOMEMADE GARLIC BALLS
1 tsp. salt
1 tsp. sugar
1 tsp. dijon mustard or mustard powder

Here’s what you’re GONNA DO:
To make the best hard boiled eggs that are cooked to absolute perfection follow these simple steps:
1. place eggs in the bottom of a pot
2. add cold water, fill to be 1-2″ above the eggs
3. bring water to a rapid boil
4. once boiling, remove from heat and cover with a lid
5. set a timer for 20 minutes
6. after 20 minutes add ice cold water to stop the cooking process
7. drain water
8. with eggs still in the bottom, gently shake back and forth to slightly crack the egg shells
9. under cold water the shells will come right off.
Easy peasy!

For the chicken part:
Pound out your chicken breasts in a big ziploc freezer bag. I use a wooden rolling pin! LOL You don’t want to demolish them… just break down the structure of those bad boys and flatten them out a bit. This will allow them to cook much faster and be a tender bite instead of a big mouthful and hope it’s fully cooked bite…
I gently massage them with a little big of olive oil just so they stay moist on the grill. I seasoned them with a small bit of sea salt, seasoning salt, fresh ground pepper, garlic, and oregano, because I love oregano.
Preheat your bbq, I’m going to say med-high but you need to know your bbq, you need to watch your food when you’re bbqing. Practice makes perfect! When they turn that white cooked colour flip them, about 10 minutes the first side and about 5 or so minutes on the second. Ensure they are cooked through and grilled up nicely Oh on the bbq! Oh on the grill Yo! haha I love bbq’d food!

–In a large salad bowl add in spinach, green onions, mushrooms
— you can slice the cooked eggs or you can use a cheese grater. I was so hungry, I opted for the grater, and also it makes the egg go further. Slicing the eggs makes for a much nicer presentation. Add to the salad bowl.
–mix it up and serve onto salad plates
–chop up a grilled chicken breast and then gentle swipe it ontop of the salad off of the cutting board.
–repeat for all servings
–serve with the red wine vinegar dressing

Oh the dressing!!! I make this in a jar. It’s easy to add in all the ingredients and shake it up. Because it’s oil and vinegar it will seperate obviously, just shake it up before serving it and keep it in the fridge. Add to the jar the last 7 ingredients. Shake it up. Taste it and adjust it to your liking!

20140405-210630.jpg

So like I said up there at the top, my Mom used to make Spinach salad for us all the time, the same as this but with bacon and no chicken. Gosh I love that version, and I will still make this version, when I feel like being a bad girl. 😉

❤️

Thanks for visiting, if you liked this blog please click LIKE below.
If you want to follow my blog please scroll to the bottom, click the FOLLOW button and enter in your email address.

Love Haleykins
20131230-210222.jpg

**Please click OLDER POSTS, {below} to see more**

❤️

Tagged , , , , , , , , , , , , , , , , , , , , , , , , , , , , , ,

GARLIC & CHILI PEPPER HUMMUS

20140316-230143.jpg
GARLIC & CHILI PEPPER HUMMUS
1 CAN CHICK PEAS, rinsed and drained
1/4 CUP TAHINI
2 TBSP. LEMON JUICE
1 1/2 PRE MADE HOMEMADE GARLIC BALLS
2 TBSP. OLIVE OIL
WATER

I mix everything together in my food processor, except the olive oil. I once read that olive oil in a food process or more specifically, a blender, can turn the oil bitter and also cloud the bowl of the food processor. Well I love my food processor so I don’t take the chance. Once everything is smooth and creamy I transfer it to a mixing bowl and stir in the olive oil. Then if it’s thick, I add water until its’s the proper consistency.
20140316-230329.jpg
Of course, you can use as much or as little, garlic, as you want.
20140317-085957.jpg
Chopped up the remaining fresh veggies that I had in the crisper drawer to go with.
Actually, switch that around, I made the hummus so I had something to go with the veggies. As much as I love my breads, pita, naan, mmmmm naan…. this was a refreshing option.
20140316-230205.jpg
Kinda well needed after a not so healthy weekend. Ugh….
I wasn’t going to blog this one as I’m pretty sure most of you make hummus often, however, it just looked so nice and yummy, especially on the new surface prop Hubby made me! This is a classic dish and always a favorite. I do have some other Hummus recipes to show you. Some that are completely the opposite of classic. Hope you come back to visit. Stay tuned!
20140316-230221.jpg

❤️

Thanks for visiting, if you liked this blog please click LIKE below.
If you want to follow my blog please scroll to the bottom, click the FOLLOW button and enter in your email address.

Love Haleykins
20131230-210222.jpg

**Please click OLDER POSTS, {below} to see more**

❤️

Tagged , , , , , , , , , , , , , , , , , , , , , , , ,