Tag Archives: cheese

Grilled Chicken with FETA + BASIL SAUCE

FETA + BASIL SAUCE

♥  2 C. FETA CHEESE, crumbled
♥  2 T. FRESH BASIL, chopped
♥  1 HEAPING T. GARLIC, fresh and minced
♥  ½ C. MILK
♥  ½ TSP. CHILI POWDER
♥  ½ TSP. SUGAR
♥  ½ TSP. PEPPER

Boil a couple inches of water in a double boiler, reduce to med-high.

(or set up a small pot with water and bring it to a boil and have all your ingredients in a heatproof glass bowl larger than the pot.  Place the bowl over the pot.  Make sure it doesn’t touch the water, needs to be above the water)

Combine all the ingredients to the upper pot of your double boiler or into your glass bowl.  Mixing and stirring until creamy and fairly smooth.

You may need more milk if it’s too thick.  This is a thicker type of sauce so it’s not going to be thin and runny…  You want to dollop it on top of your grilled chicken.

Who doesn’t love a dollop of anything?  LOL

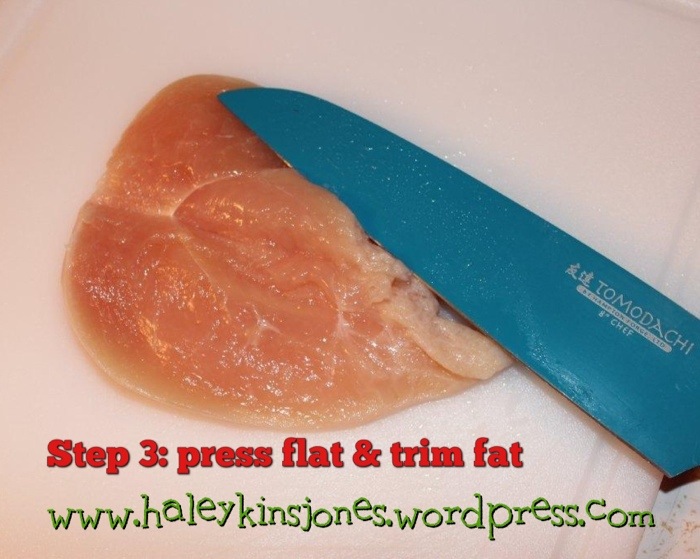
I have a large square cast iron dutch oven and the lid for it has grills on the underside so lately I’ve been using this heavy duty thing for everything.  I flipped the lid over and heated up the grills and grilled the chicken.

My go to staple is frozen boneless skinless chicken breast.  I buy them in 4 kg boxes or bags whenever they go on sale and usually have 4-5 packs in my deep freeze at any one time.  Chicken breast is high in protein and low in fat.

Season them with a little olive oil and some salt and pepper and grill to perfection.

When cooking chicken without skin, I always baste with a brushing of olive oil.  This will help seal in the natural juices of the meat and keep your dinner from going dry.  Have the grills or your pan preheated to med-high before adding the chicken.  Avoiding moving the chicken once you place it on the grills.  It will stick at first and you know you’ll be tempted to try and move it and “un-stuck it” but don’t!  It will pull away from the heat source on it’s own when it’s ready.  Well for the most part… just be patient alright.  This way you’ll get the perfect sear and grill marks.  Also, avoid turning and turning pieces of meat.  The raw juices cook on one side and then when you flip the piece of meat you allow the cook juices to run down through the rest of the meat helping cook that side through.  Flipping prematurely and back and forth might withhold some of those raw chicken juices and leave the center raw.  RAW!!!!  Don’t want that.

I heard this along time ago.  I only assume it’s true but it makes sense.  So I try to be as patient as I can and cook evenly and properly per side.

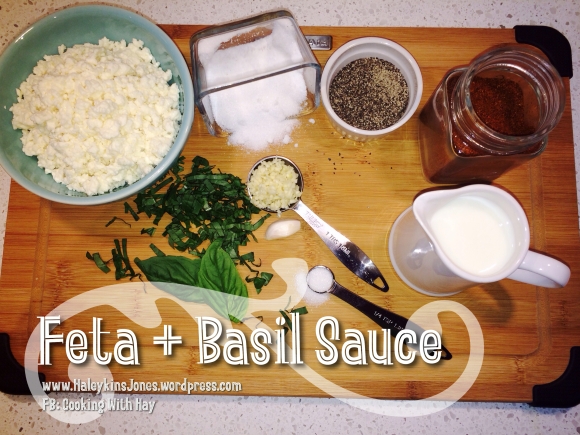
The image above includes salt. However my recipe does not.  When I made this, I added salt and found it to be incredibly too salty.  The feta gives this creamy topping enough salt…
Yum!  Look at it in all it’s feta and basil goodness.  I find I don’t cook with a lot of cheese, but feta can be used in so many ways!  I’m loving it.
Now #getinmybelly!

Give this one a whirl guys, it’s super easy and delicious too!


♥♥ Thanks for visiting, if you liked this blog please click LIKE below. If you want to follow my blog please scroll to the bottom, click the FOLLOW button and enter in your email address.
Love Haleykins♥♥
**Please click “OLDER POSTS” button, (bottom of the page)
or the “COOKING WITH HAY” tab (top of the page) to see more**

Tagged , , , , , , , , , , , , , , , , , , , , , , ,

QUINOA STUFFED BELL PEPPERS

Have any of you made these before? I’ve seen them around for a few years now I think, but I had yet to try them. Or try quinoa for that matter. I wasn’t sure if I would like it or not or how to cook it so that I would like it. I came across this on one of my boards and immediately decided it was time. If you are a big quinoa fan please leave me a comment below this blog post or comment on the facebook post please. Turns out I do really like it and want to find more ways to make it.
20140312-004108.jpg
QUINOA STUFFED BELL PEPPERS
20 minutes to cook the quinoa
30 minutes to bake the stuffed peppers
Makes 6
Done in less than an hour! OH Yeah!

HERE’S WHAT YOU’LL NEED:
3 CUPS QUINOA, cooked
1 SMALL CAN DICED GREEN CHILIES
1 CUP CORN
1 CAN BLACK BEANS, drained and rinsed
1/2 CUP FINE DICED TOMATOES, remove the seeds,
1/2 CUP MONTERAY JACK CHEESE, grated
1/4 CUP LIGHT FETA CHEESE, crumbled
3 TBSP. FRESH CILANTRO, chopped
1 TSP. CUMIN
1 TSP. GARLIC POWDER
1/2 TSP. ONION POWDER
1/2 TSP. CHILI POWDER, or more to taste
GROUND SEA SALT to taste
GROUND FRESH PEPPER to taste

6 BELL PEPPERS, tops cut, stemmed and seeded

HERE’S WHAT YOU NEED TO DO:
Preheat oven to 350 degrees F.
1. Place parchment paper on the bottom of a shallow baking dish.
2. Mix all the ingredients gently in a big bowl, except for the peppers obviously.
3. Spoon the filling into the pepper bowls. Tap them on the counter to get everything to the bottom.
4. Gently stuff.
5. Place them in the parchment lined baking dish.
6. Bake for about 40 minutes. I baked mine with the “tops” on but as you can see in the pics, they wrinkled. Bake them without the tops until the filling is hot inside.
7. Eat em up right away!

Quinoa is usually found in the same section of the grocery store that the rice is found in.
20140312-205346.jpg
1 cup of uncooked quinoa will equal 3 cups after it’s cooked
For every 1 cup of uncooked quinoa use 1.5 cups water or chicken broth
Rinse and drain quinoa in a fine mesh strainer
Bring liquid to a boil, and add in the quinoa, give it a stir and then reduce the heat to a med-low temp. Put the lid on it and let it simmer for 15 minutes or until all the liquid is absorbed.
Put the lid back on it and remove it from the heat. Set it aside for 5 minutes.
Fluff it up with fork
20140312-181545.jpg
I recruited Hubby to help me out with the next 3 shots. It gets awfully challenging trying to hold that massive camera and operate a sharp knife. Here you want to cut the top portion of the peppers off to create the ‘tops’
Use a sharp knife and slice down the edge of the ribs of the pepper following down towards the base of the pepper but not cutting through!!
Pop out the seed pack in the middle and knock out any seeds.
Using that handy melon baller {I like it better than a spoon because it has sharper edges} scrape out the remaining bits of the ribs until you have some nice little pepper bowls!
20140312-004250.jpg
They are super cute. I think I can find other reasons to use this type of ‘vessel’ for dips and sides in the future.
20140312-004310.jpg
Ok mix up all those ingredient, minus the peppers, in a nice big mixing bowl. Toss it all together gently.
I think this is the first time I’m using feta cheese in something other than a greek meal. I find this highly intersting and can’t wait to see what it tastes like.
20140312-004331.jpg
Once you have the filling all together you can simply put it in a casserole dish with a lid on it and just bake it that way if you don’t want to go through the effort of the pepper. I think the next time I will omit the pepper bowl if it’s just Hubby and I, and maybe leave the quirky presentation to when I’m preparing it for guests. It’s just alot of pepper for us. I like my peppers much more tender. Too the point of fully softened mush. Mmmmmm nummy yummy
20140312-004336.jpg
Here’s where you get to fill the pepper bowls up with that yum yum quinoa filling. I sprayed my baking dish as I ran out of parchment paper at christmas time and never replaced it. This caused my filled pepper bowls to slide around. I’m thinking the parchment would keep them in place better. Scoop and stuff the peppers and put them in the lined dish. The original recipe that I saw did not seem to bake the peppers with the “tops” on. I did and the “tops” came out quite wrinkled. I think for a better presentation, I would bake them without the “tops” and then just pop them on after you take them out of the oven. I also added a few shreds of the monteray cheese to the top of the filling before baking. gives them a nice finished look. Then I meant to sprinkle them with fresh chopped cilantro but I forgot and had already taken the pictures…. LOL #foodbloggerproblems haha.
20140312-004342.jpg
I baked these in a preheated 350 F oven for about 40 minutes. Check them at 30 minutes. You want the filling to be hot throughout. I think they look cute with the wrinkled tops, but not that cute, oh well. They were absolutely scrumptious! Even Hubby liked them.
20140312-004356.jpg
I served these with butterflied, grilled chicken breast. Seasoned them with sea salt, fresh ground pepper, garlic and a slight sprinkle of chili powder, with a side of a homemade chipotle dip {fat free sour cream, a wee bit of light mayo and as much chipotle puree as you can handle}
Yay for the second bbq this year! I just love the flavour that a bbq or grill can bring to the food and to the table 😉
Now I know it’s not a Green Egg bbq or anything like that or a nice old fashioned one but it does the job. It may actually need to be replaced this year. We’ve been saying this for the last 2 years so we’ll see.
20140312-004404.jpg

20140312-004421.jpg

And since I’m suffering from severe post vacay depression….. I’ve posted a small collection of pics from House Of Haley Photography, from our time in Mexico a few weeks ago. You can find them at the bottom of this post.

❤️

Thanks for visiting, if you liked this blog please click LIKE below.
If you want to follow my blog please scroll to the bottom, click the FOLLOW button and enter in your email address.

Love Haleykins
20131230-210222.jpg

❤️

**Please click OLDER POSTS, {below} to see more**
Find me on Facebook at http://www.facebook.com/cookingwithhay – Please LIKE my page.
Follow me on Twitter at @cookingwithhay

20140312-193443.jpg

20140312-193504.jpg

20140312-193510.jpg

Tagged , , , , , , , , , , , , , , , , , , , , , , , , , , , , , , , , , ,

Bruschetta Chicken on Spinach and Avocado Salad

20140118-220113.jpgLook at it all steaming and juicy up there. My photos are aways rushed and half assed because I’m anxious to eat it! Haha. #bloggerproblems

I made my Bruschetta Chicken again. I baked it in the oven this time, because the air is thick and the fog is heavy and I really don’t want to be out by the BBQ right now.

I make this often it seems but I added a little twist by putting it on a salad this time. It’s that good. Plus, I need to eat more green veggies.

Fresh Spinach is a favorite in our house.
20140118-220133.jpgSince I decided to do a salad with the chicken this time, I got to work on the tomatoes and dressing the day before so it had lots of time to marinade together.

Start by chopping up and deseeding 4 Roma tomatoes, into small even pieces so they stay on the chicken nicely.

Add in 2 Premade Homemade Garlic Balls or 4 or 5 minced garlic cloves.

I used 1 full packet of fresh basil and about half of another one {rolled and sliced, chiffonade style}.

But the good thing about cooking and the reason I find it so hard to post specific recipes is that… it’s always up to you, as to how much of what, you add. Your palate is different than mine and the joy of cooking is making it your own Fo Sho! Whoa, ramble, where was I? Oh ya the tomato mixture…

K, add in some coarse sea salt and about a cup and a bit more of the balsamic vinegar. Give it a good mix and then refrigerate it over night.
20140118-220141.jpgDay of dinner!

Butterfly 4 boneless, skinless, chicken breasts {see how in my previous Bruschetta Chicken post done a few months ago}

I then scored them and drizzled on some balsamic and popped those bad boys in a preheated 400 degree oven for 25 minutes. After this time I cranked the heat up to 425 and left them for another 5 minutes.
20140118-220208.jpg15 minutes after you’ve put the chicken in you’ll want to prepare the basic salad. This is made up of fresh baby spinach leaves, cubed avocado {this is why we wait 15 minutes. Don’t want your avocados to brown on you.} and some more chopped up Roma tomatoes.

Next pull out your marinaded tomatoes. With a spoon take some of the liquid, the oh-so-yummy, garlicky, vinegary, tomatoey goodness, and drizzle it over your salad. Some might want to add some olive oil but I don’t see the point. It’s not needed!!

My phone starts wailing “I’m Different by 2 Chains signifying that the chicken is ready for toppings. I let it play for a few beats and jam out obviously, before taking it out of the oven.
Reduce the heat back down to 400 degrees.

Sprinkle some mozzarella cheese and heap on the marinated tomatoes. I think I get them close to an inch high. Completely cover the chicken with the tomatoes, in my opinion this is the best!

Bake in the oven again for about 10 minutes keep your eye on em.
Tomatoes stay fairly fresh and juicy.
20140118-220218.jpgWhen they’re done they look like this. I know, I can’t believe the cooking sheet actually comes clean after this, but it does, to some degree… LOL

Now, I like to find my biggest knife and chop up the chicken into lengthwise strips on a cutting board. Lift the cutting board and swipe that juicy, hot, steaming chicken onto your oh-so-fresh salad.

Need I say more? No, I thought not.
Now grab a fork and dig in.
You have waited long enough.
20140118-220230.jpg

20140118-220237.jpg

20140118-220245.jpg

20140118-220251.jpg
Thanks for visiting, if you liked this blog please click LIKE below.
If you want to follow my blog please scroll to the bottom, click the FOLLOW button and enter in your email address.

Love Haleykins
20131230-210222.jpg

Tagged , , , , , , , , , , , , , , , , , , , , , , , , , , ,

Roast Beef & Jalapeno Halvarti Panini’s

20131231-162029.jpg

After a long rainy afternoon of shopping and errands… A hot, crispy and fresh Panini is a must!
Treat yourself to something yummy…. Could be your last meal of this year!!

Love Hay 💋
XoXoX

Tagged , , , , , , , , , , , , , , , , ,

Crunchy Fiesta Chicken Wraps

Mexico, oh how I miss Mexico. It does not seem like we were there in Feb/Mar, but we were. Forever ago. I love that place, the sights, the sand, the seas, the people and of course, the food. We have done all inclusive in Mexico and we have gone to local restaurants out on the town. Please take my advice and DON’T do all inclusive. Enjoy the real food, the fresh food, the food that is cooked when it’s needed not cooked, shipped, stored, reheated, put out in the buffet and then with whats left it gets reheated….. And well,you get where I’m going with this, right.

Last time I was at the grocery store I picked up some wraps, thinking it had been far too long since we had something of this variety. That was a few days ago and those wraps sat untouched, on the counter, whispering to me.

As I had mentioned in a past post, similar to this one, wraps just make everything that extra bit more awesomesauce. As well there was rice in the fridge from the Butter Chicken recipe I made the other night. Seemed like a win win. Plus, a slow cooker is a dream. It does the the work and makes for super yummy-licious juicy shredded chicken!!!

Hubby likes foods that are juicy and yet still crunchy, I look forward to his reaction with this one. I intend to fulfill both. LOL

20130923-224837.jpg

CRUNCHY FIESTA CHICKEN WRAPS

INGREDIENTS:
4 LARGE CHICKEN BREASTS (boneless, skinless)
1/2 ONION, FINE DICED
1 SMALL CAN ZESTY ROTEL TOMATO SAUCE (tomatoes & green chilies)
3-4 TABLESPOONS HOT SAUCE (Franks, Sriracha, Habanero – adjust to your taste, start with less then add more)
1 TEASPOON SALT
2 TEASPOONS CUMIN
1+1/2 TEASPOON CHILI POWDER
1 PREMADE HOMEMADE GARLIC BALL, or 4 cloves, minced
1/4 CUP RED PEPPER, DICED
1/4 CUP BLACK BEANS (rinsed & drained)
1/4 CUP CORN, (drained)
2 CUPS GRATED CHEDDAR CHEESE
1 CUP SOUR CREAM
2 CUPS RICE, COOKED
8-10 FLOUR TORTILLAS (wraps)
2 TABLESPOONS OIL
CILANTRO & HOT SAUCE FOR GARNISH

DIRECTIONS:
Place chicken breasts in the bottom of your slow cooker
Toss in the onions
Add the Zesty Rotel Tomato Sauce
Then add the hot sauce of your choosing
Add in the salt, cumin, chili powder and garlic
I cooked this on high in my slow cooker for 4 hours
Stirring once or twice
At the 3:30 hour mark, shred the chicken with 2 forks and let it continue to cook

ASSEMBLY:
Mix shredded chicken, rice, beans, corn,and peppers in a separate bowl, set aside
Heat the oil in a frying pan over medium heat
Sprinkle cheese on the tortillas and add the sour cream
Spoon on the chicken & rice mixture down the center of the tortilla
Add a squirt of hot sauce if you so choose
Roll em up
Place 2 assembled wraps, seam side down in the hot oiled pan
Flip them when golden brown and slightly crunchy on the bottom, they only need a few minutes
Let them rest on a cutting board for about 3-4 minutes.
Slice in half and garnish with cilantro and hot sauce

HERE’S HOW IT ALL WENT DOWN:
20130923-224137.jpg
Place chicken breasts in the bottom of your slow cooker
Toss in the onions
20130923-224145.jpg
Add the Zesty Rotel Tomato Sauce
20130923-225054.jpg
Then add the hot sauce of your choosing
20130923-224224.jpg
20130923-224230.jpg
Add in the salt, cumin, chili powder and garlic
20130923-224511.jpg
I cooked this on high in my slow cooker for 4 hours
Stirring once or twice
20130923-224538.jpg
At the 3:30 hour mark, shred the chicken with 2 forks and let it continue to cook
20130923-224241.jpg
20130923-224340.jpg
20130923-224417.jpg
20130923-224424.jpg
20130923-234948.jpg
20130923-224524.jpg
20130923-224530.jpg
20130923-224543.jpg
20130923-224549.jpg
Mix shredded chicken, rice, beans, corn,and peppers in a separate bowl, set aside
20130923-224559.jpg
Sprinkle cheese on the tortillas and add the sour cream
20130923-224606.jpg
Spoon on the chicken & rice mixture down the center of the tortilla
Add a squirt of hot sauce if you so choose
Roll em up
Place 2 assembled wraps, seam side down in the hot oiled pan
20130923-224611.jpg
Flip them when golden brown and slightly crunchy on the bottom, they only need a few minutes
20130923-224724.jpg
Oh my goodness! YUMMY
Let them rest on a cutting board for about 3-4 minutes.
Slice in half and garnish with cilantro and hot sauce
20130923-224733.jpg
20130923-224738.jpg
20130923-224759.jpg
20130923-224751.jpg

Thanks for visiting, if you liked this blog please click LIKE below.
If you want to follow my blog please scroll to the bottom, click the FOLLOW button and enter in your email address.

Love Haleykins
20130919-203639.jpg

Tagged , , , , , , , , , , , , , , , , , , , , , , , , , , , , , , , , , , , , , , , , , , , , , , , , , ,

Another Greek Chicken Recipe

I found a recipe a few weeks ago while searching the interweb for new ideas. I followed it pretty closely but tweaked it just a bit… more garlic, less oil, etc.
I also added a bit more lemon then required and upon taste testing… too much lemon. So stick with this and you can’t go wrong
20130920-183427.jpg
GREEK MARINADED CHICKEN

INGREDIENTS:
1 + 1/4 CUPS PLAIN GREEK YOGURT,FAT FREE
1 T OLIVE OIL
5 CLOVES MINCED GARLIC (or a frozen premade homemade garlic ball 😉)
I LEMON (the juice and as well the zest)
1 T OREGANO
1 T PARSLEY
FRESH CRACKED PEPPER (at your discretion)
12 CHICKEN LEGS and/or CHICKEN THIGHS🍗🍖
DIRECTIONS:
Combine everything, except the chicken, in a bowl.
Place chicken pieces in a large ziplock bag.
Pour the marinade over the chicken. 🍗
Mix the chicken around in the bag for a consistent coating
Seal and chill in the fridge for at least an hour. I did 4 hours 😋 YUM
Preheat oven to 375
Line a large baking dish with parchment like I did or grease the pan
Bake chicken in the pan uncovered for about 1 hour or until slightly crispy and golden brown
20130920-190415.jpg
We had this along side a super fresh greek salad with light feta cheese and lemon rice pilaf.

Thanks for visiting, if you liked this blog please click LIKE below.
If you want to follow my blog please scroll to the bottom, click the FOLLOW button and enter in your email address.

Love Haleykins
20130919-203639.jpg

Tagged , , , , , , , , , , , , , , , , , , , , , , , , , , , , , ,

Grilled Bruschetta Chicken & Pasta

I was very excited to try tonight’s menu out.

(Tomorrow I promise I will post something other than food. My blog was not meant to just be about food but these days it seems to be. Sorry about that.)

Ok, so tonight I tried something new. Now I’ve never even had bruschetta let alone make it so this was interesting for me. First of all I wasn’t even sure I was going to like it. I am not opposed to balsamic vinegar, I just have never tried it. Remember it was only a couple of years ago that I started liking flavors of foods. Also, I have never cooked with basil or rather fresh basil. And do I like tomatoes. Cooked yes, but fresh…. I’m still not sure yet.

Basically… this ought to be interesting hey? But I wanted to try something new and more importantly, something fresh!!!

Here we go!!

Grilled Bruschetta Chicken & Pasta
20130519-214014.jpg
20130519-214044.jpg
Ingredients:

    Chicken

4 boneless skinless chicken breasts, butterflied, see pictures below
salt & pepper
1/4 C. extra virgin olive oil or as Rachael Ray calls it, EVOO. *gaaa*
1/4 C. balsamic vinegar
mozzarella cheese in slices
fresh grated parmesan cheese
20130519-222218.jpg
20130519-222225.jpg
20130519-222231.jpg

    Topping

2 roma tomatoes, finely diced
handful of grape or cherry tomatoes, finely diced
4 or 5 cloves of minced garlic
1 T. balsamic vinegar
10 fresh basil leaves, rolled and sliced thin
fresh grated parmesan cheese
20130519-220224.jpg
20130519-222900.jpg
20130519-220245.jpg
Instructions:

    Chicken

Season chicken with S & P
Mix vinegar and oil and brush on both sides of chicken breast
BBQ the seasoned chicken breasts
20130519-222801.jpg
Once cooked, cover with mozza slices and a sprinkle of parm
20130519-223358.jpg
20130519-223806.jpg

    Topping

Mix tomatoes, garlic & vinegar in a bowl
Top the cheesy chicken with the tomato mixture
Then sprinkle with fresh basil & parm
Place topped chicken back on the BBQ or in a hot oven for a few minutes
20130519-222704.jpg
I served this with pasta.
20130519-220313.jpg
I used Farfalle pasta, better known as bowtie pasta
20130519-220448.jpg
I made a mozza parm cheese sauce with chicken stock, tomatoes, basil & garlic for the pasta
20130519-223858.jpg
Thanks for visiting! I hope someone tries out this recipe and let’s me know what you think.
If you enjoy my blog please click like below and if you would like to follow my blog please scroll to the bottom of the page, click the FOLLOW button and enter in your email address.

Thanks again guys!

Tagged , , , , , , , , , , , , , , , , , , , , , , , , , , , ,

GREEK! A meal without Avocado…. Finally! Too much of a good thing as my mom said.

While chatting with my wonderful mother again last night about the Creamy Potato & Cauliflower Soup and Roasted Garlic as well that I had just made, I thought I should ask her about avocado’s. We eat so many avocado’s because they are just sooo tasty and we really enjoy the meals that include this wonderful stuff. Well she said if you were to eat 1 a day you may start to gain weight…. Yikes, we eat more than 1 a day each… sometimes 3! YIKES again! I told her I really like them tho and she responded with… “too much of a good thing”

True!

It’s time to slow down on the avocado’s and so I decided to go Greek for the night!
Here are some new recipies I’ve managed to find and everything tasted really good.

Just some of the things needed for tonights dinner!
GREEK TONIGHT

LOW FAT GREEK SALAD DRESSING

Ingredients:
4 tablespoons fresh lemon juice
4 tablespoons red wine vinegar
1 teaspoon dried oregano
1/4 teaspoon black pepper
1 garlic clove
1/4 cup extra-virgin olive oil
1/4 cup fat-free chicken broth

Directions:
Blend all the ingredients and let it sit a couple of hours .

I doubled this recipe to ensure I had enough for everyone for 2 nights.

________________________________________

GREEK PRAWN & PASTA SALAD

Ingredients:
1 lb of raw prawns (without the shell or tails)
1 tbsp. butter
2 cloves of minced garlic
Salt & pepper
3-4 cups of cooked and cooled pasta (I used rotini noodles)
½ purple onion, chopped
1 green pepper, chopped
½ red pepper, chopped
¼ yellow pepper, chopped
1 cucumber, sliced then quartered
1 cup cherry or grape tomatoes
I small tub of low fat feta cheese
*feel free to add olives… hubby doesn’t like em….
Low Fat Greek Salad Dressing

Directions:
1. Saute prawns in butter and garlic, season with salt and pepper. Chill in the fridge
2. In a salad bowl add the pasta, feta cheese, onion, peppers, cucumber, tomatoes, prawns and feta cheese. *olives if you choose
3. Gently toss with Low Fat Greek Salad Dressing
4. Garnish with a lemon wedge

________________________________________

GREEK OVEN BAKED CHICKEN

Ingredients:
4 bone in split chicken breasts (I used chicken legs because I had some in the freezer)
1/2 cup olive oil
juice of 2 lemons
3 -4 cloves of garlic, crushed or minced (I used 5 cloves because we love garlic)
3 tsp. dried oregano
1/2 tsp. kosher salt
1/2 tsp. pepper

Directions:
1. Mix the olive oil and next 5 ingredients in a 9 X 11 baking dish.
2. Place chicken in the dish, turning them in the marinade a few times. I like to lift the skin and use my hands to spread some of the marinade underneath it. Leave them skin side down in the dish. Cover them and refrigerate overnight.
3. The next day, bake them at 350 degrees for 30 minutes. Flip and bake an additional 30-40 minutes.
4. turn the broiler on high during the last 5 minutes to brown up the skins.


In the end I was very pleased!  A very refreshing juicy meal that made the husband quite pleased.  Success!

I would add a little more lemon to the chicken next time and they didn’t make for nearly as long because I used legs instead of breast piecese smaller than they should have been but hey they were what I had leftover in the freezer.

The best part is I have enough left over so I don’t have to make dinner tomorrow!

Thanks for reading!

Tagged , , , , , , , , , , , , , , , , , , , , , , , , , , ,

Creamy Potato & Cauliflower Soup with Roasted Garlic

There was a very good reason for roasting that garlic this afternoon, see previous post.
I was talking with my mom last night and she had made a yummy sounding creamy potato soup. It sounded like a great idea.
She sent me her recipe and with other recipes I found online and my own thoughts, I twisted it!
I made a recipe to suit my tastebuds and to use up more items in my fridge. Those items being chicken stock and… cauliflower!

Here’s the recipe and if you make it, please let me know what you think!

IMG_7169

IMG_7172

Creamy Potato & Cauliflower Soup with Roasted Garlic

1 ½ fists of roasted garlic
2 cups cooked cauliflower, chopped in (approx) ½ inch chunks (half a head of cauliflower)
1 cup onion, finely diced
2 tbsp. butter
4 cups raw russet potatoes, chopped in even ½ inch cubes (2 large russets)
2 cups water
2 cups low sodium chicken stock
2 cups skim milk
½ cup fat free greek yogurt
2 tsp. salt
2 tsp. pepper
green onions
cheddar cheese
cooked crumbled bacon

Add butter to soup pot, sauté onions till clear, do not overcook
Add garlic, potatoes, water, and stock and simmer for 10-15 minutes until the potatoes are tender
To the pot, add the cooked cauliflower, milk and greek yogurt, salt & pepper.
Give it all a good mix.
In small batches, puree till smooth and creamy
Pour back into the pot and reheat
You may need to add more milk depending on the consistency, you don’t want it too thick, or maybe you do 🙂

Garnish with more fat free greek yogurt, green onions, cheddar cheese and if you feel sinful, bacon!

I have to say, it tastes soooooo good, I filled a shot glass of it and downed it! Can’t wait for lunch tomorrow!

Tagged , , , , , , , , , , , , , , , , , , , , , , , , ,

Filled my backpack with onions and… french bread

I woke up to sunshine in my eyes, shining through the trees in my back yard. It’s been this way the last few mornings. Absolutely beautiful the way the light dances along the walls and over my perfumes. Another nice day.

However I’ve been feeling “blah” lately. Can I use that, non-word? It really is the best word to describe how I feel. I think it’s because I’ve not been out in that sunshine… so this morning I threw my backpack on and pulled out my bike. It was crisp and the air smelled wonderful. There is definitely a different vibe out there now than there was just a few months ago. School kids here school kids there. There’s a kid, there’s another ok you get it. Even the sun looks different than it did before. I appreciated the change.

On my way back through my neighbourhood I stopped at the local market and filled up my backpack with a bunch of….. onions and a loaf of french bread…. Thankfully the bread fit in my bag so I didn’t have to finish my bike ride with a loaf of bread sticking out the top…. Time to fire up the slow cooker.

Upon purchasing my new slow cooker a few weeks ago, I’ve been filling up my book with new recipes to try. A basic, and one in which I’ve only ever tried twice in my life, caught my eye. French Onion Soup.

Now I’m excited to get this going. I’ve recently had two addictions…. onions and red pepper flakes. I’ve been going through onions like a crazy person gone mad. Luckily I wear contact lenses and thus…. no burning or teary eyes! Yes the rumor is true. Also, red pepper flakes…. why can’t they go in every meal? Give me one good reason why they can’t.  Mmmmmm spicy.

FRENCH ONION IN THE SLOW COOKER

Ingredients

3 Cans beef broth (I prefer Swanson)

3 T butter

2 yellow onions

¾ T sugar

1/3 C cooking sherry

1 t salt

Slices of crusty bread (I used french)

Gruyere Cheese (I had swiss in the fridge)

Directions

Turn slow cooker on to high

Add butter

Slice onions into rings and separate the rings from each other with your hands

When butter is melted add in the onion rings

Toss to coat onions evenly in the butter

Add beef broth, sugar, sherry, and salt

Cook on high for about 7-8 hours or low for about 10

It’s done when the onions are translucent and softened.

To Serve

Set your oven to broil

Toast a slice of bread for each person.

Cut the cheese into slices (My swiss was presliced)

Spoon soup into individual oven safe bowls

Cheese goes on the toasted bread

Float each piece of cheese toast in each bowl.   And hope they fit…

Place bowls of soup and cheese toast on a cookie sheet or baking pan for ease and safety

Put em in the oven under the broiler.

Broil for a few minutes until cheese is melty and slightly golden

Serves 4-6

While I had the butter melting in the slow cooker to start the soup, I started in on the next dish.  So incredibly glad I started this one early as I had no idea, nor did I even begin to think about just how long it would take!  OMG.  I made Beef Pot Stickers to go with Soup.  The filling itself is easy to make…. But it took a very long time to assemble each one.

I love gyoza and always order it when we have sushi..  It becomes the usual with our sushi order.  If you don’t know what gyoza are, well they are basically pork dumplings but I guess they can be made various ways.  They are fried on one side and slightly steamed I believe.  Yum Yum Yum  in my Tum Tum.  These are similar, and although I have not yet fried them up for dinner…. I can’t imagine them not being tasty

BEEF POT STICKERS

Ingredients

2 lbs extra lean ground beef

1 egg white

½ a carrot, finely diced

4 green onions, finely chopped

½ yellow onion, finely chopped

3 cloves of garlic, minced

1 red pepper, finely chopped

3T oyster sauce

3T soy sauce

72 wonton wrappers

1 egg yolk, beaten

Directions

In a food processor, combine the beef and egg white and grind to a paste.

Mix in the carrot, green onion, yellow onion, garlic, red pepper and the oyster sauce and soy sauce.

Lay 4 wonton wrappers out on a clean, dry surface, then place 1 Tablespoon beef mixture into the center of each wrapper. Wet all four sides with a pastry brush or your finger, then fold the bottom right-hand corner up the top left-hand corner and seal the edges, being careful to remove all air pockets. Transfer potsticker to a wax paper-lined baking sheet and press down gently to create a flat bottom.

Repeat with remaining wrappers and filling. Annoying!!!

To freeze: Place baking sheet into the freezer until potstickers are frozen solid. Transfer to a freezer-safe container or bag. When ready to eat, cook the same way as fresh.

To cook: Heat 1 teaspoon vegetable oil in a medium-sized skillet. Place potstickers, being careful not to crowd, into the skillet, getting oil on the bottom of each potsticker. Cook until golden brown on the bottom, then add enough water to come 1/3 of the way up the potstickers. Place a lid on top and let the potstickers steam for 2-3 minutes.

When there is just a couple Tablespoons water left in the skillet, remove the lid and allow the water to cook out and the potsticker bottoms to crisp back up. Use a spatula to gently unstick the wrappers from the skillet and serve with Au Jus dipping sauce (heat ingredients in a small saucepan or in the microwave.)

Serve as is or with chili-sauce-spiked soy sauce.

I don’t know how many wonton wrappers I originally had… I didn’t count and I ran out.  So I had to run out to the store.  The new ones seemed to work out quite a bit faster.  Don’t ask me why, but a trip to the grocery store when I had already been cooking for an hour was annoying!

Well I’m about to pull it altogether and serve Hubby his dinner.  Hopefully it all goes as planned. Wish me luck!

I’ll touch back later and add in some pics!

Tagged , , , , , , , , , , , , , , , , , , , , , , , , , , , , , , , , , , , , , , , , , , , , , , , , , , ,