
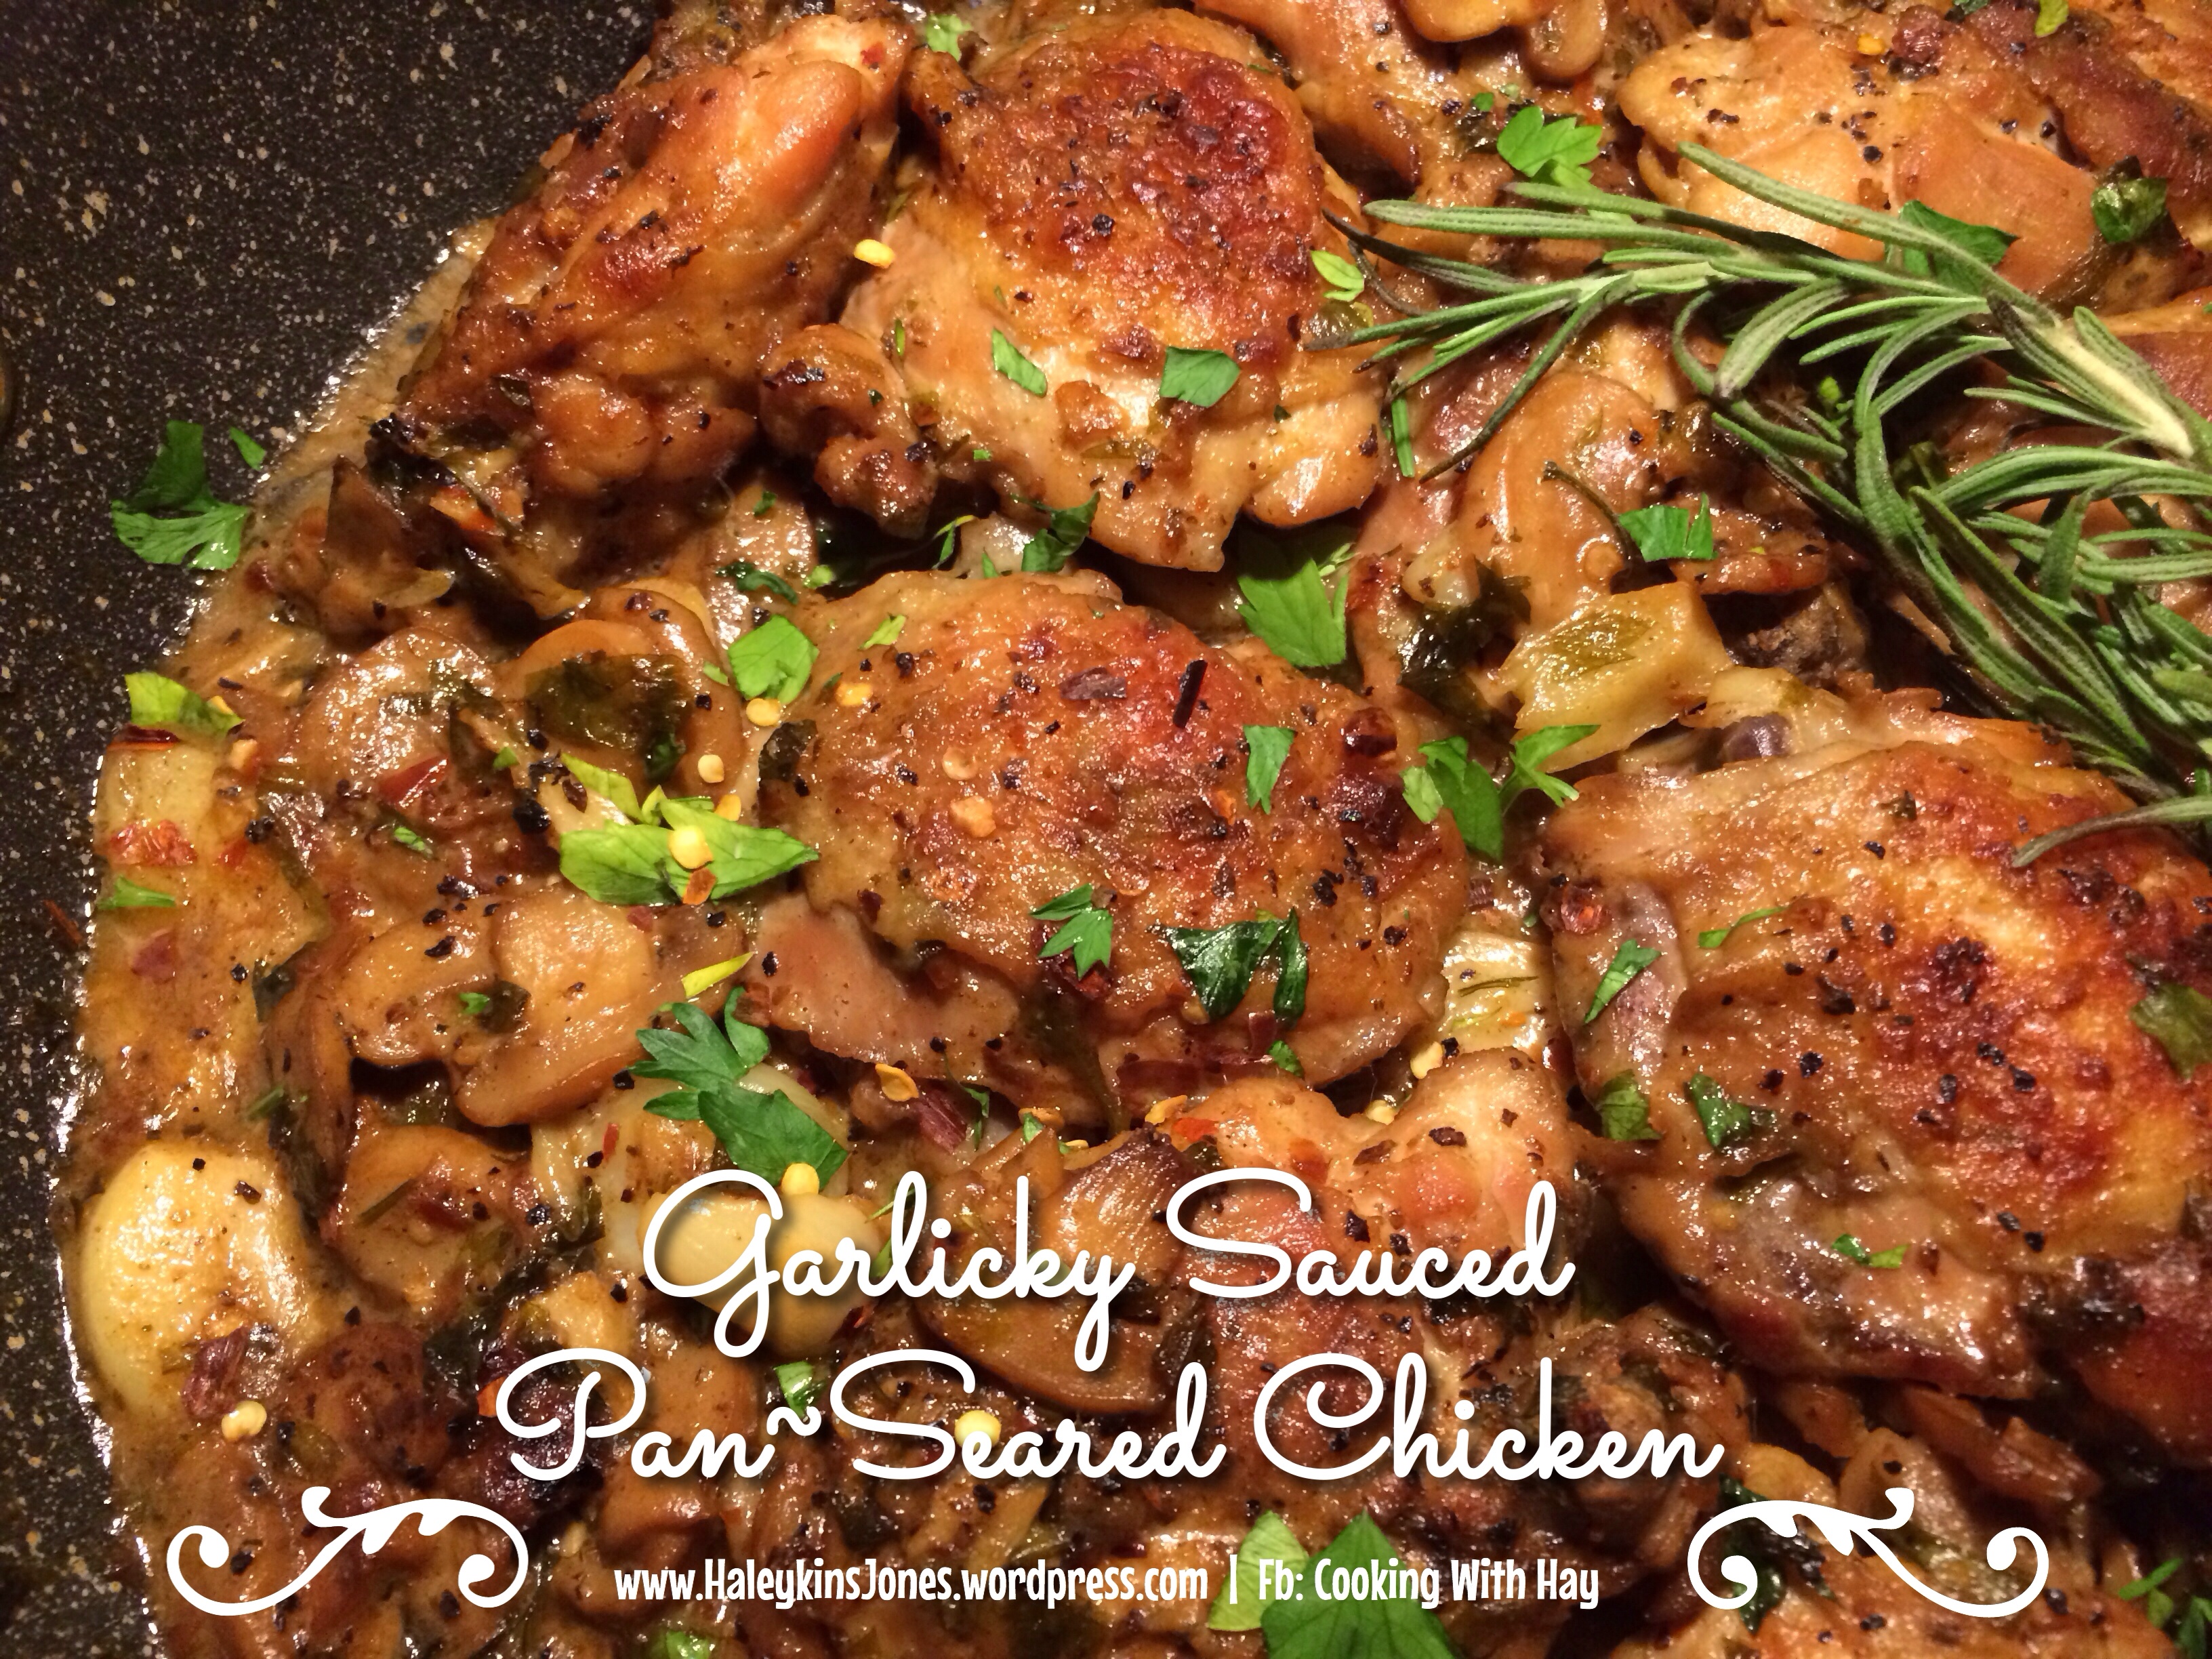
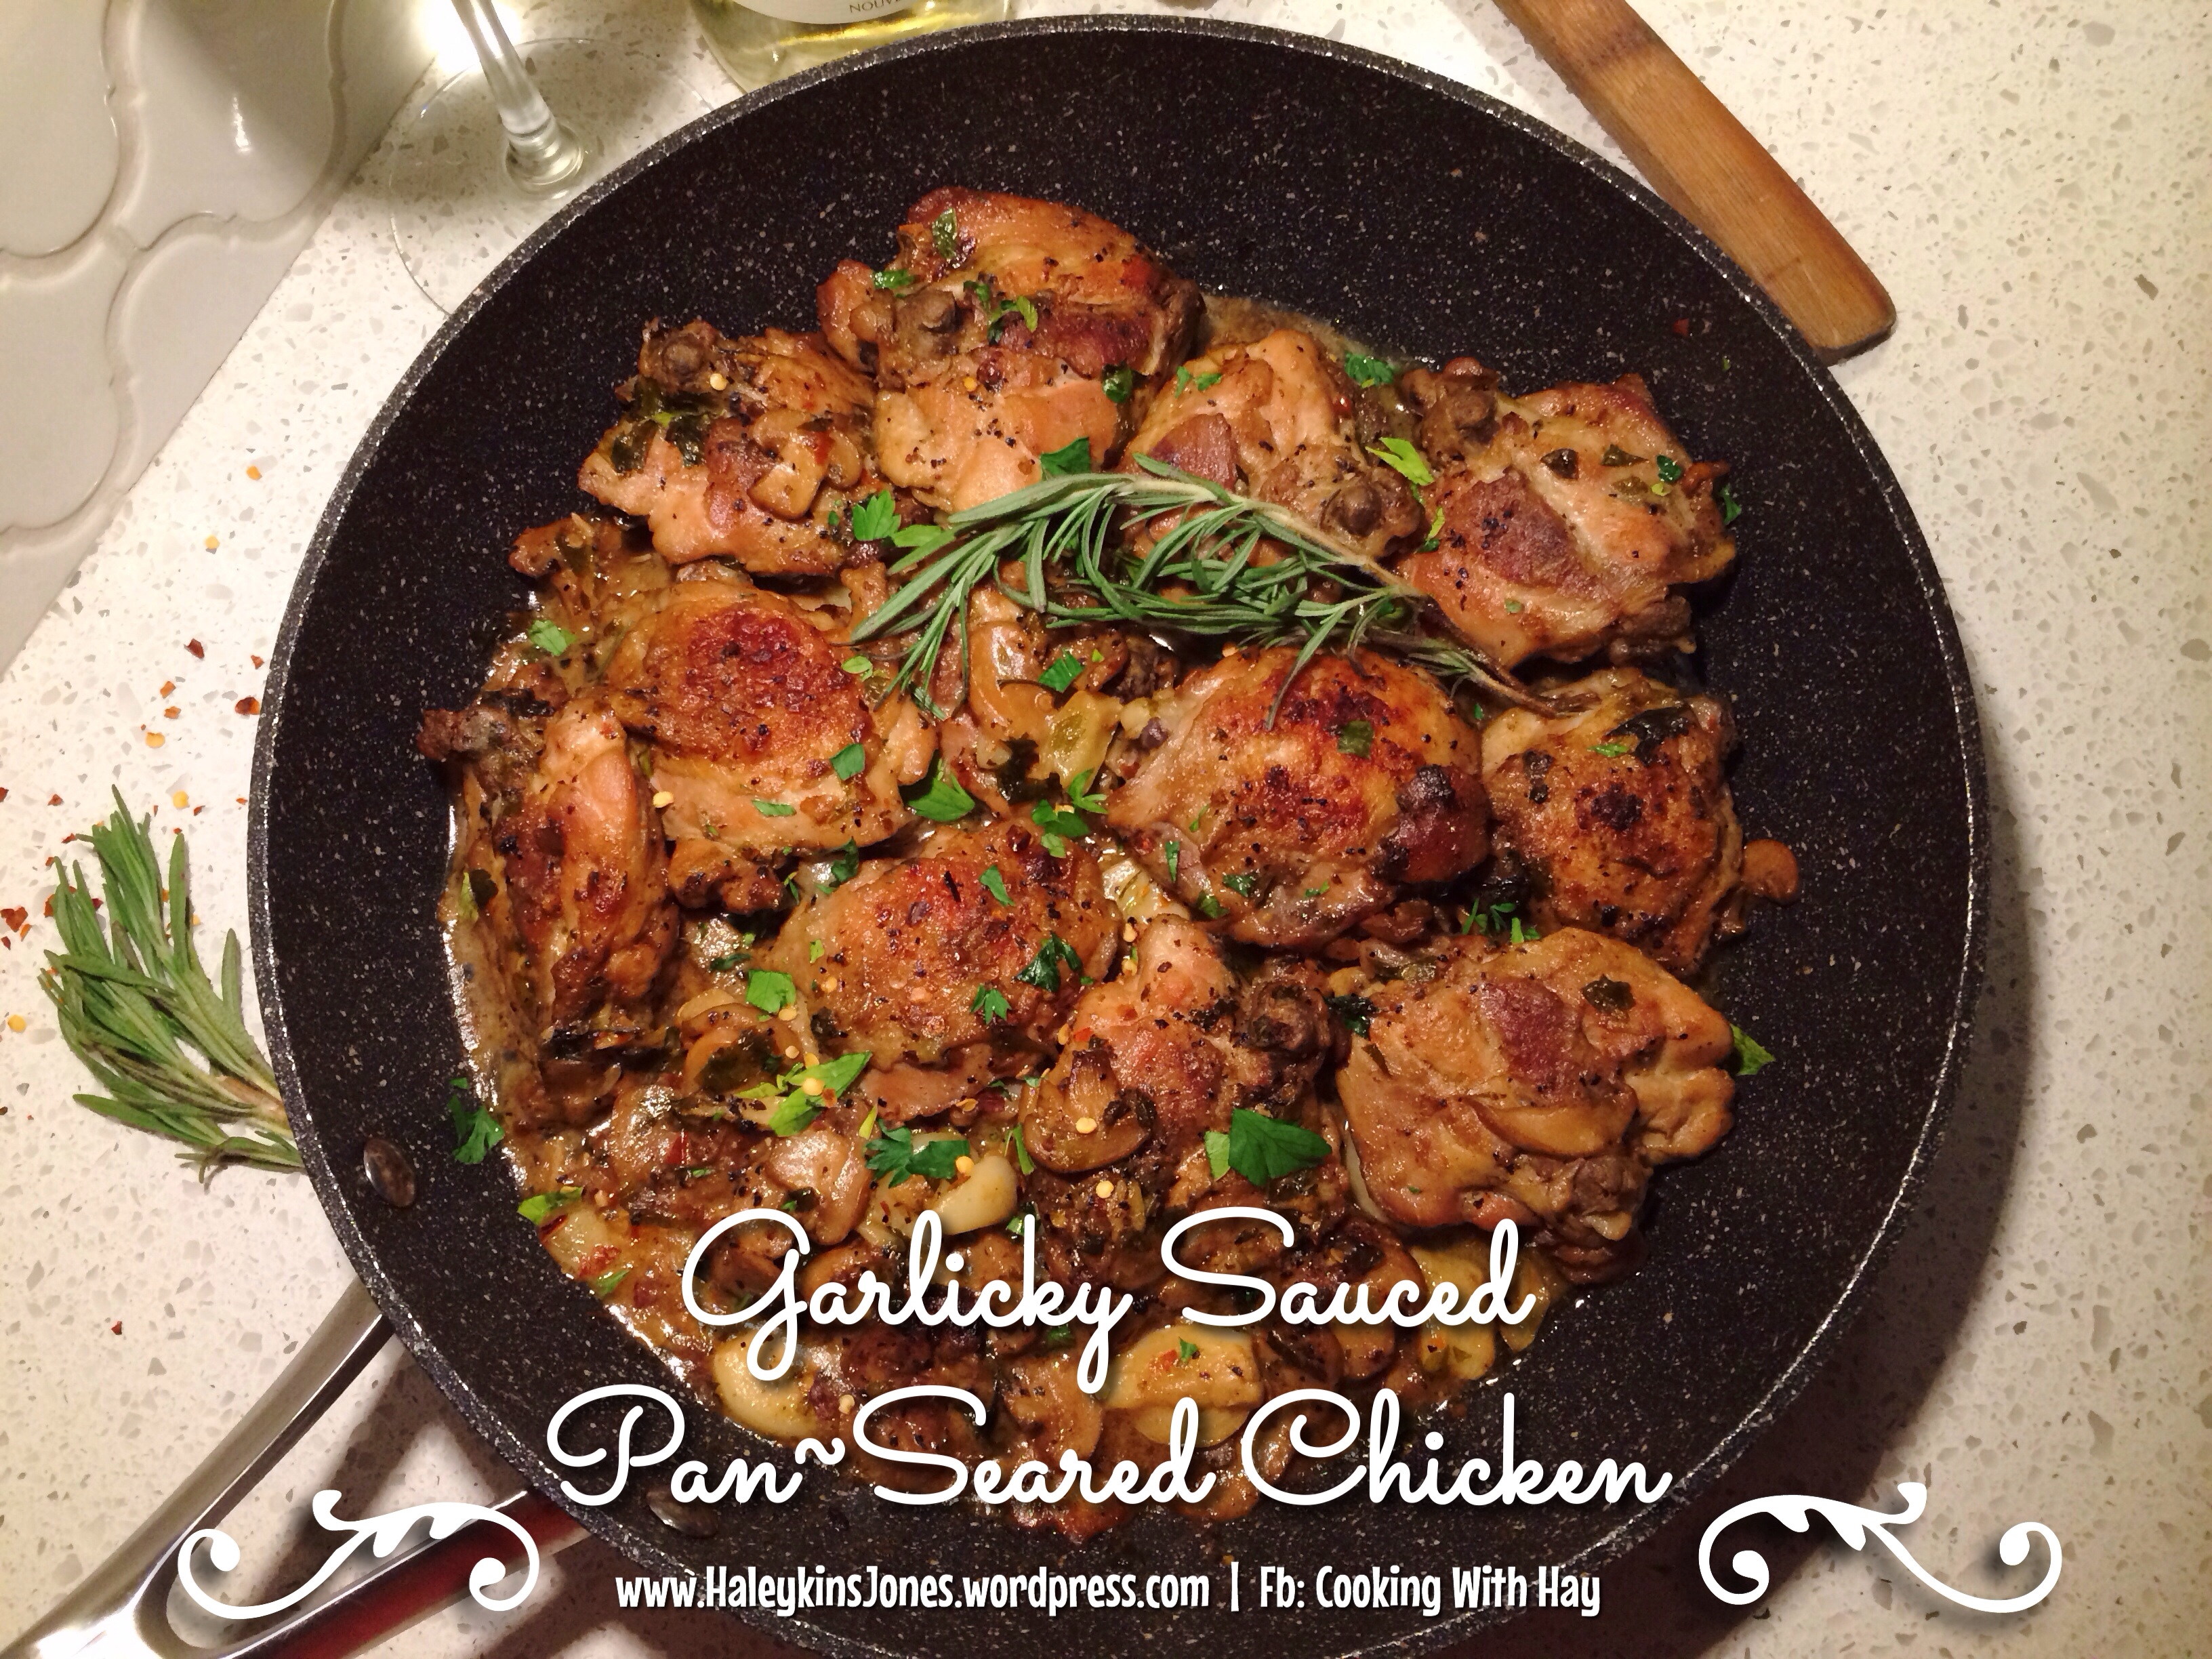
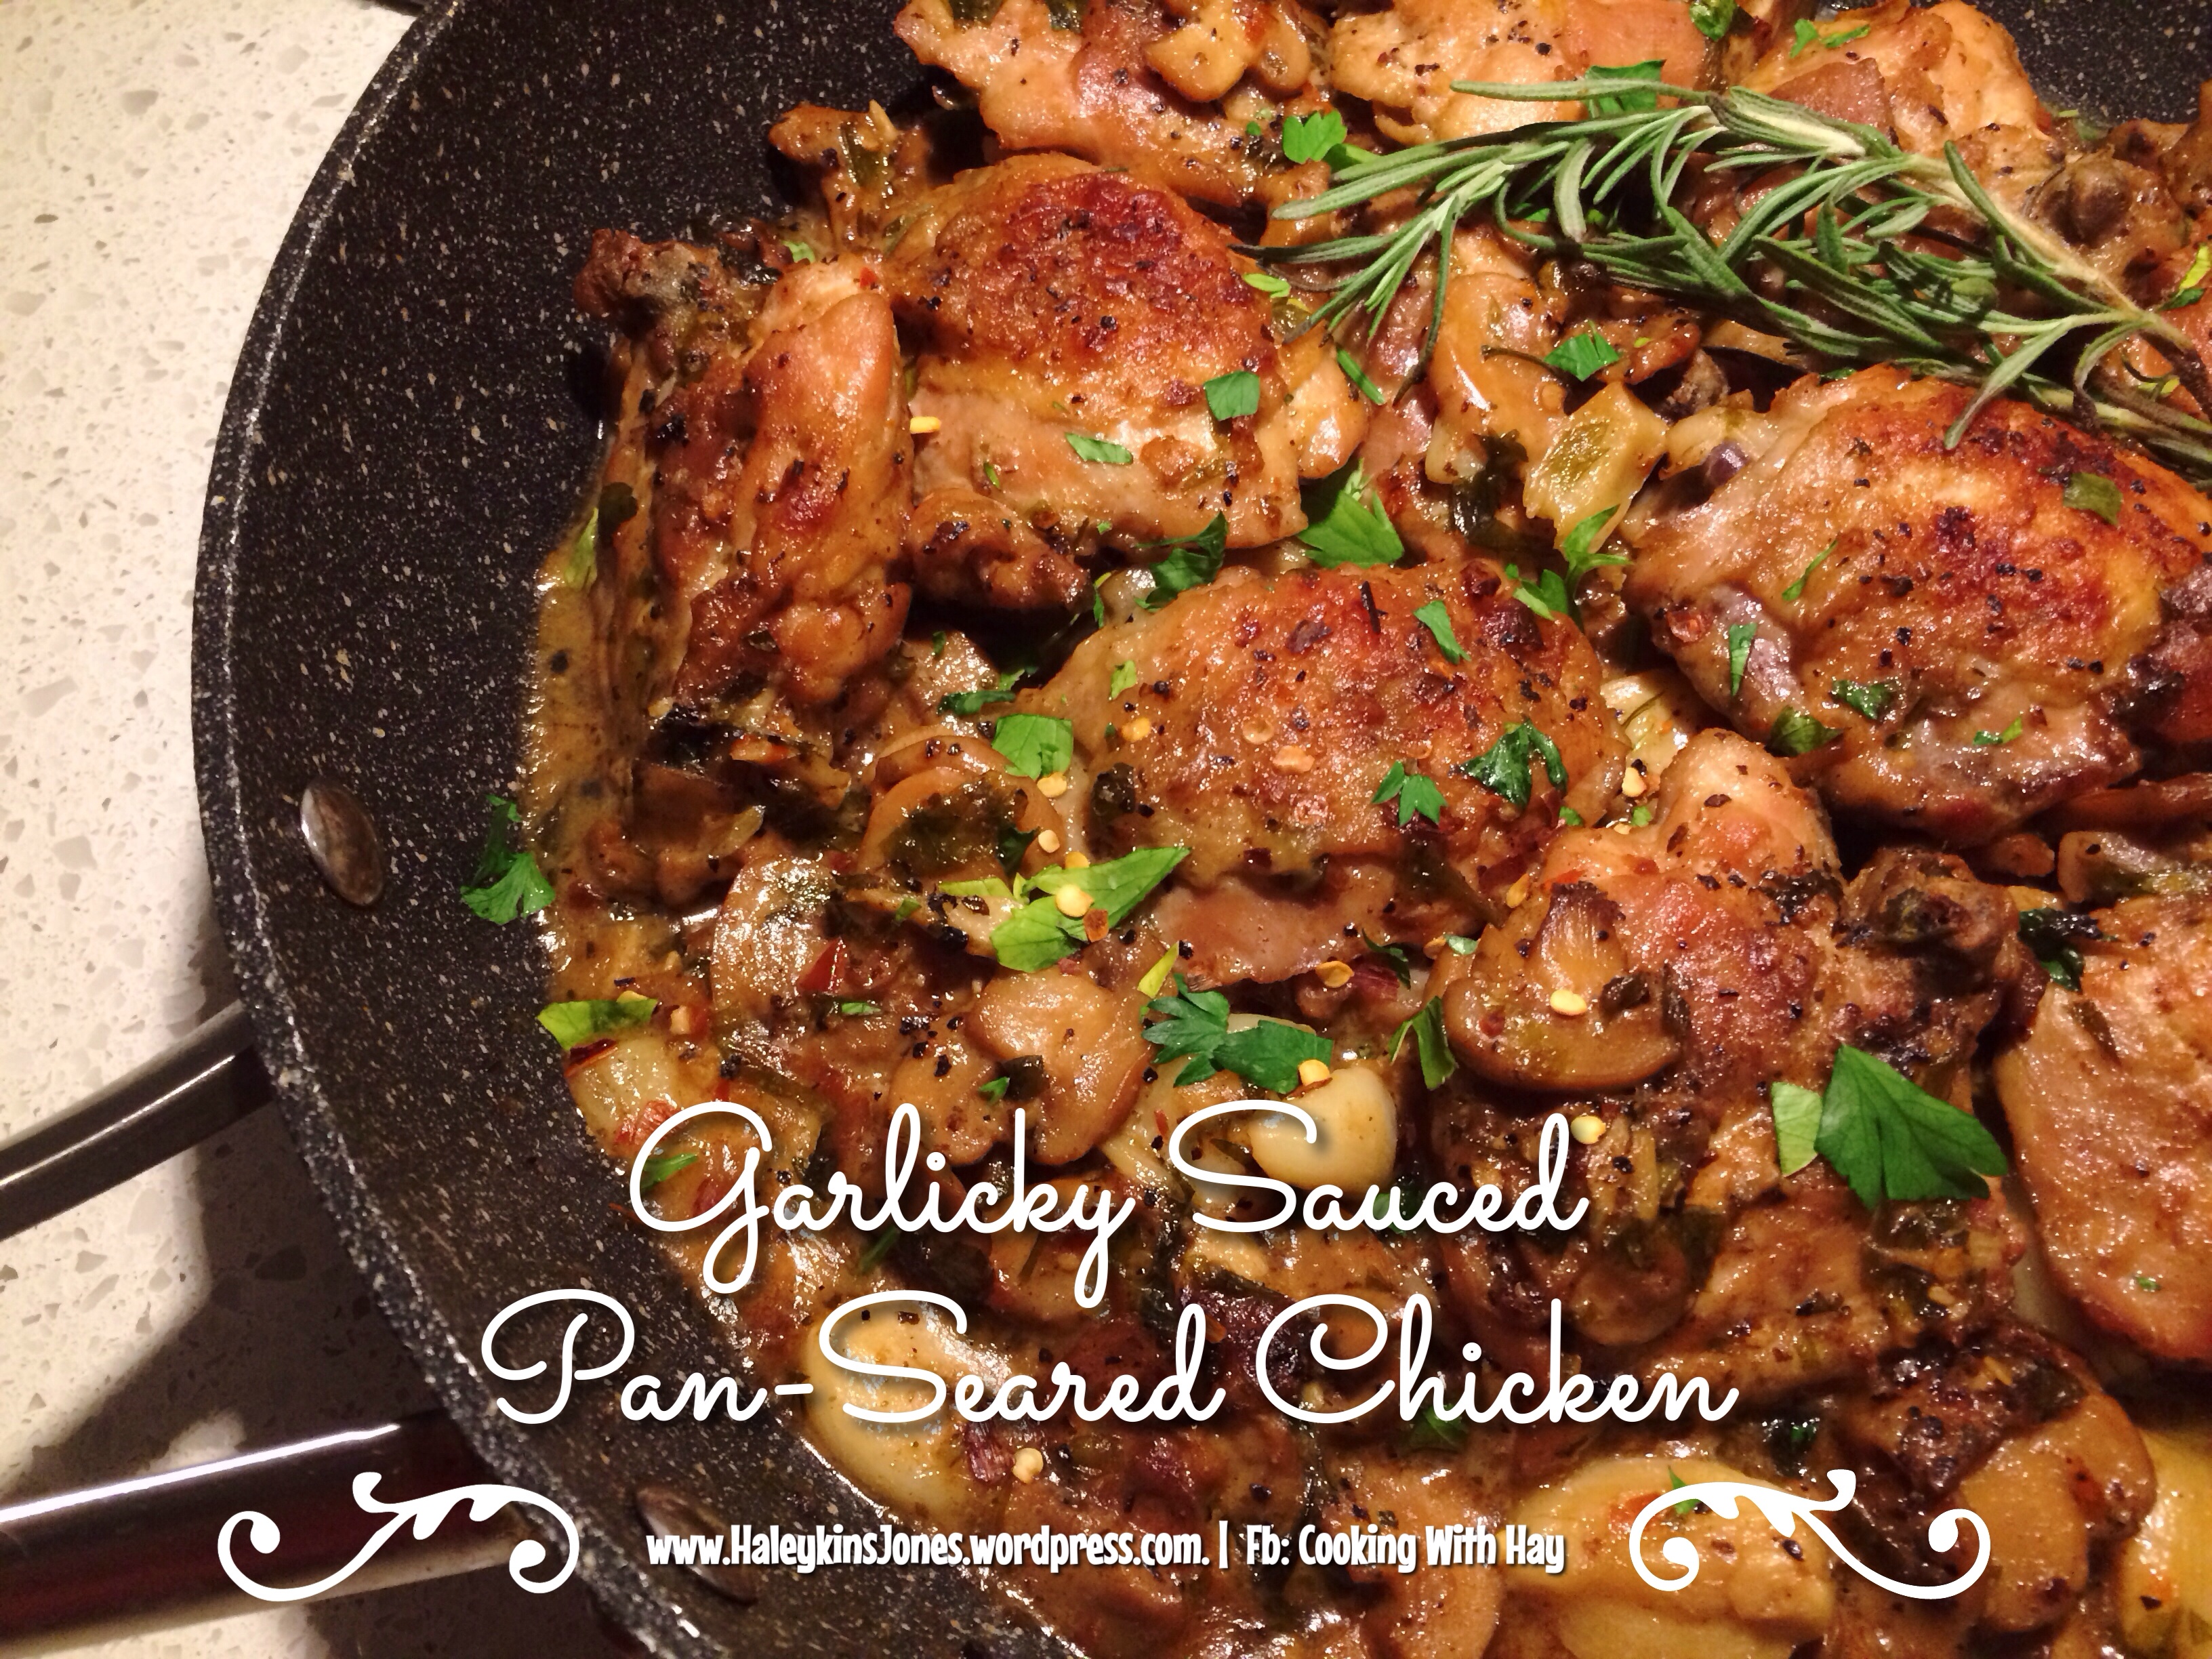
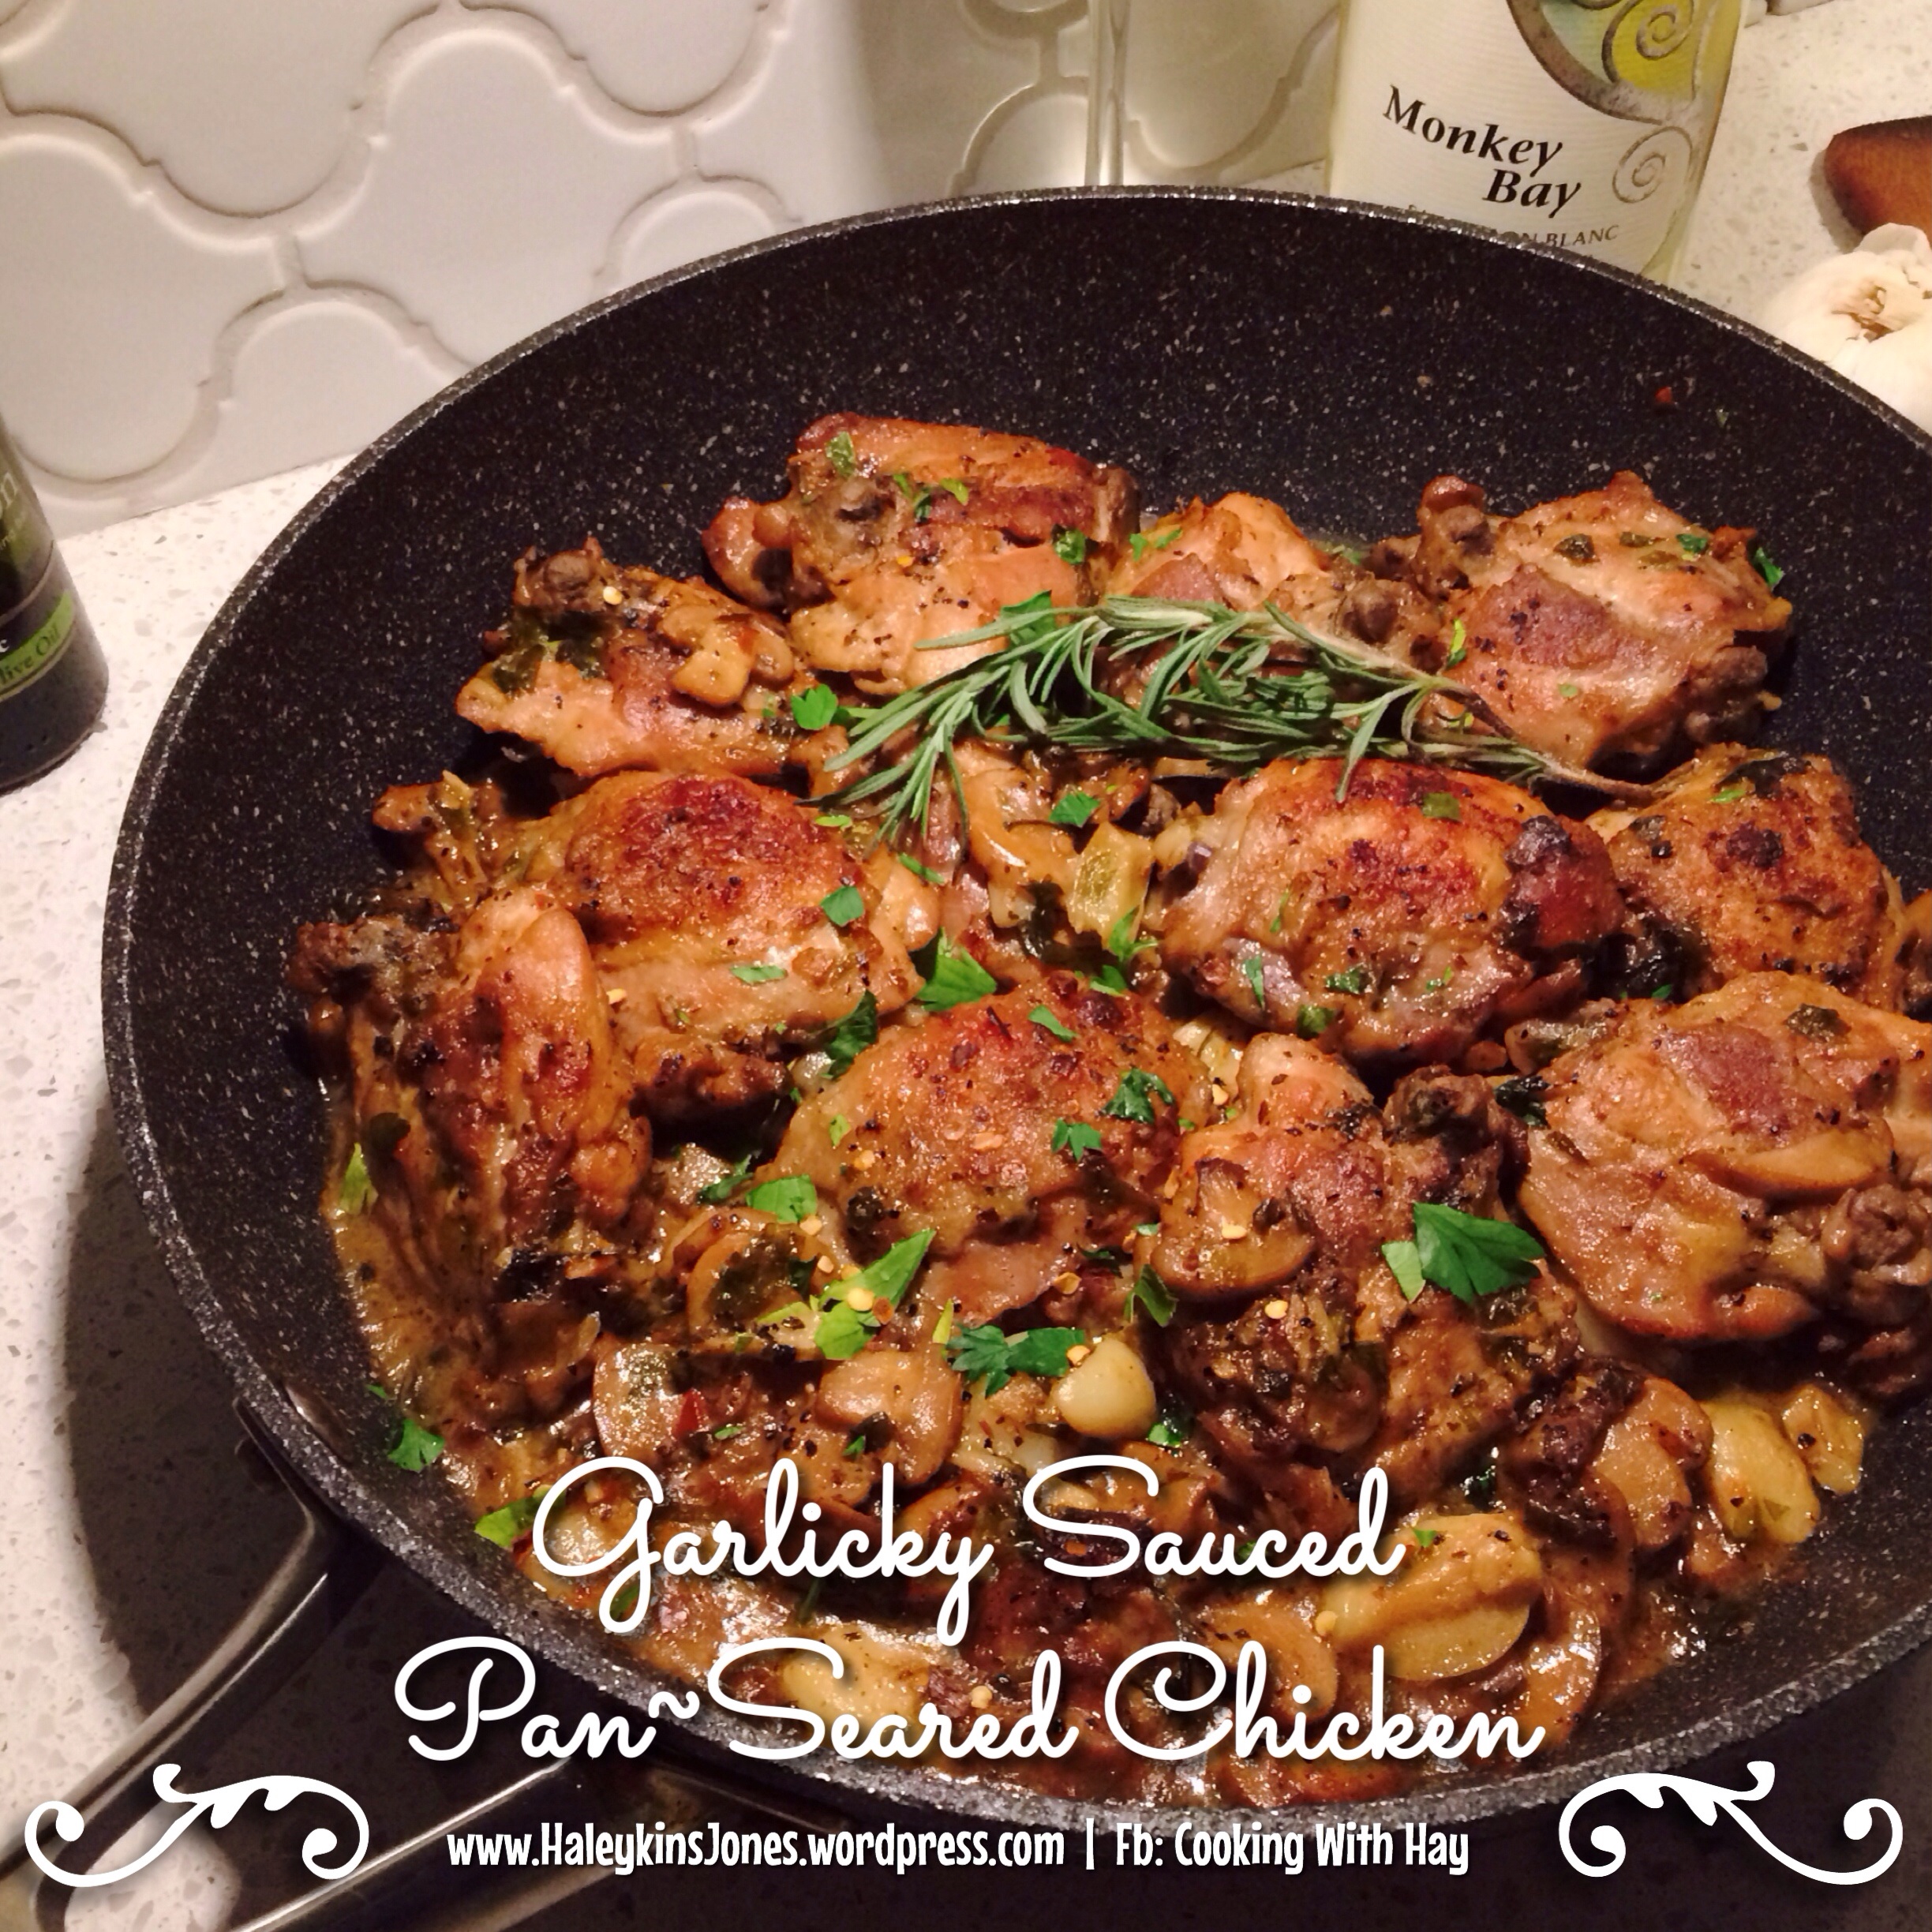
GARLICKY SAUCED PAN~SEARED CHICKEN
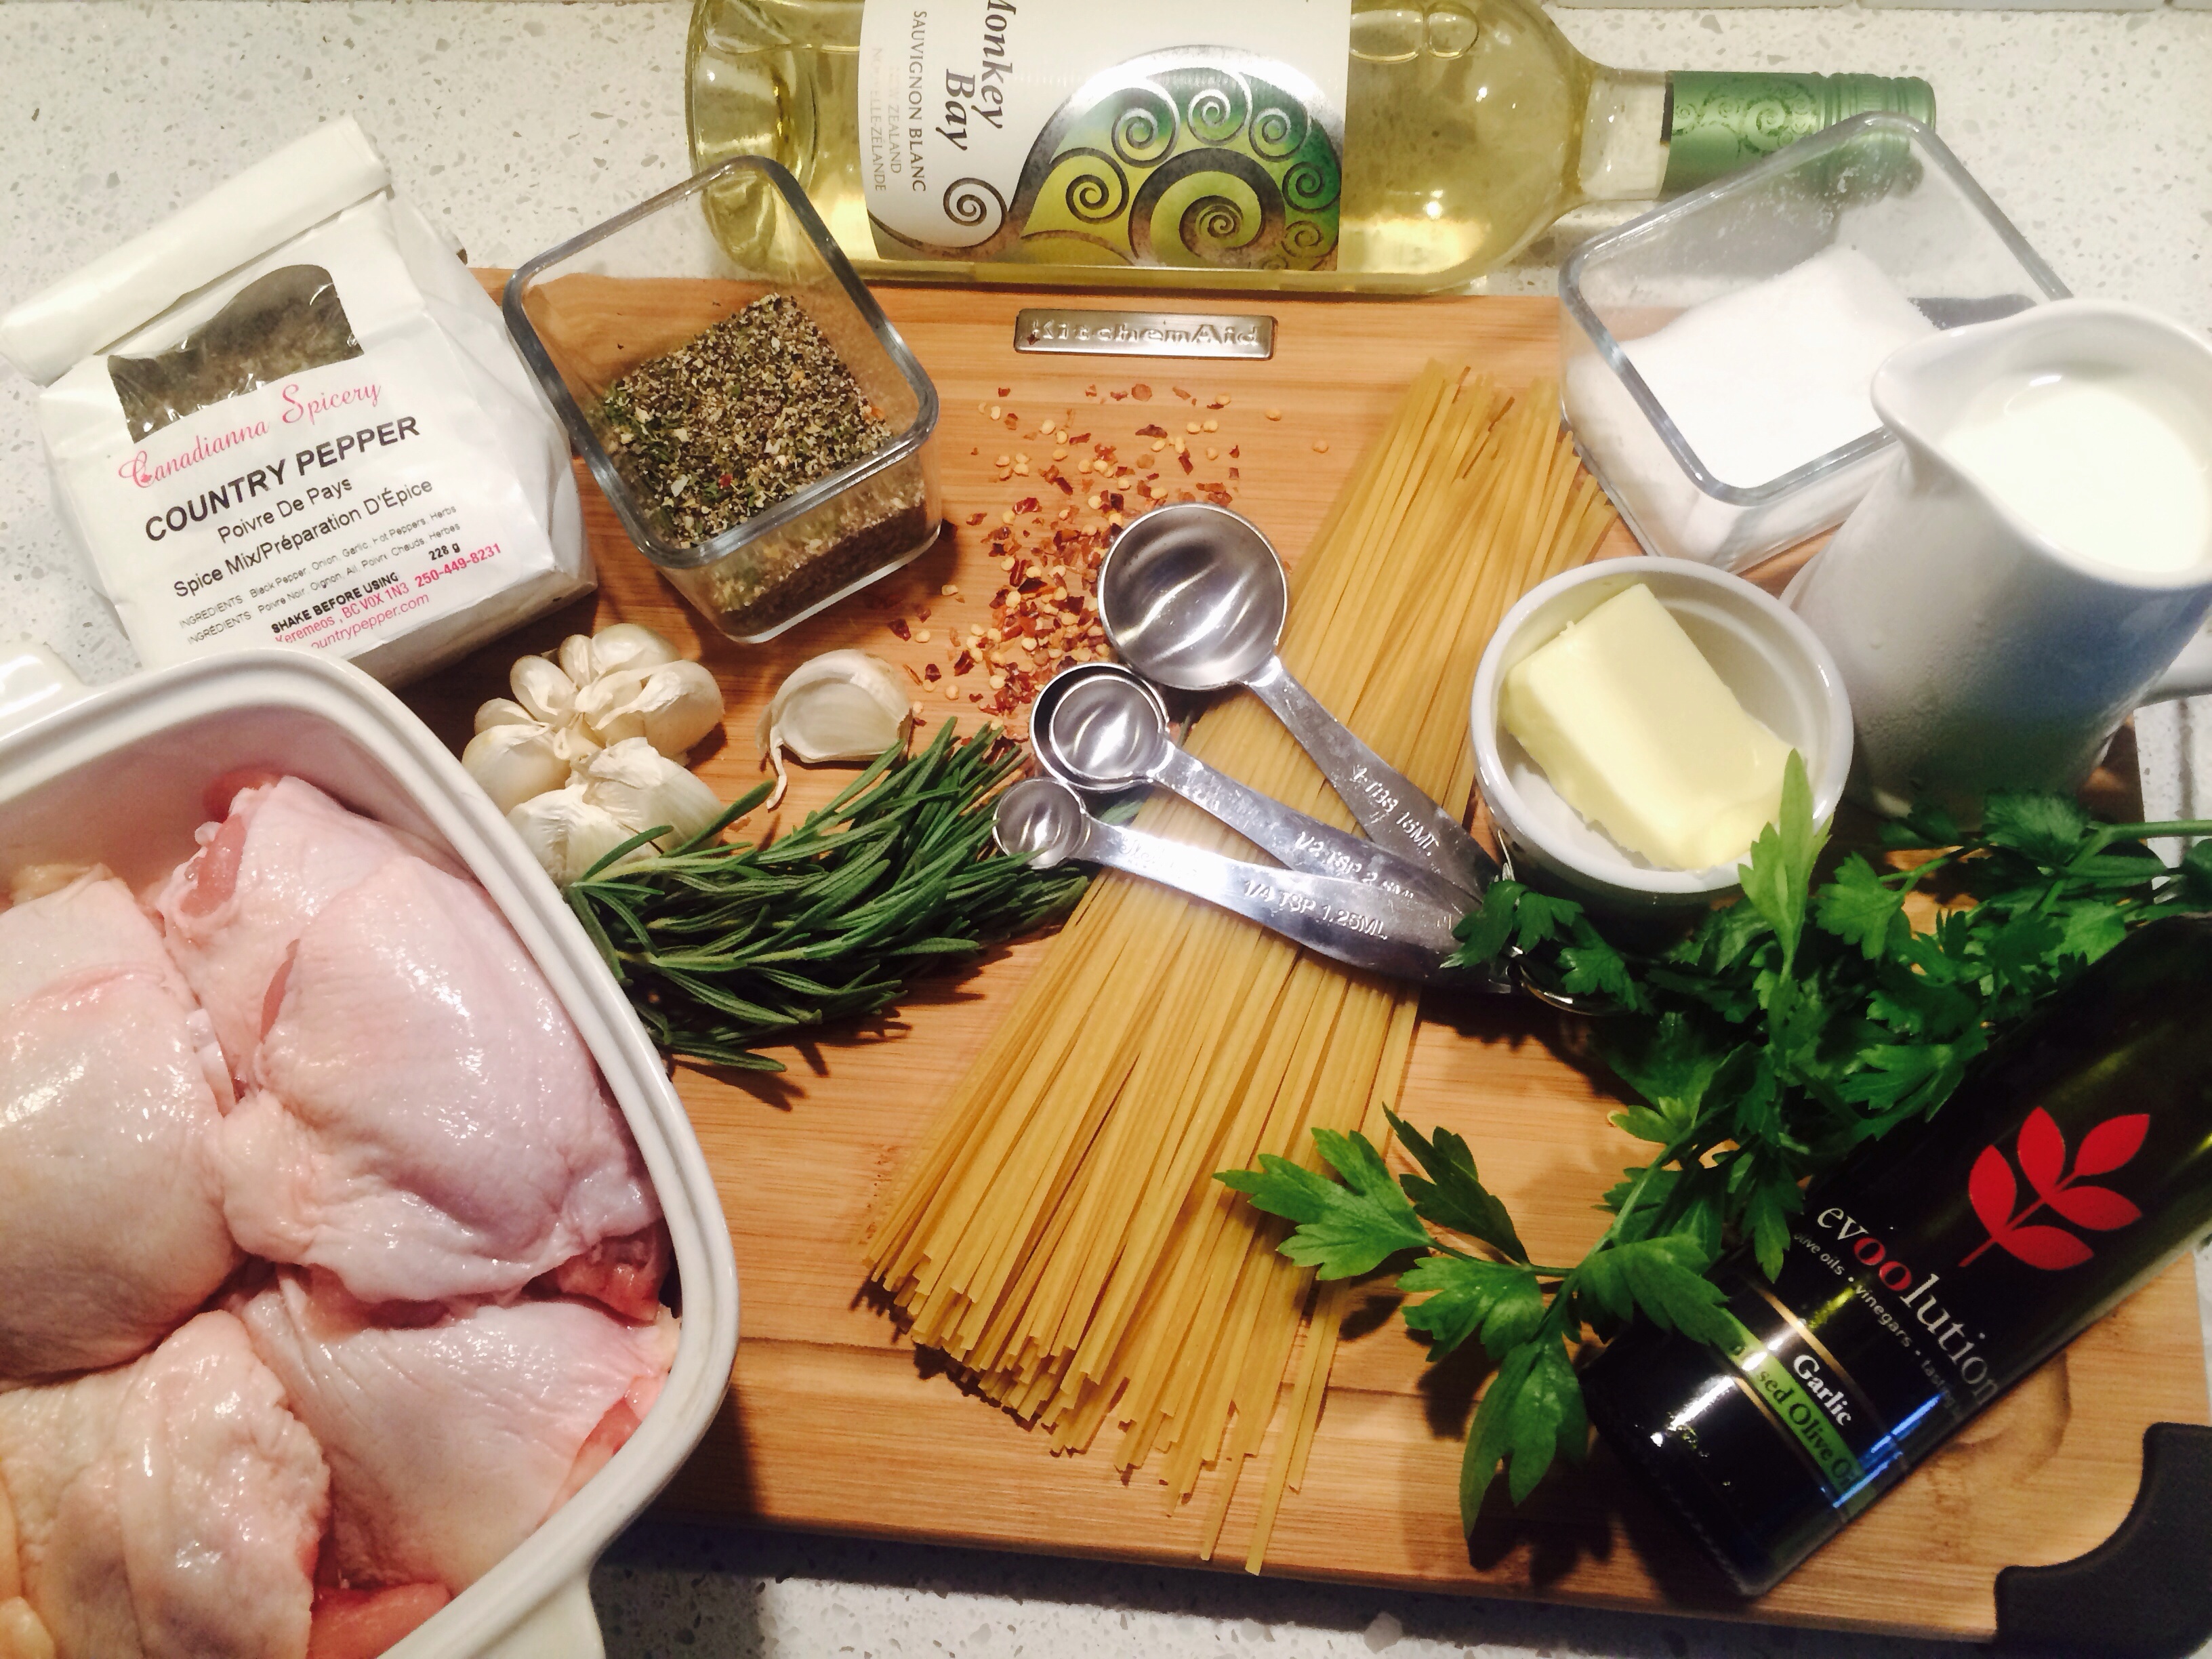
INGREDIENTS
♥ 4 T. OLIVE OIL
♥ 1 LARGE PACK OF CHICKEN THIGHS
♥ ½ TSP. SALT
♥ ½ TSP. PEPPER
♥ 2 CUPS SLICED FRESH MUSHROOMS
♥ 1 T. CHILI PEPPER FLAKES
♥ 1½ FISTS OF GARLIC
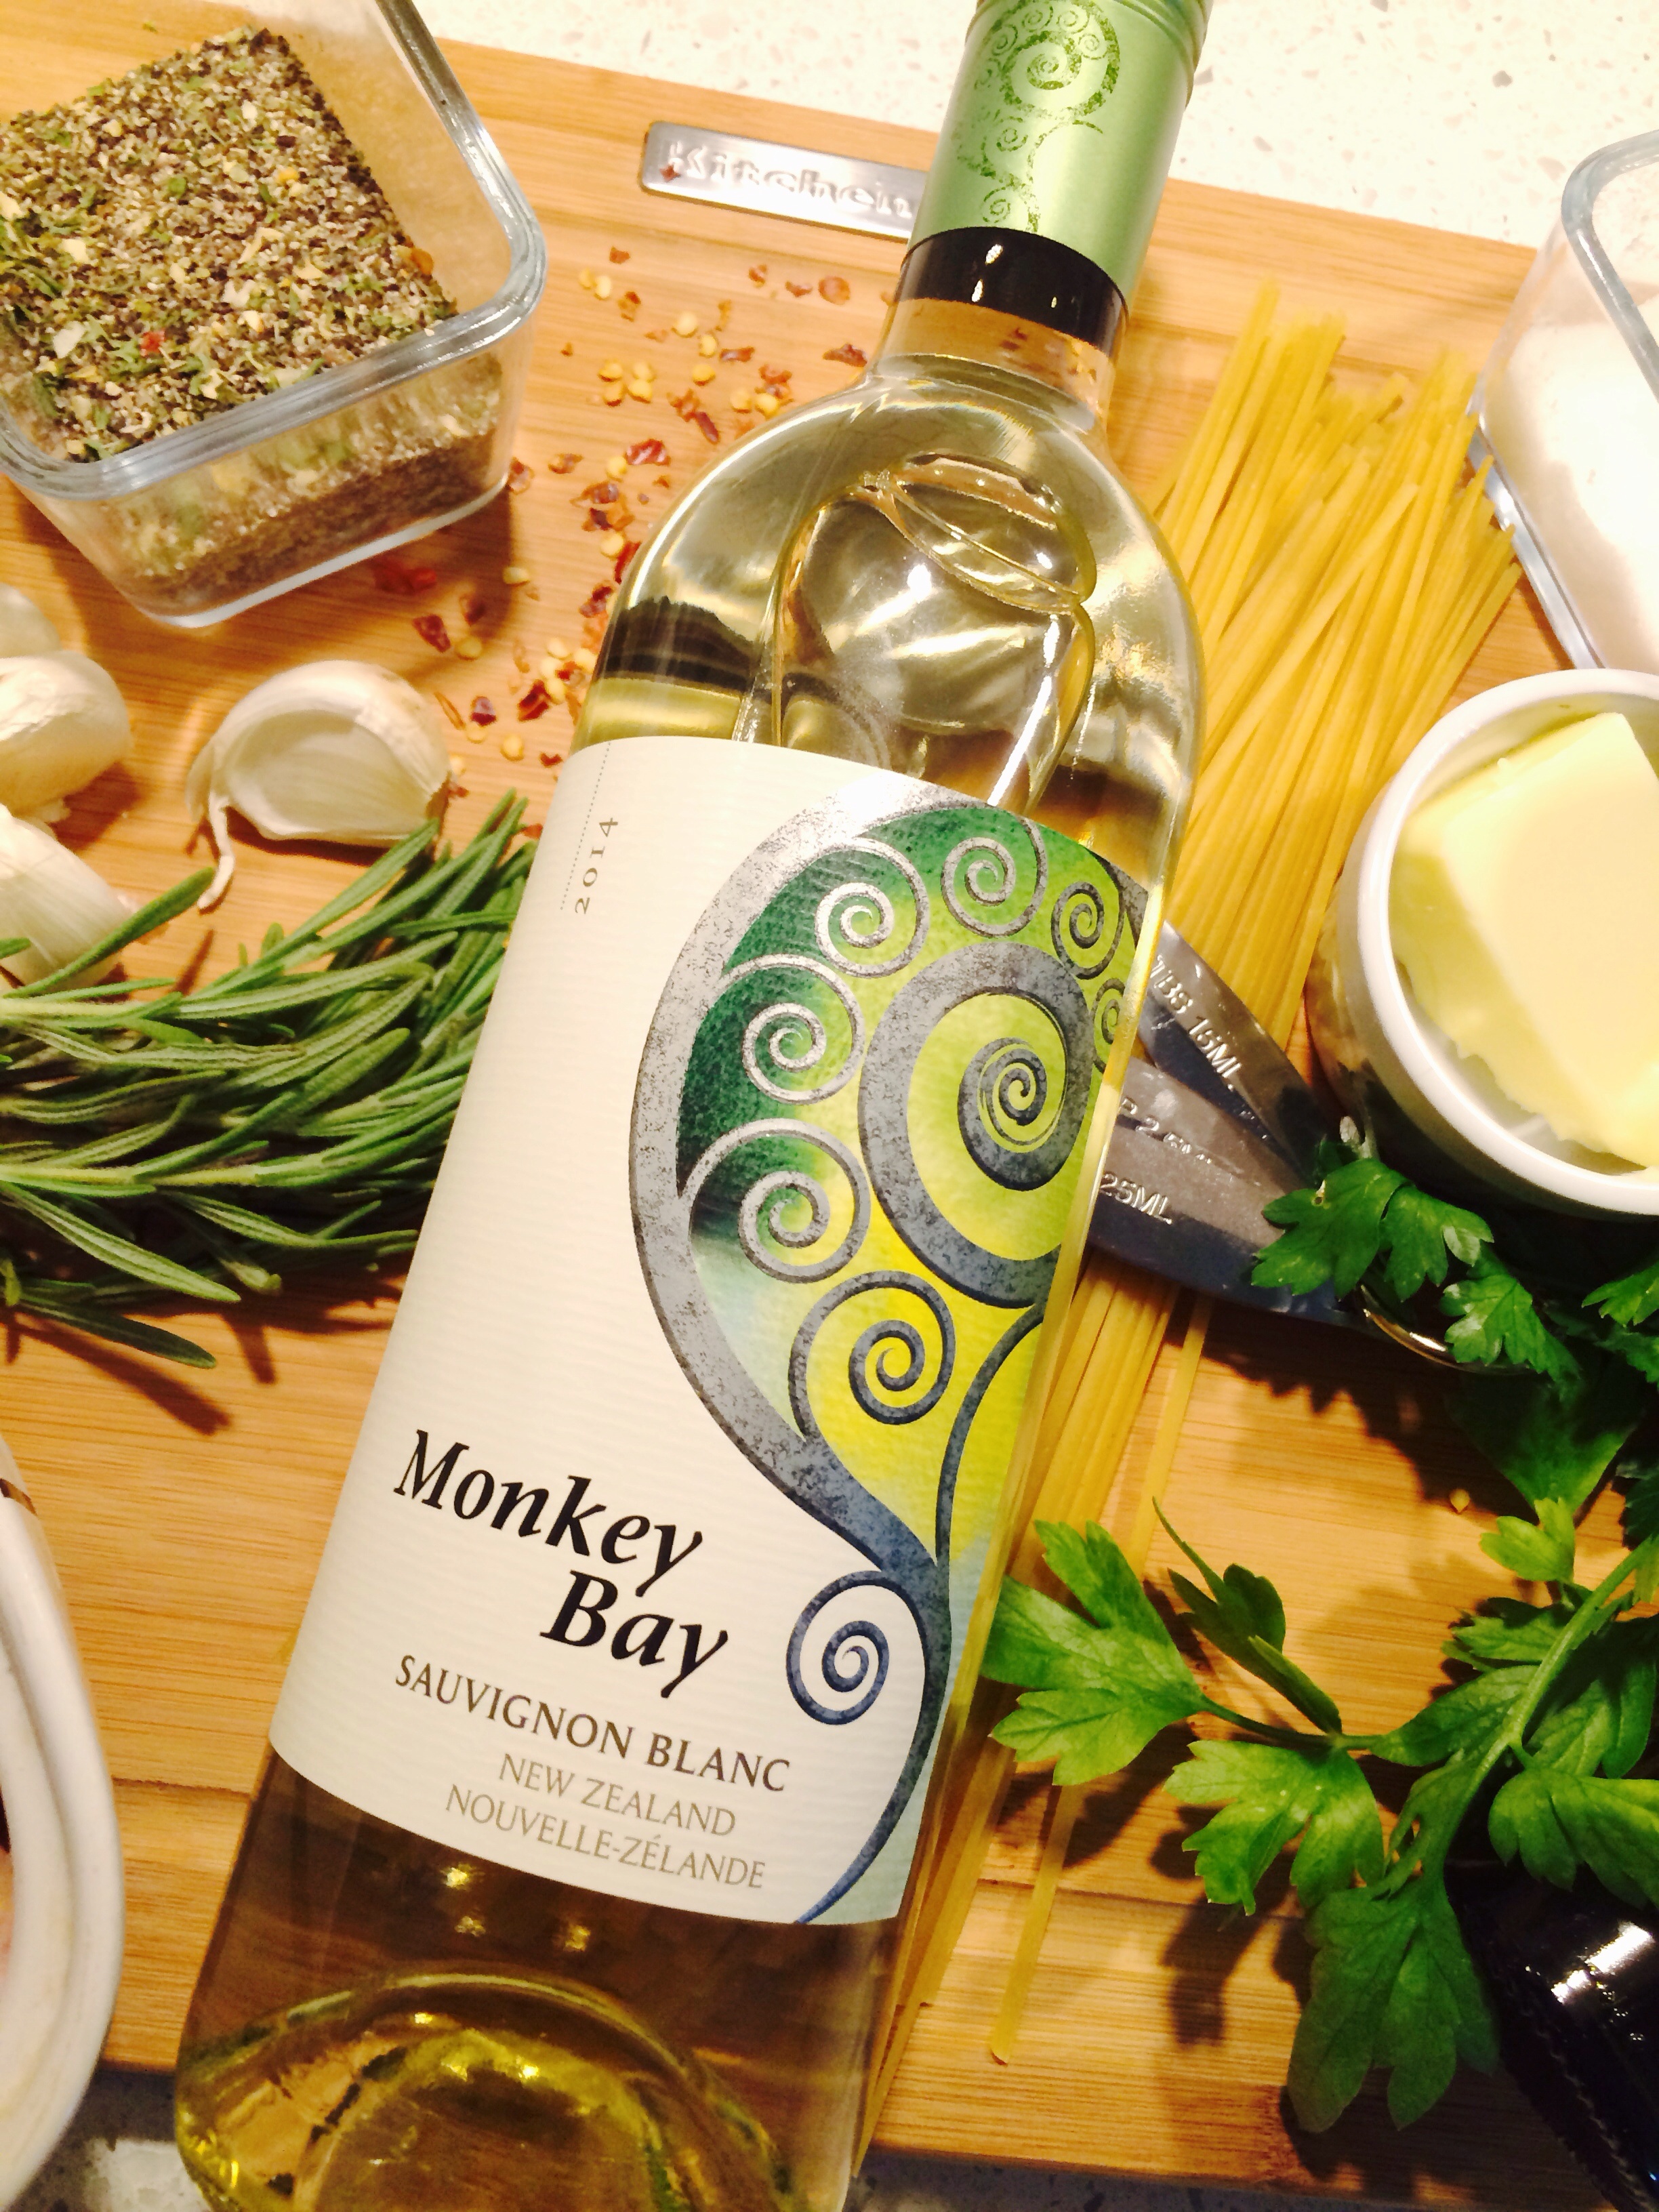
♥ 2½ CUPS SAUVIGNON BLANC WHITE WINE
♥ ¼ CUP MILK
♥ 2 T. BUTTER
♥ ¼ CUP FRESH CHOPPED PARSLEY
♥ 2 SPRIGS FRESH ROSEMARY
DIRECTIONS
PREHEAT OVEN TO 375°F
HEAT THE OIL IN A DEEP DISH PAN ON YOUR STOVE TOP. (OR LARGE DUTCH OVEN OR CAST IRON POT) CAST IRON WORKS BEST I THINK AND THE DEEPER THE BETTER, YOUR APPLIANCE WILL THANK YOU LATER. SPLASHY GREASE BLAH.
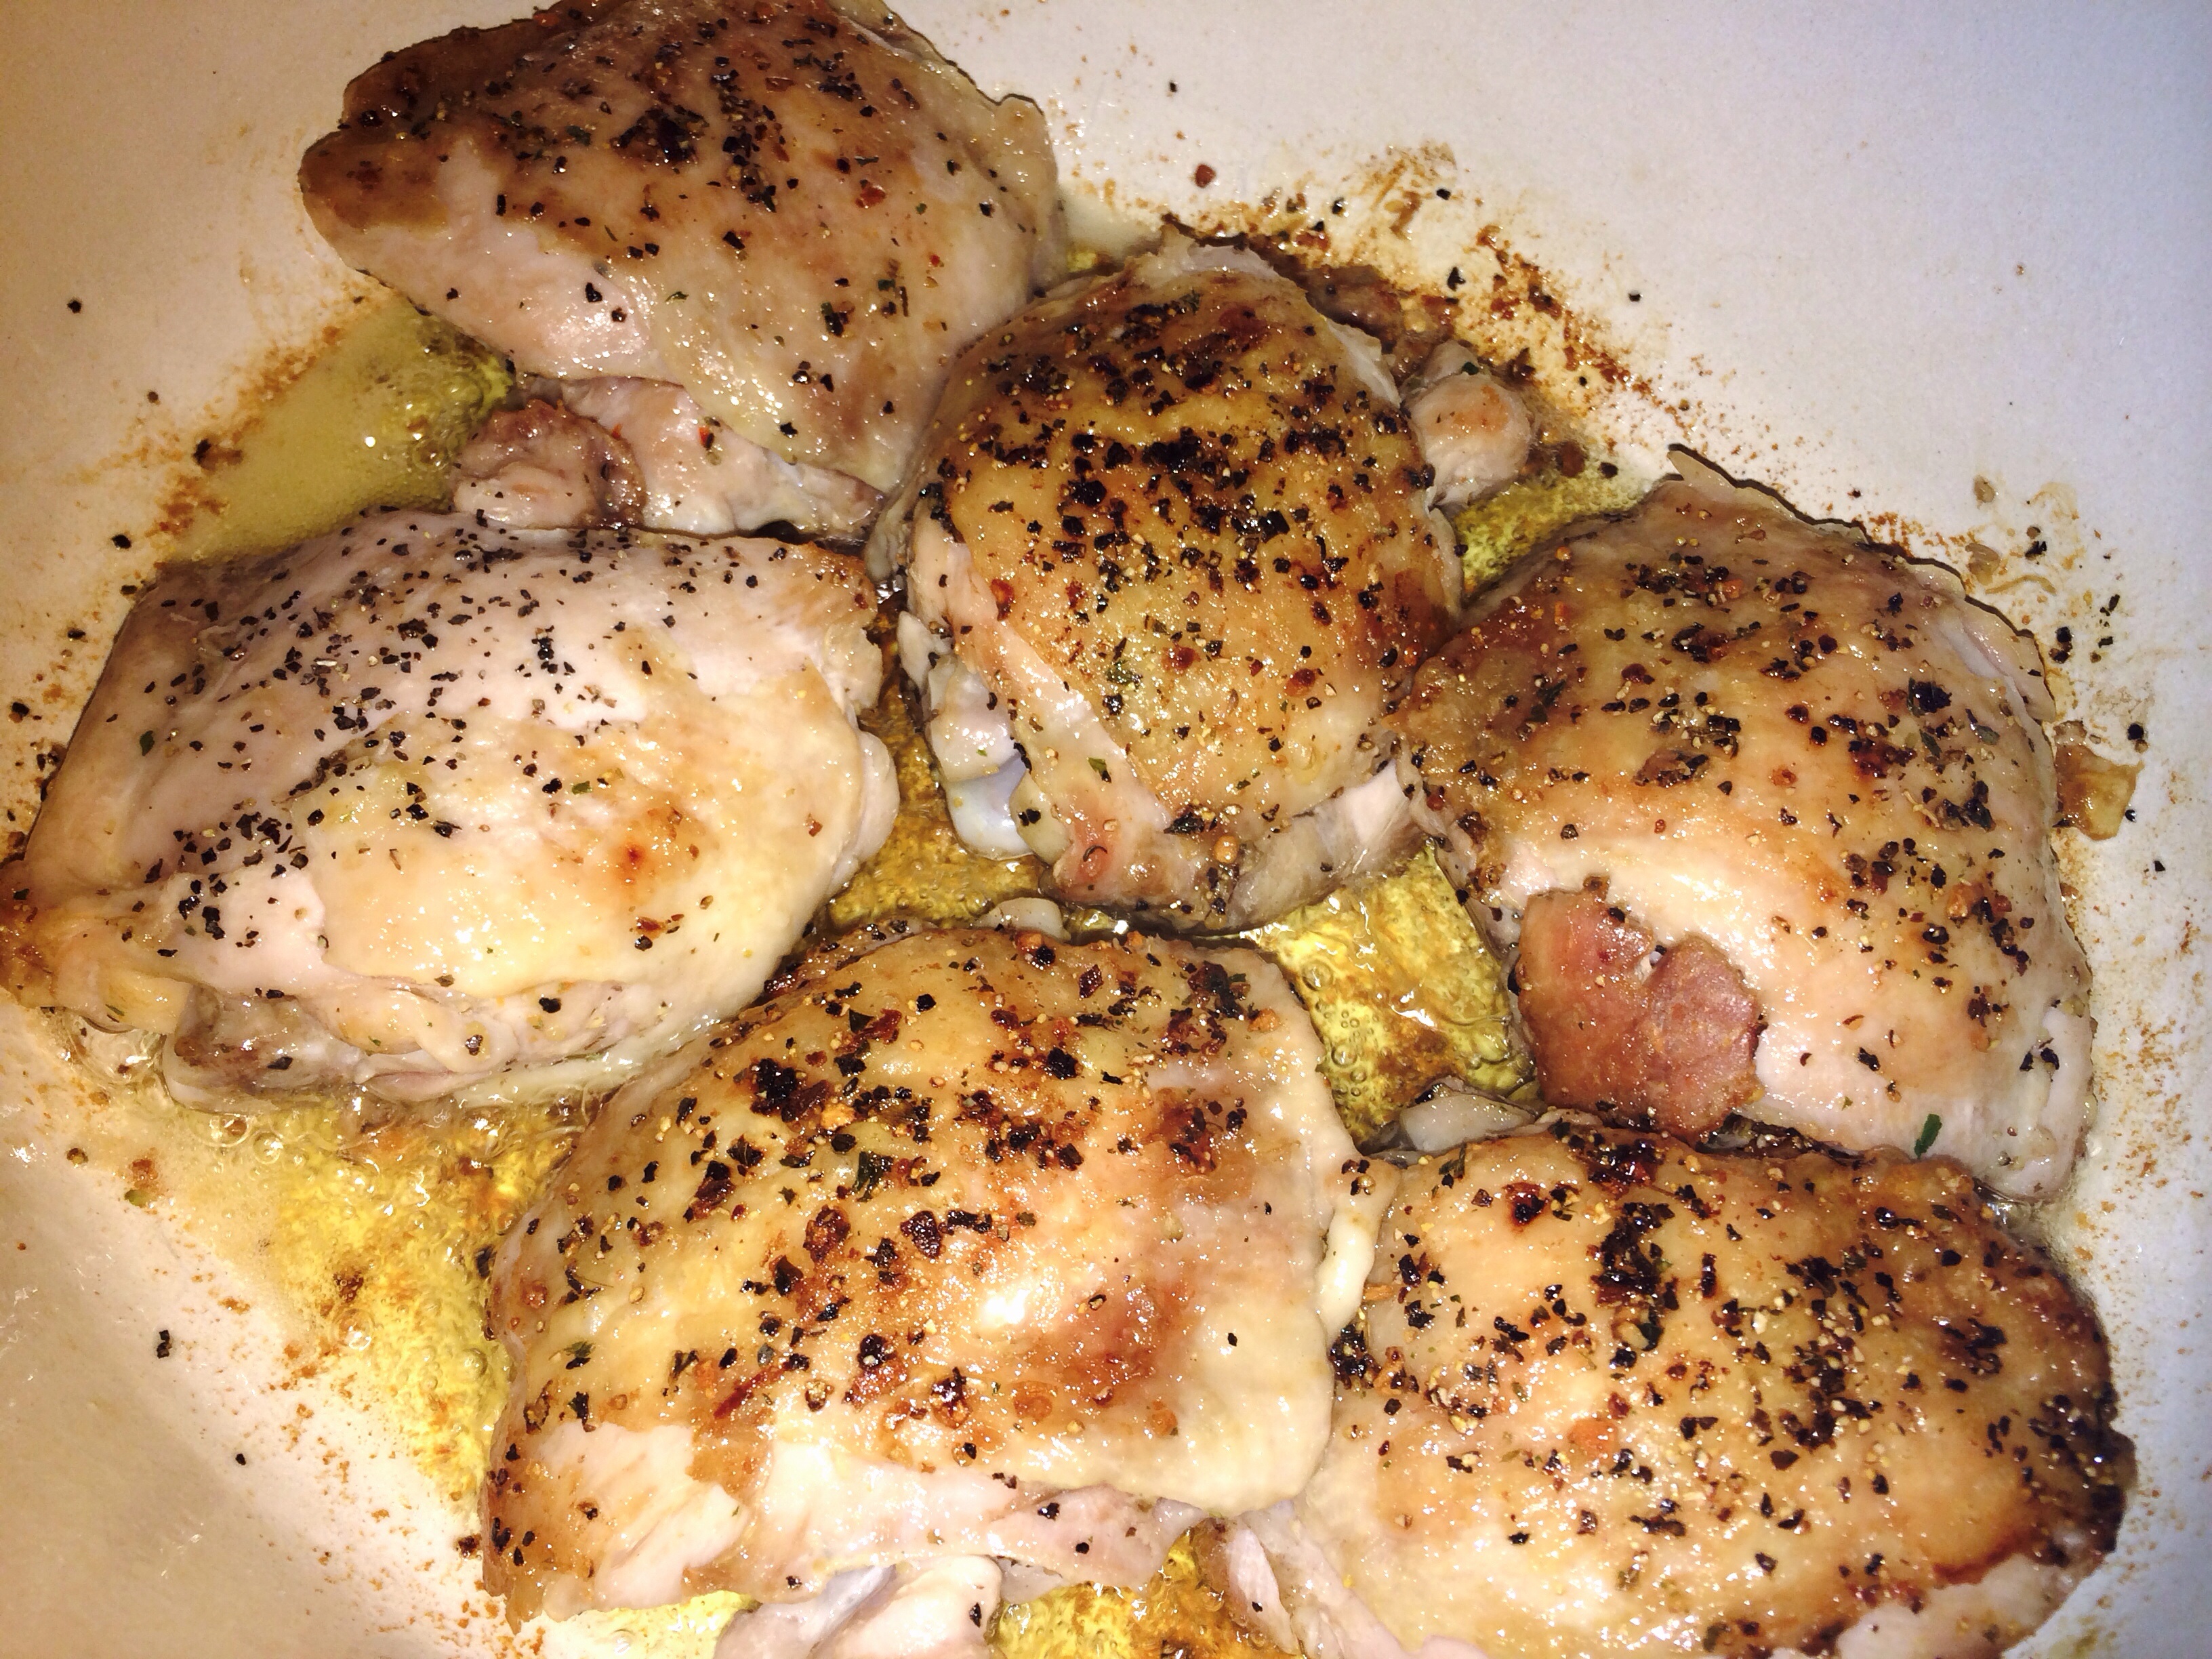
SEASON THE CHICKEN THIGHS WITH SALT AND PEPPER AND PLACE CHICKEN IN THE PAN. SEAR THESE BAD BOYS UP UNTIL GOLDEN AND THE JUICES JUST RUN CLEAR. THEY WILL COOK MORE IN THE SAUCE.
REMOVE THE SEARED CHICKEN FROM THE PAN AND SET ASIDE.
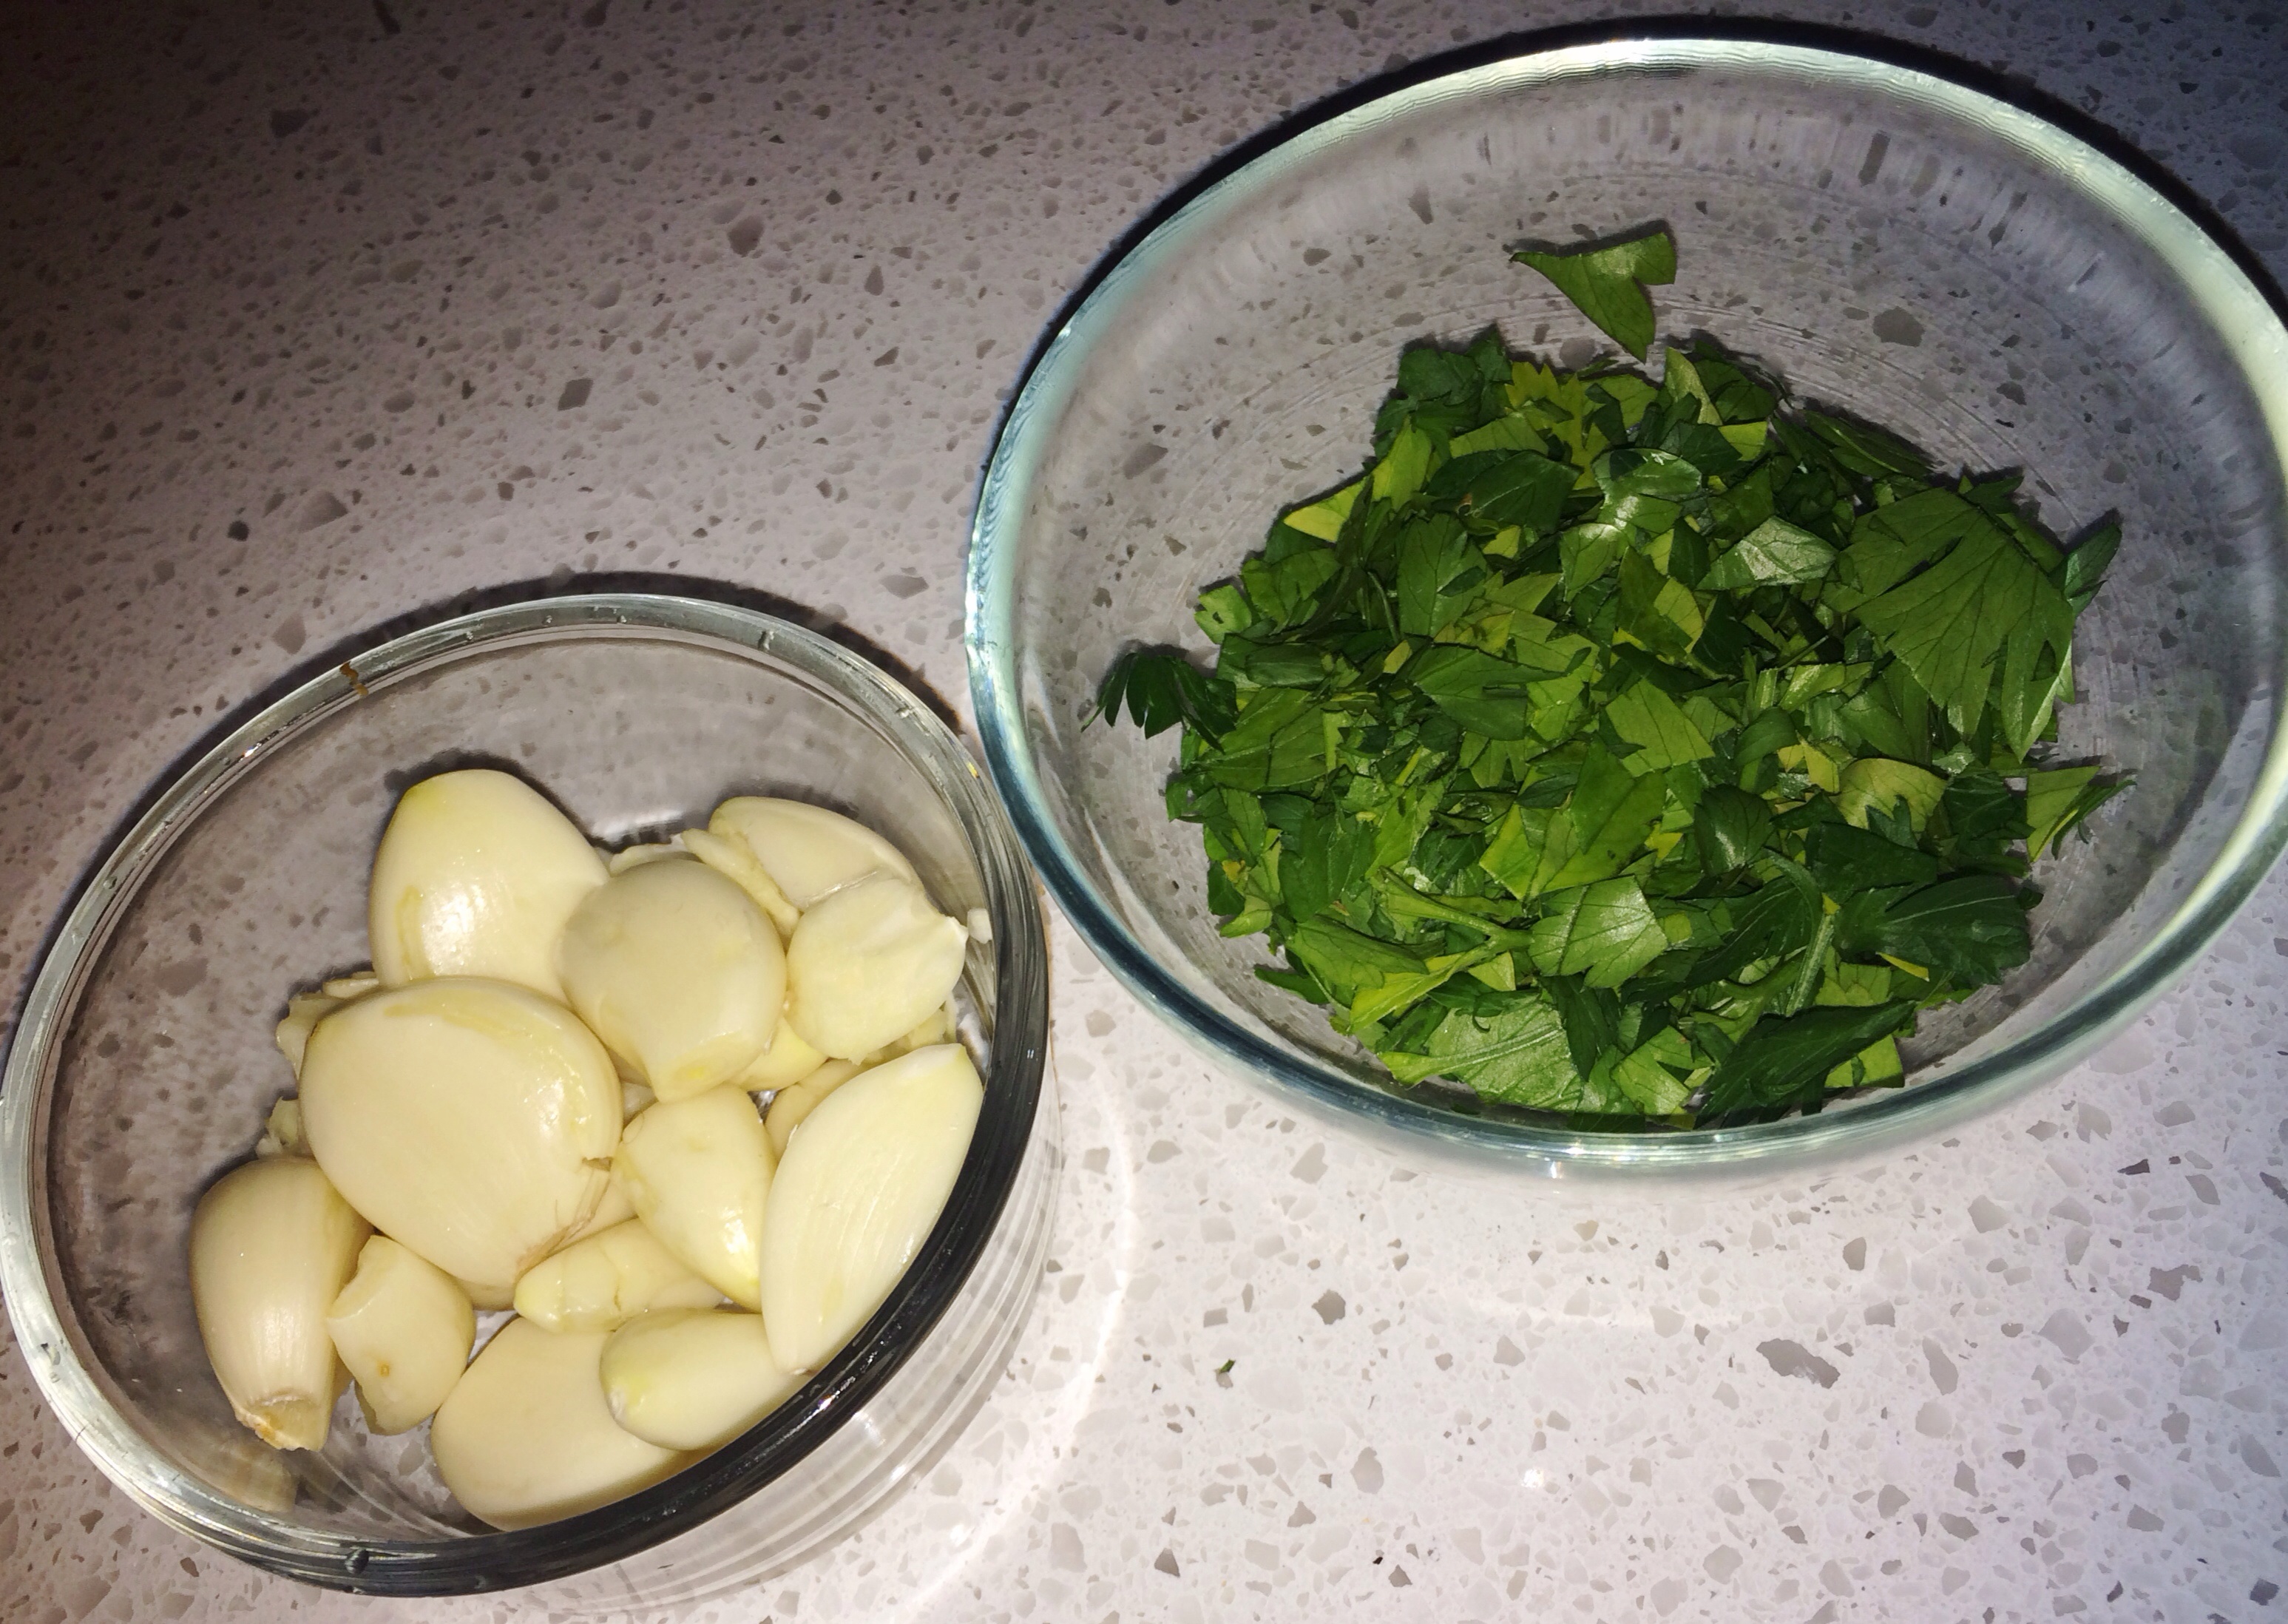
SEPARATE THE GARLIC CLOVES AND PEEL THEM. ADD THE MUSHROOMS, PEPPER FLAKES AND GARLIC CLOVES TO THE CHICKEN PAN AND IT’S LEFTOVER LIQUIDS.
SAUTE UNTIL TENDER AND GOLDEN, BUT MAKE CERTAIN NOT TO BURN THE GARLIC. TILL JUST GOLDEN. GARLIC GOES QUITE BITTER WHEN OVERCOOKED.
ADD THE WINE, MILK, BUTTER AND STIR IN THE PARSLEY.
GENTLY ADD THE CHICKEN BACK TO THE PAN.
ADD THE ROSEMARY SPRIGS AND COVER.
PLACE IN PREHEATED OVEN. BAKE FOR 20-30 MINUTES. TURNING THE CHICKEN OVER HALF WAY THROUGH.
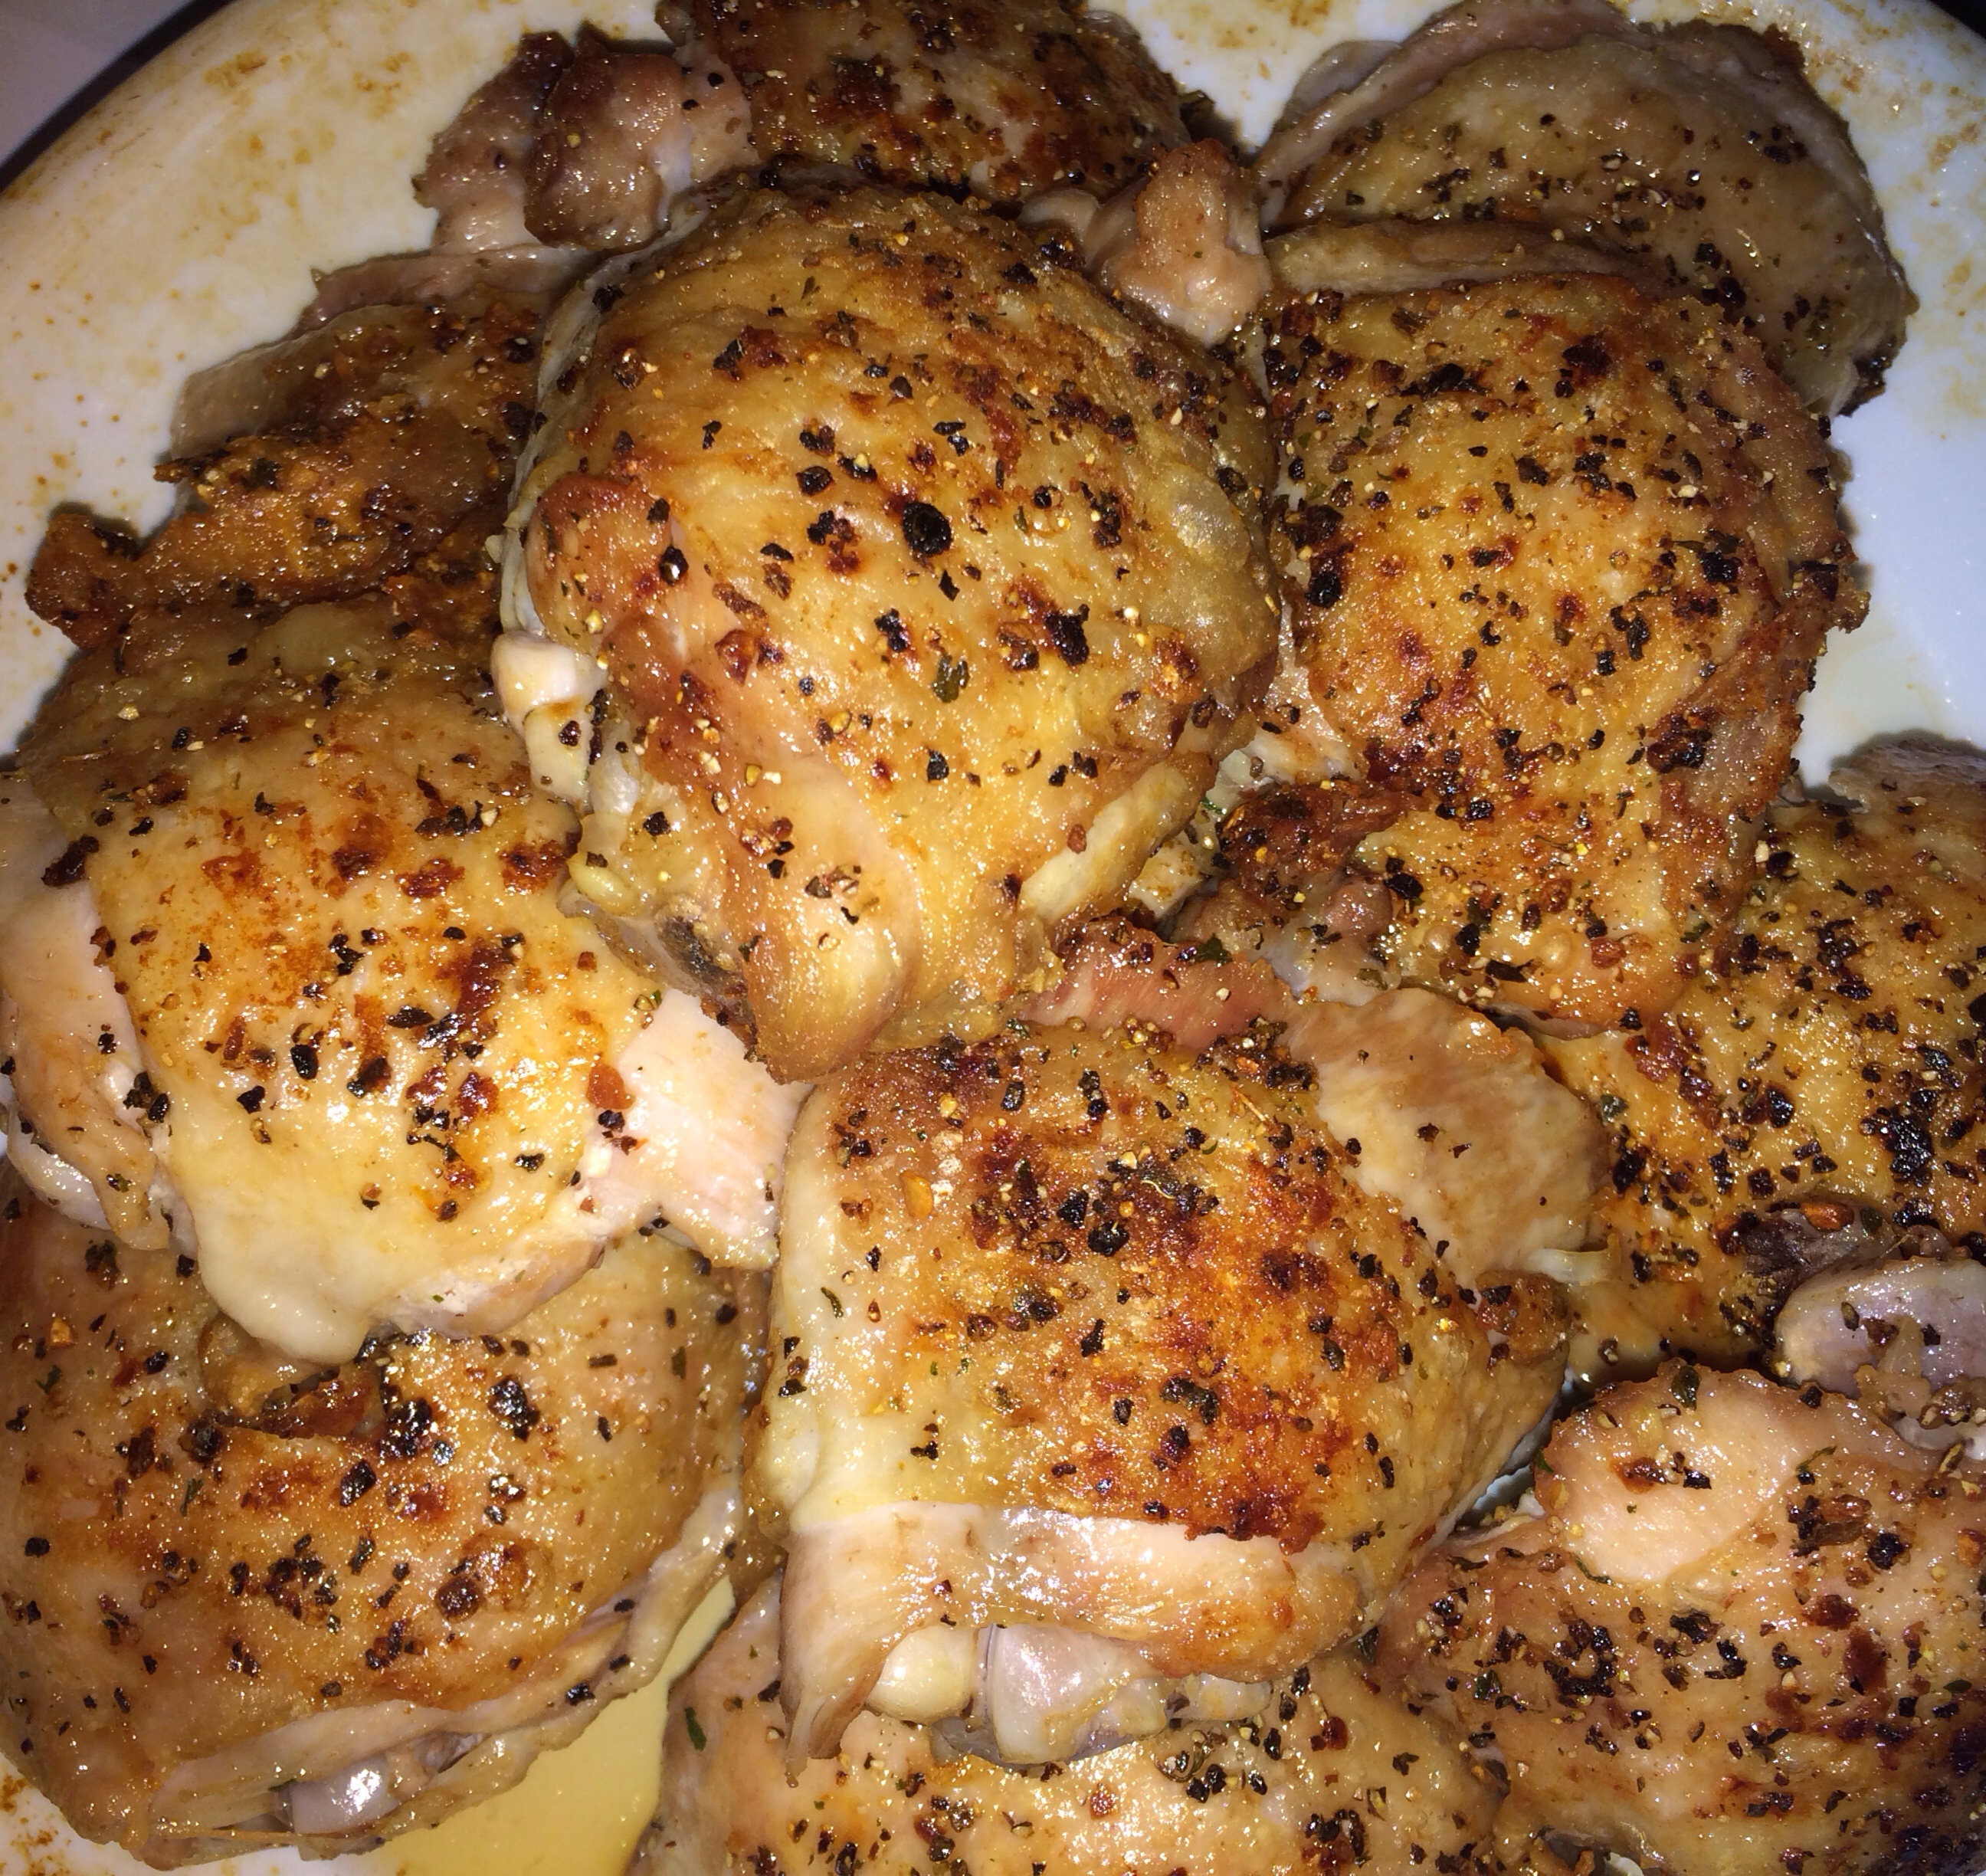
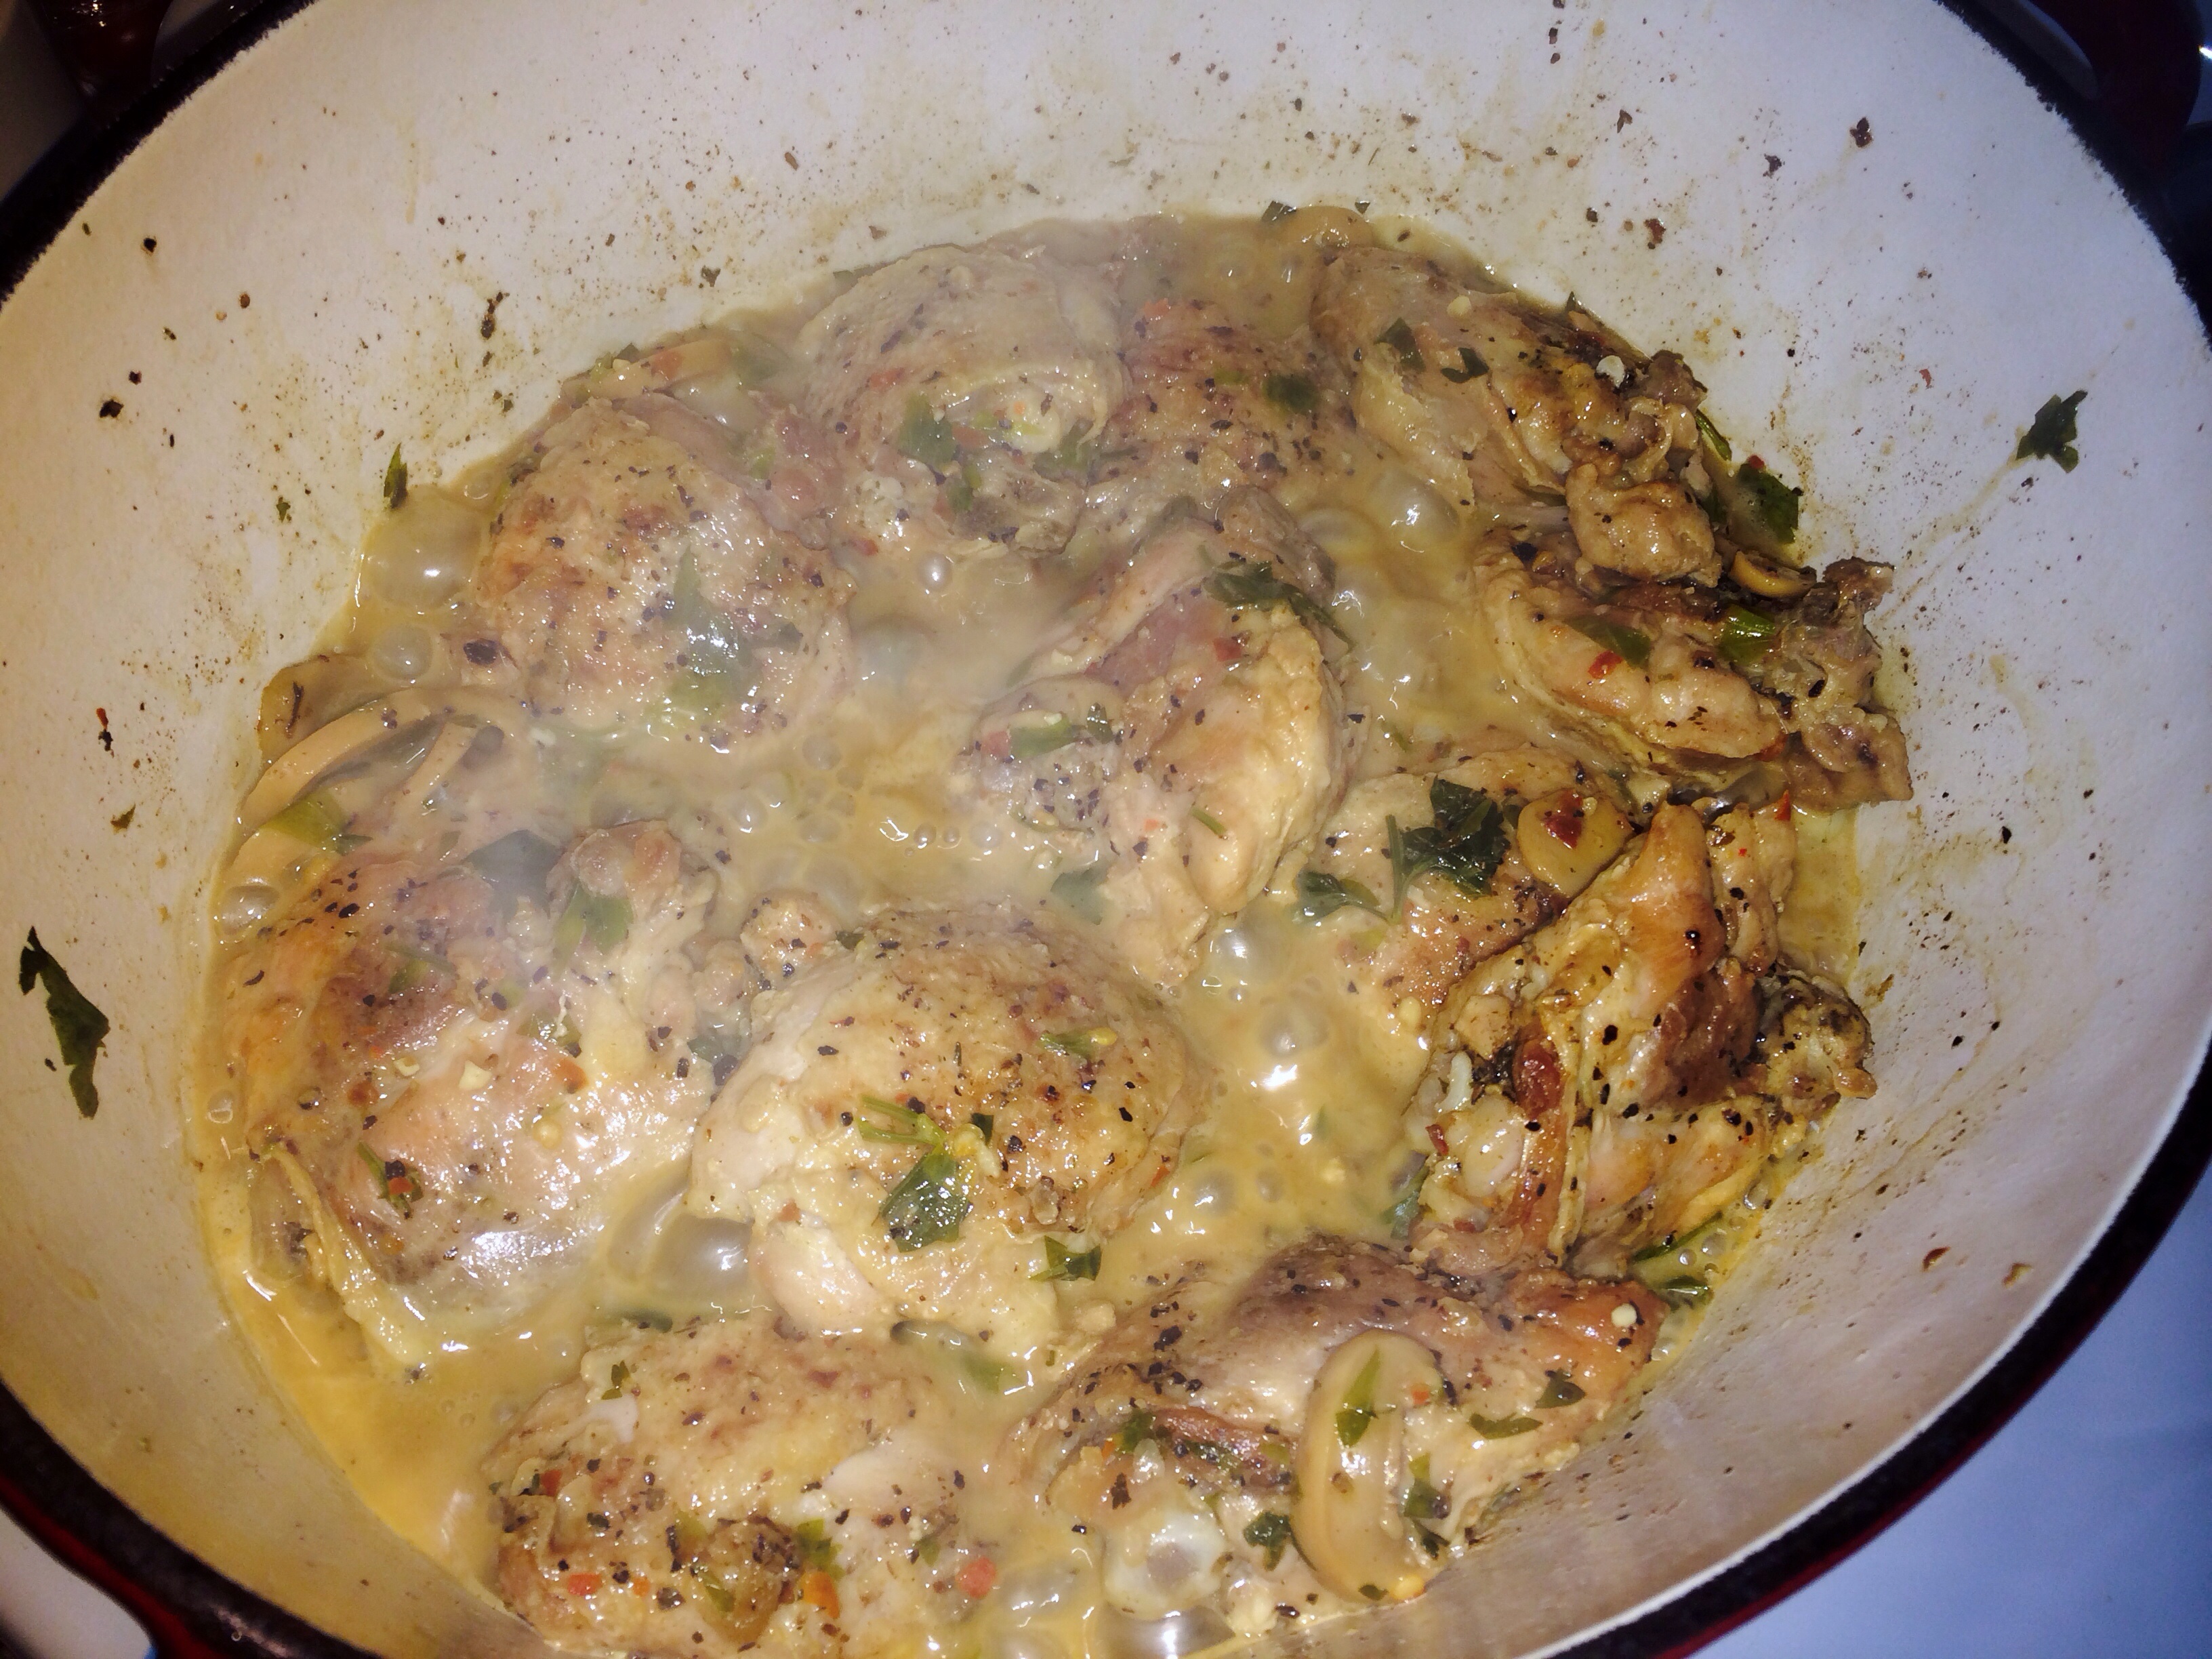
REMOVE FROM OVEN WHEN THE SAUCE STARTS TO REDUCE AND THICKEN UP.
I TRANSFERRED ALL OF THIS TO A HOT FRYING PAN FOR APPEARANCE PURPOSES FOR THIS BLOG BUT YOU CAN CERTAINLY FINISH IT UP IN THE OVEN IF YOU CHOOSE. LESS MESS. HOWEVER IF THE SAUCE IS TOO DRY YOU MAY WANT TO ADD MORE WINE AND LET IT SIMMER A BIT LONGER. THIS WAS DEFINITELY EASIER TO DO ON THE STOVE TOP.
SPOON THE GARLICKY SAUCE OVER THE CHICKEN AND SPRINKLE WITH A LITTLE MORE FRESH PARSLEY AND CHILI PEPPER FLAKES.
SERVED SEARING HOT OVER LINGUINE NOODLES.
I am needing a large tripod and to get my amazing Canon Rebel T3i camera up and running to do these blog photos now that the “Cooking With Hay” Kitchen is nearing completion!
At the time of making this dish I had cabinets, counters and some lighting in. Oh and the backsplash tile was added but had just been grouted. No appliances, no running water, just a much more appealing place for a food blog photo set.
Regardless, it’s all a vast improvement from the basement temp. kitchen, 2×4 studding and insulation backdrops seen in previous blog photos.
Is ‘garlicky’ even a word ? ? ?
The recipe I was using called for white wine… I have drank wine in the past but by any means, don’t consider myself a wine drinker.
However… GalPal is!
She came to my rescue with some suggestions after I let her know my ingredients and what I was making.
Monkey Bay Sauvigon Blanc from New Zealand was the perfect wine, as this dish was phenomenal. Not too sweet, not to dry. I’m not even going to bother experimenting with other wines.
The bottle… as GalPal mentioned, coordinated nicely with the ingredients needed to make this dish. Thanks for the help Amber!! Guess I should make this for you now hey?!
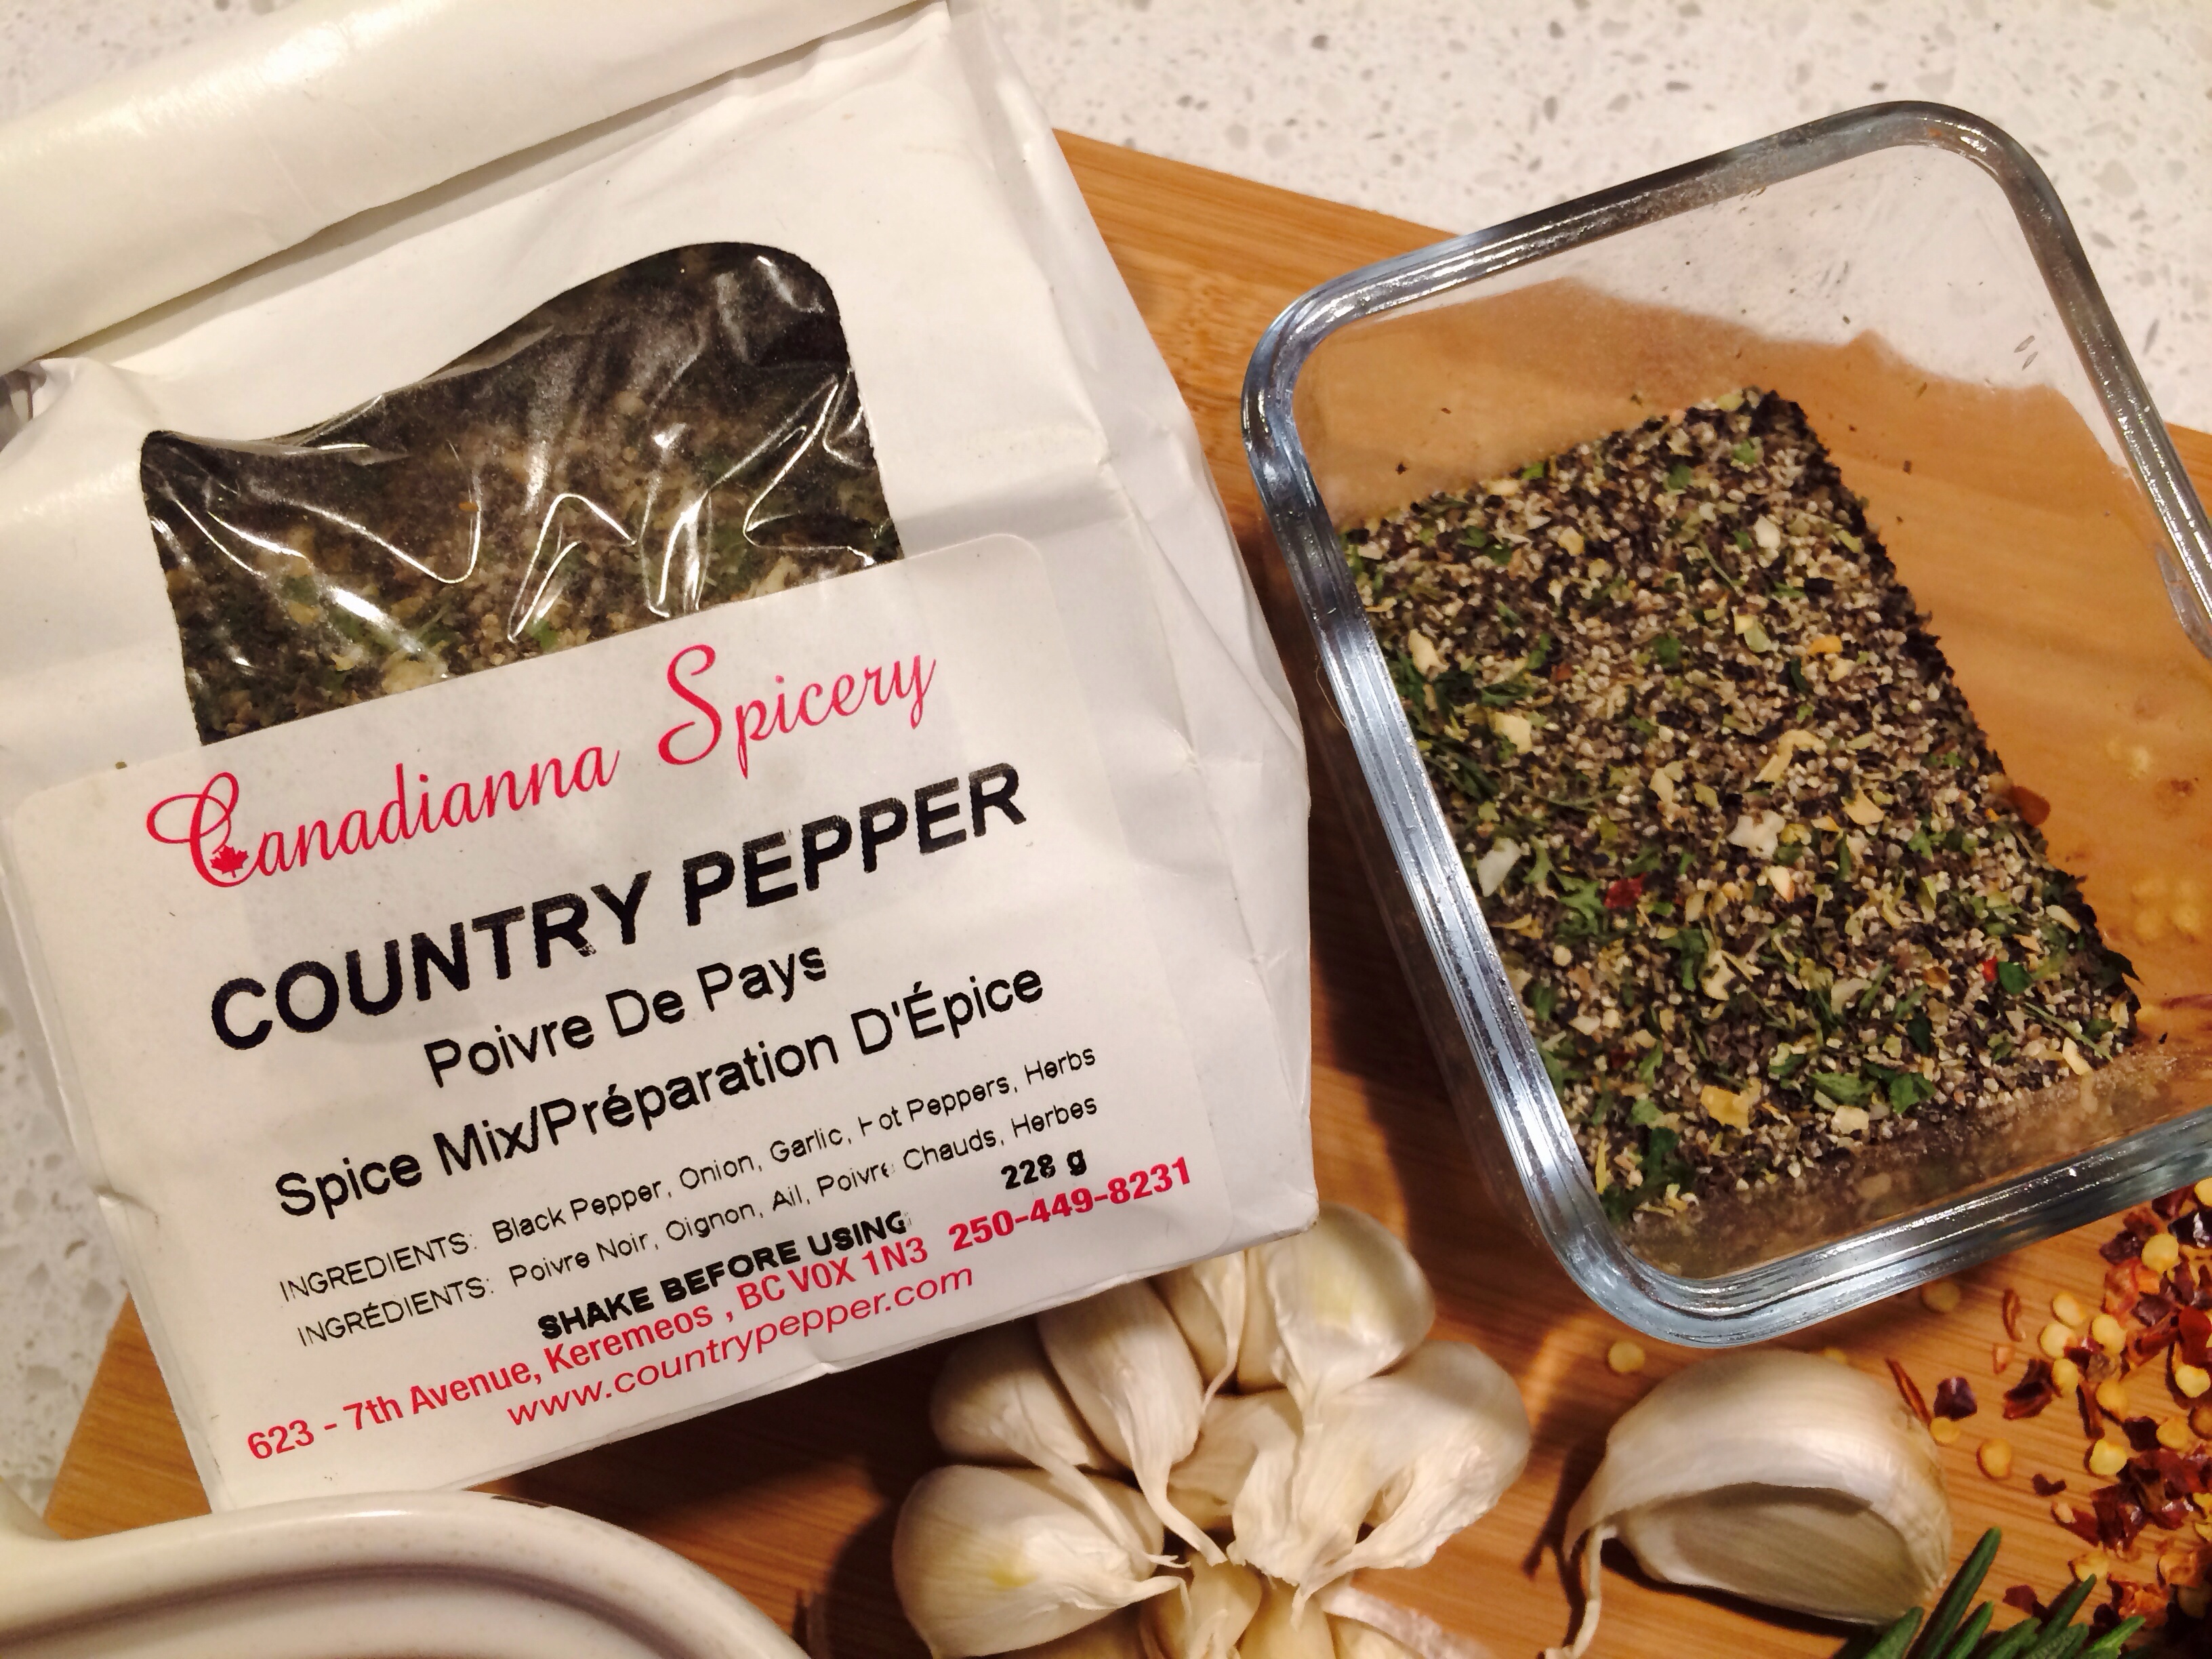
This pepper tho! Gift from Mother-In-Law and I’ve become quite addicted to it. I use it on my sunny side up eggs in the morning to grilled salmon and everything in between. It’s made just a few hours from my house in Keremeos BC. It’s pepper, onions garlic and herbs and is a great change-up to the regular black pepper or fresh ground peppercorns.
Season the chicken thighs with a little salt and sprinkle of pepper. There is enough flavour coming in the garlic and wine and parsley that not much seasonings are needed on the chicken.
I assure you. This dish packs a savory garlic KA-POW with a mix of fragrant herbs. Absolutely delish my gosh!
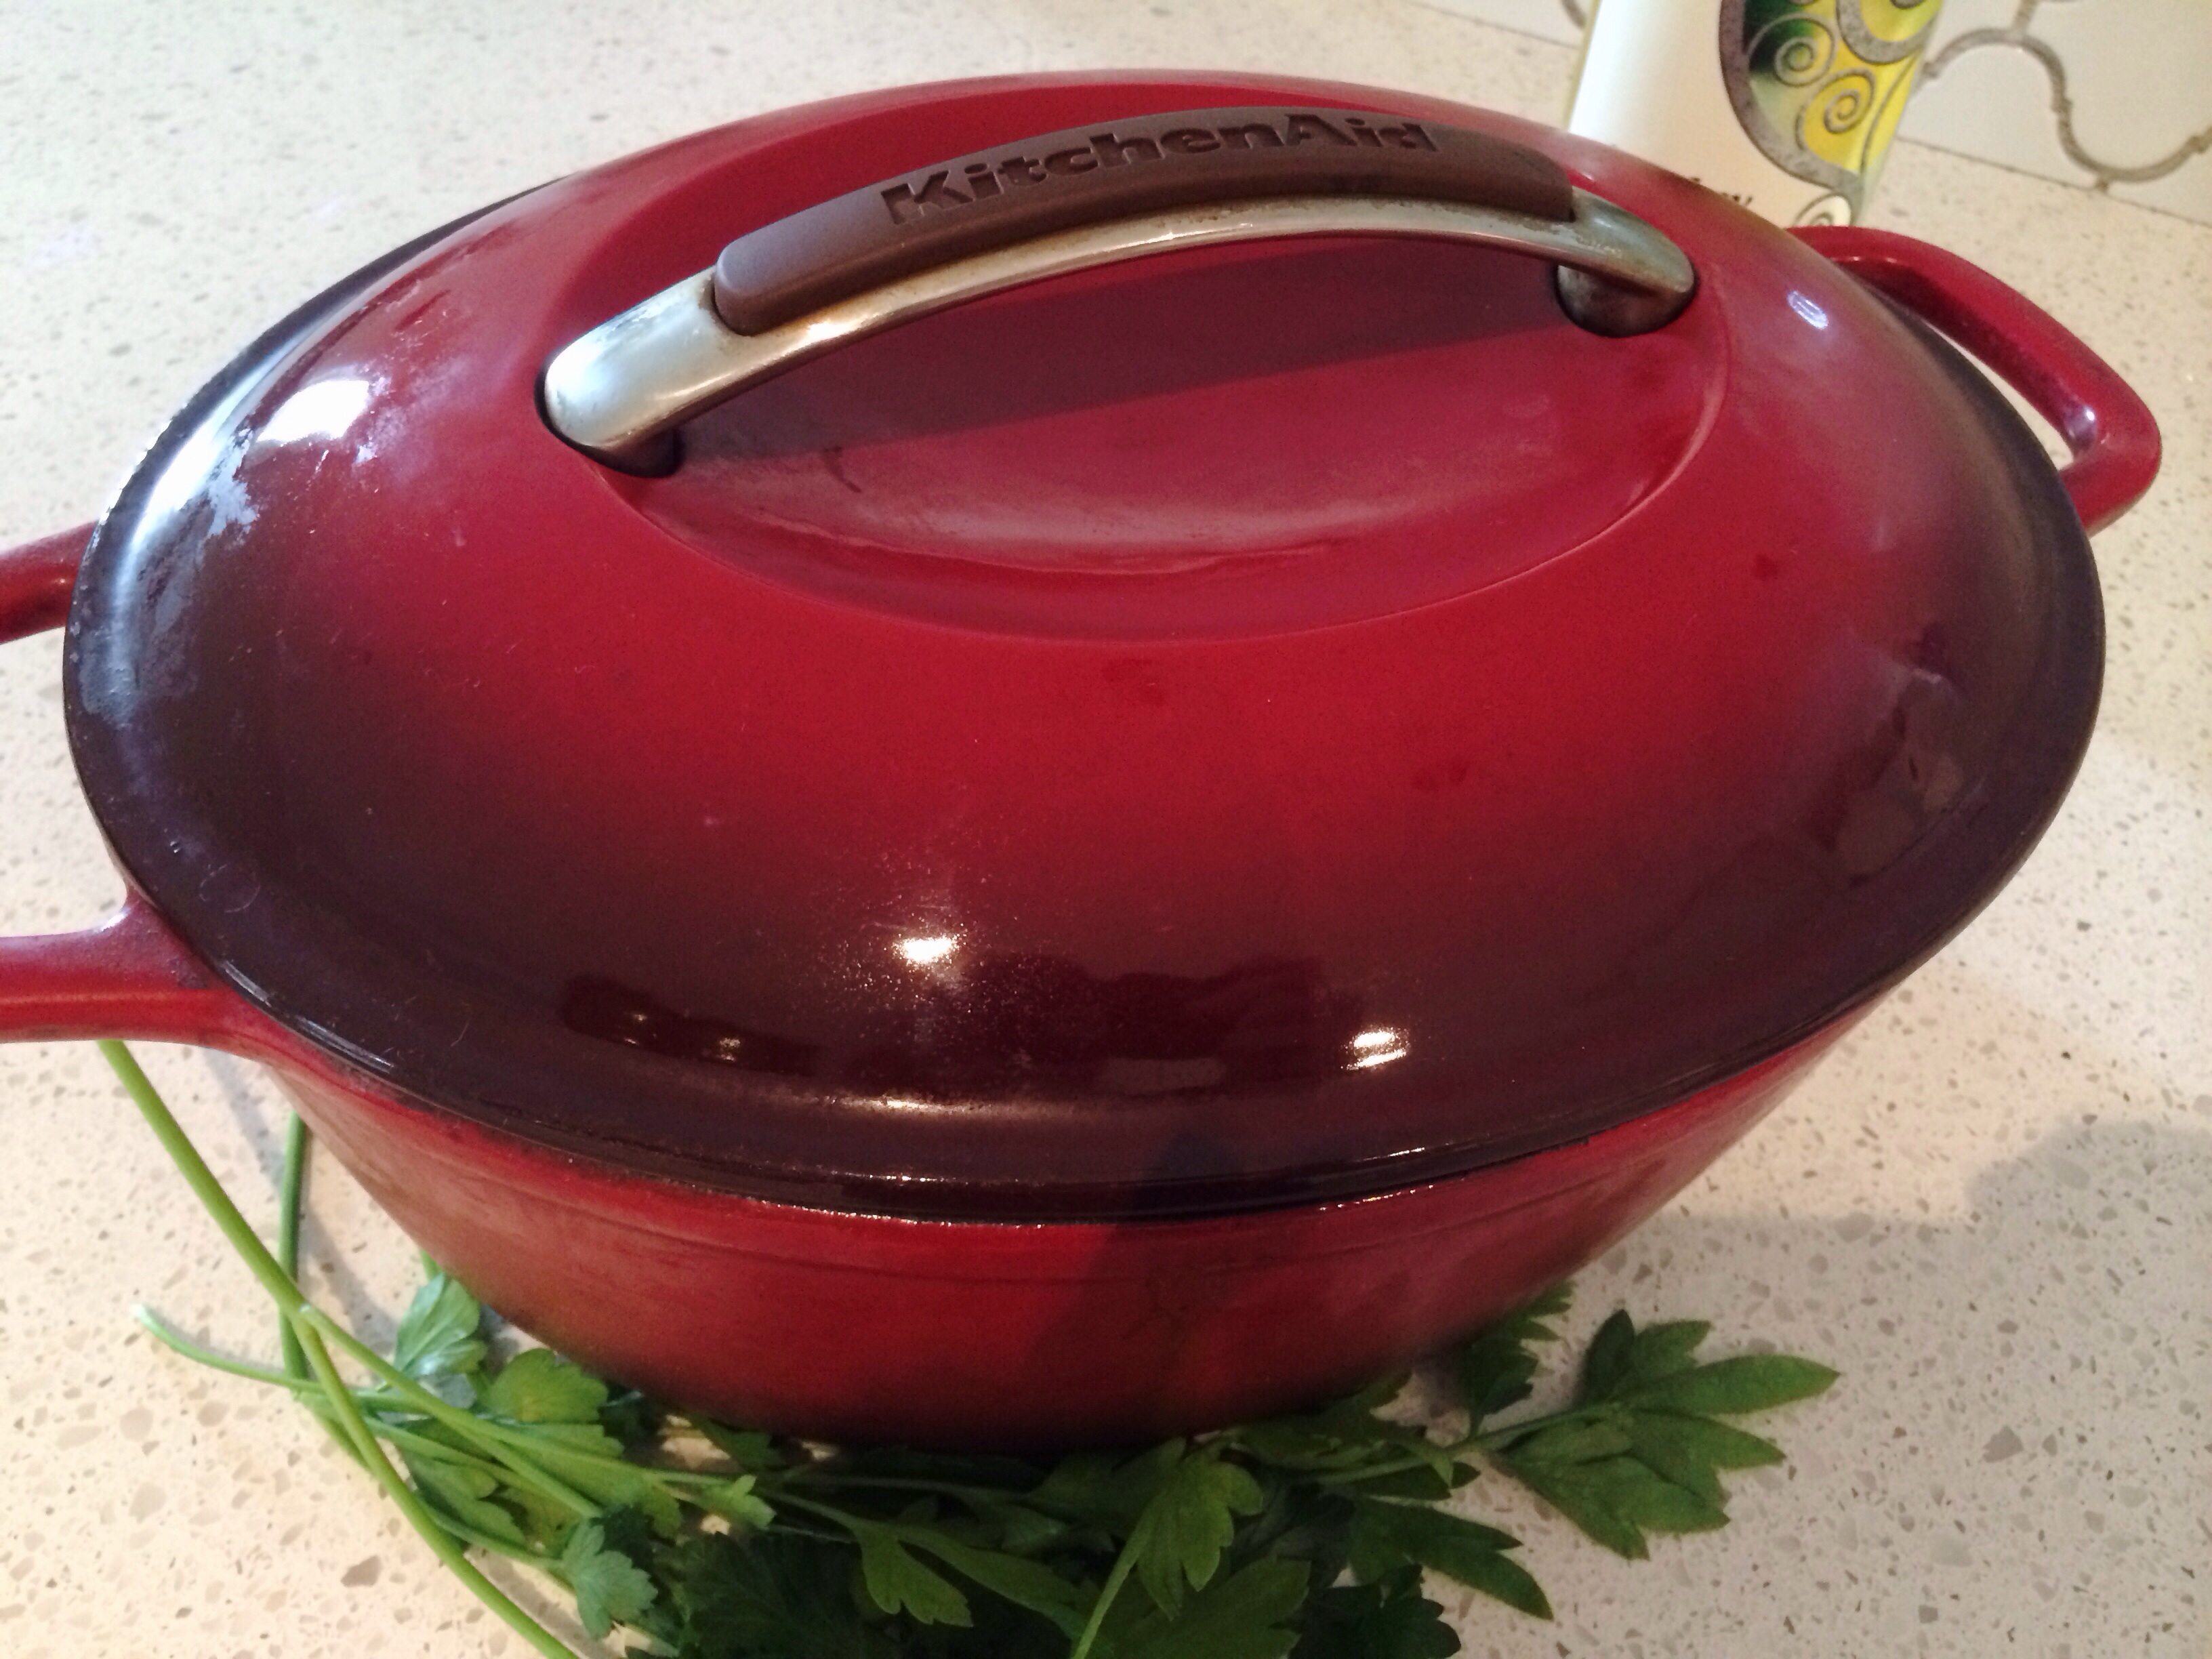
My mom is a wonderful cook, and I’ve used many of her recipes to get me into cooking. She got me this gorgeous glazed cast iron KitchenAid dish and this is what I used to pan~sear my chicken thighs. Keeps even heat and kept the splatter in the dish rather than on my stove-top.
I used this dish on the stove top to brown the chicken and saute the mushrooms, chili pepper flakes and the garlic. It also has a lid to cover so this same dish was what I used to baked it up into the perfect saucy chicken while in the oven. From Canadian Tire and I definitely recommend one for your cooking adventures also.
After transferring the chicken, there was a fair amount of liquids, chicken grease and juices, left in the bottom of the pan. I removed most of it and left just a small amount in the bottom to saute the mushrooms and garlic in. Your choice.
Now on the bottom of this dish was a dark golden layer from the chicken juices etc. searing up. Don’t be alarmed… I was thinking to myself… Oh shit, did I ruin this whole thing? Is everything now going to stick and burn?
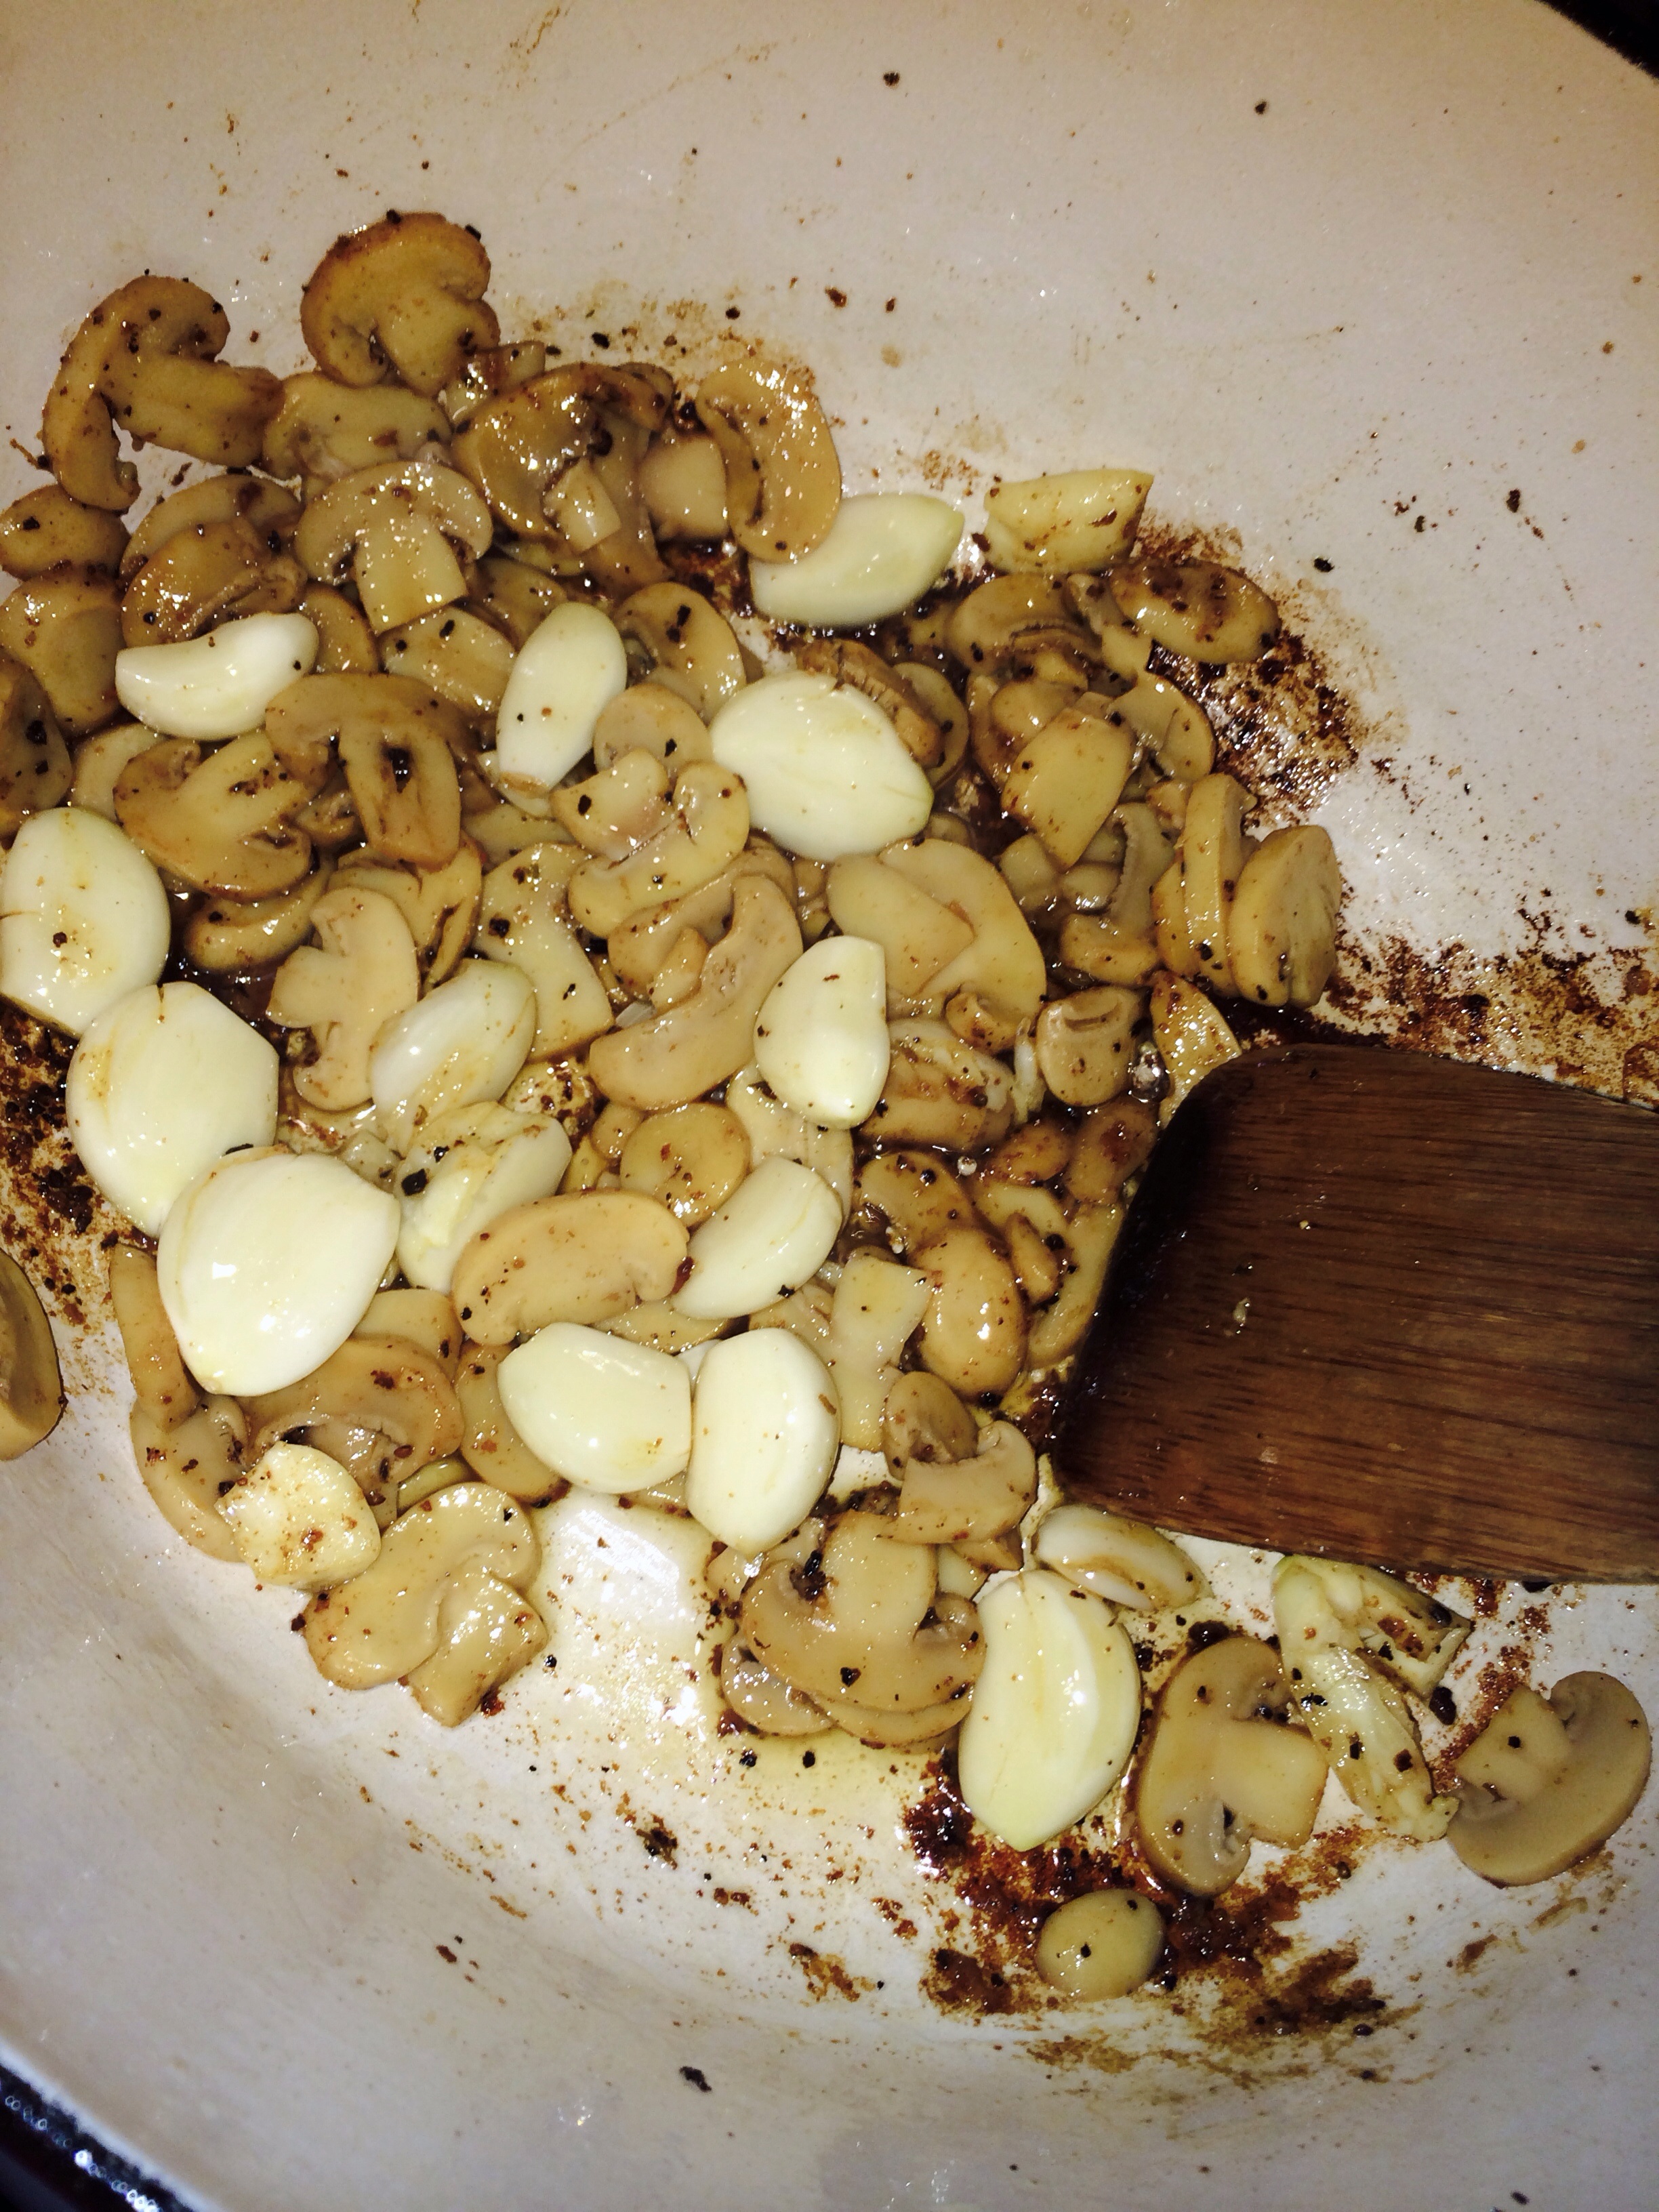
But the mushrooms and garlic seemed to soften it up and cook together and created such a rich flavourful sauce.

I couldn’t have been more pleased. It is really a good day when things work out for me, haha. I’m sure you’d feel the same. Yay for good cooking. Go me Go. Feel free to do a little booty shakin touchdown dance when things like this happen. It’s all about the simple things in life am I right My Lovelies?! LOL
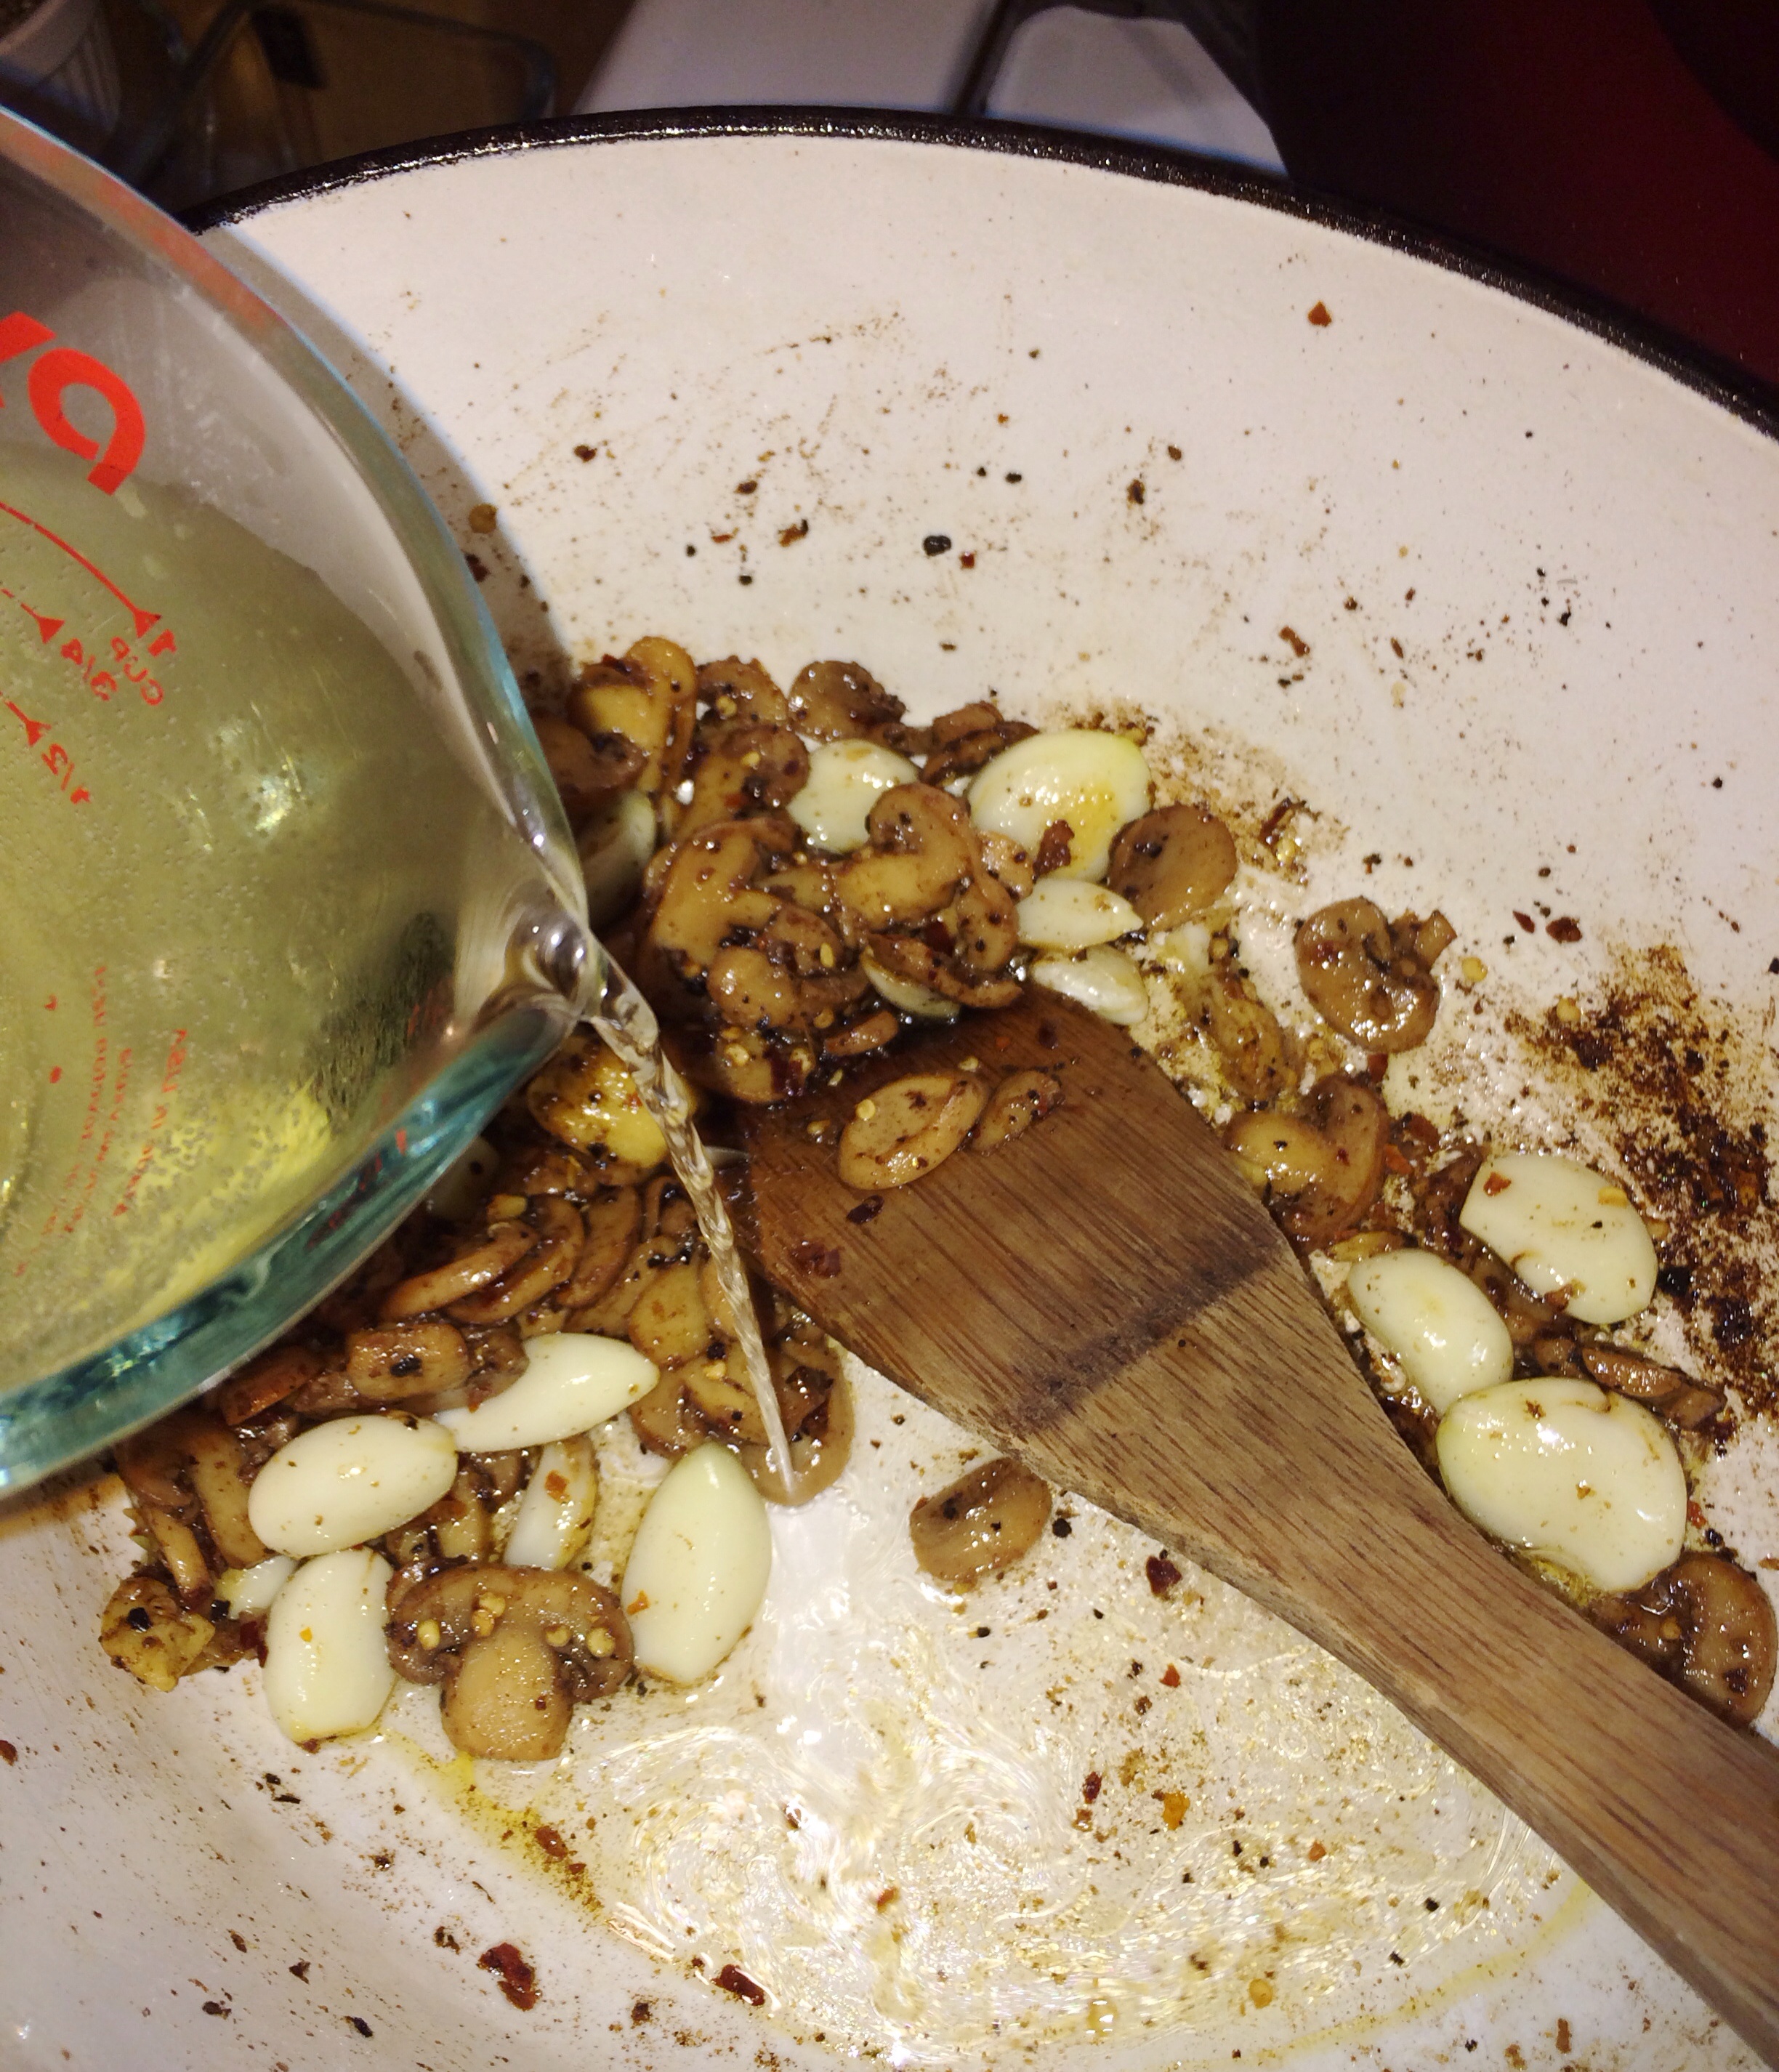
Adding wine to things like this also acts as a de-glazer for your well cooked pans. Don’t waste that seared liquid. That’s your concentrated flavour right there. Just the same as the bottom of your roaster from your roasts and hams make the best gravies and soup broths.
In this case it’s our deglazer and the base for this sauce. I am not a wino so I will admit that I have always been apprehensive about dishes that are made with wine. If someone made this for me and I ate the whole thing… I don’t think I would have even known it was made with wine. I’m serious! So so so so so so good!

**NOTE: Milk is added for volume. This will help create that thicker fuller sauce to coat the chicken. If you wanted a more concentrated demi-glaze like sauce, you can omit the milk completely. As mentioned in the recipe, you may need to add more wine if you find the sauce to dry when you turn over the chicken half way through cooking.**

Time for the fun! Let’s bring it all together. Gently add the chicken back in once you’ve mixed in the wine, milk, butter and parsley.
Nestle it down in that fragrant garlic bath. Time for these thighs to tantalize.
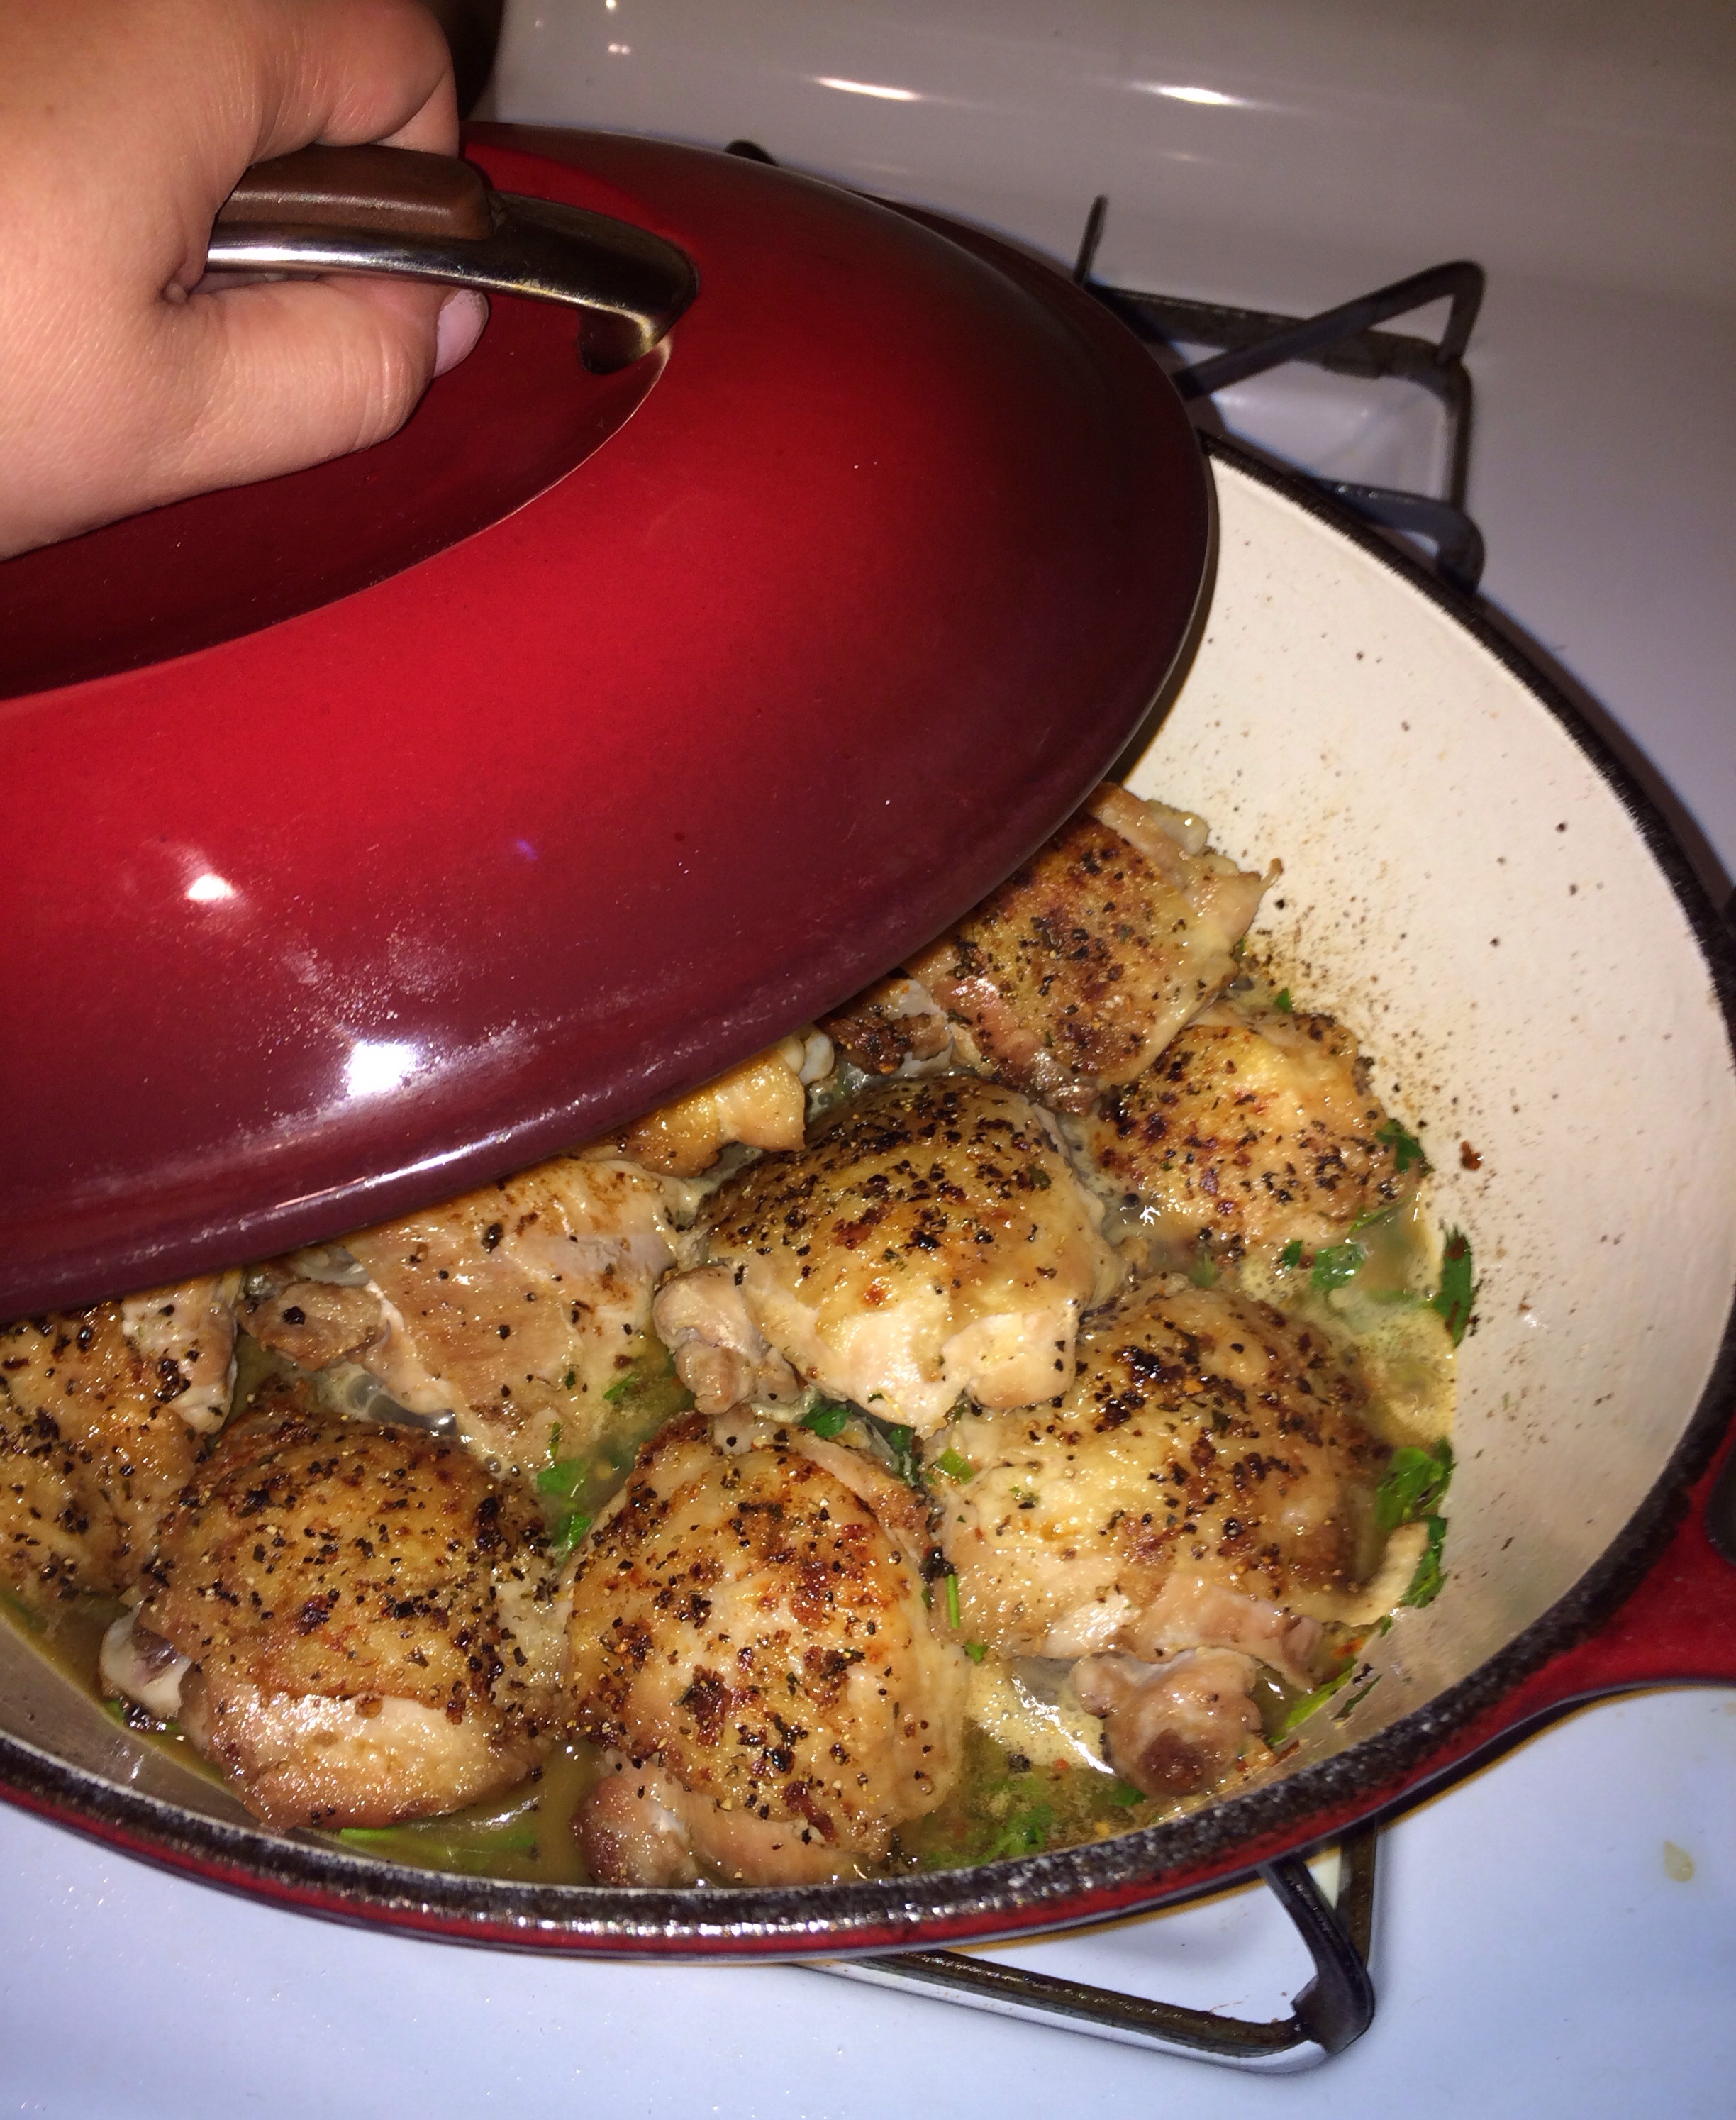
Cover it with a tight-fitting lid and place it in a preheated oven and bake it up so the sauce can thicken up.
Don’t forget to check it half way through and flip that chicken over. Keep it saucy!
It will look soupy at first. As it continues to cook the sauce will get darker and richer in colour and of course flavour.
Be patient and wait for it. It will look ‘blah’ before it looks ‘ta da’
There it is! TA DA!!!
As mentioned in my recipe, I then transferred my contents of my kitchen aid glazed cast iron dutch oven to a pan for appearance purposes for this blog. LOL
Got to love dirty dishes! LMAO
This pan is worthy of a few photos though. Another splendid purchase from Canadian Tire. I think I’ve gotten every single one of my pans from Canadian Tire over my years. They always have good deals on cookware FYI. Watch the flyers. This is a Heritage Rock Forged Non Stick Pan. It’s got a big capital ‘H’ on the stunning stainless steel handle. My name, being Haley… thus…H-Town bitches…. hahah. Nah my Mommy has one and I used it while at my parents place this spring and of course I fell in love. It having a big ole ‘H’ on it for ‘Cooking With Hay’ is just an added perk. I love this pan so much that I don’t really use any other pans besides The H Rock, this KitchenAid glazed dutch oven or my cast iron dutch oven and griller.
This will be a regular meal cooked in my kitchen. Please give it a try guys! Feedback is always appreciated. As is your SHARES and LIKES on Facebook, Pinterest, Twitter, etc…. Sharing is Caring and it would really help expand my page! Love you all! Thanks for your support.
There you have it. Garlicky Sauced Pan~Seared Chicken ♥
♥♥ Thanks for visiting, if you liked this blog please click LIKE below. If you want to follow my blog please scroll to the bottom, click the FOLLOW button and enter in your email address.
Love Haleykins♥♥
**Please click “OLDER POSTS” button, (bottom of the page)
or the “COOKING WITH HAY” tab (top of the page) to see more**


 ___________________________________________________
 Thanks Mommy, for another good recipe! I will be making this scrumptious one again soon I know it. Doesn’t it look pretty with the little pops of colour from the coleslaw mix 😜 Serve it up along side something yummy for your tummy and enjoy this bowl full of goodness.