Tag Archives: sauce

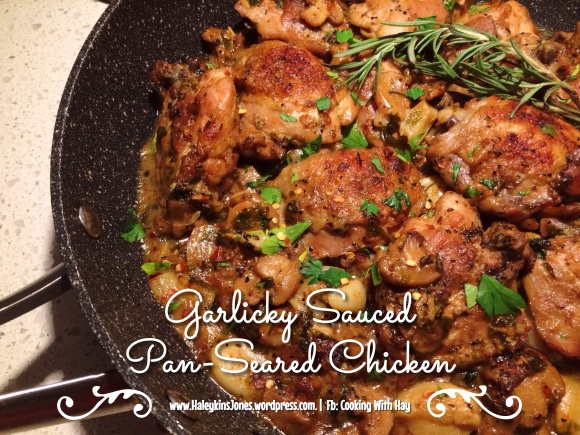
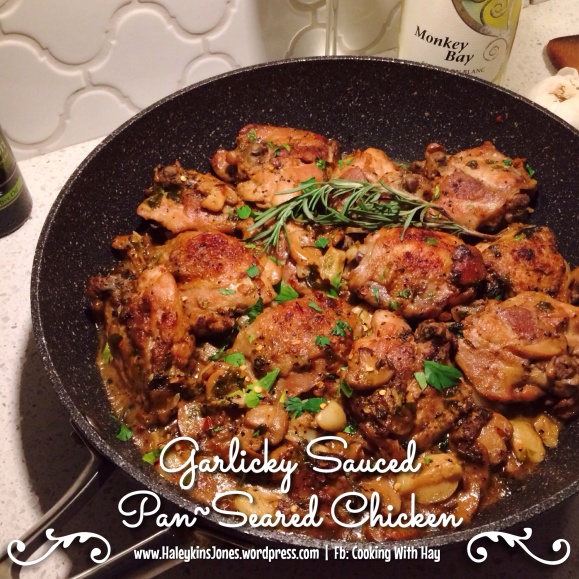
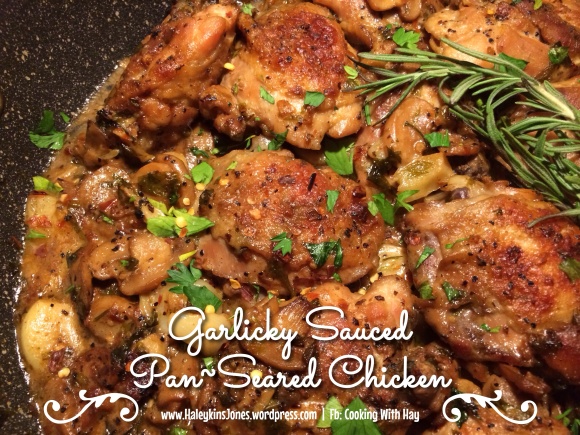
GARLICKY SAUCED PAN~SEARED CHICKEN

image


GARLICKY SAUCED PAN~SEARED CHICKEN

INGREDIENTS
♥ 4 T. OLIVE OIL
♥ 1 LARGE PACK OF CHICKEN THIGHS
♥ ½ TSP. SALT
♥ ½ TSP. PEPPER
♥ 2 CUPS SLICED FRESH MUSHROOMS
♥ 1 T. CHILI PEPPER FLAKES
♥ 1½ FISTS OF GARLIC
♥ 2½ CUPS SAUVIGNON BLANC WHITE WINE
♥ ¼ CUP MILK
♥ 2 T. BUTTER
♥ ¼ CUP FRESH CHOPPED PARSLEY
♥ 2 SPRIGS FRESH ROSEMARY

DIRECTIONS
PREHEAT OVEN TO 375°F

HEAT THE OIL IN A DEEP DISH PAN ON YOUR STOVE TOP. (OR LARGE DUTCH OVEN OR CAST IRON POT) CAST IRON WORKS BEST I THINK AND THE DEEPER THE BETTER, YOUR APPLIANCE WILL THANK YOU LATER. SPLASHY GREASE BLAH.

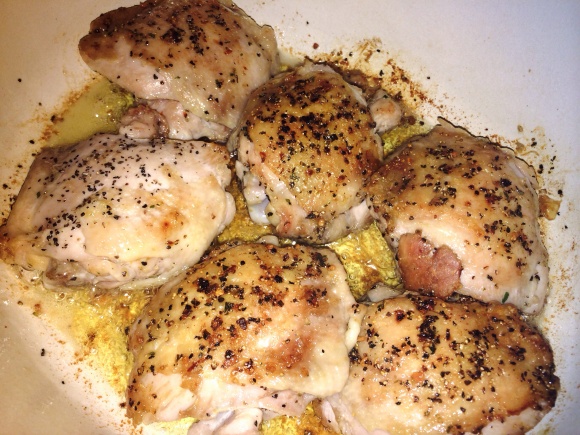
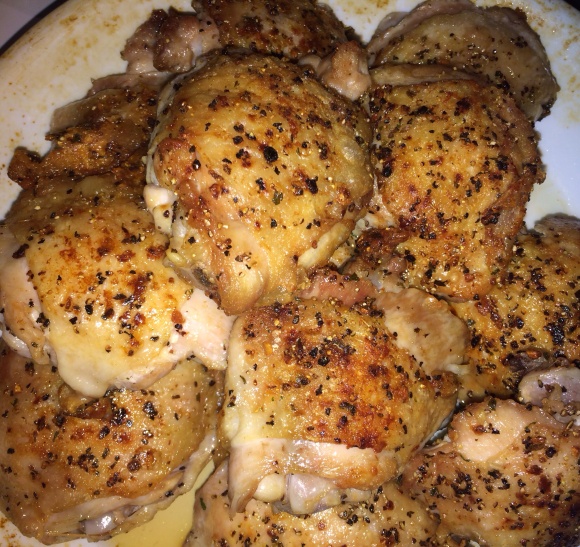
SEASON THE CHICKEN THIGHS WITH SALT AND PEPPER AND PLACE CHICKEN IN THE PAN. SEAR THESE BAD BOYS UP UNTIL GOLDEN AND THE JUICES JUST RUN CLEAR. THEY WILL COOK MORE IN THE SAUCE.

REMOVE THE SEARED CHICKEN FROM THE PAN AND SET ASIDE.

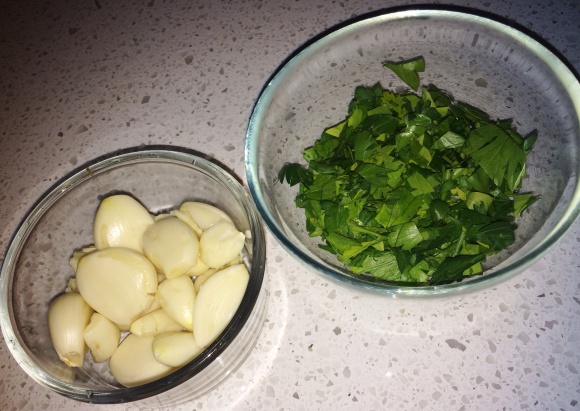
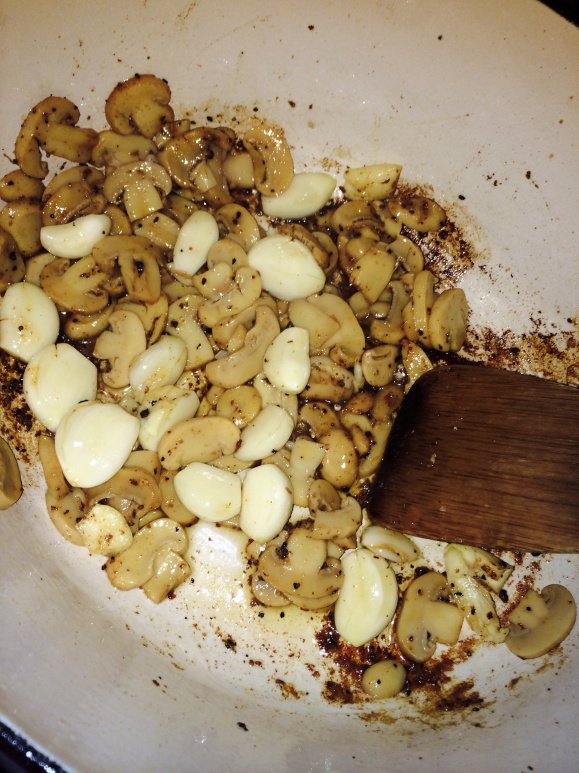
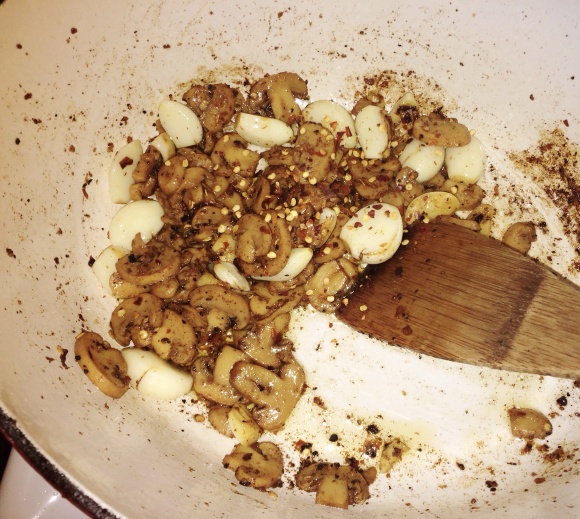
SEPARATE THE GARLIC CLOVES AND PEEL THEM. ADD THE MUSHROOMS, PEPPER FLAKES AND GARLIC CLOVES TO THE CHICKEN PAN AND IT’S LEFTOVER LIQUIDS.

SAUTE UNTIL TENDER AND GOLDEN, BUT MAKE CERTAIN NOT TO BURN THE GARLIC. TILL JUST GOLDEN. GARLIC GOES QUITE BITTER WHEN OVERCOOKED.

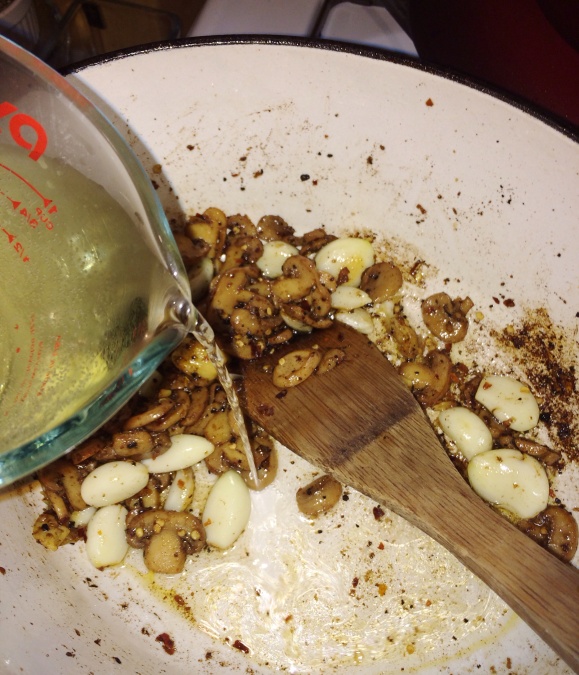
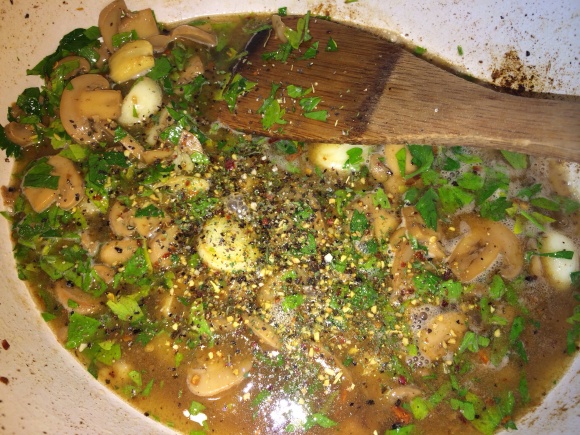
ADD THE WINE, MILK, BUTTER AND STIR IN THE PARSLEY.

GENTLY ADD THE CHICKEN BACK TO THE PAN.

ADD THE ROSEMARY SPRIGS AND COVER.

PLACE IN PREHEATED OVEN. BAKE FOR 20-30 MINUTES. TURNING THE CHICKEN OVER HALF WAY THROUGH.

REMOVE FROM OVEN WHEN THE SAUCE STARTS TO REDUCE AND THICKEN UP.

I TRANSFERRED ALL OF THIS TO A HOT FRYING PAN FOR APPEARANCE PURPOSES FOR THIS BLOG BUT YOU CAN CERTAINLY FINISH IT UP IN THE OVEN IF YOU CHOOSE. LESS MESS. HOWEVER IF THE SAUCE IS TOO DRY YOU MAY WANT TO ADD MORE WINE AND LET IT SIMMER A BIT LONGER. THIS WAS DEFINITELY EASIER TO DO ON THE STOVE TOP.

SPOON THE GARLICKY SAUCE OVER THE CHICKEN AND SPRINKLE WITH A LITTLE MORE FRESH PARSLEY AND CHILI PEPPER FLAKES.

SERVED SEARING HOT OVER LINGUINE NOODLES.
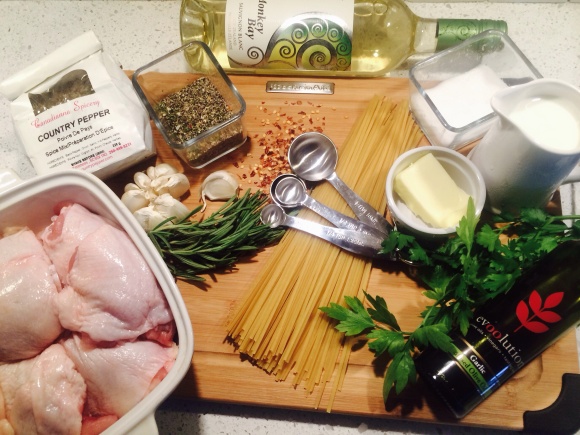


I am needing a large tripod and to get my amazing Canon Rebel T3i camera up and running to do these blog photos now that the “Cooking With Hay” Kitchen is nearing completion!

At the time of making this dish I had cabinets, counters and some lighting in. Oh and the backsplash tile was added but had just been grouted. No appliances, no running water, just a much more appealing place for a food blog photo set.

Regardless, it’s all a vast improvement from the basement temp. kitchen, 2×4 studding and insulation backdrops seen in previous blog photos.

image

Is ‘garlicky’ even a word ? ? ?

The recipe I was using called for white wine… I have drank wine in the past but by any means, don’t consider myself a wine drinker.

However… GalPal is!

She came to my rescue with some suggestions after I let her know my ingredients and what I was making.

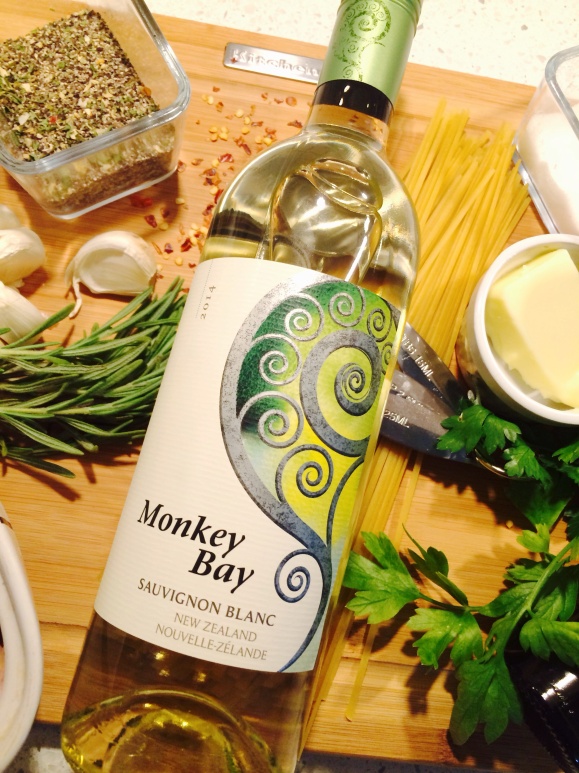
Monkey Bay Sauvigon Blanc from New Zealand was the perfect wine, as this dish was phenomenal. Not too sweet, not to dry. I’m not even going to bother experimenting with other wines.

The bottle… as GalPal mentioned, coordinated nicely with the ingredients needed to make this dish. Thanks for the help Amber!! Guess I should make this for you now hey?!

image
This pepper tho! Gift from Mother-In-Law and I’ve become quite addicted to it. I use it on my sunny side up eggs in the morning to grilled salmon and everything in between. It’s made just a few hours from my house in Keremeos BC. It’s pepper, onions garlic and herbs and is a great change-up to the regular black pepper or fresh ground peppercorns.

Season the chicken thighs with a little salt and sprinkle of pepper. There is enough flavour coming in the garlic and wine and parsley that not much seasonings are needed on the chicken.

I assure you. This dish packs a savory garlic KA-POW with a mix of fragrant herbs. Absolutely delish my gosh!

image

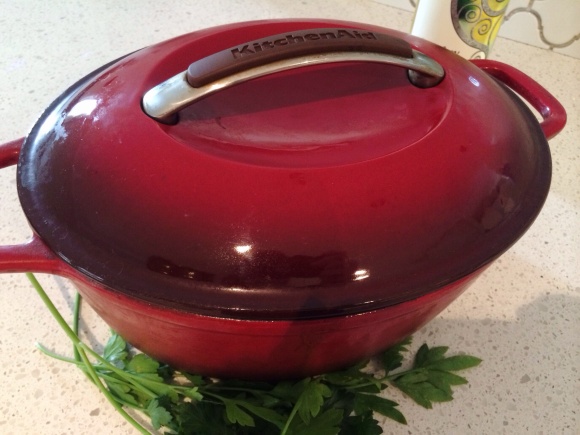
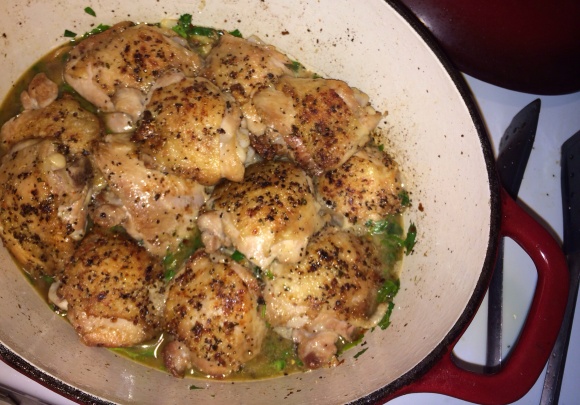
My mom is a wonderful cook, and I’ve used many of her recipes to get me into cooking. She got me this gorgeous glazed cast iron KitchenAid dish and this is what I used to pan~sear my chicken thighs. Keeps even heat and kept the splatter in the dish rather than on my stove-top.

image

I used this dish on the stove top to brown the chicken and saute the mushrooms, chili pepper flakes and the garlic. It also has a lid to cover so this same dish was what I used to baked it up into the perfect saucy chicken while in the oven. From Canadian Tire and I definitely recommend one for your cooking adventures also.

image

After transferring the chicken, there was a fair amount of liquids, chicken grease and juices, left in the bottom of the pan. I removed most of it and left just a small amount in the bottom to saute the mushrooms and garlic in. Your choice.

image

Now on the bottom of this dish was a dark golden layer from the chicken juices etc. searing up. Don’t be alarmed… I was thinking to myself… Oh shit, did I ruin this whole thing? Is everything now going to stick and burn?

image

But the mushrooms and garlic seemed to soften it up and cook together and created such a rich flavourful sauce.

image

I couldn’t have been more pleased. It is really a good day when things work out for me, haha. I’m sure you’d feel the same. Yay for good cooking. Go me Go. Feel free to do a little booty shakin touchdown dance when things like this happen. It’s all about the simple things in life am I right My Lovelies?! LOL

image

Adding wine to things like this also acts as a de-glazer for your well cooked pans. Don’t waste that seared liquid. That’s your concentrated flavour right there. Just the same as the bottom of your roaster from your roasts and hams make the best gravies and soup broths.

In this case it’s our deglazer and the base for this sauce. I am not a wino so I will admit that I have always been apprehensive about dishes that are made with wine. If someone made this for me and I ate the whole thing… I don’t think I would have even known it was made with wine. I’m serious! So so so so so so good!

image

**NOTE: Milk is added for volume. This will help create that thicker fuller sauce to coat the chicken. If you wanted a more concentrated demi-glaze like sauce, you can omit the milk completely. As mentioned in the recipe, you may need to add more wine if you find the sauce to dry when you turn over the chicken half way through cooking.**

image

Time for the fun! Let’s bring it all together. Gently add the chicken back in once you’ve mixed in the wine, milk, butter and parsley.

Nestle it down in that fragrant garlic bath. Time for these thighs to tantalize.

image

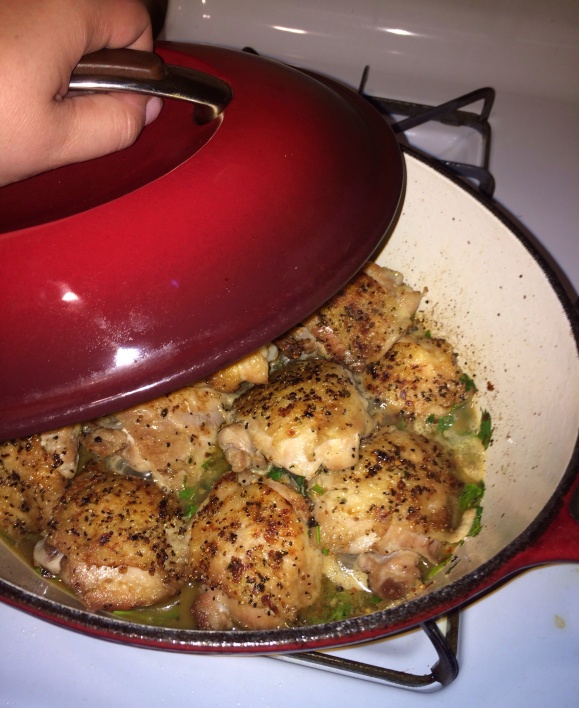
Cover it with a tight-fitting lid and place it in a preheated oven and bake it up so the sauce can thicken up.

image

Don’t forget to check it half way through and flip that chicken over. Keep it saucy!

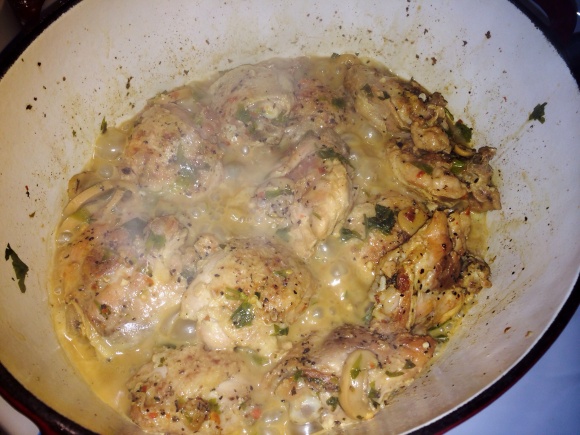
It will look soupy at first. As it continues to cook the sauce will get darker and richer in colour and of course flavour.

Be patient and wait for it. It will look ‘blah’ before it looks ‘ta da’

image

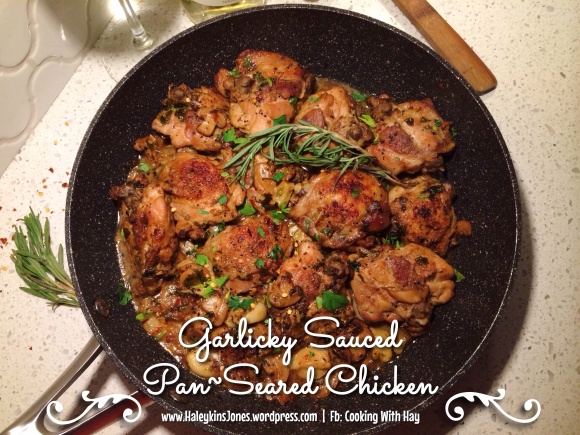
There it is! TA DA!!!

image

As mentioned in my recipe, I then transferred my contents of my kitchen aid glazed cast iron dutch oven to a pan for appearance purposes for this blog. LOL

Got to love dirty dishes! LMAO

This pan is worthy of a few photos though. Another splendid purchase from Canadian Tire. I think I’ve gotten every single one of my pans from Canadian Tire over my years. They always have good deals on cookware FYI. Watch the flyers. This is a Heritage Rock Forged Non Stick Pan. It’s got a big capital ‘H’ on the stunning stainless steel handle. My name, being Haley… thus…H-Town bitches…. hahah. Nah my Mommy has one and I used it while at my parents place this spring and of course I fell in love. It having a big ole ‘H’ on it for ‘Cooking With Hay’ is just an added perk. I love this pan so much that I don’t really use any other pans besides The H Rock, this KitchenAid glazed dutch oven or my cast iron dutch oven and griller.

image

This will be a regular meal cooked in my kitchen. Please give it a try guys! Feedback is always appreciated. As is your SHARES and LIKES on Facebook, Pinterest, Twitter, etc…. Sharing is Caring and it would really help expand my page! Love you all! Thanks for your support.

There you have it. Garlicky Sauced Pan~Seared Chicken ♥

♥♥ Thanks for visiting, if you liked this blog please click LIKE below. If you want to follow my blog please scroll to the bottom, click the FOLLOW button and enter in your email address.
Love Haleykins♥♥

**Please click “OLDER POSTS” button, (bottom of the page)
or the “COOKING WITH HAY” tab (top of the page) to see more**

Tagged , , , , , , , , , , , , , , , , , , , , , , , , , , , , , , , , , , , , , , , , , , , , , , , , , , , , , , , , ,

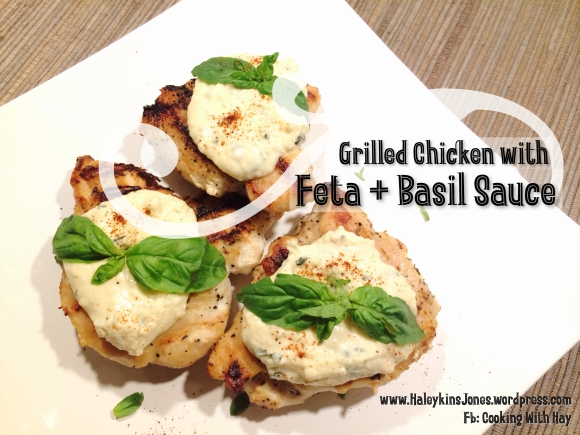
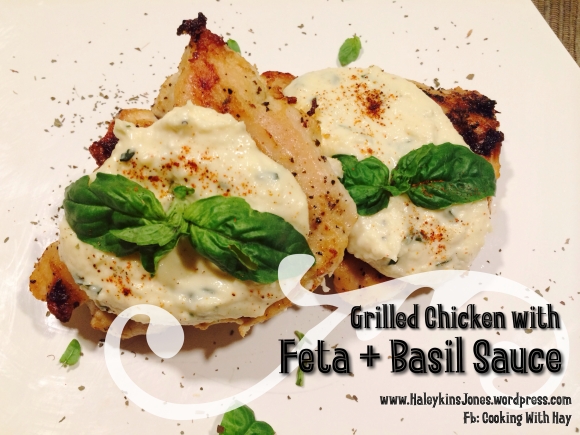
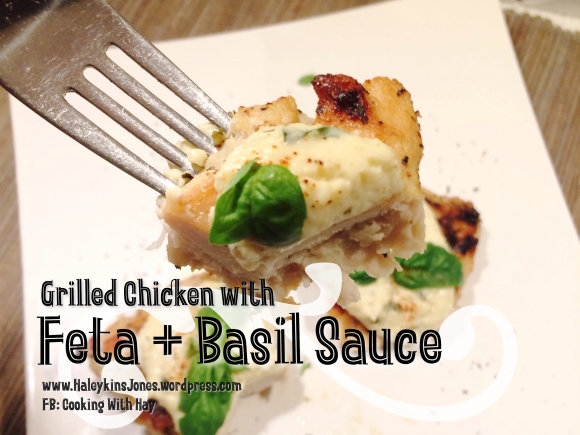
Grilled Chicken with FETA + BASIL SAUCE

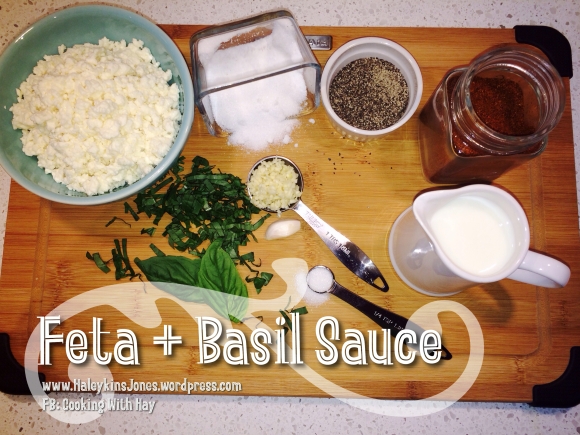
FETA + BASIL SAUCE

♥  2 C. FETA CHEESE, crumbled
♥  2 T. FRESH BASIL, chopped
♥  1 HEAPING T. GARLIC, fresh and minced
♥  ½ C. MILK
♥  ½ TSP. CHILI POWDER
♥  ½ TSP. SUGAR
♥  ½ TSP. PEPPER

Boil a couple inches of water in a double boiler, reduce to med-high.

(or set up a small pot with water and bring it to a boil and have all your ingredients in a heatproof glass bowl larger than the pot.  Place the bowl over the pot.  Make sure it doesn’t touch the water, needs to be above the water)

Combine all the ingredients to the upper pot of your double boiler or into your glass bowl.  Mixing and stirring until creamy and fairly smooth.

You may need more milk if it’s too thick.  This is a thicker type of sauce so it’s not going to be thin and runny…  You want to dollop it on top of your grilled chicken.

Who doesn’t love a dollop of anything?  LOL

I have a large square cast iron dutch oven and the lid for it has grills on the underside so lately I’ve been using this heavy duty thing for everything.  I flipped the lid over and heated up the grills and grilled the chicken.

My go to staple is frozen boneless skinless chicken breast.  I buy them in 4 kg boxes or bags whenever they go on sale and usually have 4-5 packs in my deep freeze at any one time.  Chicken breast is high in protein and low in fat.

Season them with a little olive oil and some salt and pepper and grill to perfection.

When cooking chicken without skin, I always baste with a brushing of olive oil.  This will help seal in the natural juices of the meat and keep your dinner from going dry.  Have the grills or your pan preheated to med-high before adding the chicken.  Avoiding moving the chicken once you place it on the grills.  It will stick at first and you know you’ll be tempted to try and move it and “un-stuck it” but don’t!  It will pull away from the heat source on it’s own when it’s ready.  Well for the most part… just be patient alright.  This way you’ll get the perfect sear and grill marks.  Also, avoid turning and turning pieces of meat.  The raw juices cook on one side and then when you flip the piece of meat you allow the cook juices to run down through the rest of the meat helping cook that side through.  Flipping prematurely and back and forth might withhold some of those raw chicken juices and leave the center raw.  RAW!!!!  Don’t want that.

I heard this along time ago.  I only assume it’s true but it makes sense.  So I try to be as patient as I can and cook evenly and properly per side.

The image above includes salt. However my recipe does not.  When I made this, I added salt and found it to be incredibly too salty.  The feta gives this creamy topping enough salt…
Yum!  Look at it in all it’s feta and basil goodness.  I find I don’t cook with a lot of cheese, but feta can be used in so many ways!  I’m loving it.
Now #getinmybelly!

Give this one a whirl guys, it’s super easy and delicious too!


♥♥ Thanks for visiting, if you liked this blog please click LIKE below. If you want to follow my blog please scroll to the bottom, click the FOLLOW button and enter in your email address.
Love Haleykins♥♥
**Please click “OLDER POSTS” button, (bottom of the page)
or the “COOKING WITH HAY” tab (top of the page) to see more**
Tagged , , , , , , , , , , , , , , , , , , , , , , ,

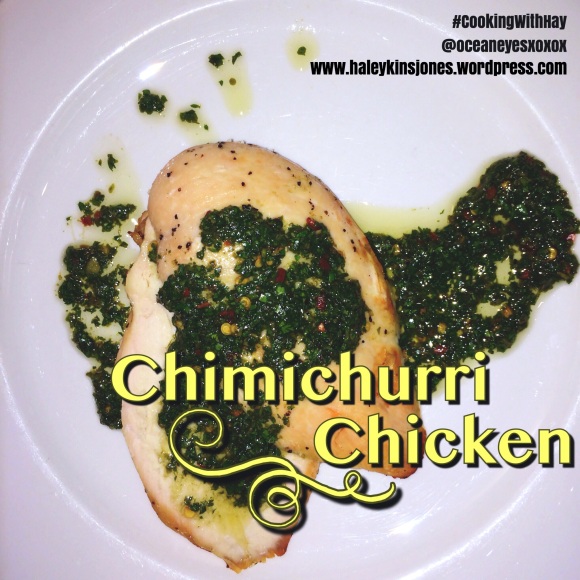
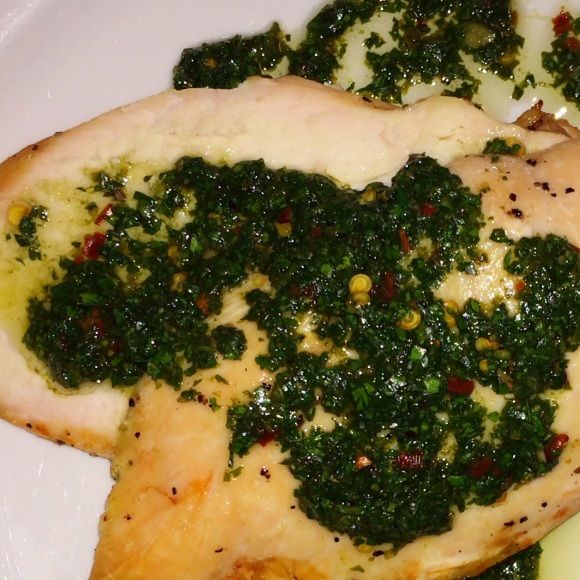
Chimichurri Chicken

Chimichurri… where has this been all my life? Chimichurri is an Argentinean sauce similar to a pesto with many variations for sure.  Make it your own😉

🌿I’m telling you, amazingly good and I can’t even believe how much I love it.  I had it in Jamaica and had to try it at home.  Fan-freakin-tastic.  I also made it with my Mom a few weeks ago.  We had it on some bbq’d pork chops… Hello melt in my mouth delicious!  I’m already checking the calendar to see when I can make it again!  On steak next time I think… 😊 INGREDIENTS

• 1 CUP FIRMLY PACKED FRESH FLAT LEAF PARSLEY

• 1/2 CUP FIRMLY PACKED FRESH CILANTRO

• 2 TABLESPOONS FRESH OREGANO LEAVES (or you can use 2 teaspoons of dried oregano)

• 4 GARLIC CLOVES

• 1/2 CUP OLIVE OIL

• 2 TABLESPOONS WINE VINEGAR (red or white, I used white)

• 1 TEASPOONS SEA SALT OR KOSHER SALT**

• 1/4 TEASPOON GROUND BLACK PEPPER

• 1/2 TEASPOON CHILI PEPPER FLAKES

DIRECTIONS

1. Pulse the parsley, cilantro, fresh oregano, and garlic in a food processor until it’s a coarse consistancy

2. Scrape down the food processor and get all that good green out into a nice little glass dish

3. Gently stir in olive oil, vinegar, salt, pepper, and chili pepper flakes. 

💡Adjust your seasonings to your liking.  If you won’t be using all the sauce the first night, any chili pepper flakes will continue to make the sauce hotter as they marinate in the oil… Sometimes hotter is better💡

4. Serve immediately or refrigerate. Bring to room temperature before serving. 

________________________________________

❤️ Thanks for visiting, if you liked this blog please click LIKE below. If you want to follow my blog please scroll to the bottom, click the FOLLOW button and enter in your email address. 

Love Haleykins 20131230-210222.jpg

**Please click OLDER POSTS, {below} to see more** ❤️

Tagged , , , , , , , , , , , , , , , , , , , , , , , , , , , , ,

CHICKEN SATAY WITH COCONUT PEANUT THAI SAUCE


I was on vacation in Jamaica🌍 a few weeks ago and we stayed at a fabulous resort; Secrets Wild Orchid.🌴  I was impressed with all the food that we had during our week long stay.🍴  Everything felt and tasted well made, light and never heavy or greasy if you know what I mean.  Everything looked fresh and made to order; it was delicious.  While I enjoyed Jerk Chicken and Jamaican spiced patties usually for lunch😋… in the evenings we enjoyed the fare from most of their specialty restaurants.  

After the pool bar it was up to the room to primping and get dolled up for the evening fun.👠👗  My favourite part of these vacations is suprisingly the evenings.  As much as I love the sunshine and the ocean, pool bar fun and all….  there is nothing better than getting dolled up in the carribean at a fancy shmancy resort, eating and drinking with friends that we’ve known for 8 years and that we only get to see for 1 week a year.☺️ Call Don and Laurie’s room and meet them down at the lobby bar for Pre-Cocks (pre drinks/cocktails😜, and yes non alcholic for me, 34 weeks today without a drop of booze. #noboozejustshoes)  From there we would wander down restaurant lane, a cobblestone/brick swooping pathway through the resort and along the oceanfront with a gorgeous view of the jamaican hillside in the distance.  Hubby wants to move there, just for that evening view!!  I am so game!!  

As in most of these resorts, you get to choose your style of dinner from French to Italian, steak, seafood, or Asian cuisine.  One night we chose Asian and I had a Chicken Satay dish in a delectable peanut sauce, and I vowed to make this as soon as I got home.  And I did… and the recipe is below, but first, a few pics of Jamaica to share with you😘         

And now let’s get back to cooking shall we😜

________________________________________

MARINADE

1/2 CUP COCONUT MILK

1 CLOVE MINCED GARLIC

1 TEASPOON CURRY POWDER

1 1/2 TEASPOONS BROWN SUGAR

1/2 TEASPOON SALT

1/2 TEASPOON BLACK PEPPER

1/2 TEASPOON CHILI PEPPER FLAKE (OPTIONAL)

4 CHICKEN BREASTS (boneless & skinless, cut in 1 inch strips)

DIRECTIONS

1. Stir together the first 6 or 7 ingredients until the brown sugar has dissolved. (chili pepper flakes are optional)

2. Pour over chicken breasts in a sealable container

3. Marinate the chicken in the fridge for 4 or more hours

________________________________________

COCONUT PEANUT THAI SAUCE

1 CUP COCONUT MILK

1 TABLESPOON CURRY POWDER

1/2 CUP CREAMY PEANUT BUTTER

3/4 CUP CHICKEN STOCK

1/4 CUP BROWN SUGAR

1/2 TEASPOON CHILI PEPPER FLAKE (OPTIONAL)

2 TABLESPOONS LIME JUICE

1 TEASPOON SOY SAUCE

SALT TO TASTE

10 (6 INCH) WOODEN SKEWERS (soak them in water for a few hours before cooking, this will keep them from burning when on the grill.)

GARNISH

CHOPPED SALTED PEANUTS

THINLY SLICED GREEN ONIONS 

DIRECTIONS

1. Turn on your bbq or grill for medium-high heat.

2. Bring coconut milk, currey powder, peanut butter, chicken stock, brown sugar and optional chili pepper flake to a simmer in a saucepan over medium-high heat.

3. Simmer and stir constantly until it’s thickend up and smooth.

4. Remove from heat and stir in lime juice and the soy sauce.

5. Season to taste with salt

6.  Skewer marinated chicken slices onto presoaked, 6 inch, wooden skewers

7. Grill each skewer for about 4-5 minutes on each side or until cooked through.

8. Drizzle with some of the warm Coconut Peanut Thai Sauce, reserve the rest for dipping.

9. Garnish with chopped peanuts and sliced green onions

________________________________________


❤️ Thanks for visiting, if you liked this blog please click LIKE below. If you want to follow my blog please scroll to the bottom, click the FOLLOW button and enter in your email address. 

Love Haleykins 20131230-210222.jpg

**Please click OLDER POSTS, {below} to see more** ❤️

Tagged , , , , , , , , , , , , , , , , , , , ,

Chicken Hoisin Rolls aka Chicken Teriyaki Rolls Haleykins Style

20140124-201803.jpg I just don’t like bottled teriyaki sauce… neither does Hubby… I use these two sauces. Hoisin Sauce and Stir Fry Sauce. Why? Because the first time I went to make these rolls I thought I had teriyaki sauce in the fridge but I was wrong and it was too late to run to the store, so I improvised. Hoisin and stir fry sauces in the pan of cooked sliced chicken breast. 20140124-204925.jpg

Super funny thing is that these are both Chinese sauces… for my sushi dinner?!?!
I don’t care, it works! It works well if you ask me. But you didn’t ask, so I’ll let it be.20140124-204947.jpgWhat would normally be a Chicken Teriyaki Roll now becomes a Haleykins Chicken Hoisin Roll.20140124-204954.jpgThanks for visiting, if you liked this blog please click LIKE below.
If you want to follow my blog please scroll to the bottom, click the FOLLOW button and enter in your email address.

Love Haleykins
20131230-210222.jpg

Tagged , , , , , , , , , , , , , , , , , , , , , , , ,

Crunchy Fiesta Chicken Wraps

Mexico, oh how I miss Mexico. It does not seem like we were there in Feb/Mar, but we were. Forever ago. I love that place, the sights, the sand, the seas, the people and of course, the food. We have done all inclusive in Mexico and we have gone to local restaurants out on the town. Please take my advice and DON’T do all inclusive. Enjoy the real food, the fresh food, the food that is cooked when it’s needed not cooked, shipped, stored, reheated, put out in the buffet and then with whats left it gets reheated….. And well,you get where I’m going with this, right.

Last time I was at the grocery store I picked up some wraps, thinking it had been far too long since we had something of this variety. That was a few days ago and those wraps sat untouched, on the counter, whispering to me.

As I had mentioned in a past post, similar to this one, wraps just make everything that extra bit more awesomesauce. As well there was rice in the fridge from the Butter Chicken recipe I made the other night. Seemed like a win win. Plus, a slow cooker is a dream. It does the the work and makes for super yummy-licious juicy shredded chicken!!!

Hubby likes foods that are juicy and yet still crunchy, I look forward to his reaction with this one. I intend to fulfill both. LOL

20130923-224837.jpg

CRUNCHY FIESTA CHICKEN WRAPS

INGREDIENTS:
4 LARGE CHICKEN BREASTS (boneless, skinless)
1/2 ONION, FINE DICED
1 SMALL CAN ZESTY ROTEL TOMATO SAUCE (tomatoes & green chilies)
3-4 TABLESPOONS HOT SAUCE (Franks, Sriracha, Habanero – adjust to your taste, start with less then add more)
1 TEASPOON SALT
2 TEASPOONS CUMIN
1+1/2 TEASPOON CHILI POWDER
1 PREMADE HOMEMADE GARLIC BALL, or 4 cloves, minced
1/4 CUP RED PEPPER, DICED
1/4 CUP BLACK BEANS (rinsed & drained)
1/4 CUP CORN, (drained)
2 CUPS GRATED CHEDDAR CHEESE
1 CUP SOUR CREAM
2 CUPS RICE, COOKED
8-10 FLOUR TORTILLAS (wraps)
2 TABLESPOONS OIL
CILANTRO & HOT SAUCE FOR GARNISH

DIRECTIONS:
Place chicken breasts in the bottom of your slow cooker
Toss in the onions
Add the Zesty Rotel Tomato Sauce
Then add the hot sauce of your choosing
Add in the salt, cumin, chili powder and garlic
I cooked this on high in my slow cooker for 4 hours
Stirring once or twice
At the 3:30 hour mark, shred the chicken with 2 forks and let it continue to cook

ASSEMBLY:
Mix shredded chicken, rice, beans, corn,and peppers in a separate bowl, set aside
Heat the oil in a frying pan over medium heat
Sprinkle cheese on the tortillas and add the sour cream
Spoon on the chicken & rice mixture down the center of the tortilla
Add a squirt of hot sauce if you so choose
Roll em up
Place 2 assembled wraps, seam side down in the hot oiled pan
Flip them when golden brown and slightly crunchy on the bottom, they only need a few minutes
Let them rest on a cutting board for about 3-4 minutes.
Slice in half and garnish with cilantro and hot sauce

HERE’S HOW IT ALL WENT DOWN:
20130923-224137.jpg
Place chicken breasts in the bottom of your slow cooker
Toss in the onions
20130923-224145.jpg
Add the Zesty Rotel Tomato Sauce
20130923-225054.jpg
Then add the hot sauce of your choosing
20130923-224224.jpg
20130923-224230.jpg
Add in the salt, cumin, chili powder and garlic
20130923-224511.jpg
I cooked this on high in my slow cooker for 4 hours
Stirring once or twice
20130923-224538.jpg
At the 3:30 hour mark, shred the chicken with 2 forks and let it continue to cook
20130923-224241.jpg
20130923-224340.jpg
20130923-224417.jpg
20130923-224424.jpg
20130923-234948.jpg
20130923-224524.jpg
20130923-224530.jpg
20130923-224543.jpg
20130923-224549.jpg
Mix shredded chicken, rice, beans, corn,and peppers in a separate bowl, set aside
20130923-224559.jpg
Sprinkle cheese on the tortillas and add the sour cream
20130923-224606.jpg
Spoon on the chicken & rice mixture down the center of the tortilla
Add a squirt of hot sauce if you so choose
Roll em up
Place 2 assembled wraps, seam side down in the hot oiled pan
20130923-224611.jpg
Flip them when golden brown and slightly crunchy on the bottom, they only need a few minutes
20130923-224724.jpg
Oh my goodness! YUMMY
Let them rest on a cutting board for about 3-4 minutes.
Slice in half and garnish with cilantro and hot sauce
20130923-224733.jpg
20130923-224738.jpg
20130923-224759.jpg
20130923-224751.jpg

Thanks for visiting, if you liked this blog please click LIKE below.
If you want to follow my blog please scroll to the bottom, click the FOLLOW button and enter in your email address.

Love Haleykins
20130919-203639.jpg

Tagged , , , , , , , , , , , , , , , , , , , , , , , , , , , , , , , , , , , , , , , , , , , , , , , , , ,

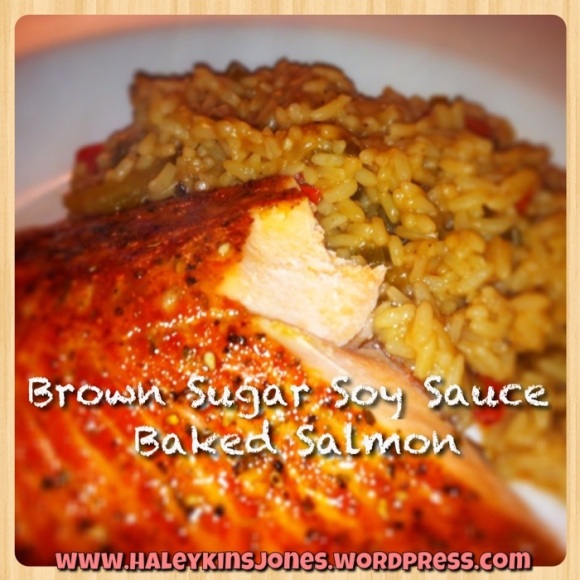
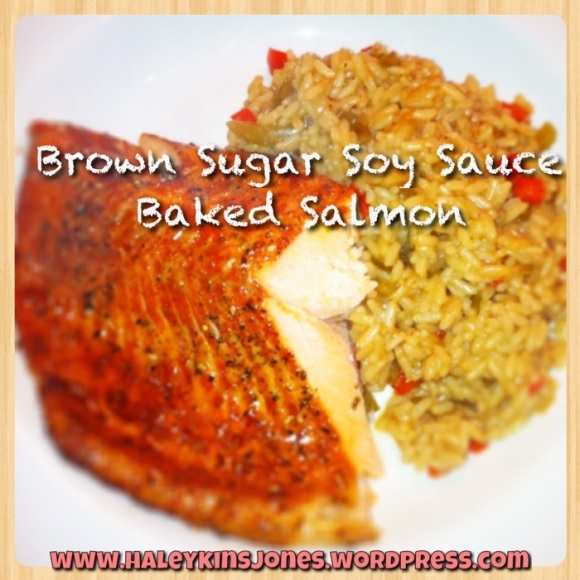
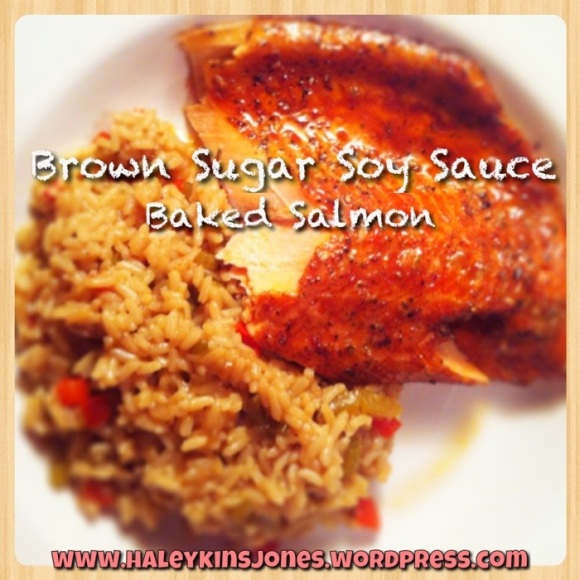
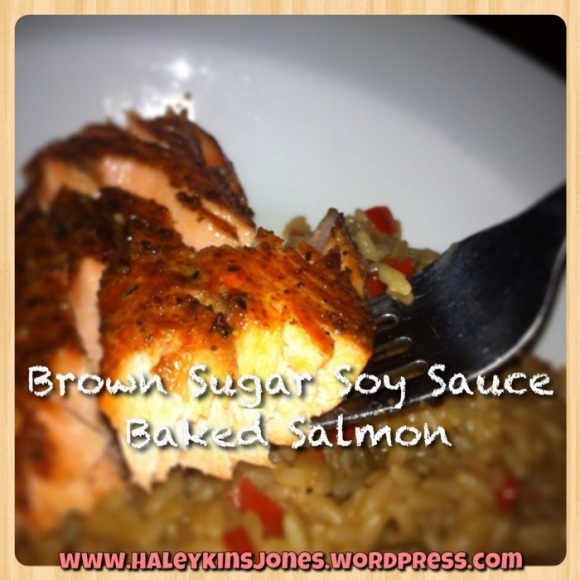
Brown Sugar Soy Sauce Baked Salmon

A week ago I made a new salmon dish, and it sure was tasty. Hubby and I love salmon, so I tested out a new recipe and it was good but needed some tweaking to satisfy our taste buds as usual. Here’s what I figure would be perfect

20130517-211753.jpg

Brown Sugar Soy Sauce Baked Salmon

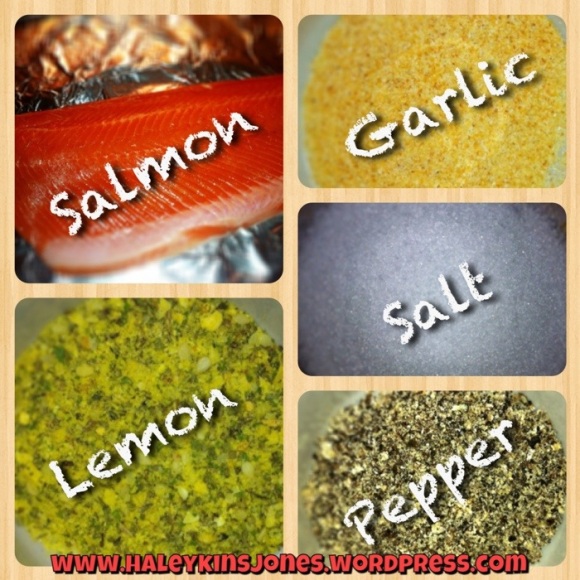
1 salmon fillet
lemon and herb seasoning
minced garlic
salt
pepper
1/3 C soy sauce
1/3 C brown sugar
1/4 C water
2 T vegetable oil

You will also need a bit of soy sauce, lemon seasoning and brown sugar and salt to sprinkle on right before u bake it.

Season the salmon with the lemon seasoning, garlic, salt & pepper
Press it gently into the fish
20130517-213238.jpg
In a bowl mix the soy sauce, brown sugar, water and oil
20130517-214650.jpg
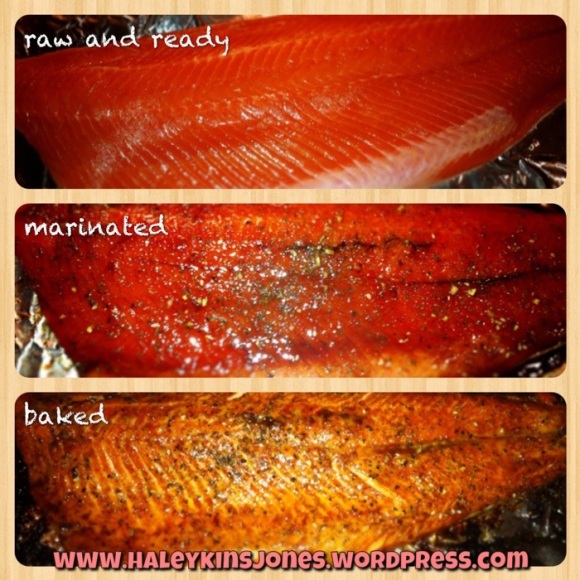
Marinate the salmon in the mixture in the fridge for at least 2 hours
Preheat oven to 425
Place marinated salmon on a foil lined, greased sheet.
Drizzle with a little soy sauce
Sprinkle a little brown sugar, lemon seasoning and salt
Bake for 15 minutes or until fish is flaky
Broil for 1 minute
20130517-214744.jpg
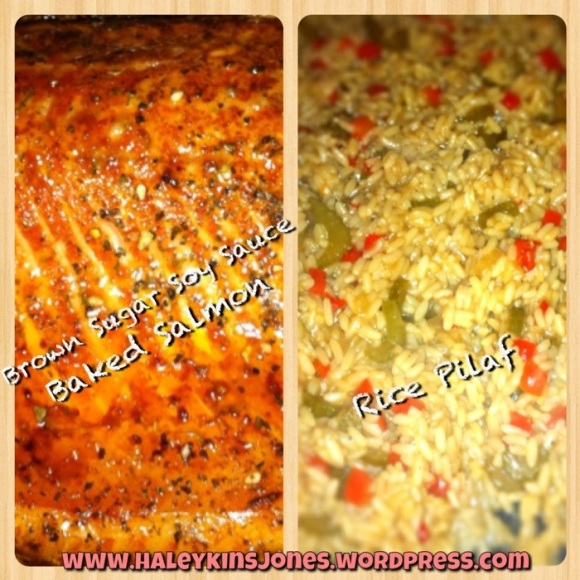
I served mine with a rice pilaf made with onion, celery, red pepper, garlic sauteed in butter and soy sauce, then cooked in chicken stock and a little bit of oyster sauce.
20130517-214953.jpg
20130517-215511.jpg
20130517-215559.jpg
Thanks for visiting. I hope you enjoy this new yummy salmon dish. I’ve got another recipe for salmon coming up in the next few weeks so if you like salmon as much as we do then stay tuned.
20130517-220354.jpg
Don’t forget to follow my blog by clicking the FOLLOW button at the bottom of this page. Enter your email address and you will be notified of anything new.

Tagged , , , , , , , , , , , , , , , , , , , , , , , , , , , , , , , , , , , , , , ,

Salmon with Sriracha Sauce

I wanted to try something different for dinner the other night and so I saw this recipe for Salmon with a Sriracha type marinade. After making it and trying it, I decided it was too bland, I wanted more flavor so I changed the amounts a bit to make it pop a bit more. You don’t have to use as much if you find it too powerful but I think it’s just right. I had never heard of Sriracha Sauce so I googled it and then I recognized the bottle.

I made a tomato, onion sriracha rice similar to mexican rice as the side dish. Hubby liked both and so I will definitely be making this again.

Salmon with Sriracha Sauce

Salmon With Sriracha Sauce and Lime

Ingredients:
1 Salmon Fillet
Juice and zest of 1 lime
1 ½ Tbsp. maple syrup
3 tsp. Sriracha sauce
½ tsp. coarse sea salt
Sriracha sauce for drizzle
2 Tbsp. coarsely chopped cilantro

Instructions:
Heat oven to 425°.
In a bowl, whisk together juice, zest, syrup, sriracha and salt.
Place salmon on a foil lined greased baking sheet or a baking dish
Pour lime-maple mixture over top.
Roast salmon until cooked through and flaky, about 15 minutes.
Drizzle with more sriracha sauce if desired
Sprinkle with cilantro
Serve.

Give it a go if you’re looking for a new way to serve up Salmon. If you do try it let me know what you think.
Thanks for visiting!

If you want to follow my blog see the follow my blog button right below this post or at the bottom of the page. Just enter in your email address and anything I do will be sent your way. Thanks Guys!

Tagged , , , , , , , , , , , , , , , , , , , , , , , , ,

Filled my backpack with onions and… french bread

I woke up to sunshine in my eyes, shining through the trees in my back yard. It’s been this way the last few mornings. Absolutely beautiful the way the light dances along the walls and over my perfumes. Another nice day.

However I’ve been feeling “blah” lately. Can I use that, non-word? It really is the best word to describe how I feel. I think it’s because I’ve not been out in that sunshine… so this morning I threw my backpack on and pulled out my bike. It was crisp and the air smelled wonderful. There is definitely a different vibe out there now than there was just a few months ago. School kids here school kids there. There’s a kid, there’s another ok you get it. Even the sun looks different than it did before. I appreciated the change.

On my way back through my neighbourhood I stopped at the local market and filled up my backpack with a bunch of….. onions and a loaf of french bread…. Thankfully the bread fit in my bag so I didn’t have to finish my bike ride with a loaf of bread sticking out the top…. Time to fire up the slow cooker.

Upon purchasing my new slow cooker a few weeks ago, I’ve been filling up my book with new recipes to try. A basic, and one in which I’ve only ever tried twice in my life, caught my eye. French Onion Soup.

Now I’m excited to get this going. I’ve recently had two addictions…. onions and red pepper flakes. I’ve been going through onions like a crazy person gone mad. Luckily I wear contact lenses and thus…. no burning or teary eyes! Yes the rumor is true. Also, red pepper flakes…. why can’t they go in every meal? Give me one good reason why they can’t.  Mmmmmm spicy.

FRENCH ONION IN THE SLOW COOKER

Ingredients

3 Cans beef broth (I prefer Swanson)

3 T butter

2 yellow onions

¾ T sugar

1/3 C cooking sherry

1 t salt

Slices of crusty bread (I used french)

Gruyere Cheese (I had swiss in the fridge)

Directions

Turn slow cooker on to high

Add butter

Slice onions into rings and separate the rings from each other with your hands

When butter is melted add in the onion rings

Toss to coat onions evenly in the butter

Add beef broth, sugar, sherry, and salt

Cook on high for about 7-8 hours or low for about 10

It’s done when the onions are translucent and softened.

To Serve

Set your oven to broil

Toast a slice of bread for each person.

Cut the cheese into slices (My swiss was presliced)

Spoon soup into individual oven safe bowls

Cheese goes on the toasted bread

Float each piece of cheese toast in each bowl.   And hope they fit…

Place bowls of soup and cheese toast on a cookie sheet or baking pan for ease and safety

Put em in the oven under the broiler.

Broil for a few minutes until cheese is melty and slightly golden

Serves 4-6

While I had the butter melting in the slow cooker to start the soup, I started in on the next dish.  So incredibly glad I started this one early as I had no idea, nor did I even begin to think about just how long it would take!  OMG.  I made Beef Pot Stickers to go with Soup.  The filling itself is easy to make…. But it took a very long time to assemble each one.

I love gyoza and always order it when we have sushi..  It becomes the usual with our sushi order.  If you don’t know what gyoza are, well they are basically pork dumplings but I guess they can be made various ways.  They are fried on one side and slightly steamed I believe.  Yum Yum Yum  in my Tum Tum.  These are similar, and although I have not yet fried them up for dinner…. I can’t imagine them not being tasty

BEEF POT STICKERS

Ingredients

2 lbs extra lean ground beef

1 egg white

½ a carrot, finely diced

4 green onions, finely chopped

½ yellow onion, finely chopped

3 cloves of garlic, minced

1 red pepper, finely chopped

3T oyster sauce

3T soy sauce

72 wonton wrappers

1 egg yolk, beaten

Directions

In a food processor, combine the beef and egg white and grind to a paste.

Mix in the carrot, green onion, yellow onion, garlic, red pepper and the oyster sauce and soy sauce.

Lay 4 wonton wrappers out on a clean, dry surface, then place 1 Tablespoon beef mixture into the center of each wrapper. Wet all four sides with a pastry brush or your finger, then fold the bottom right-hand corner up the top left-hand corner and seal the edges, being careful to remove all air pockets. Transfer potsticker to a wax paper-lined baking sheet and press down gently to create a flat bottom.

Repeat with remaining wrappers and filling. Annoying!!!

To freeze: Place baking sheet into the freezer until potstickers are frozen solid. Transfer to a freezer-safe container or bag. When ready to eat, cook the same way as fresh.

To cook: Heat 1 teaspoon vegetable oil in a medium-sized skillet. Place potstickers, being careful not to crowd, into the skillet, getting oil on the bottom of each potsticker. Cook until golden brown on the bottom, then add enough water to come 1/3 of the way up the potstickers. Place a lid on top and let the potstickers steam for 2-3 minutes.

When there is just a couple Tablespoons water left in the skillet, remove the lid and allow the water to cook out and the potsticker bottoms to crisp back up. Use a spatula to gently unstick the wrappers from the skillet and serve with Au Jus dipping sauce (heat ingredients in a small saucepan or in the microwave.)

Serve as is or with chili-sauce-spiked soy sauce.

I don’t know how many wonton wrappers I originally had… I didn’t count and I ran out.  So I had to run out to the store.  The new ones seemed to work out quite a bit faster.  Don’t ask me why, but a trip to the grocery store when I had already been cooking for an hour was annoying!

Well I’m about to pull it altogether and serve Hubby his dinner.  Hopefully it all goes as planned. Wish me luck!

I’ll touch back later and add in some pics!

Tagged , , , , , , , , , , , , , , , , , , , , , , , , , , , , , , , , , , , , , , , , , , , , , , , , , , ,

Mmm THICK n CHUNKY ~ Spaghetti My Way

Last night I had a sudden urge to go out at 9:00pm to buy a slow cooker.  I’d say ‘Crock Pot’ but that’s a brand like BandAid.  So I came home with a really nice slow cooker and today I wanted to put it to use.  I had a bunch of vegetables in my fridge (‘had’ being the key word as the fridge is void if vegetables now) and needed to get rid of them do I decided…. my Thick  n Chunky Spaghetti would be excellent!

Hubby and I like our spaghetti a certain way… think n chunky of course and filled mostly with yummy veggies.

For my spaghetti (can I even call it spaghetti when the pasta I use is Penne?), anyways, for my spaghetti I start it off with a giant stock pot on my stovetop.  Heat a small drizzle of olive oil in the bottom and add 1 diced onion, and 5 or 6 cloves of Red Russian garlic (or more or less depending on your taste buds, and if course u don’t have to use the Red Russian variety of garlic, that’s just the yummy goodness I had kickin round these parts LOL!) Sauté until the onions are translucent.  Then I removed them from the pit and set aside.

Then I browned my ground beef.  I think I started with 2 kgs?  What is that, like 4.5 lbs? Just under?  Once the beef is cooked thoroughly I drained most of the remaining liquids and added back in the sautéed onion and garlic and let it cook together for about 5 minutes.  Seasoning it with crushed red pepper flakes, cayenne, oregano and of course salt and pepper.

Ok next comes all the veggies…  I use approximately 2 cups chopped celery, 2 cups chopped carrots, 4 cups sliced mushrooms, 1 diced red pepper, 1 diced green pepper, 4 cups chopped broccoli and 2 cups chopped zucchini.  Add it all to the stockpot into the beef and onion mixture.  I cook this on low for about 10 minutes.  I want the veggies to get a bit seasoned and get em hot!

Next I add in 5-6 large cans of crushed tomatoes,  I like my sauce fairly thick and the veggies will produce a bit of liquid as well so make your best judgement.  Just don’t open all your cans of tomatoes until you know what you need.  Taste your sauce… usually it’s a bit acidic… add a pinch or two of sugar to cut down the acids.

Finally I add ½ cup of parmesan cheese.  It adds a nice bold flavor and helps everything bind together for a richer thicker sauce.

I put all this in my slow cooker and and it cooked for about 4 hours and then warmed for an hour.  I like it best after it’s cooled a bit and the flavours have blended.

It made about 7 quarts… I couldn’t even fit all of it into the slow cooker….  LOLOL  We will have spaghetti tonight and tomorrow and I will freeze the rest for a nice easy quick meal some other day.  Or share with a friend!


Tagged , , , , , , , , , , , , , , , , , , , , , , , , , , , , , , , , , , , , , , ,