
Waffles vs. pancakes… pancakes vs. Waffles. If this question came up 5 years ago I would have said pancakes. Easily! For sure pancakes. Even if someone would have asked me a year or 6 months ago… Pancakes for the win! And then my whole world changed!
I was visiting my fam back home this spring. I had just spent the day hanging with my little sister while she worked at The Dragonfly Cafe. (I shouldn’t say I spent it ‘visiting’ because it really was spent drinking far too many of the best iced coffees and eating the most scrumptious, seriously to-die-for, Panini. I walked back to my parents place, back to my second favorite kitchen, MOMS’s, and it was a busy place. Waffle iron steaming away. The house smelled so good sausage and vanilla and oh wow just heavenly. (I was no longer full from previously mentioned ‘to-die-for panini)
Niece and Neph., we’re there and if I remember right, Dad was drooling, he loves breakfasts, especially for dinner. I think Niece was pouting at the table, a typical dinner time predicament for her. Cutest pout ever though; and Mom was helping Nephew operate the coolest waffle iron I’d ever seen. It’s like a real waffle iron. Like the ones that u flip. Flipping waffles half way through cooking… perfection! The bottom side really gets the best golden look and crispy shell, so flipping them gives them that even golden crisp on BOTH sides! Very cool!
I think I said I wasn’t hungry, but mom gave me a plate and said “too bad” so I dove in head first! “Oh sweet baby jesus!” I was not expecting this! What was I eating?!?!? This waffle, and may I mention that I eat them plain. No syrup, peanut butter, honey, jam or even butter for that matter and don’t u dare ask me about that…. ughhh, Nutella. Never in my life will I eat that stuff. Hahaha. I just can’t even fathom it. I mean, no offence, Hubby acts like its gold so there s big jar in this house, but I won’t go near it. Plain waffles…..
So this amazing flavour that was rocking every tastebud in my mouth was nothing but straight up pure oral pleasure. LOL.
If anything ever was…. this was!
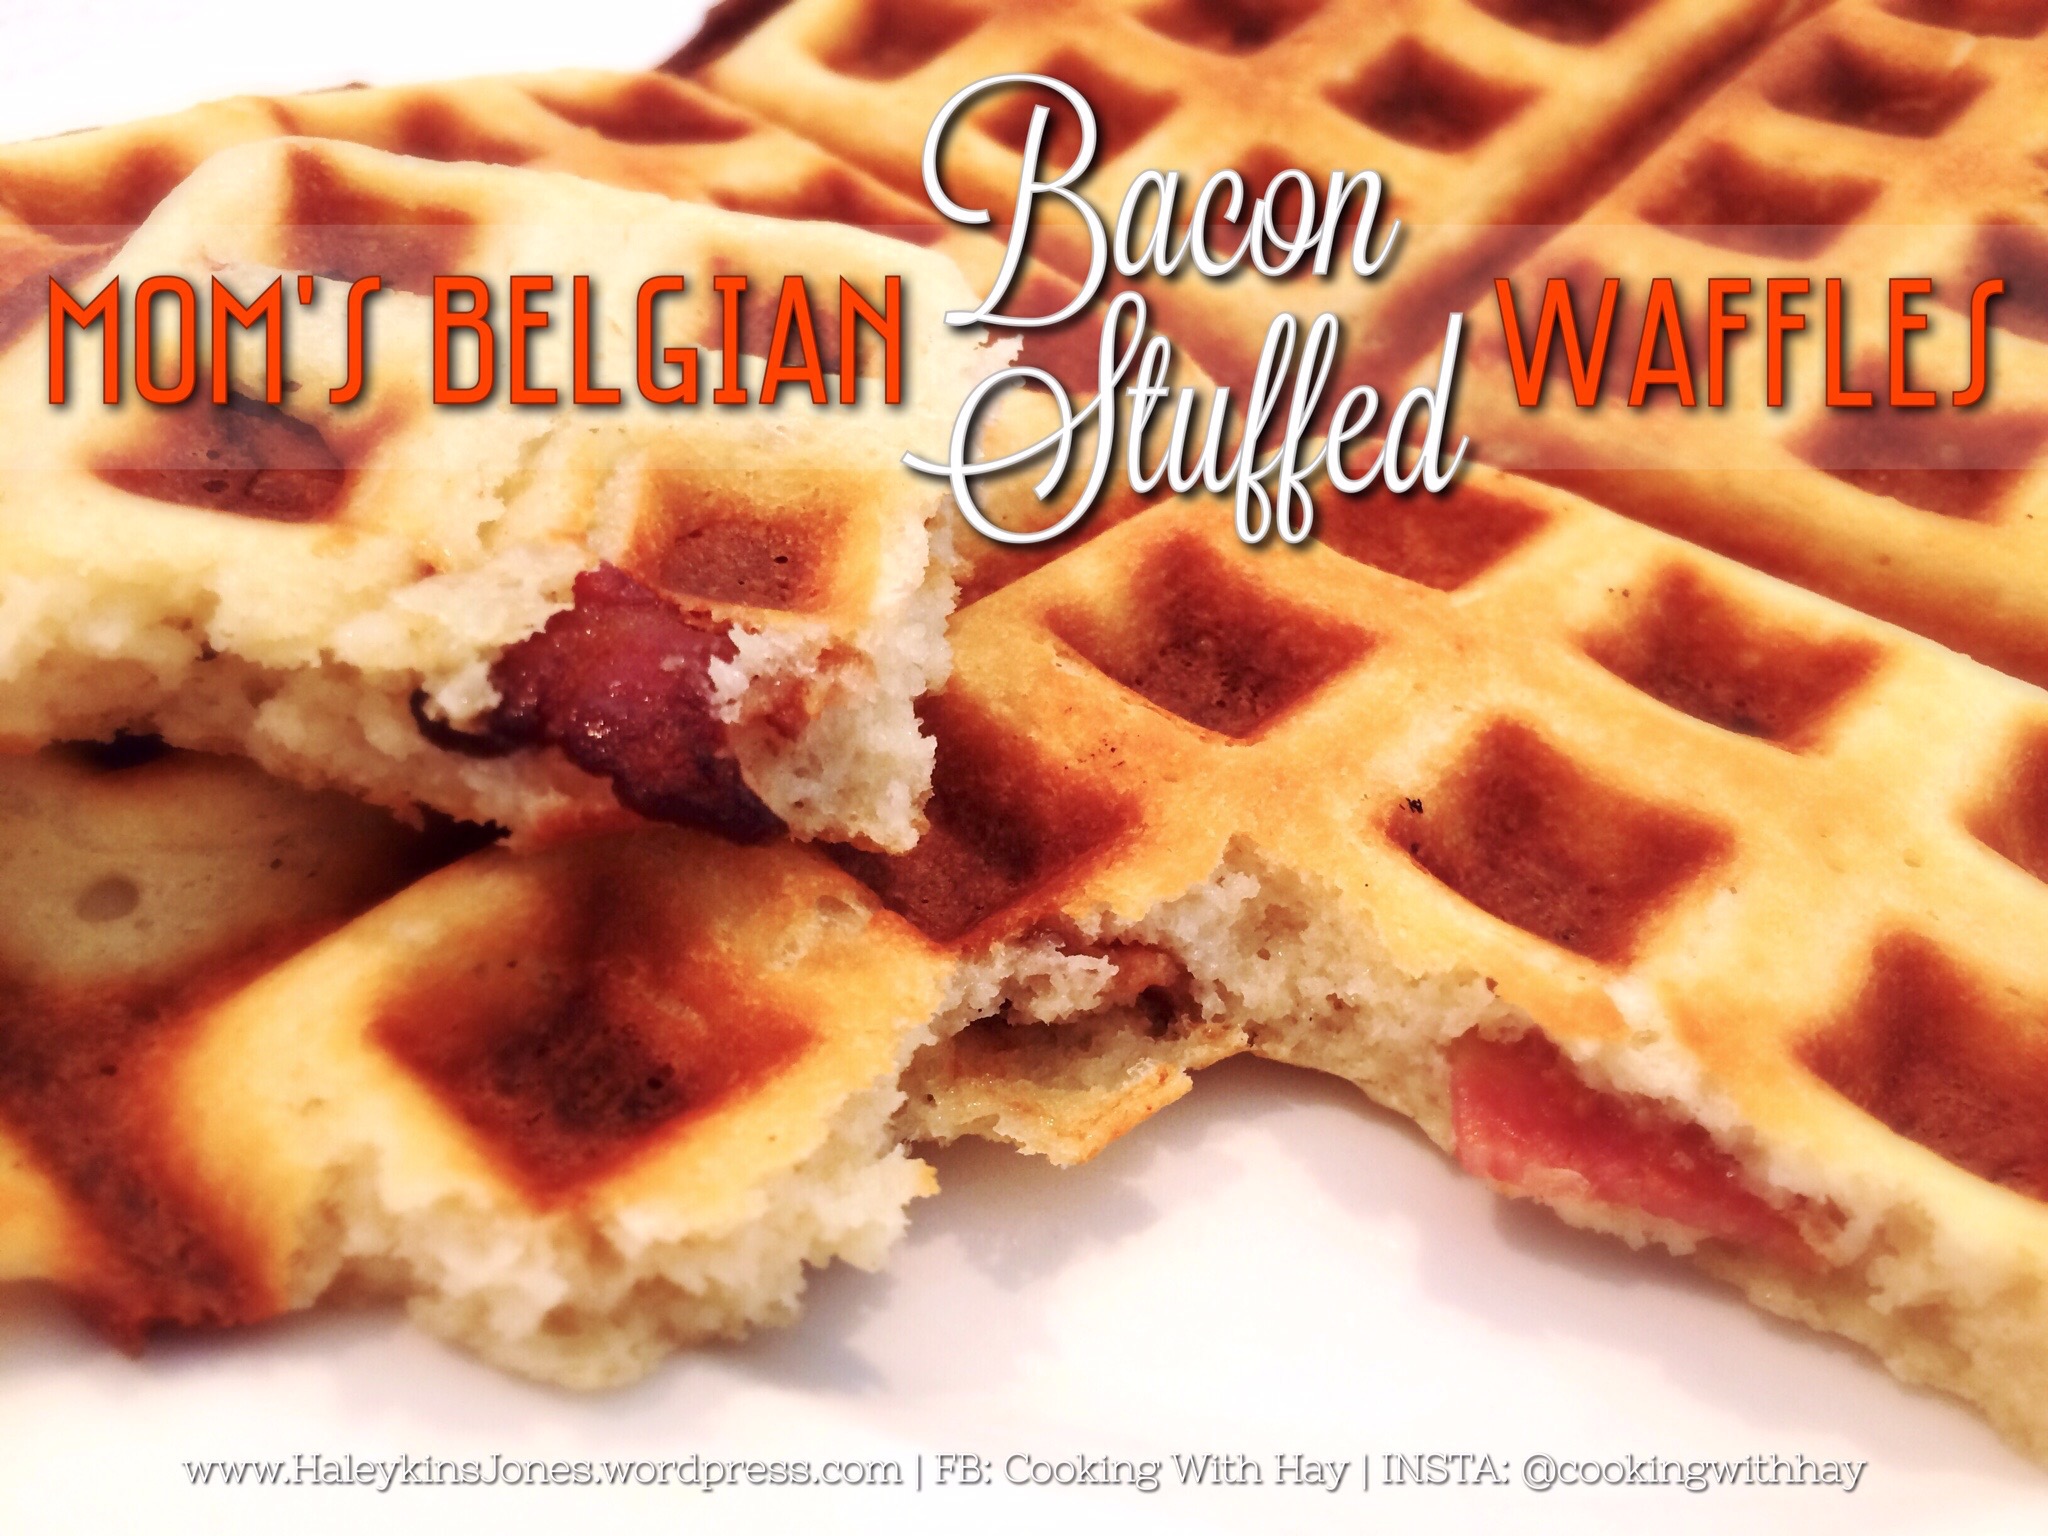
The perfect combination of a crispy outer shell and fluffy interior. They were so wonderfully sweet yet savory all at the same time and they didn’t even have any bacon stuffed inside. Mmmm a little vanilla, salt, some butter…. Just too easy and I can’t tell you enough how good the flavour is. I will never ever buy a store bought product again or Betty Crocker or any kind of mix again.
I love this recipe so much I might frame it and hang it right here on a newly finished wall. With a big ole hammer and nail. Nah…. Hubby would lose his shit! He’s spend so much time making these old walls as perfect as he can. Haha. If I dare bring out a hammer I’m likely to lose my whole arm all together.
First time I had bacon stuffed waffles was at Hash House A Go Go in Las Vegas. It comes with sage fried chicken and syrup on top speared with a steak knife LOL. If u haven’t gone….. GO!
I just made these a couple weeks ago as well. They were the first breakfast in the “Cooking With Hay” Kitchen. I even served Hubs as he sat on a bar stool at the island. As long as everyone follows the rules no one will get hurt. He stays on his side of the island, and I stay on mine. All will be good.😊
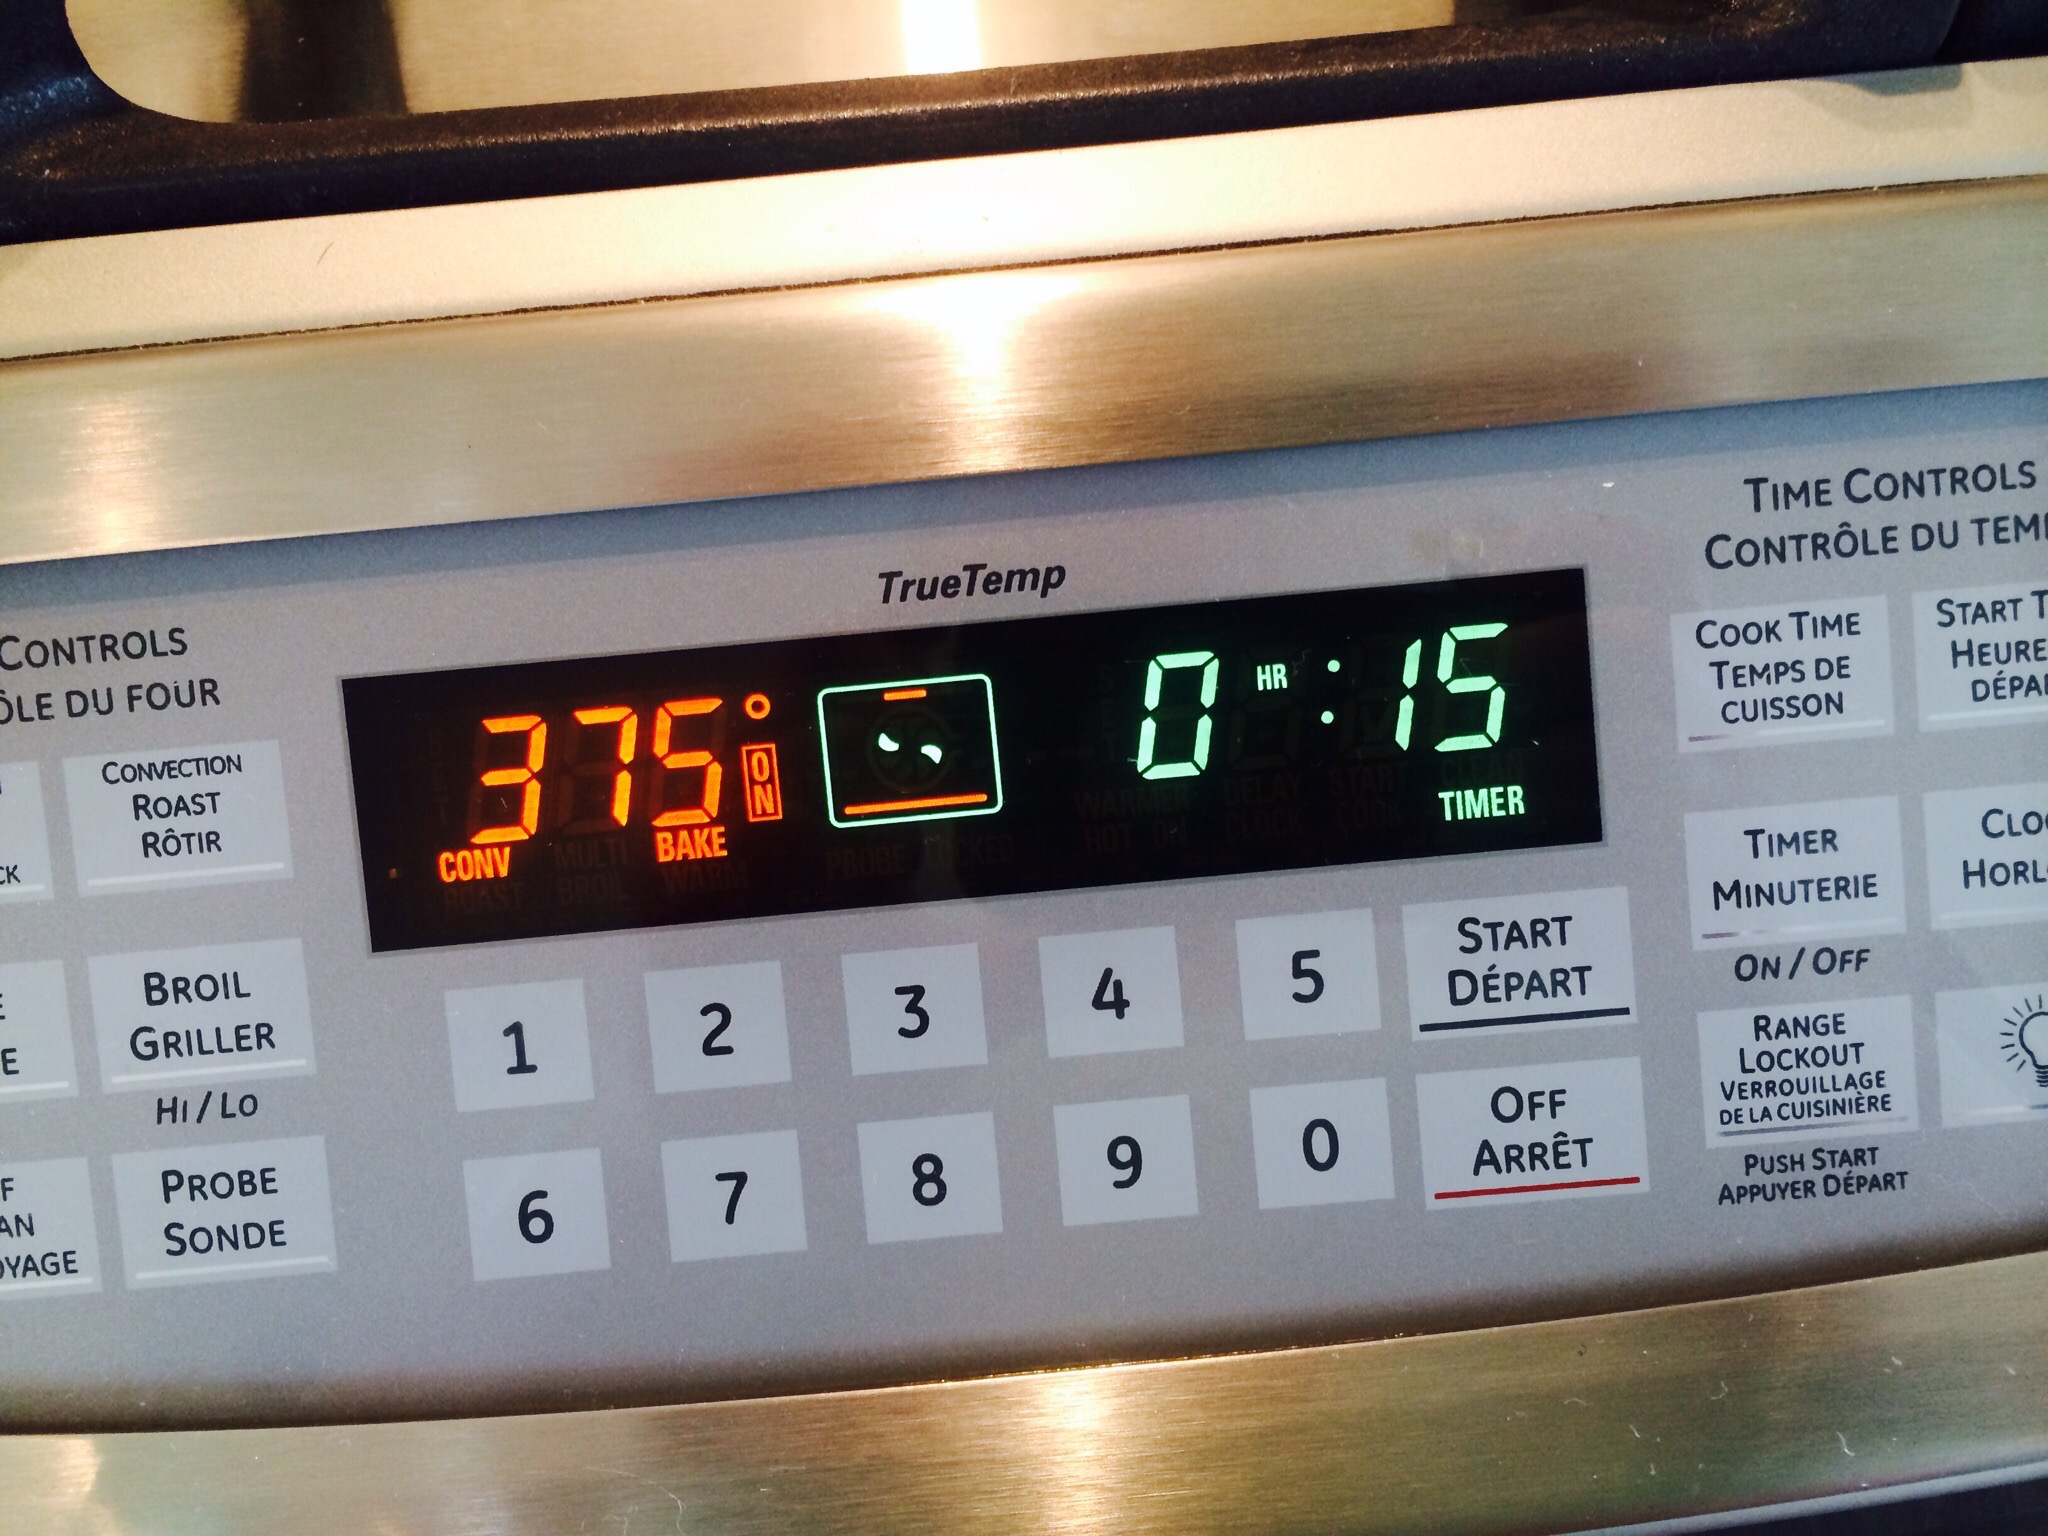
I have been cooking my bacon in the oven for over a year now. Best way ever. Stays flat and no splatter or greasy mess to deal with. Preheat your oven to 375 and you’ll need a timer set on 15 minutes once u place the pan in the oven.
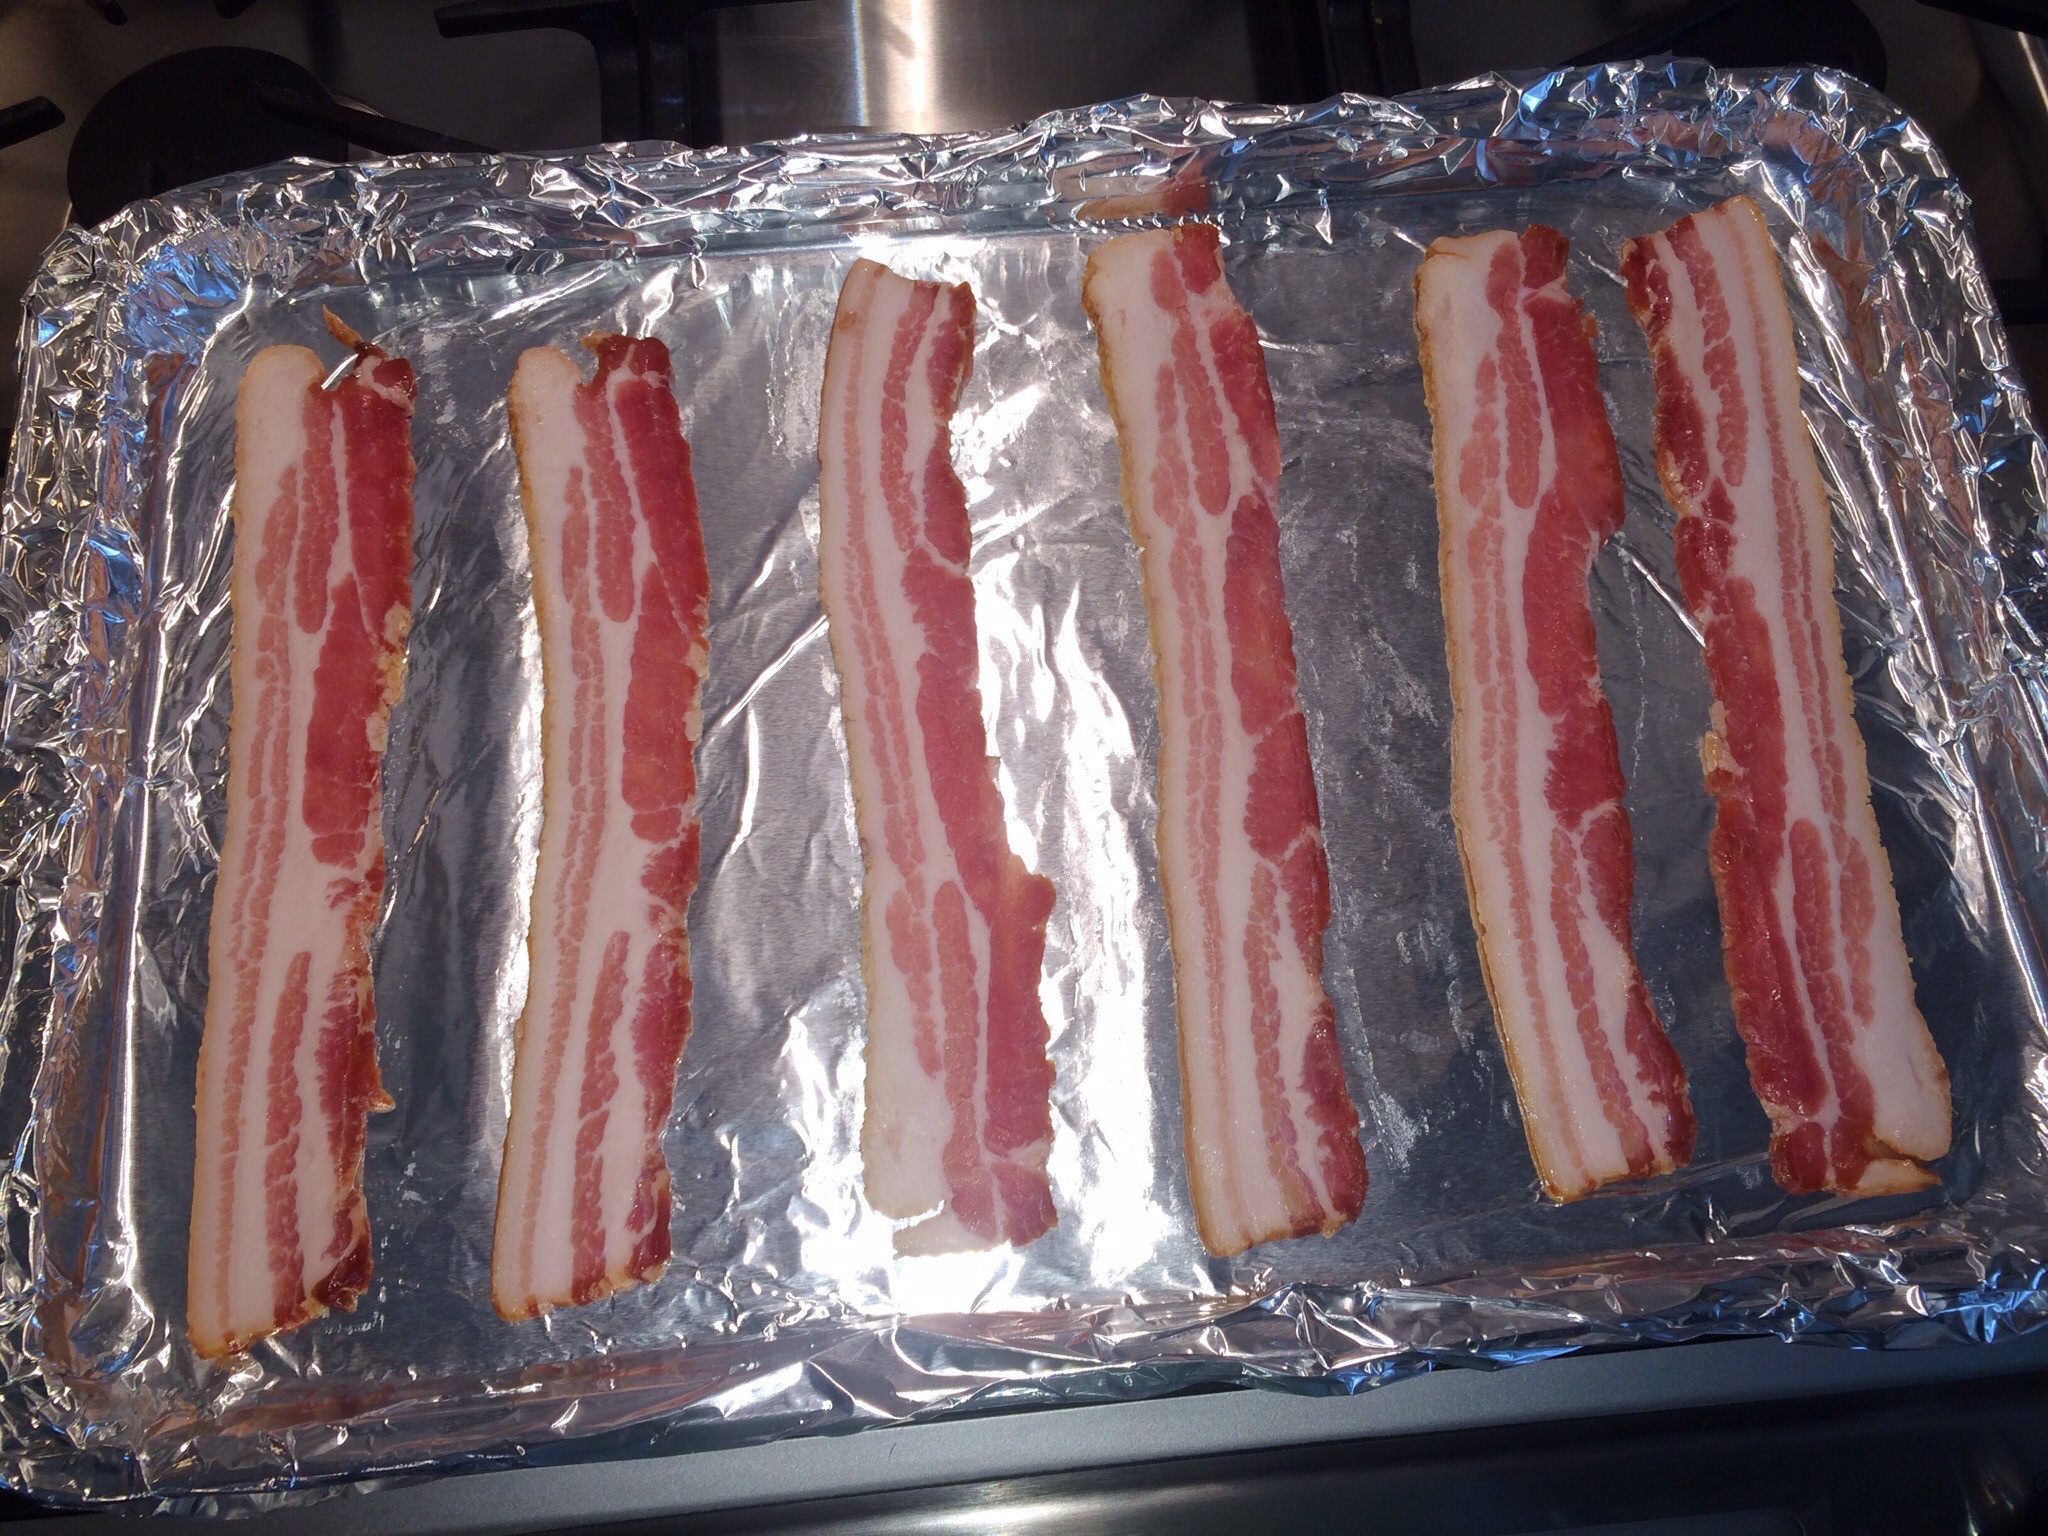
Line a baking sheet with foi and place your uncooked bacon. It’s going to shrink up. You can line em up and fit quite a few on a sheet obviously. I just make sure they don’t touch.
Now start that 15 minute timer.
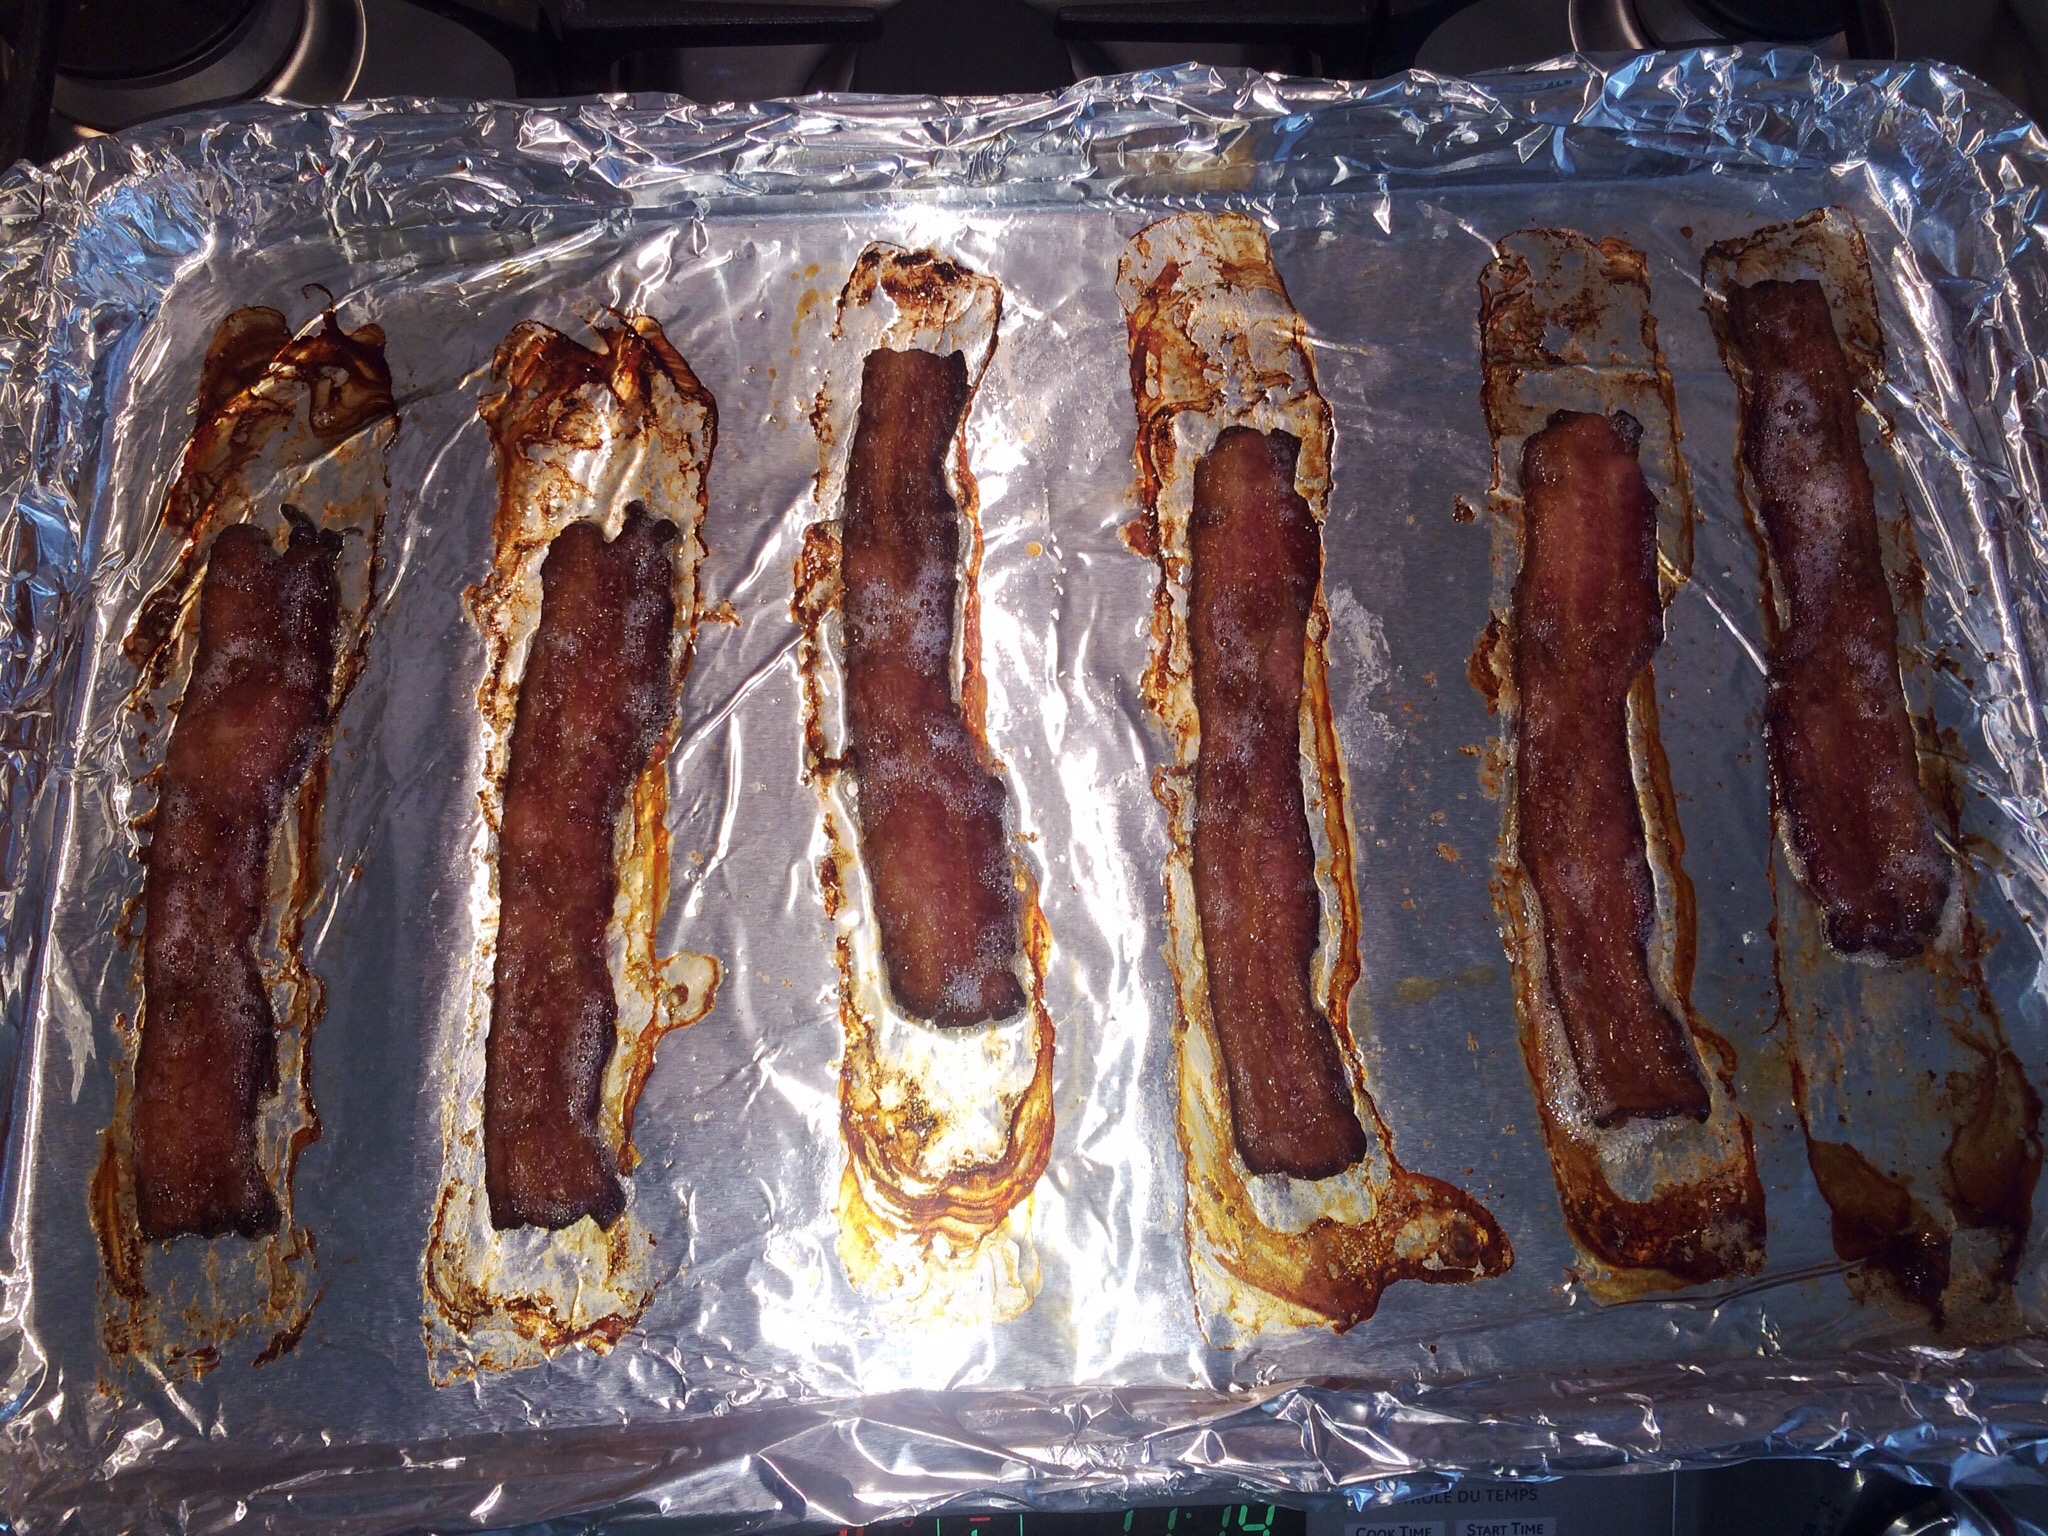
When the timer goes off they may not be quite done. They may need a minute more or a few more. Keep in mind they will continue to cook a tiny bit more after u take them out of the oven.
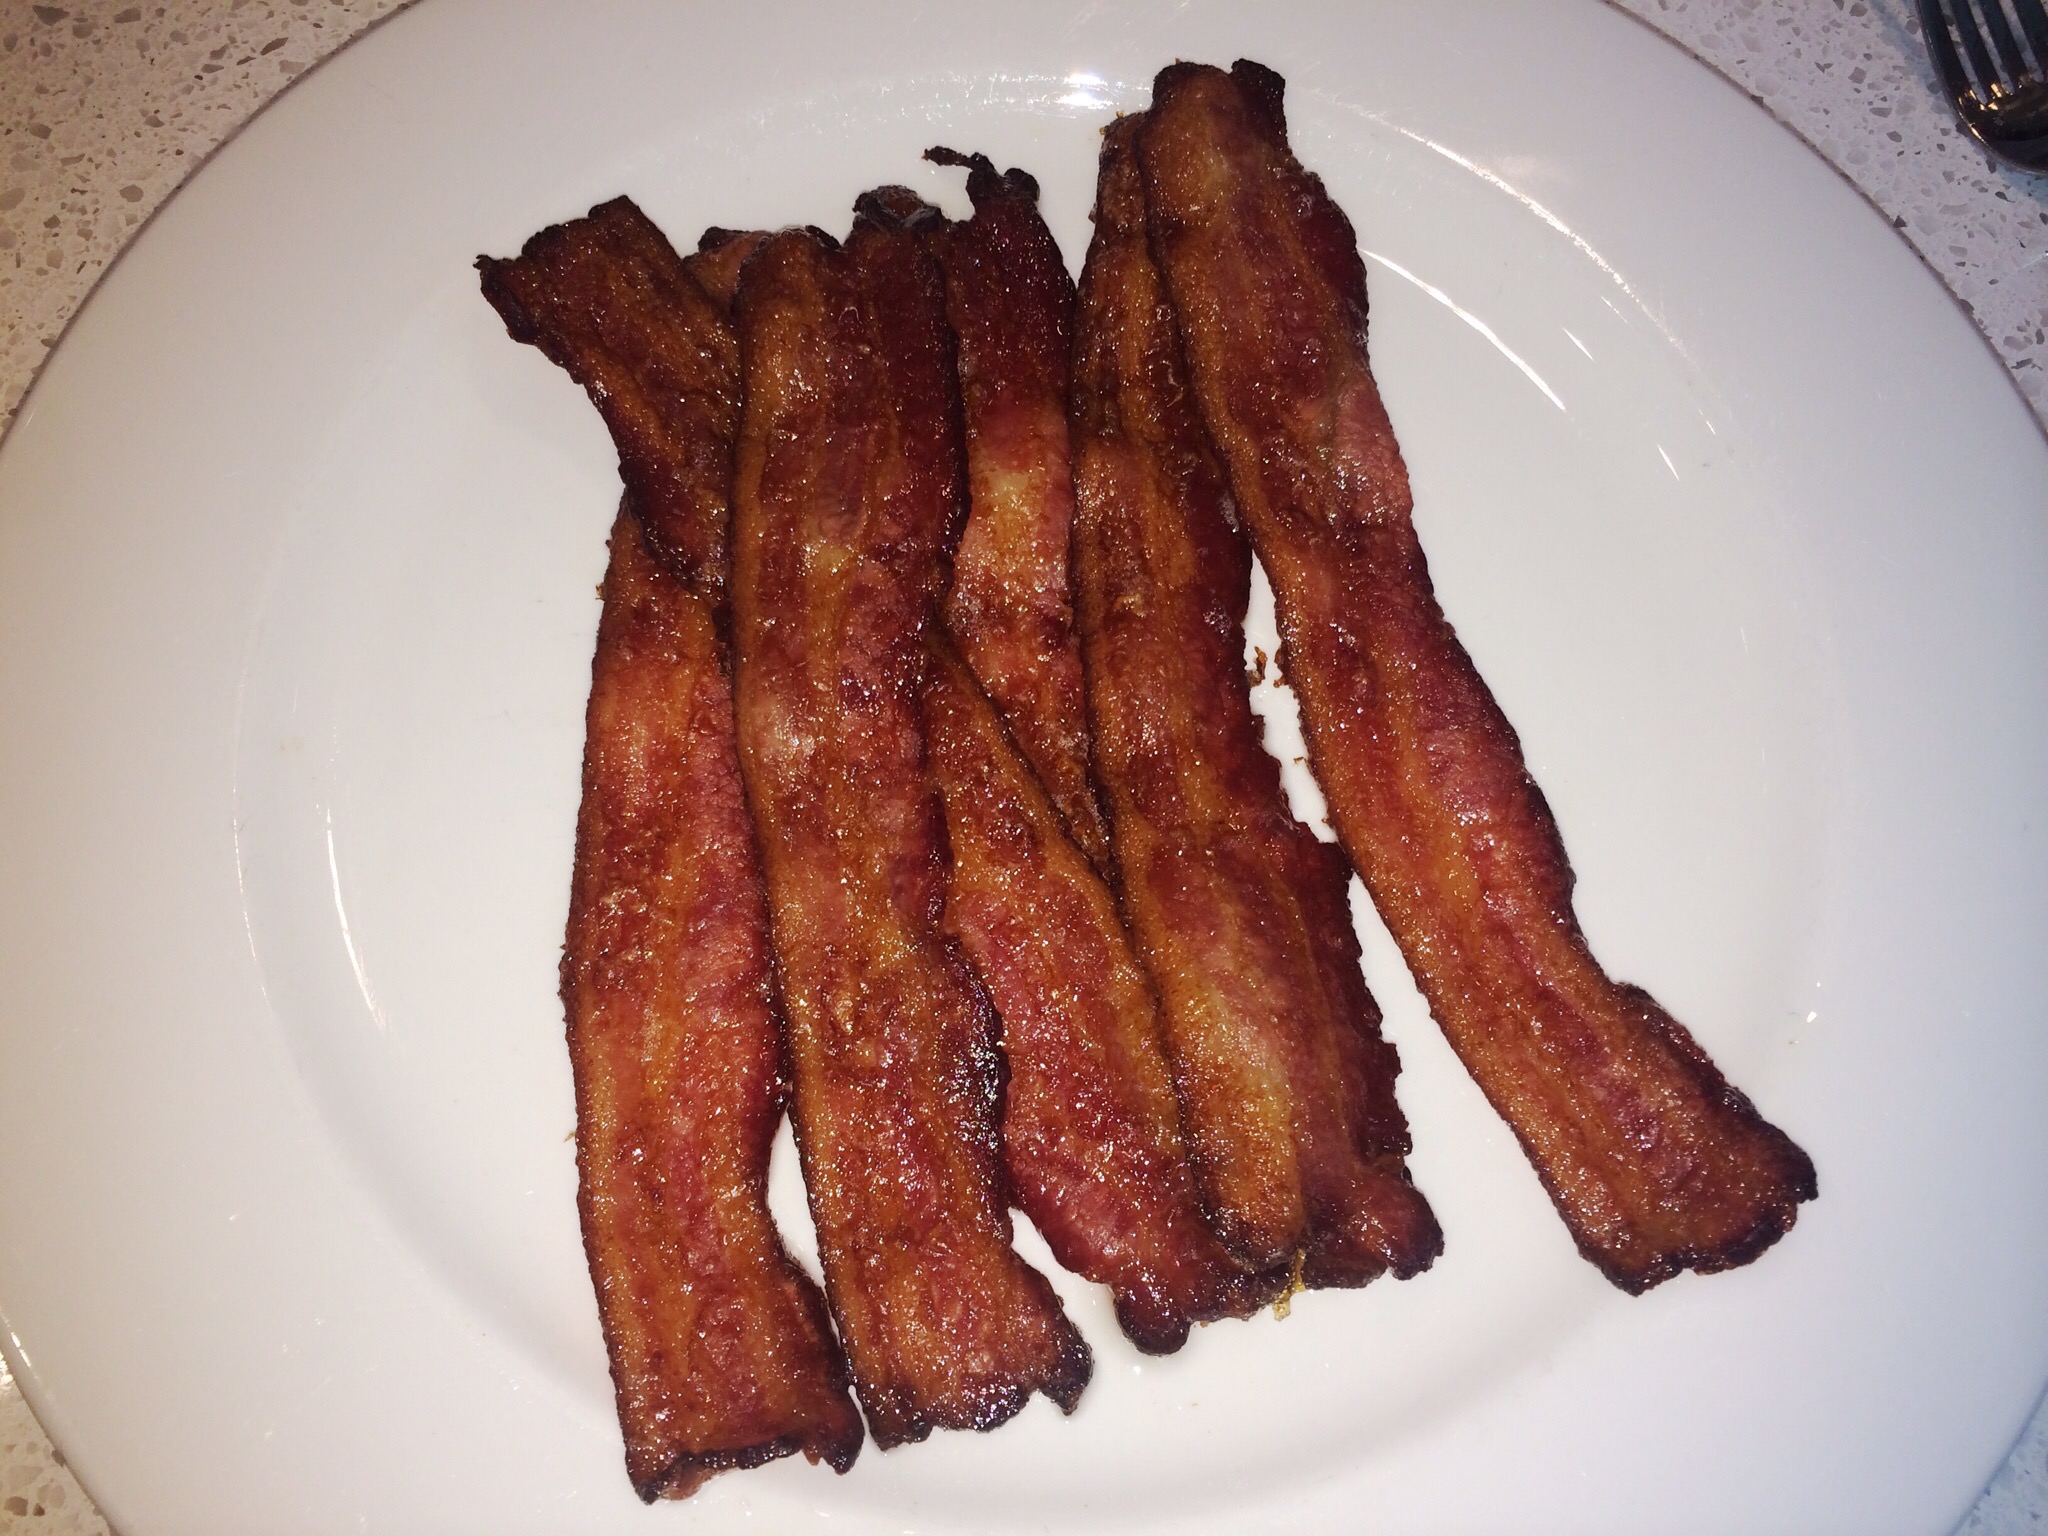
Remove from the oven and lay them on a paper towel to soak up some of that excess grease. Beautiful bacon!
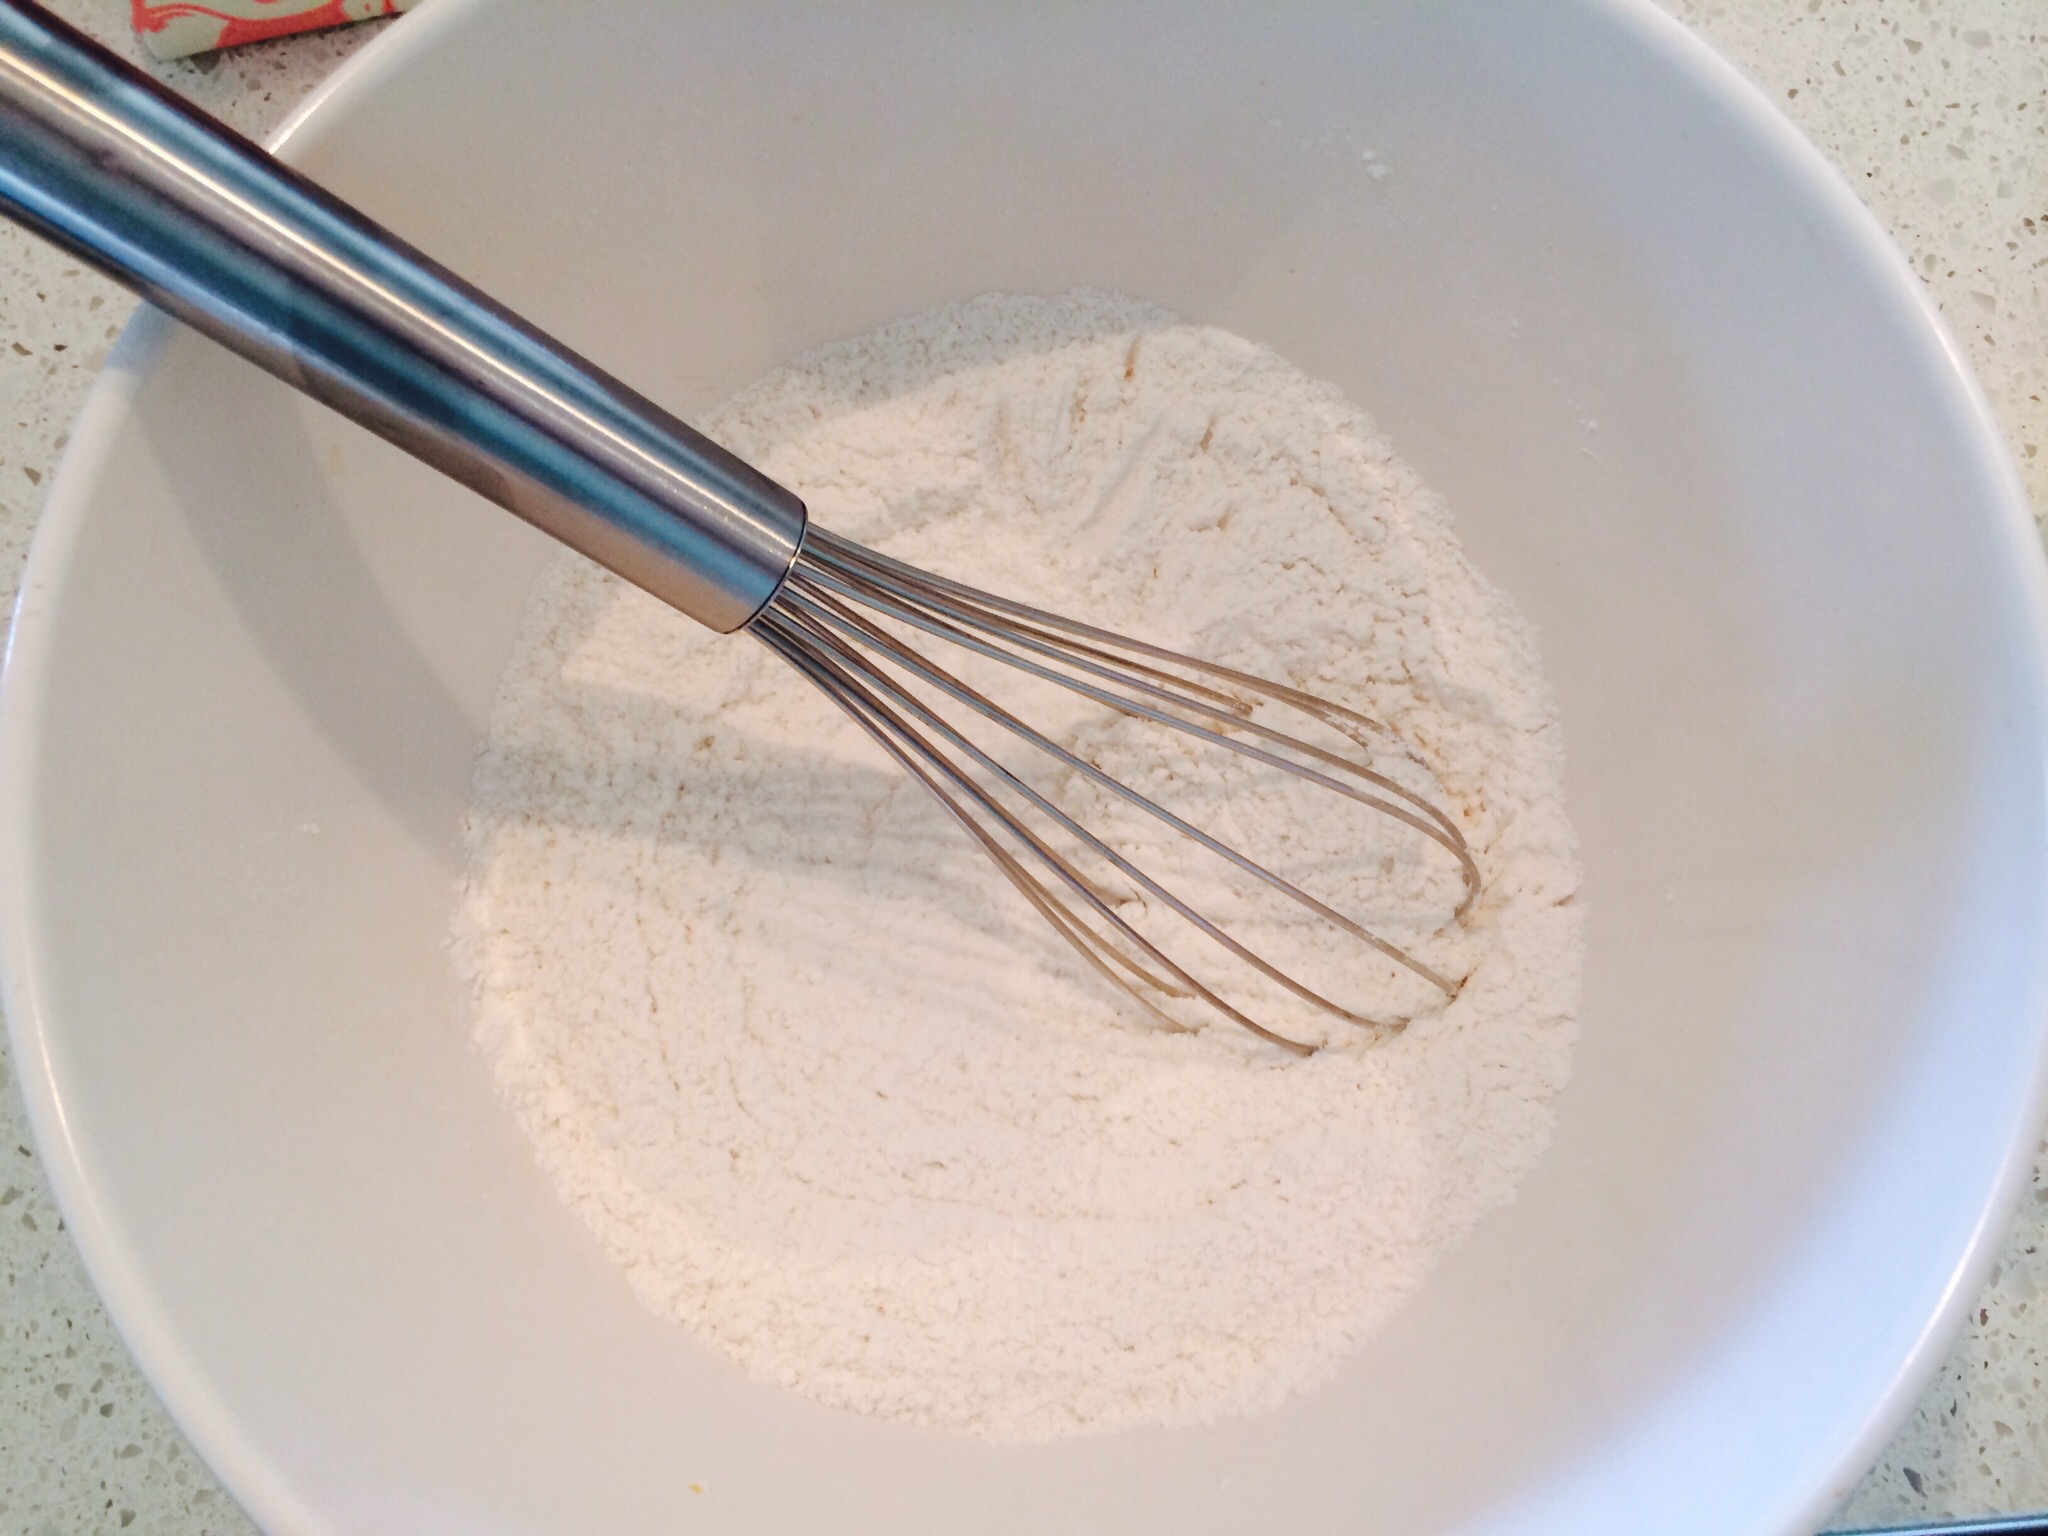
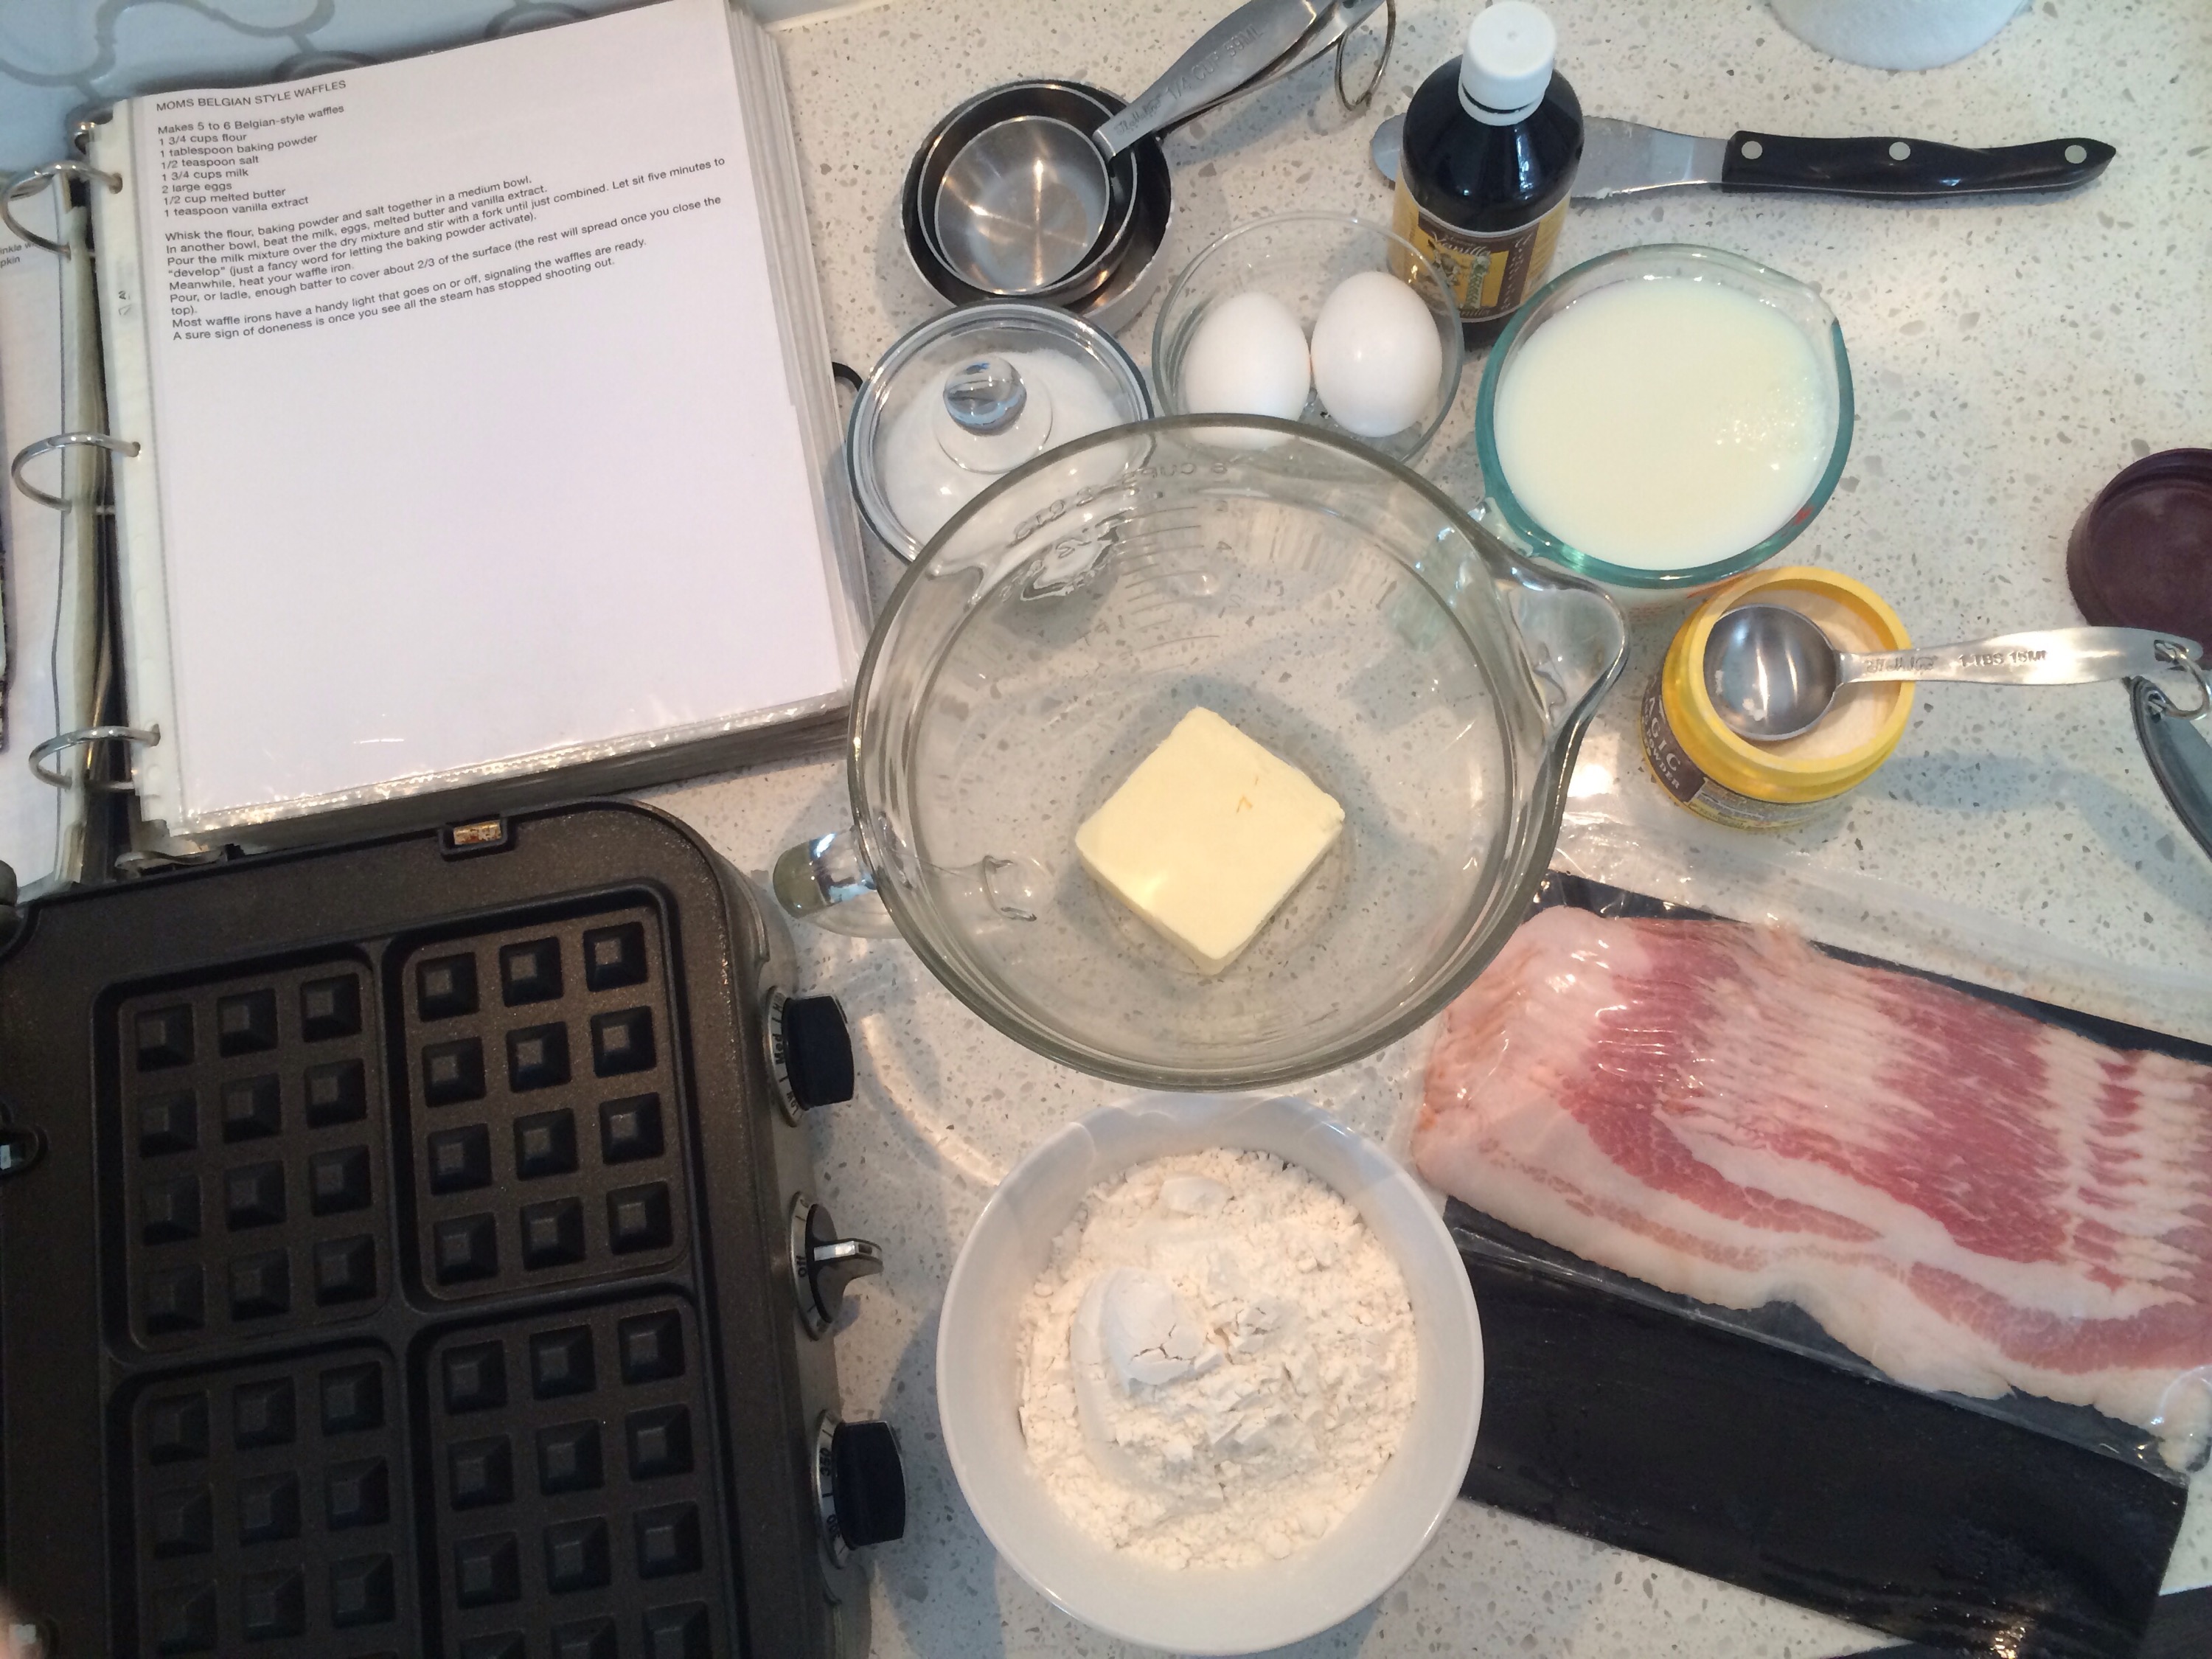
For the waffle batter mix up the dry ingredients in a bowl.
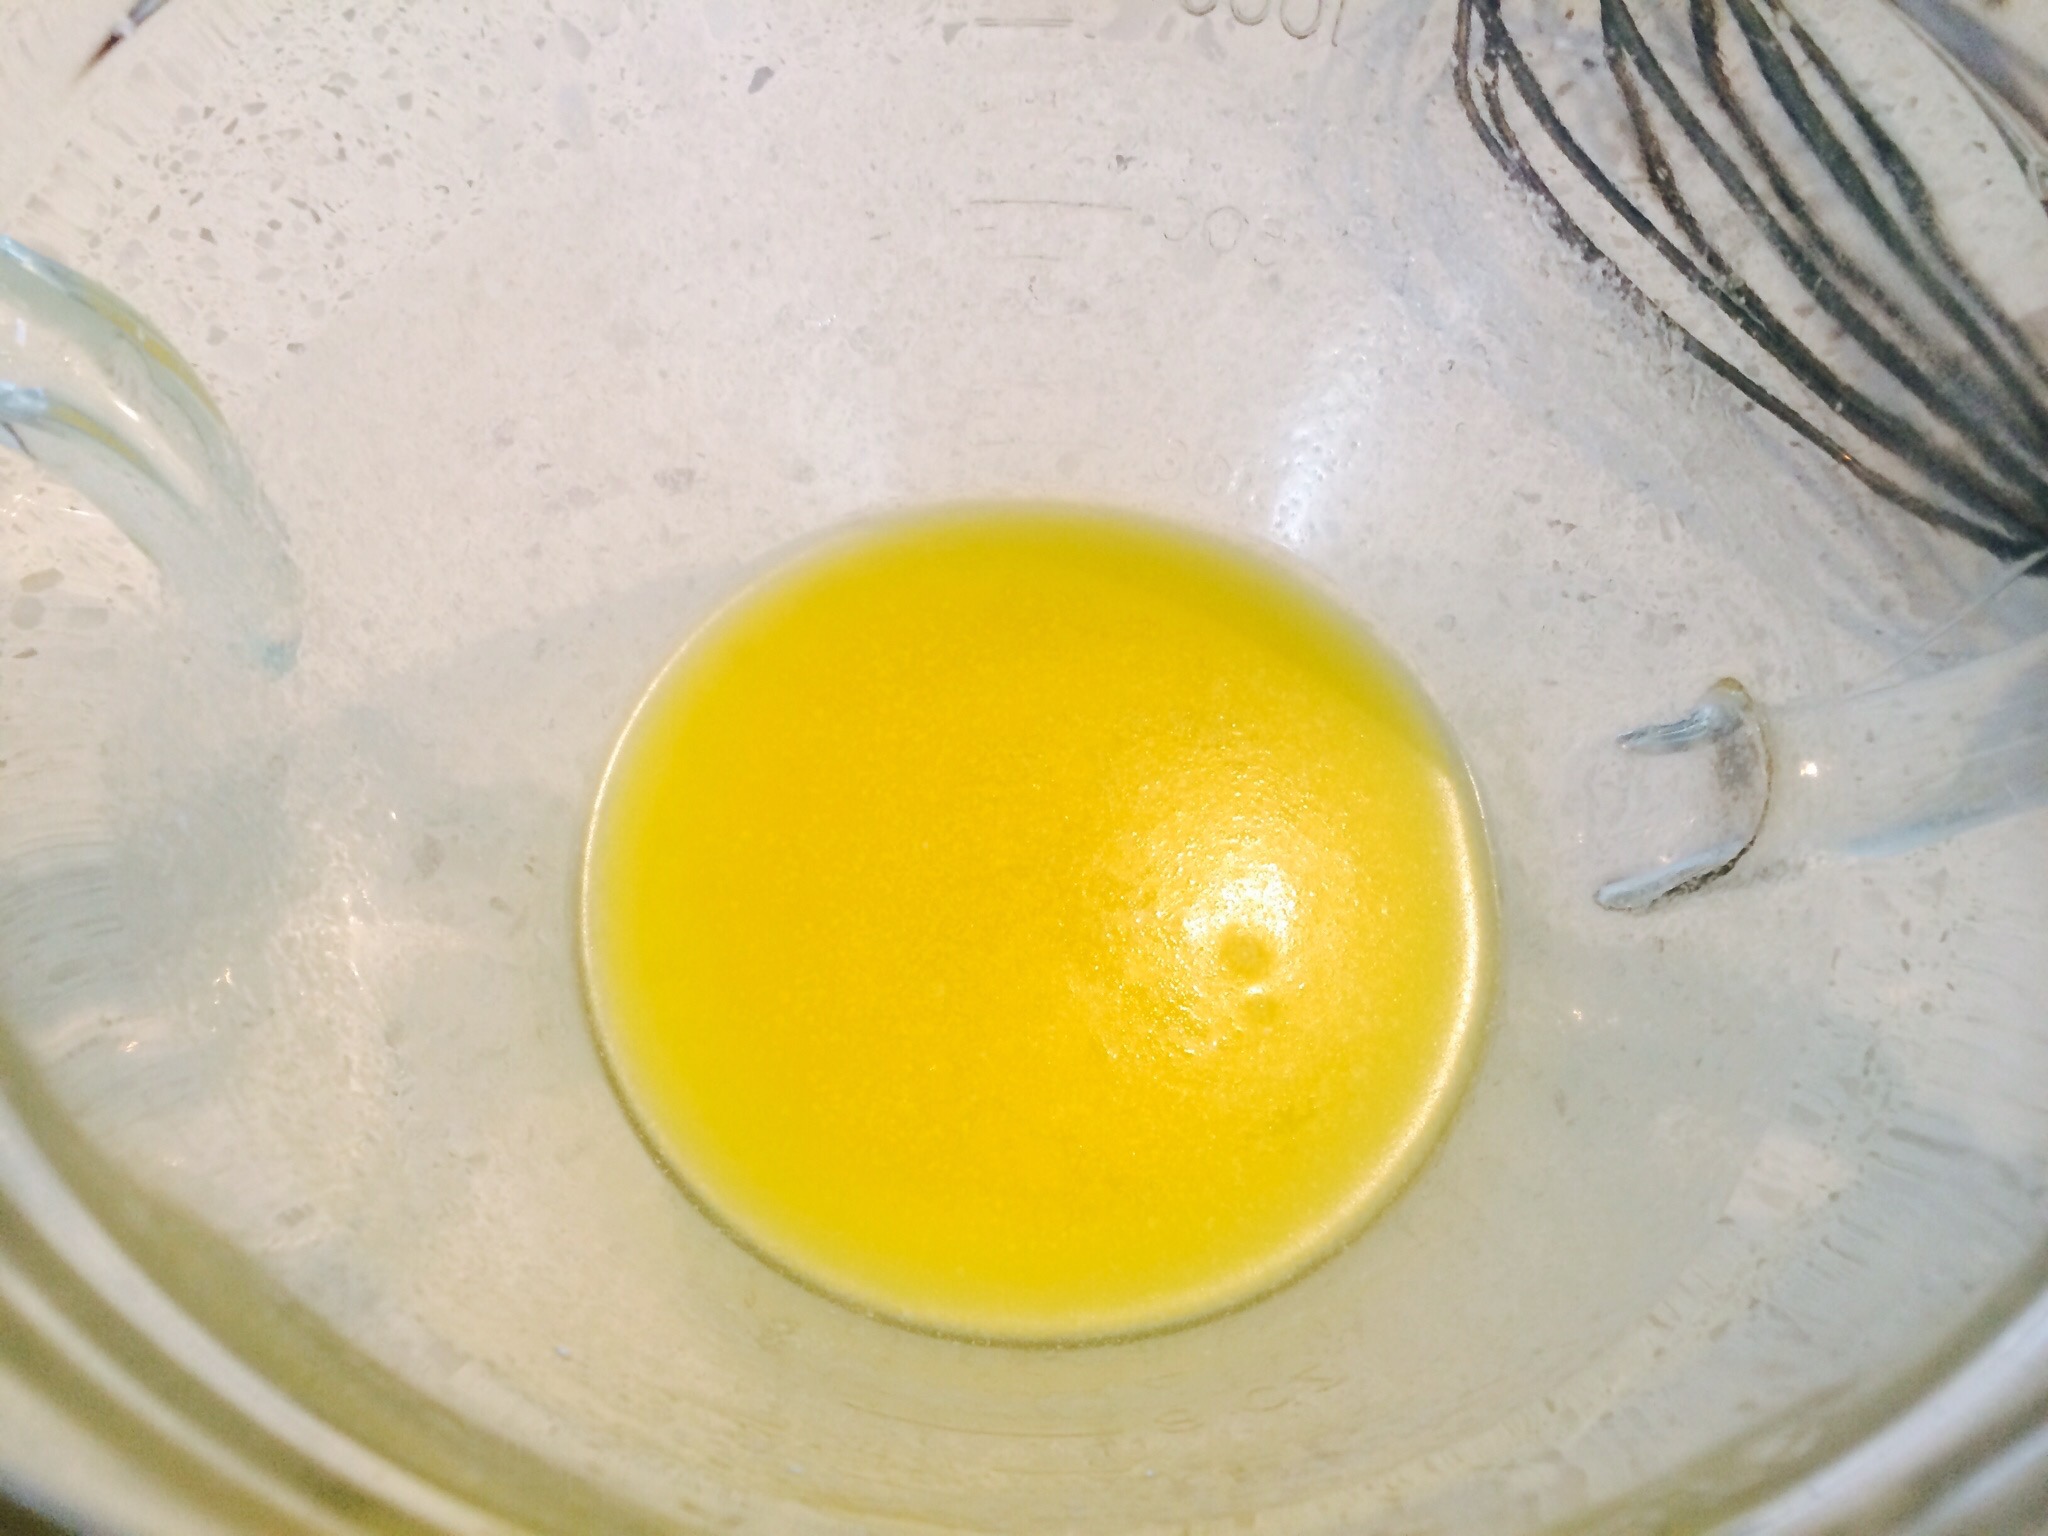
In a large glass microwaveable bowl melt the butter. Few seconds at a time.

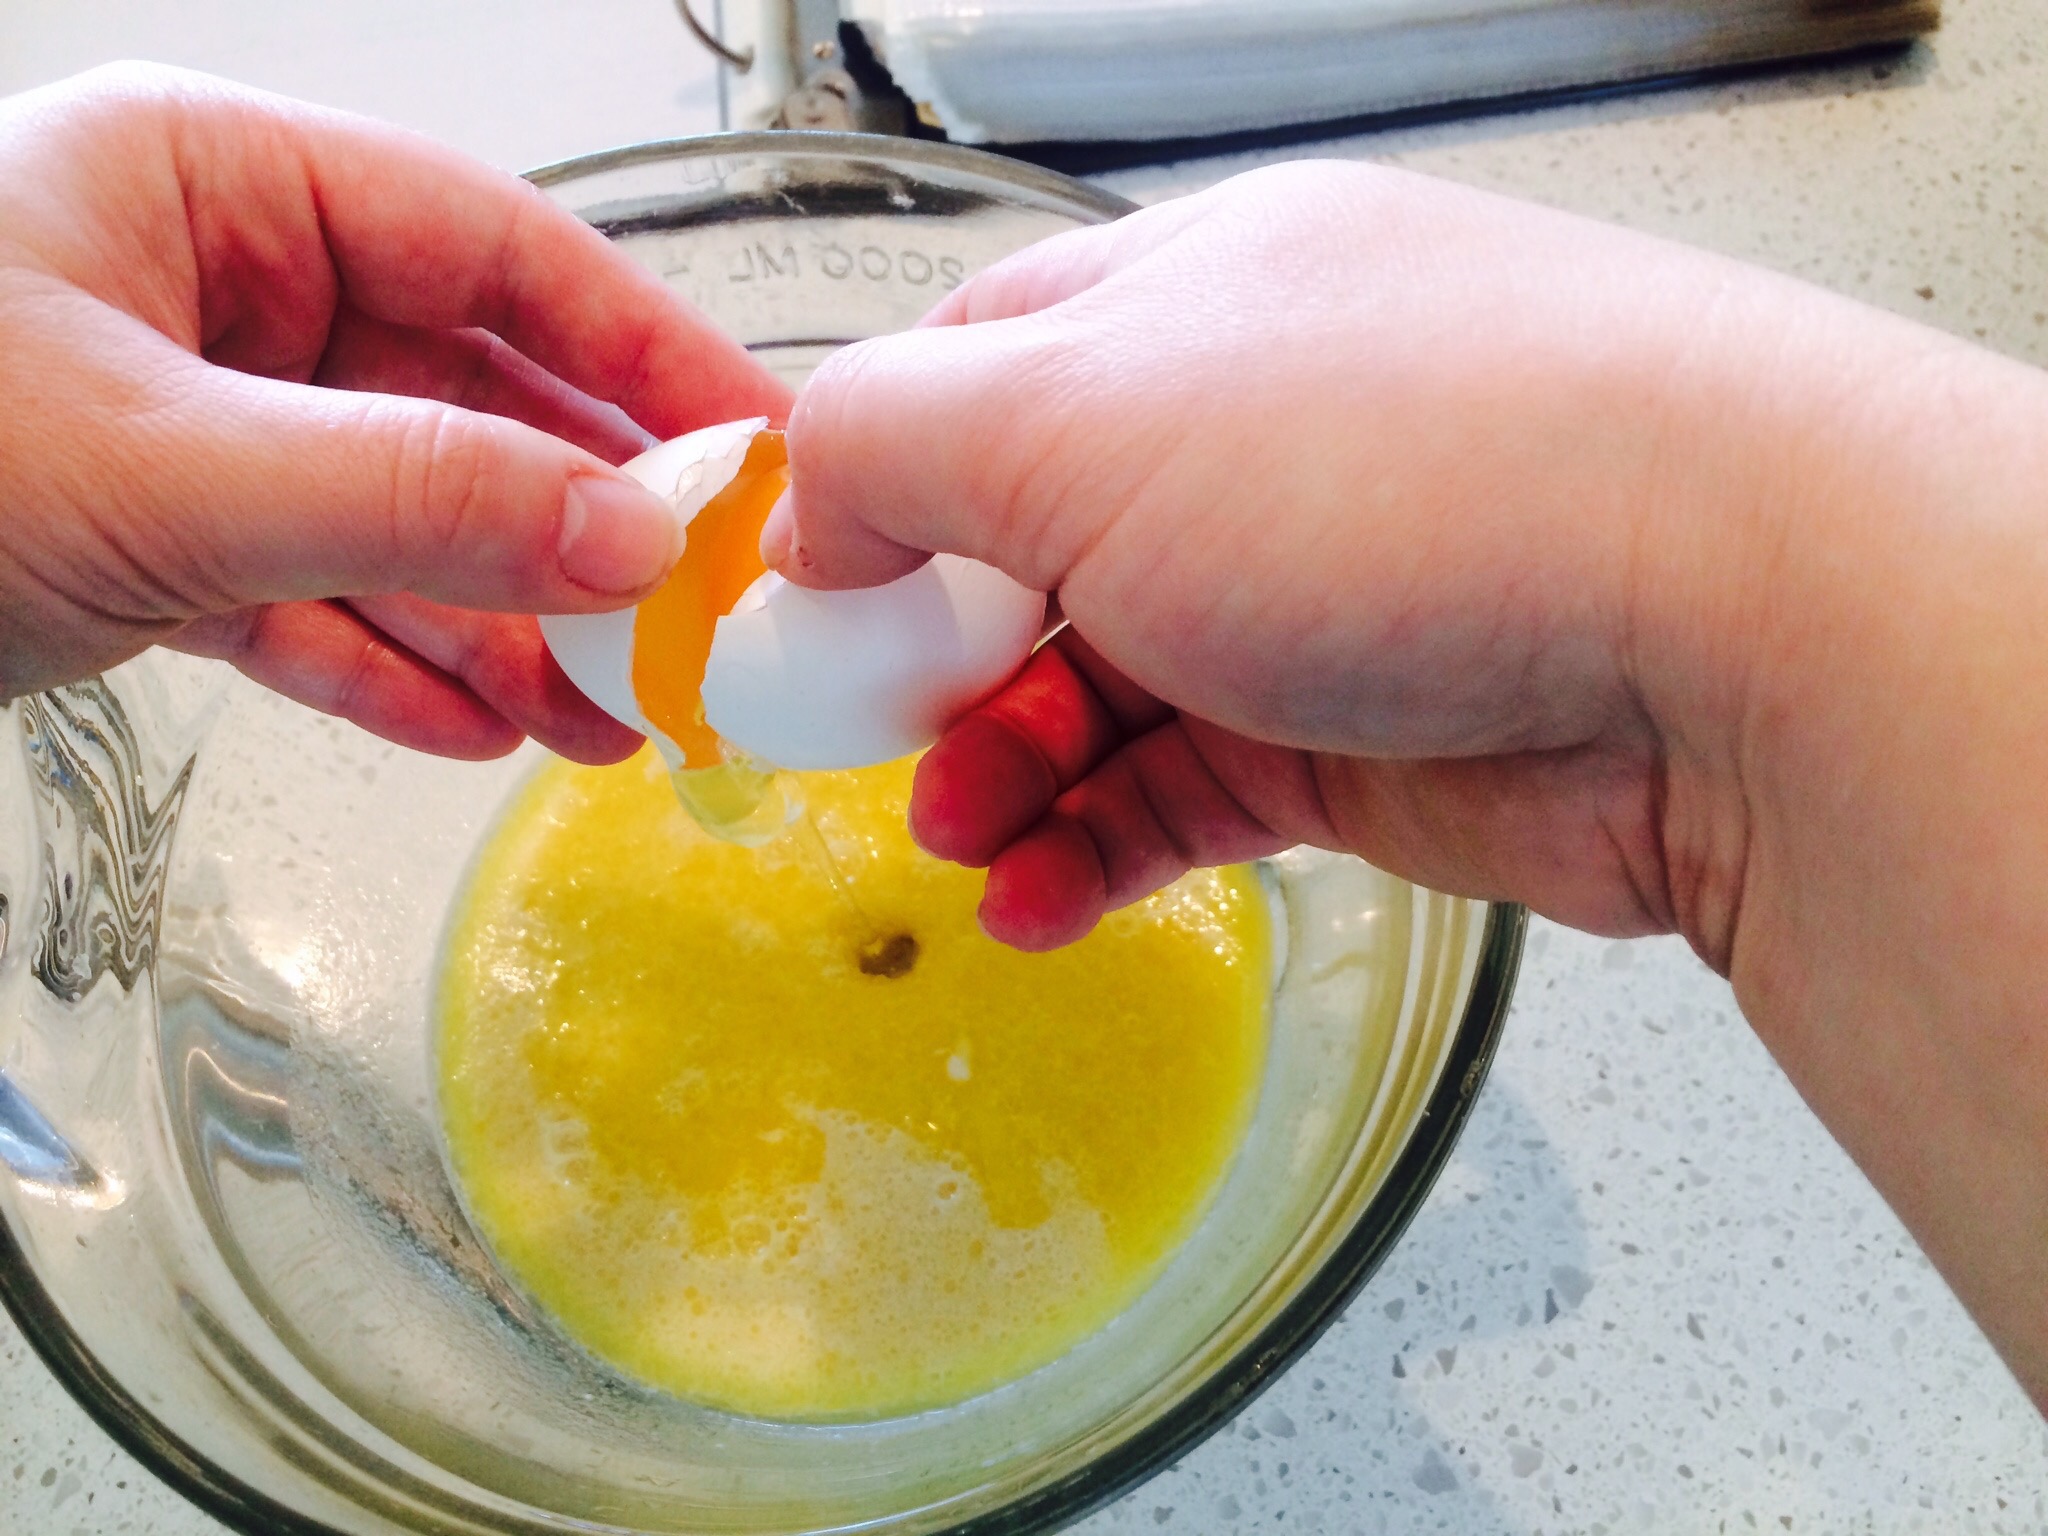
Add in the eggs the milk and the vanilla.
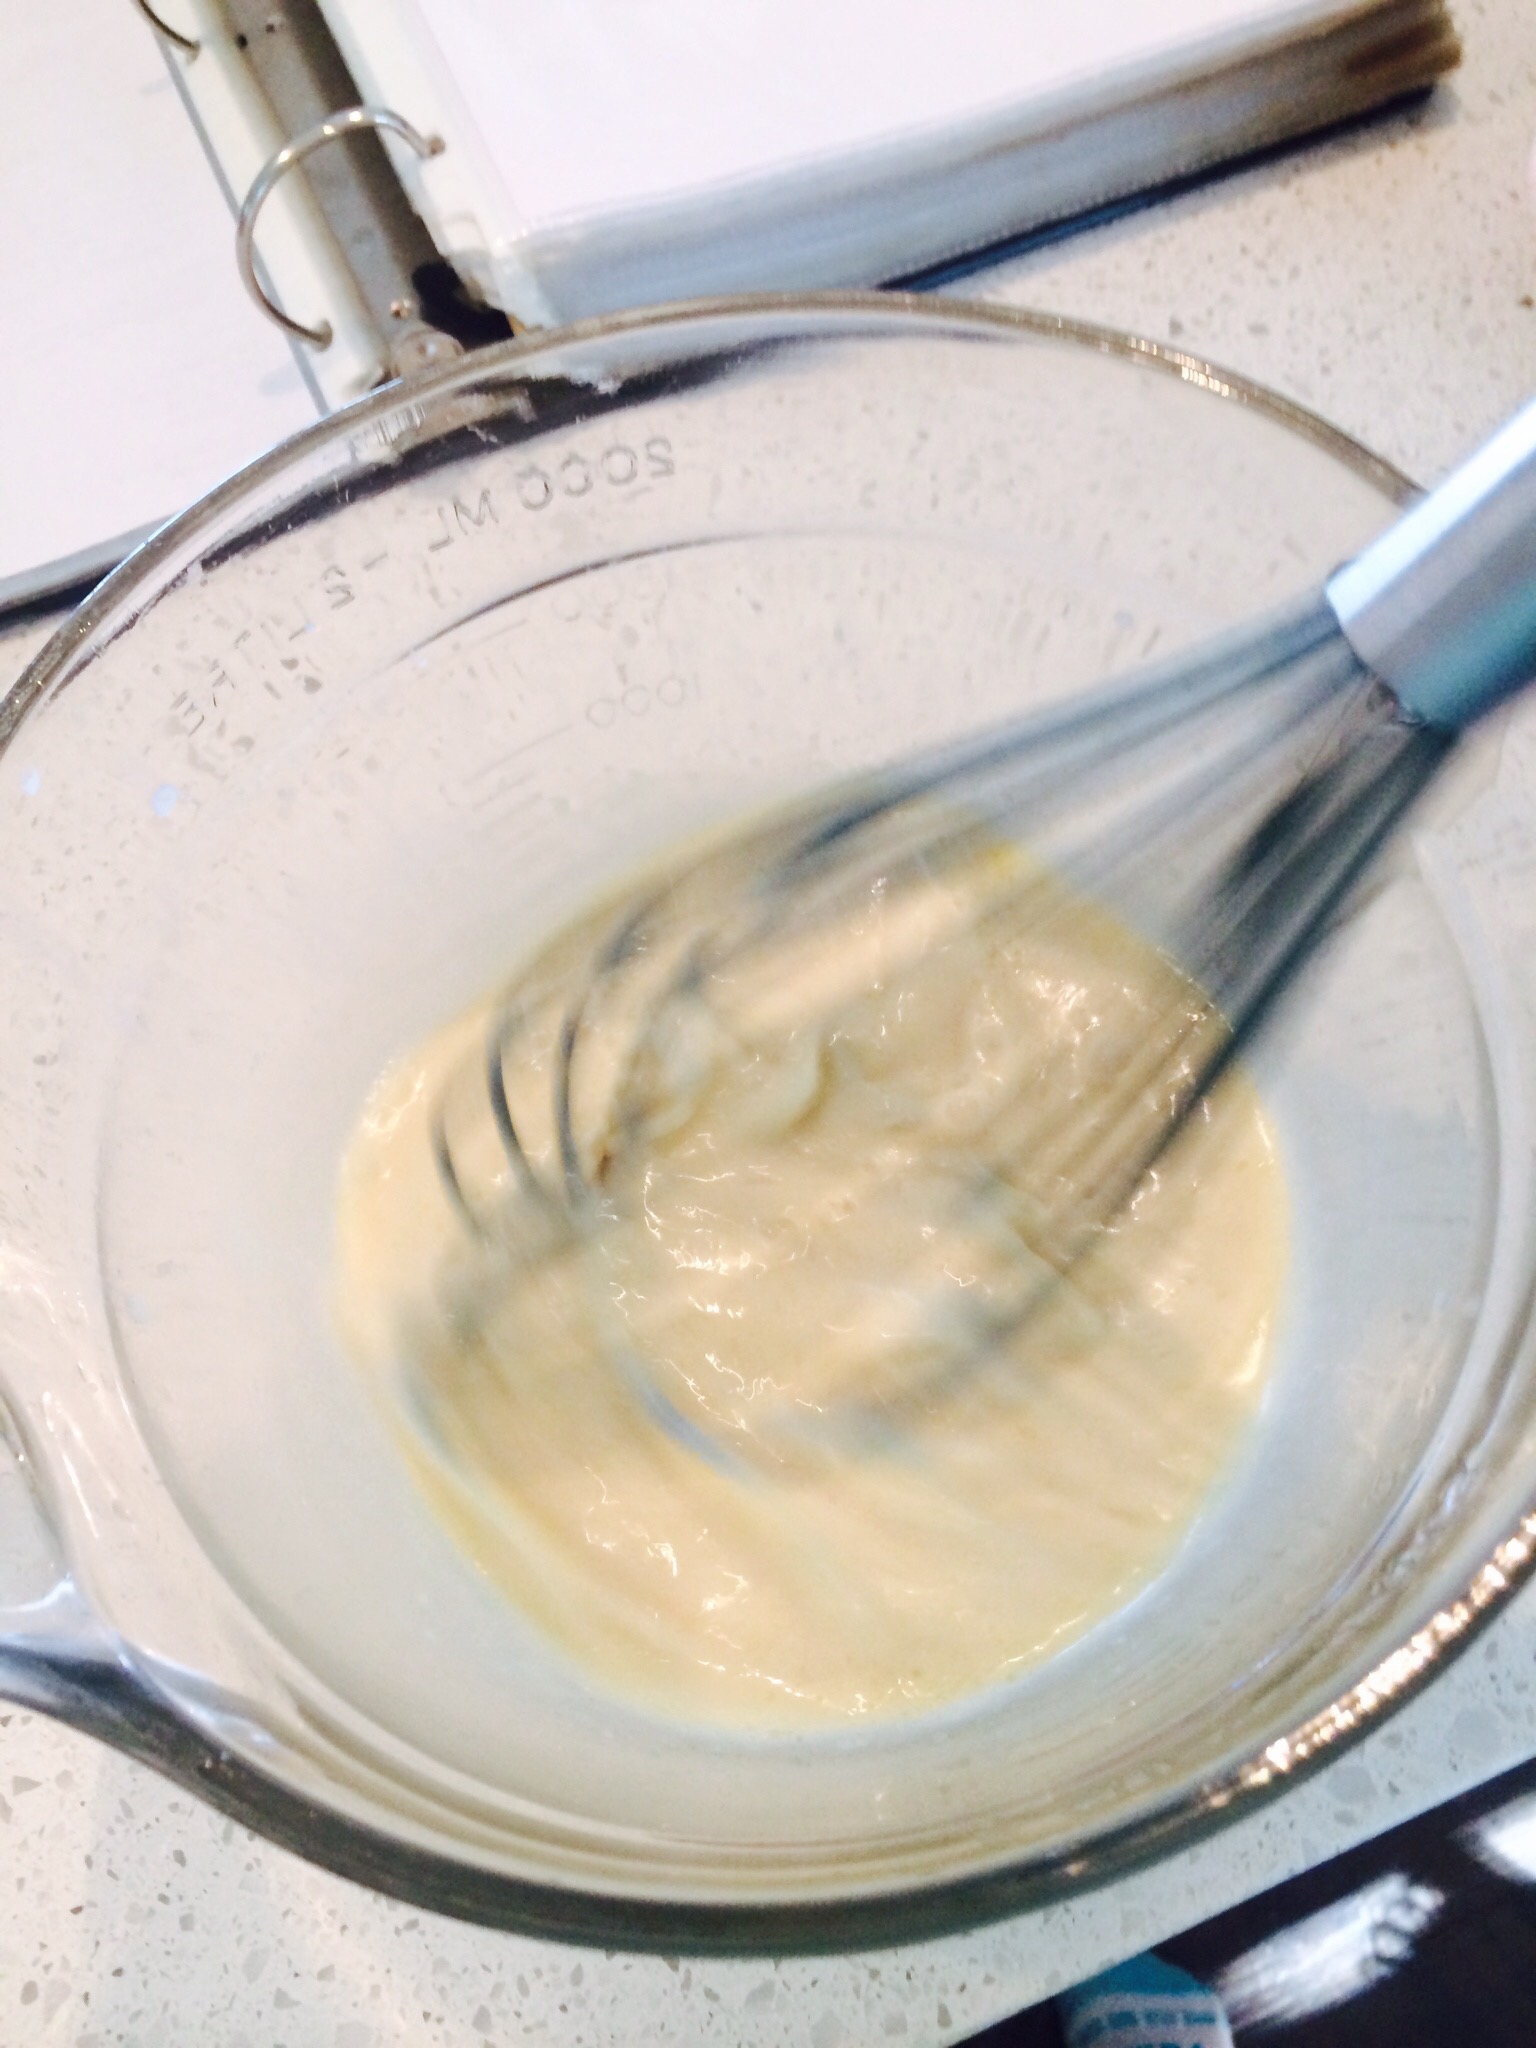
Whisk that up real good. Work it good.
🎵Look at that flick of the wrist… LOL🎵
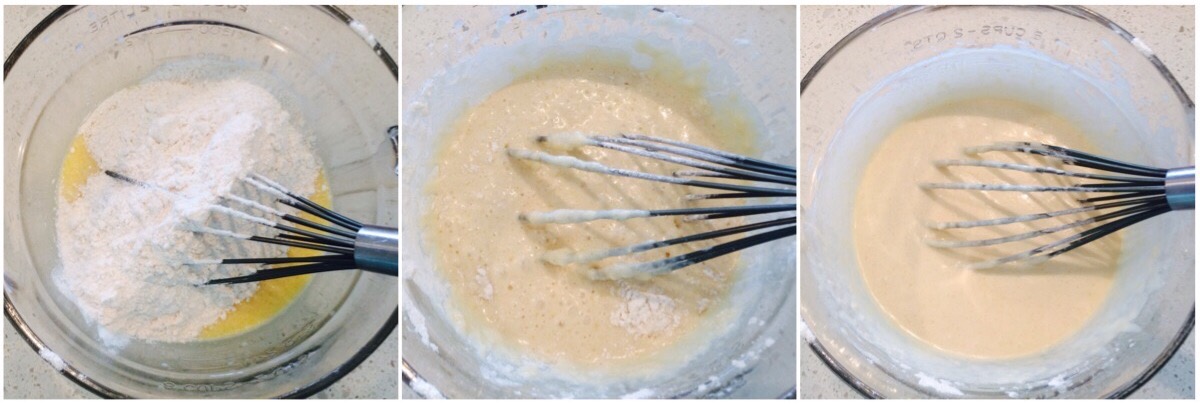
I then added the dry mixture to the wet mixture and gently whisked it until it was just smooth. Don’t over mix the batter. Once it comes together just mix it until and lumps of flour are gone and the batter is smooth.
I like to let my batter rest for a few minutes. Makes for a super good fluffy waffle.

I have a Cuisinart Griller. It’s like a panini press, a Griller and a waffle maker with all the plates that it uses. It’s fantastic. It was the only thing on my Christmas wish list a few years ago and Santa…. Aka Mom, came through for me! It goes to work for me about twice a week!
Preheat it, follow your waffle makers instructions. And spray it with cooking spray so the waffles don’t stick.
Chop up that super fabulous, oh-so-sexy, crispy, crunchy, heavenly BACON!!!
Mmmmmm I love BACON! Can u smell it wafting in the air? Taste it’s salty bite on your tongue? Hahaha. Sorry just playing. I know u want some bacon too!
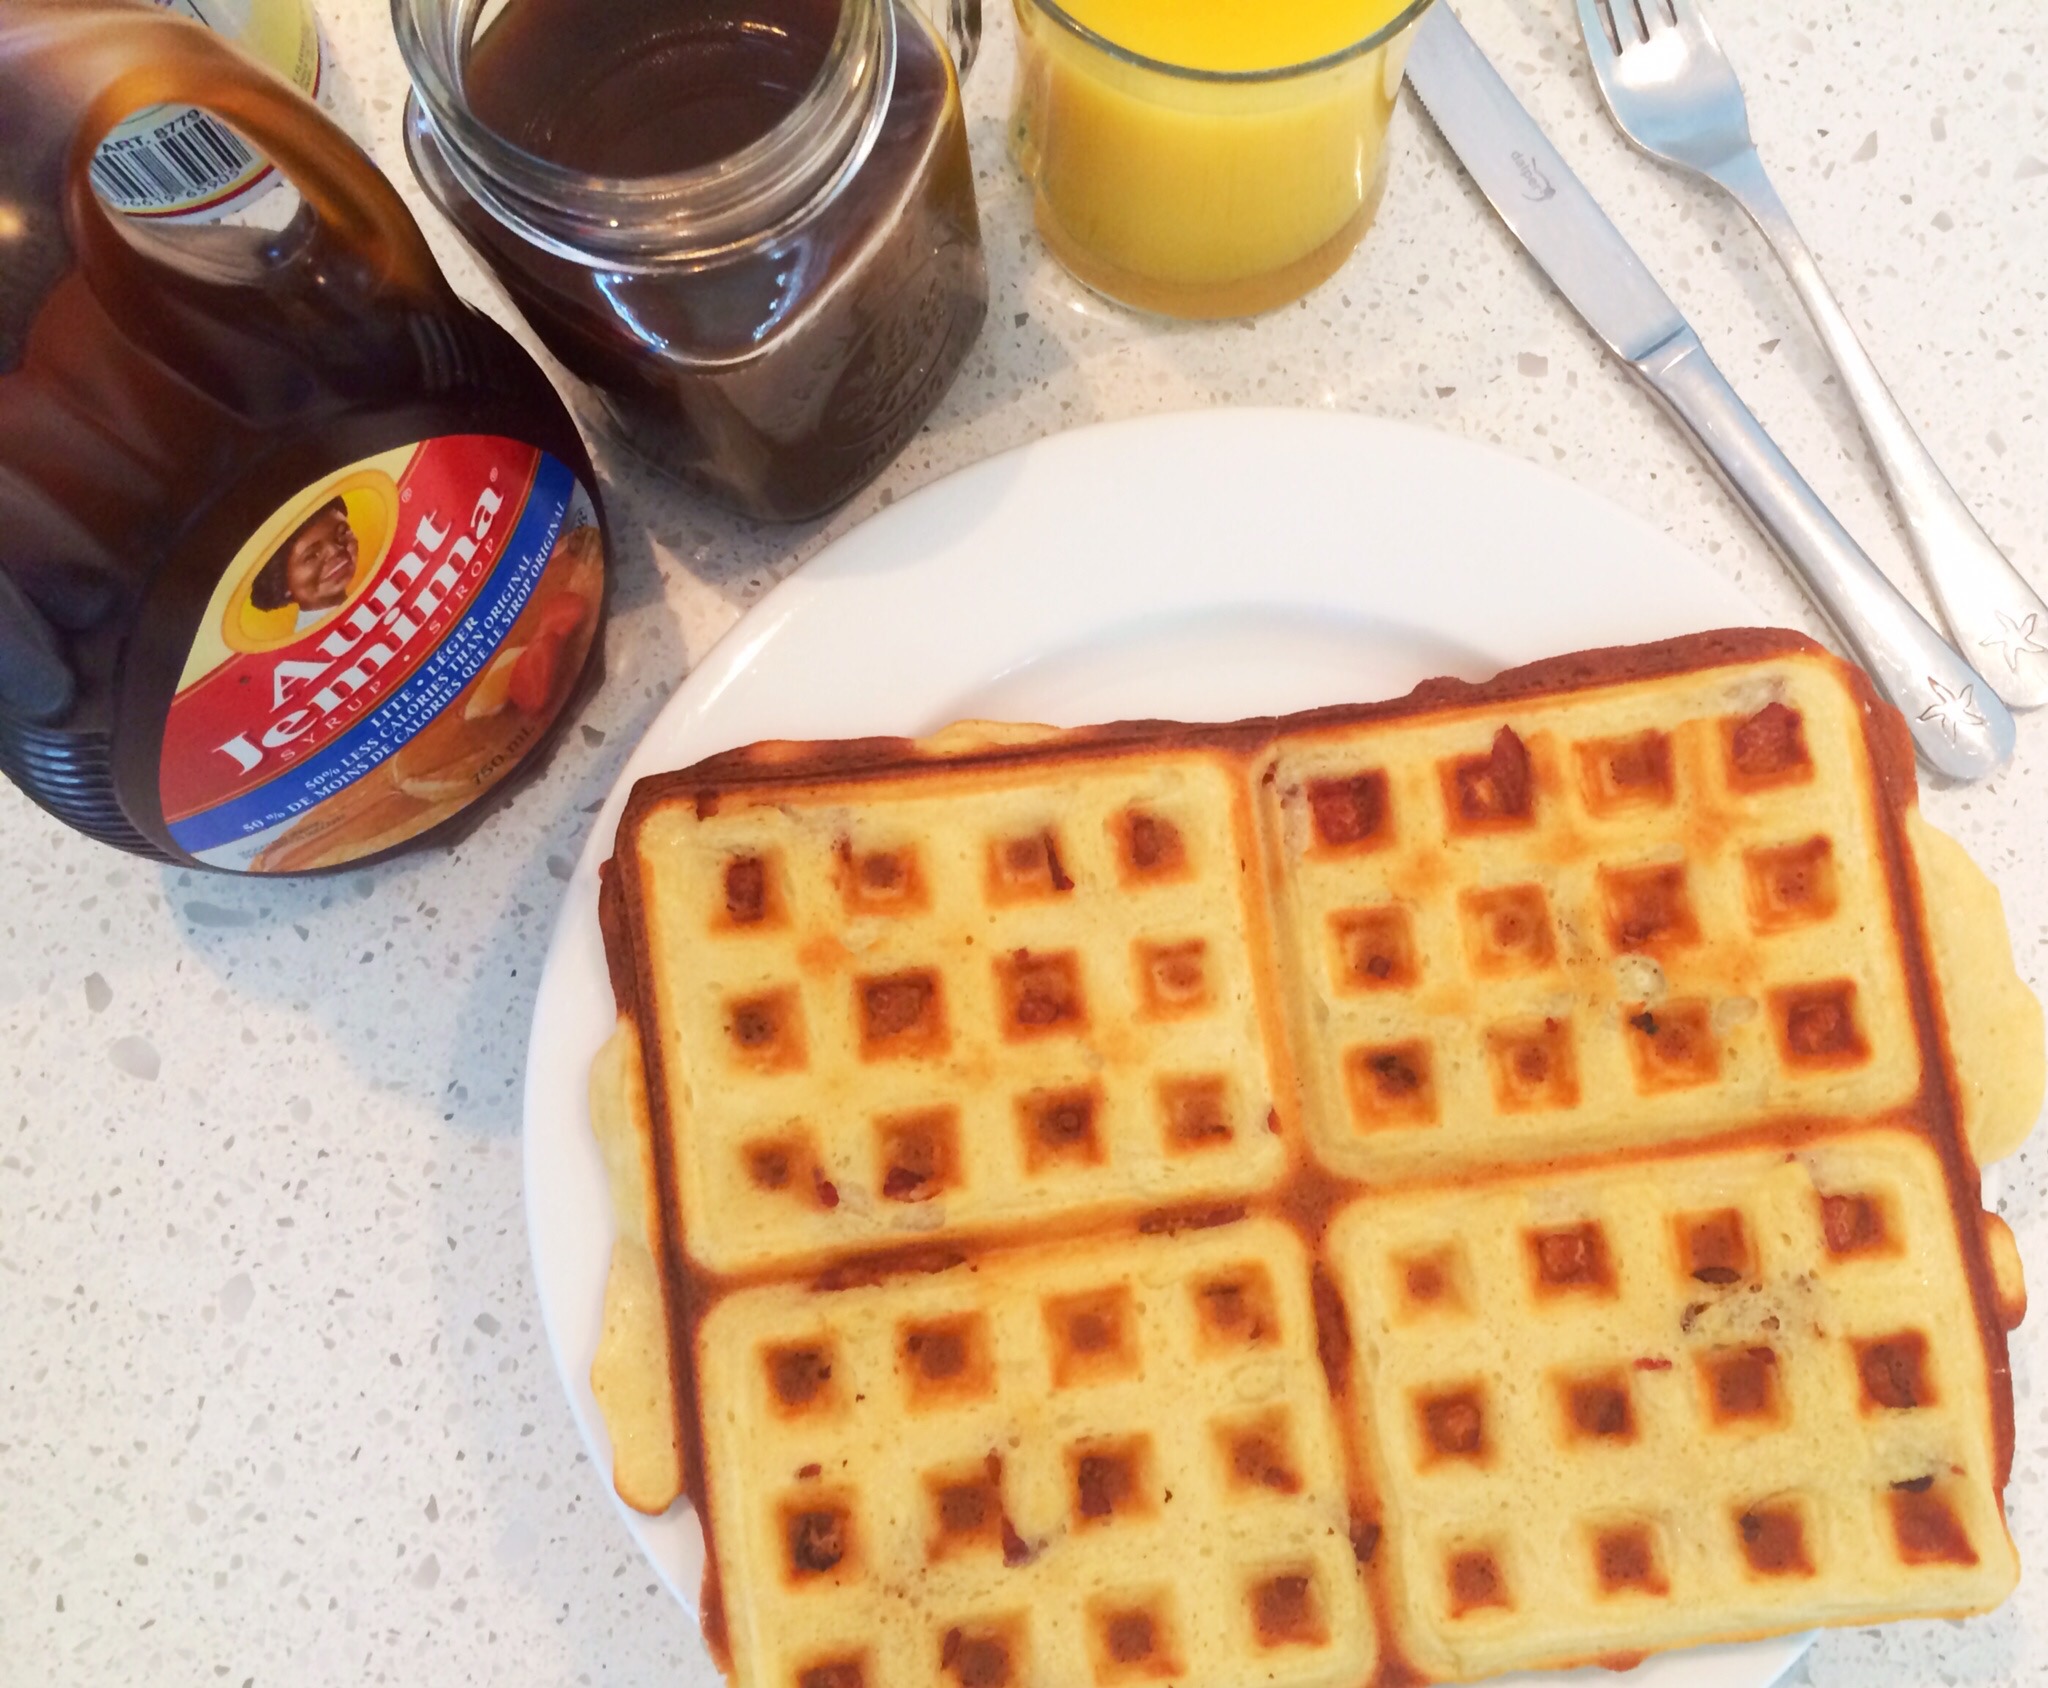
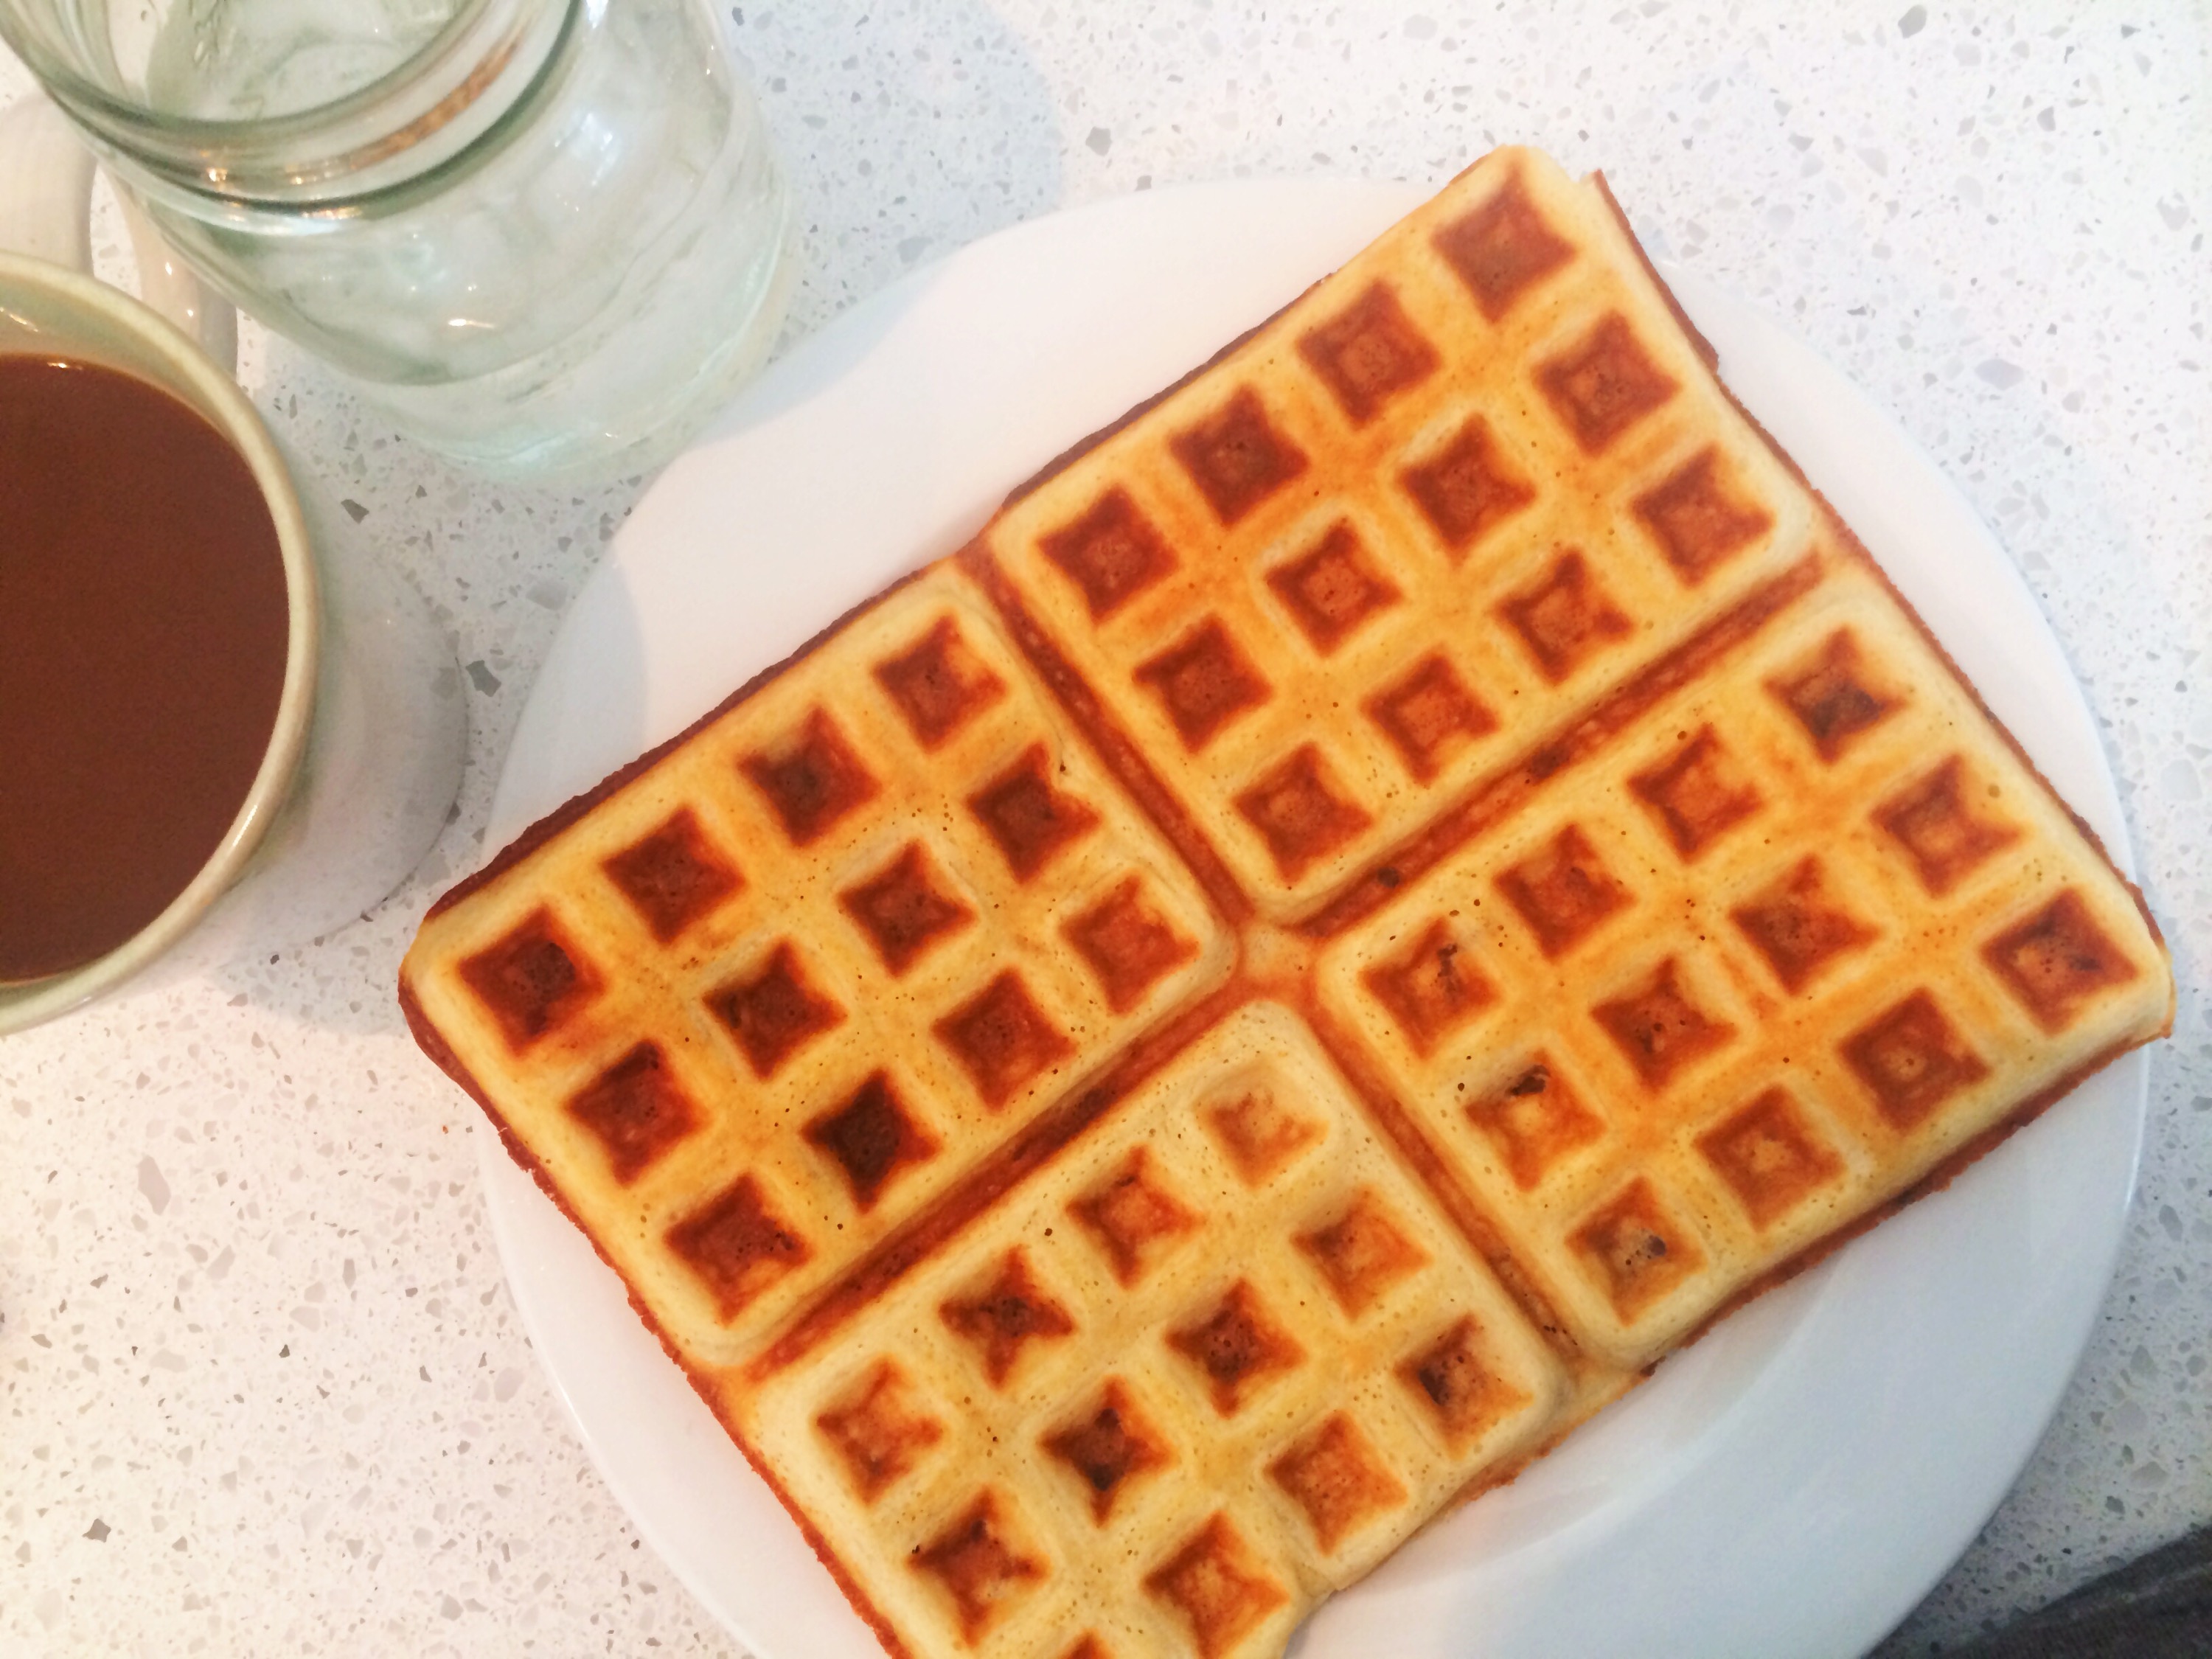
This is what they look like from the top, once they are all done.
All the bacon peeking out and waving to us saying “EAT ME”
What do you put on your waffles? Hubbster usually smothers them in crunchy peanut butter and then drowns them in syrup.

Like I mentioned before. My waffle iron doesn’t flip so the bottom side has that perfect golden waffle appearance you would expect, however no bacon can be seen…. that’s just BORING.
Or it’s a good way to surprise your house guests…”Good Morning, here’s a boring waffle” LOL And then wait for their mouth to drop once they bite inside. The smell of bacon cooking before hand and none appearing on their plate, may make them think you’re bit of selfish. They’ll get over it once they take a bite though😋
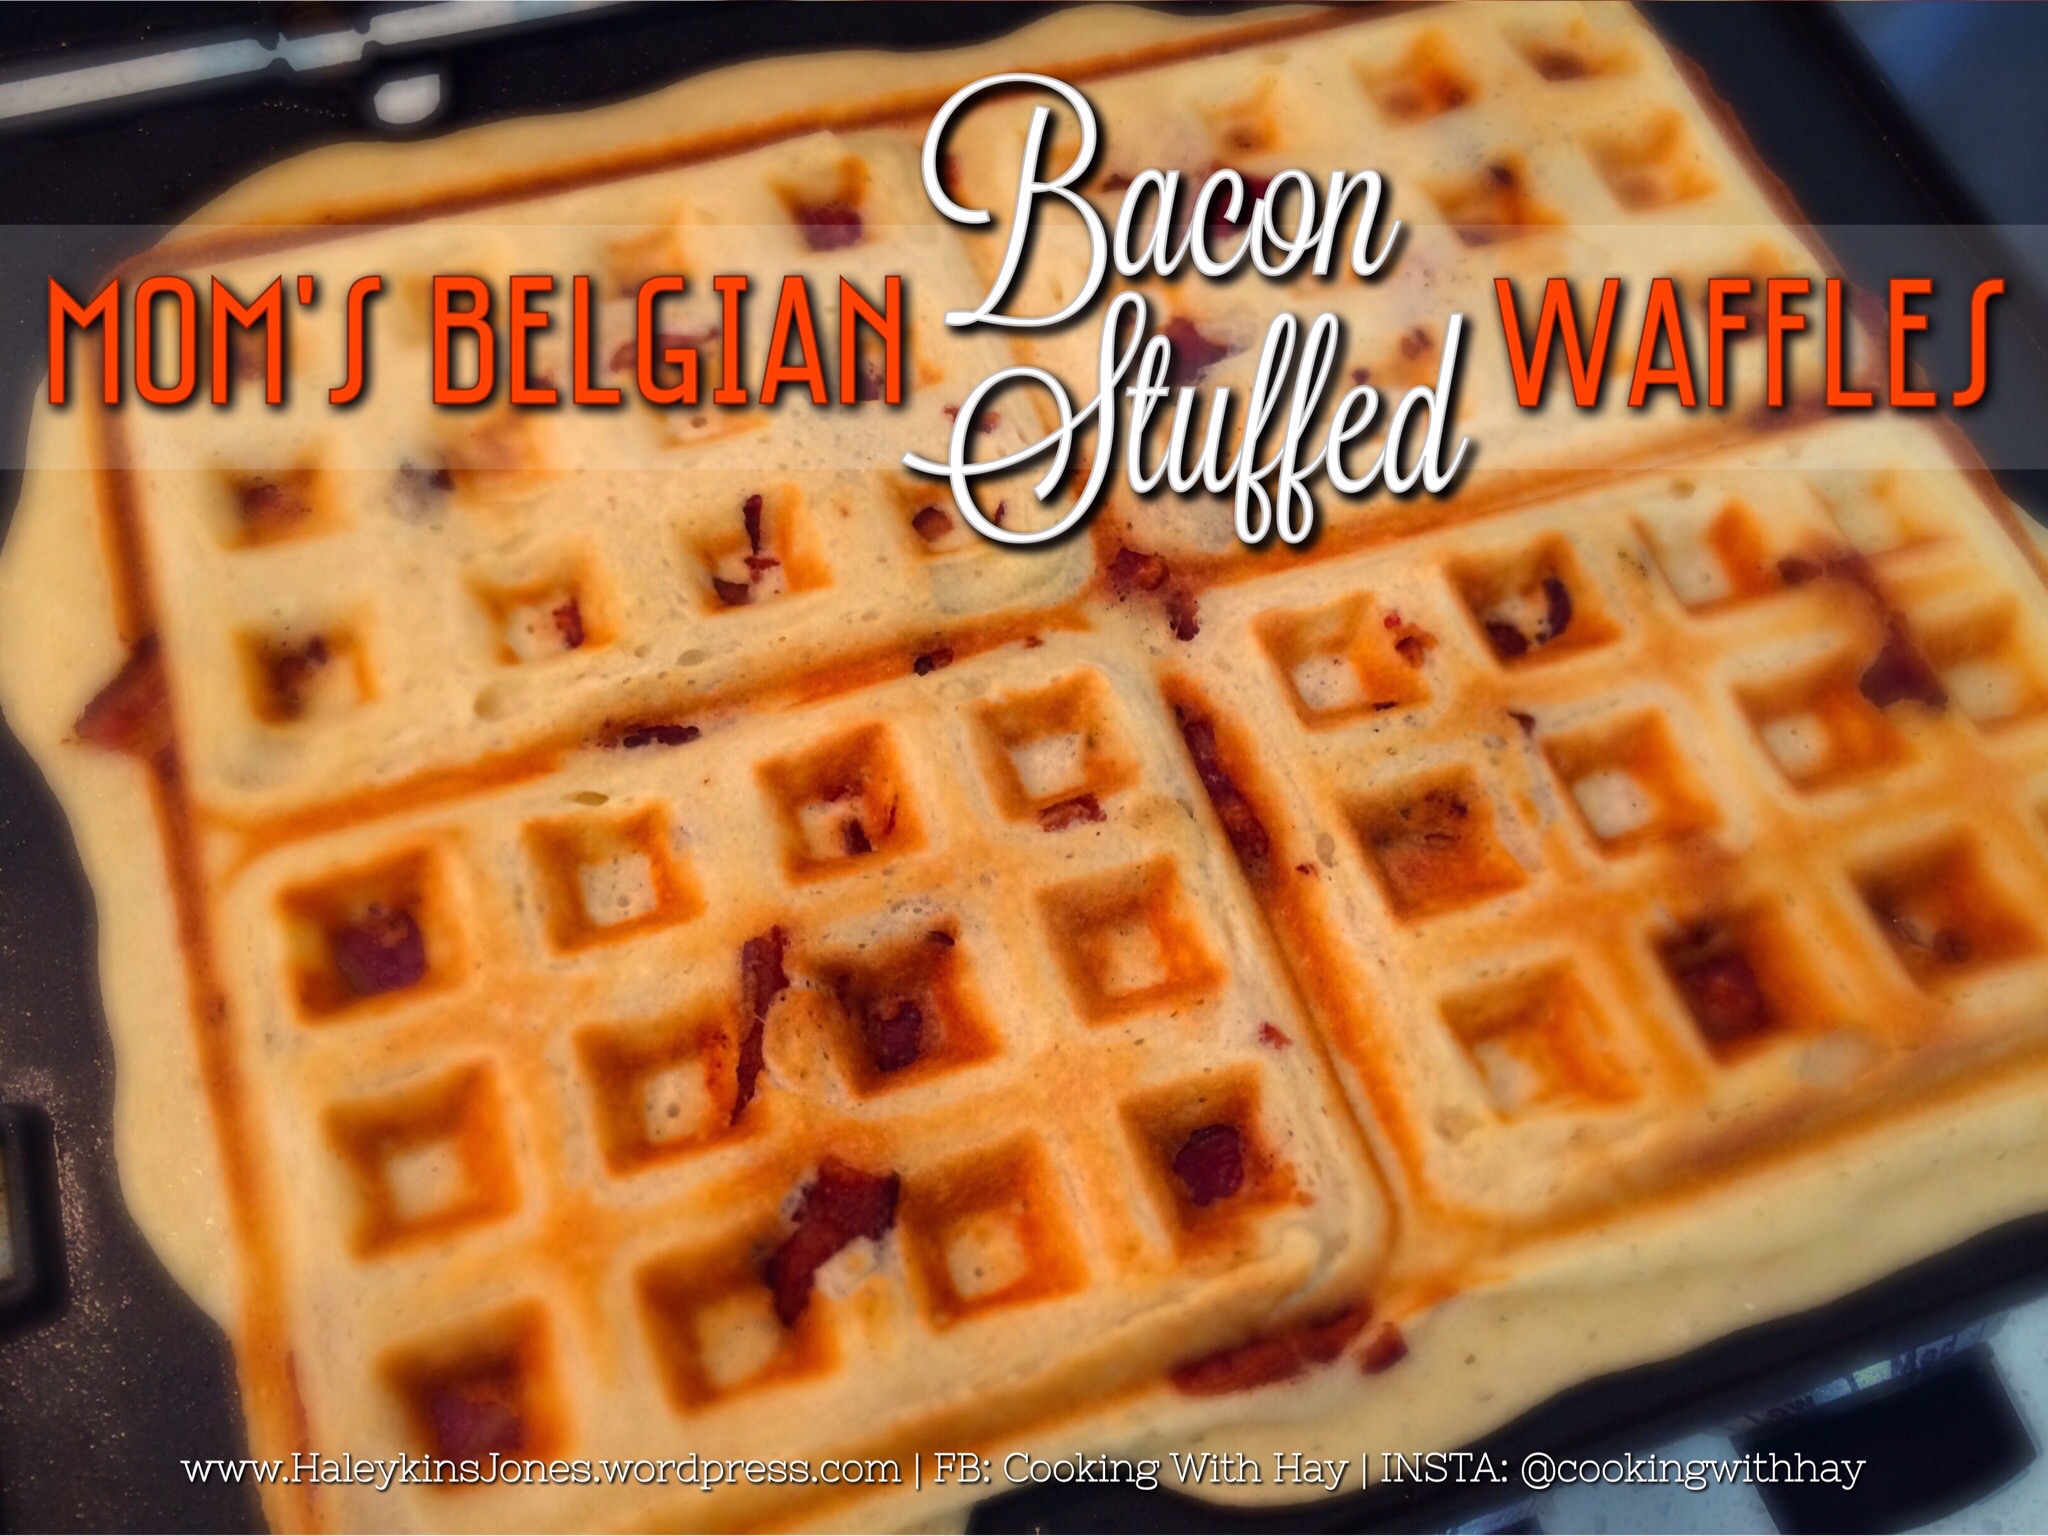
Mom’s Belgian BACON STUFFED Waffles
Makes 4 Belgian Style Waffles
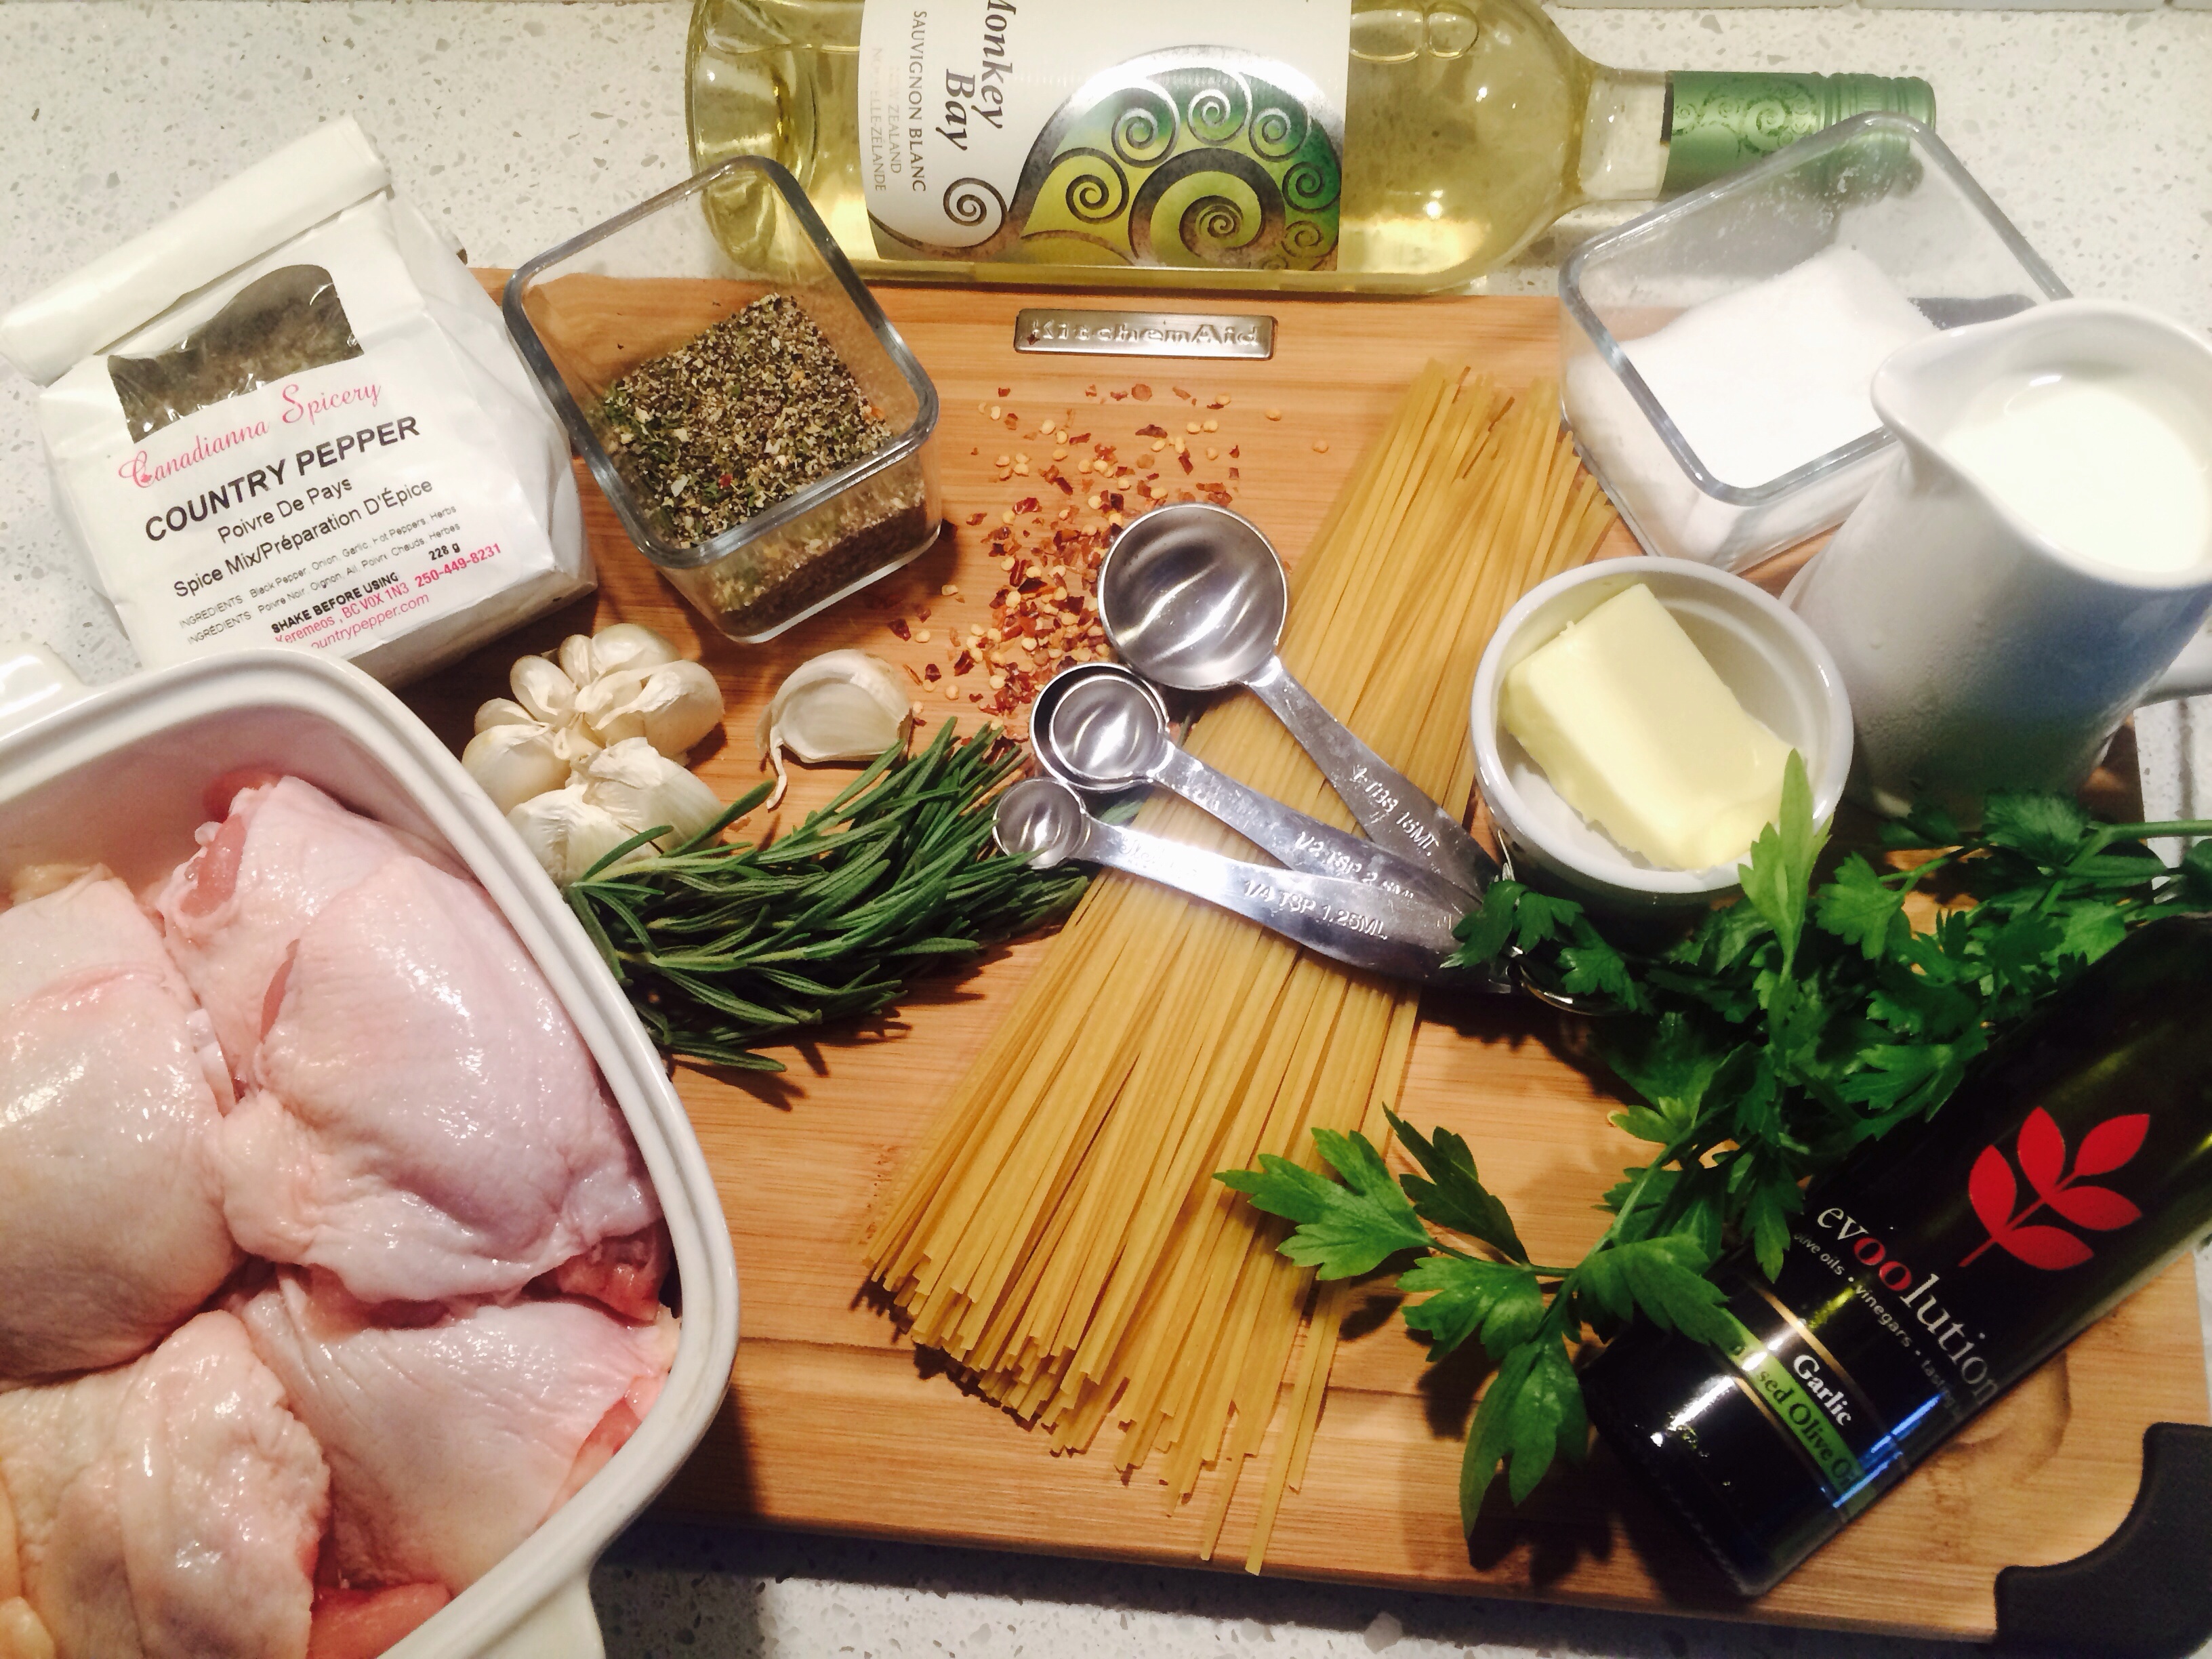
INGREDIENTS
♥ 1 3/4 CUPS FLOUR
♥ 1 T. BAKING POWDER
♥ 1/2 TSP. SALT
♥ 1 3/4 CUPS MILK
♥ 2 LARGE EGGS
♥ 1/2 CUP MELTED BUTTER
♥ 1 TSP. VANILLA
DIRECTIONS
Preheat waffle iron.
Whisk the flour, baking powder and salt together in a medium bowl.
In a microwave glass bowl melt the butter, beat in the eggs, milk and vanilla.
Combine the wet and dry mixtures and stir until just combined.
Let it sit for a few minutes to develop
Pour the waffle batter into the iron and add the bacon pieces as you like.
Close the lid and be patient.
Mine take almost 10 minutes to cook. I’m going to play with my settings a bit.
Enjoy with your fav waffle condiments

♥♥ Thanks for visiting, if you liked this blog please click LIKE below. If you want to follow my blog please scroll to the bottom, click the FOLLOW button and enter in your email address.
Love Haleykins♥♥
or the “COOKING WITH HAY” tab (top of the page) to see more**


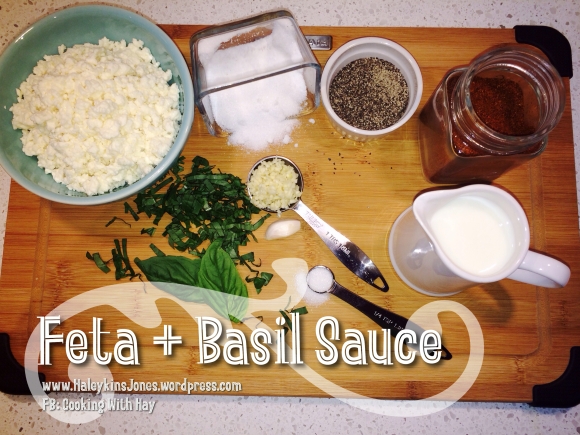 The image above includes salt. However my recipe does not. When I made this, I added salt and found it to be incredibly too salty. The feta gives this creamy topping enough salt…


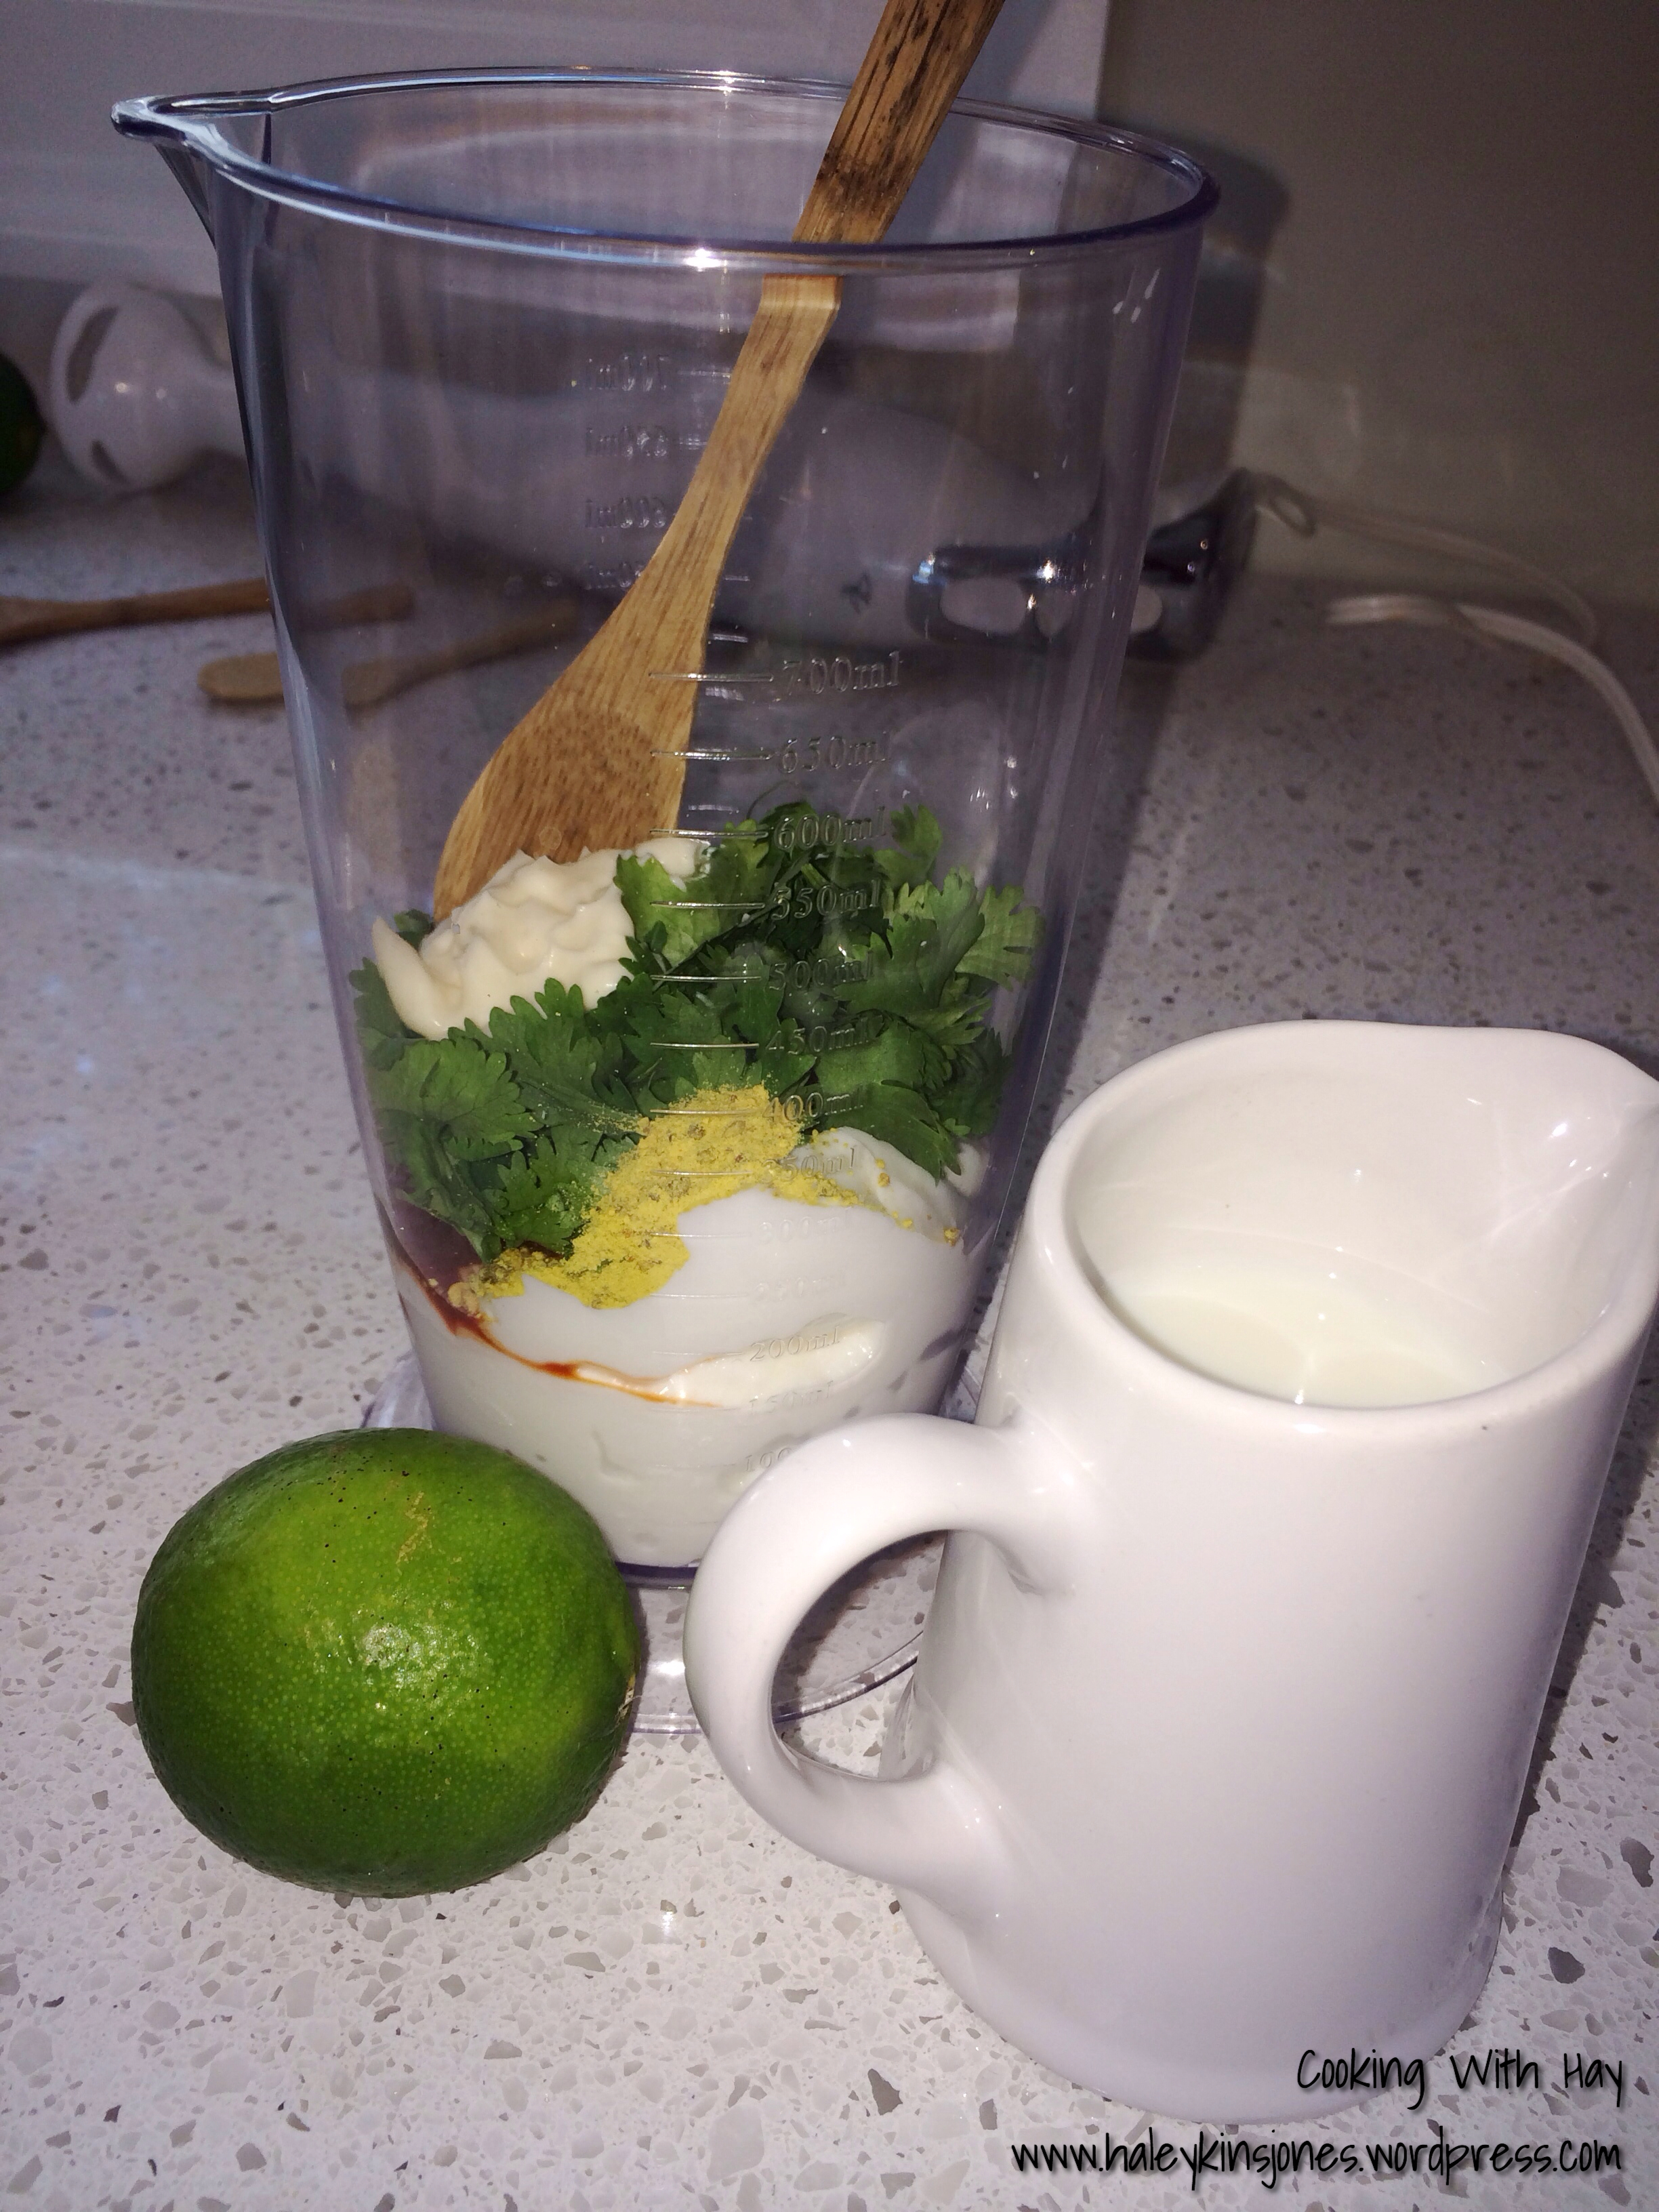


 I cut my baby potatoes in half and had them soaking in heavily salted cold water for a few hours to draw out some of their natural moisture and in the end you will achieve a more crunchier potato.
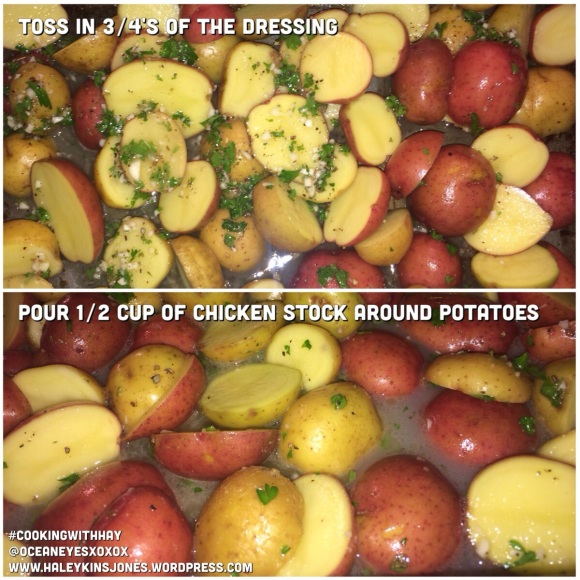
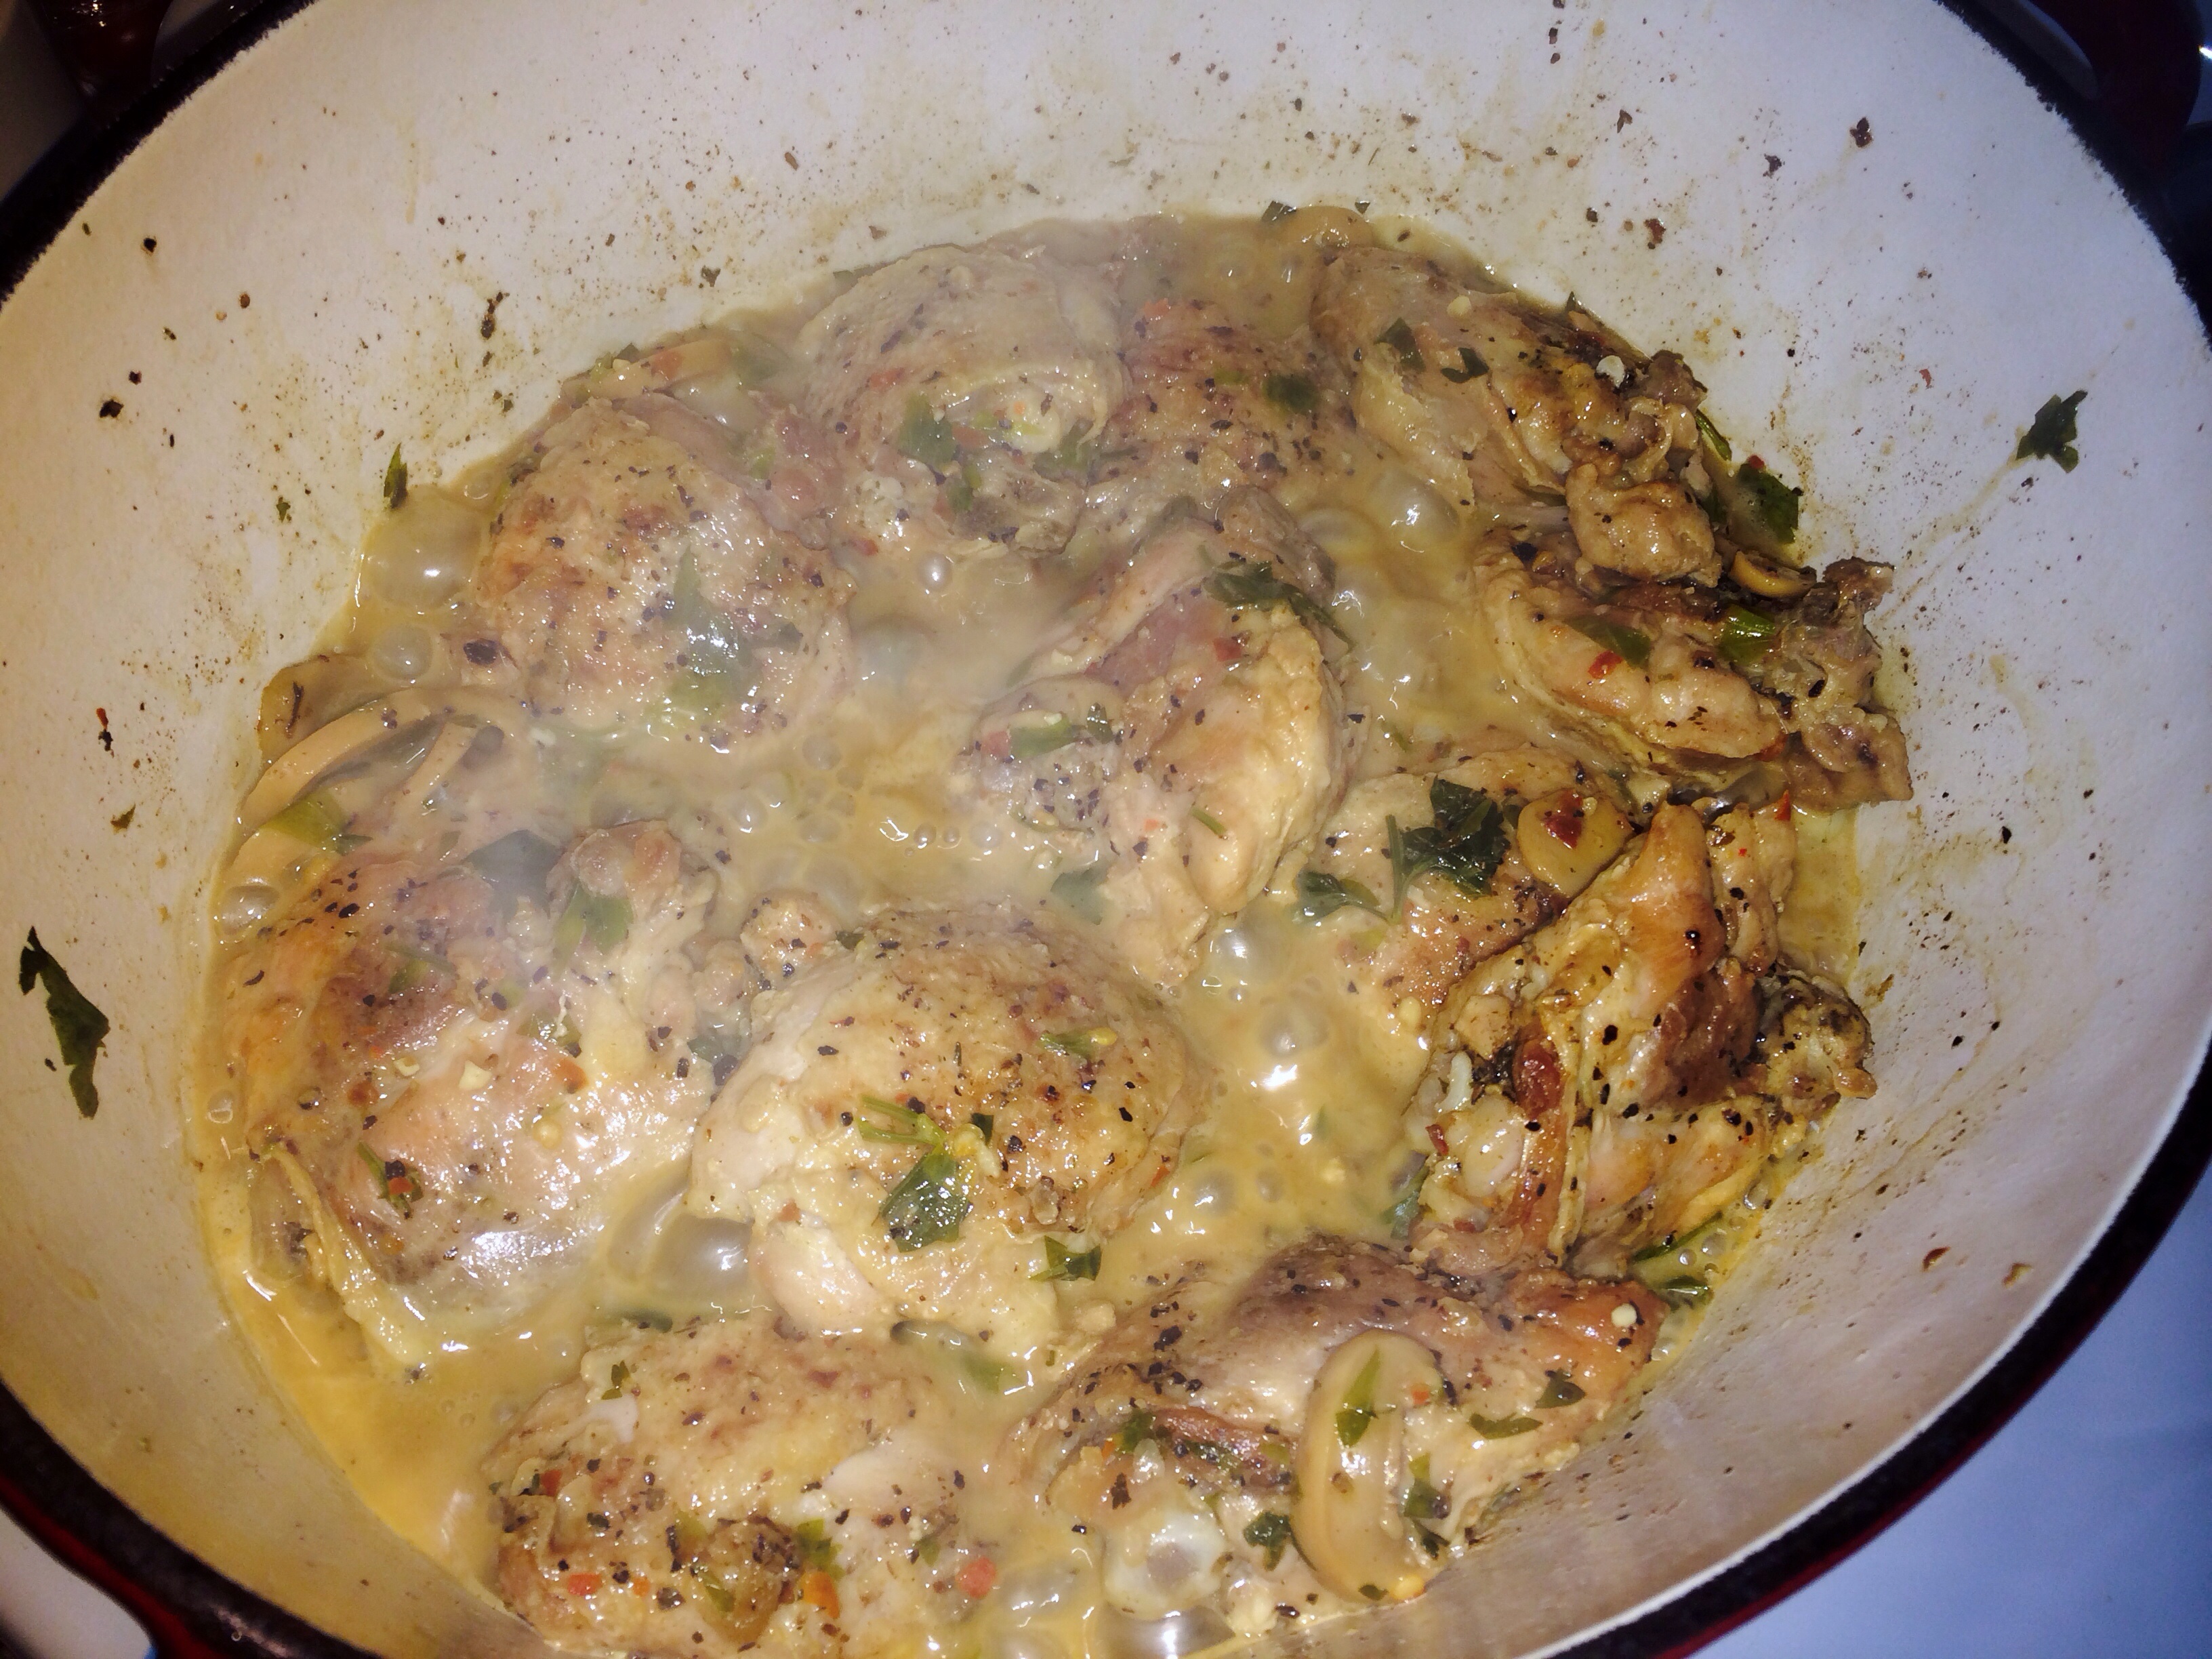
 I took these pictures before I poured over the remaining dressing… . so they are missing the yummy fresh parsley and chunky fresh garlic but at least I remembered before I served them😜 Top them with a little dollop of sour cream and more fresh parsley.


 INGREDIENTS
 ________________________________________
