Tag Archives: good

Mom’s Belgian BACON STUFFED Waffles

Waffles vs. pancakes… pancakes vs. Waffles. If this question came up 5 years ago I would have said pancakes.  Easily!  For sure pancakes. Even if someone would have asked me a year or 6 months ago… Pancakes for the win!  And then my whole world changed!

I was visiting my fam back home this spring.  I had just spent the day hanging with my little sister while she worked at The Dragonfly Cafe.  (I shouldn’t say I spent it ‘visiting’ because it really was spent drinking far too many of the best iced coffees and eating the most scrumptious, seriously to-die-for, Panini.  I walked back to my parents place, back to my second favorite kitchen, MOMS’s, and it was a busy place.  Waffle iron steaming away. The house smelled so good sausage and vanilla and oh wow just heavenly.  (I was no longer full from previously mentioned ‘to-die-for panini)

Niece and Neph., we’re there and if I remember right,  Dad was drooling, he loves breakfasts, especially for dinner.  I think Niece was pouting at the table, a typical dinner time predicament for her.  Cutest pout ever though; and Mom was helping Nephew operate the coolest waffle iron I’d ever seen.  It’s like a real waffle iron. Like the ones that u flip.  Flipping waffles half way through cooking… perfection!  The bottom side really gets the best golden look and crispy shell, so flipping them gives them that even golden crisp on BOTH sides!  Very cool!

I think I said I wasn’t hungry, but mom gave me a plate and said “too bad” so I dove in head first!  “Oh sweet baby jesus!”  I was not expecting this!  What was I eating?!?!?  This waffle, and may I mention that I eat them plain.  No syrup, peanut butter, honey, jam or even butter for that matter and don’t u dare ask me about that…. ughhh, Nutella. Never in my life will I eat that stuff. Hahaha. I just can’t even fathom it. I mean, no offence, Hubby acts like its gold so there s big jar in this house, but I won’t go near it.  Plain waffles…..

So this amazing flavour that was rocking every tastebud in my mouth was nothing but straight up pure oral pleasure. LOL.

If anything ever was….  this was!

The perfect combination of a crispy outer shell and fluffy interior.  They were so wonderfully sweet yet savory all at the same time and they didn’t even have any bacon stuffed inside.  Mmmm a little vanilla, salt, some butter….  Just too easy and I can’t tell you enough how good the flavour is.  I will never ever buy a store bought product again or Betty Crocker or any kind of mix again.

I love this recipe so much I might frame it and hang it right here on a newly finished wall.  With a big ole hammer and nail.  Nah…. Hubby would lose his shit!   He’s spend so much time making these old walls as perfect as he can.  Haha. If I dare bring out a hammer I’m likely to lose my whole arm all together.

First time I had bacon stuffed waffles was at Hash House A Go Go in Las Vegas.  It comes with sage fried chicken and syrup on top speared with a steak knife LOL. If u haven’t gone….. GO!

I just made these a couple weeks ago as well.  They were the first breakfast in the “Cooking With Hay” Kitchen.  I even served Hubs as he sat on a bar stool at the island.  As long as everyone follows the rules no one will get hurt.  He stays on his side of the island, and I stay on mine.  All will be good.😊

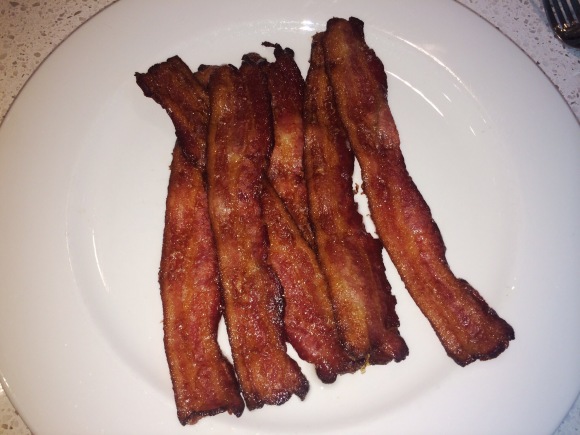
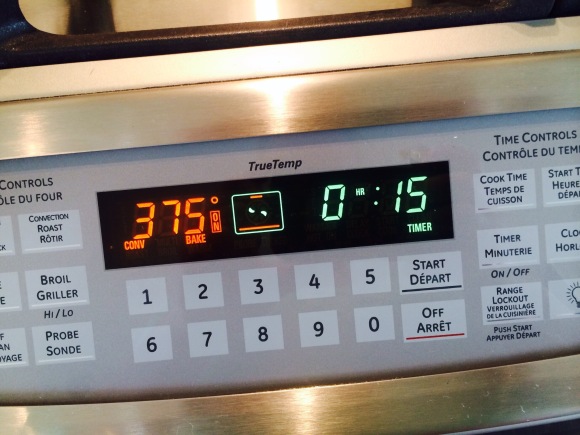
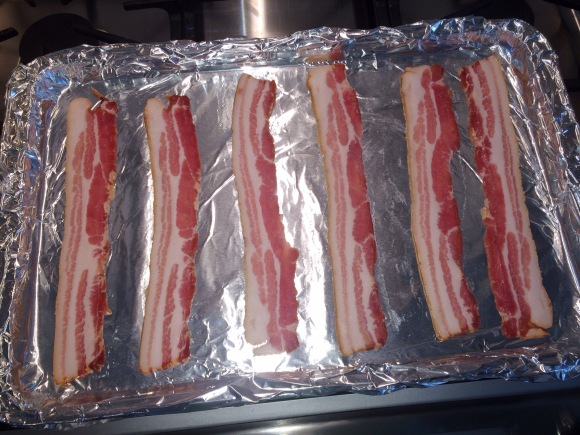
I have been cooking my bacon in the oven for over a year now.  Best way ever. Stays flat and no splatter or greasy mess to deal with.  Preheat your oven to 375 and you’ll need a timer set on 15 minutes once u place the pan in the oven.

Line a baking sheet with foi and place your uncooked bacon. It’s going to shrink up. You can line em up and fit quite a few on a sheet obviously.  I just make sure they don’t touch.

Now start that 15 minute timer.

When the timer goes off they may not be quite done. They may need a minute more or a few more.   Keep in mind they will continue to cook a tiny bit more after u take them out of the oven.

Remove from the oven and lay them on a paper towel to soak up some of that excess grease.  Beautiful bacon!

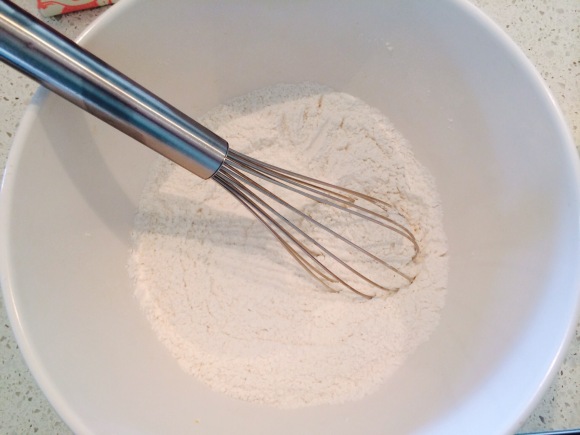
For the waffle batter mix up the dry ingredients in a bowl.

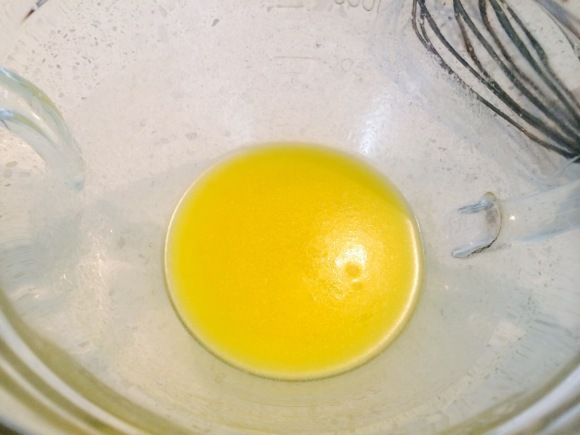
In a large glass microwaveable bowl melt the butter. Few seconds at a time.


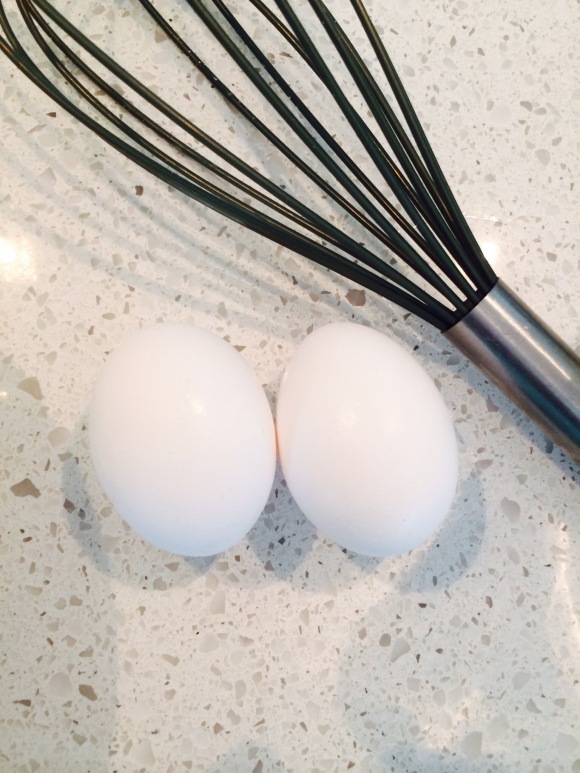
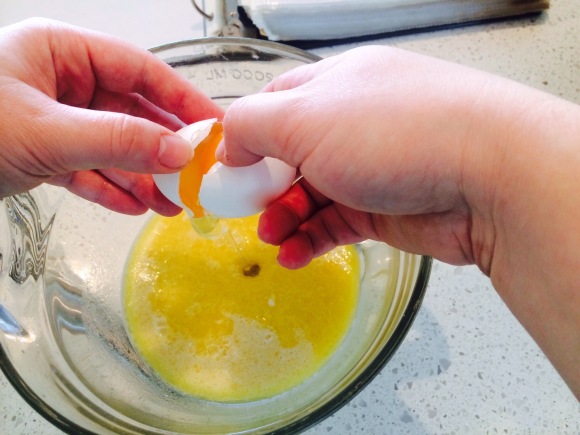
Add in the eggs the milk and the vanilla.

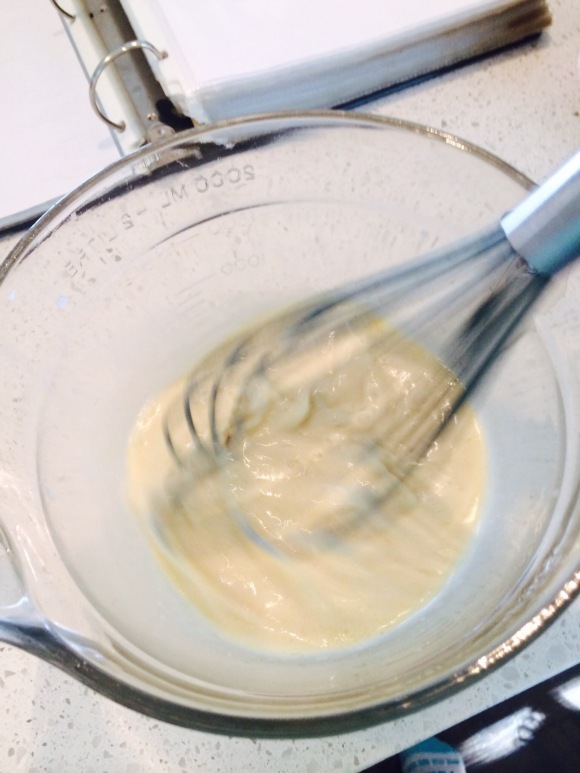
Whisk that up real good. Work it good.

🎵Look at that flick of the wrist…  LOL🎵

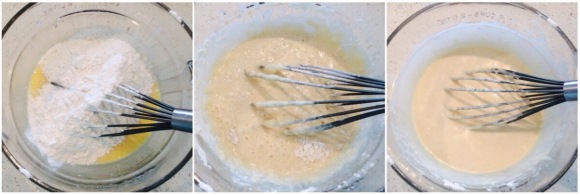
I then added the dry mixture to the wet mixture and gently whisked it until it was just smooth. Don’t over mix the batter.  Once it comes together just mix it until and lumps of flour are gone and the batter is smooth.

I like to let my batter rest for a few minutes.  Makes for a super good fluffy waffle.

I have a Cuisinart Griller. It’s like a panini press, a Griller and a waffle maker with all the plates that it uses. It’s fantastic. It was the only thing on my Christmas wish list a few years ago and Santa…. Aka Mom, came through for me!  It goes to work for me about twice a week!

Preheat it, follow your waffle makers instructions.   And spray it with cooking spray so the waffles don’t stick.

Chop up that super fabulous, oh-so-sexy, crispy, crunchy, heavenly BACON!!!

Mmmmmm I love BACON!  Can u smell it wafting in the air?  Taste it’s salty bite on your tongue?  Hahaha. Sorry just playing. I know u want some bacon too!

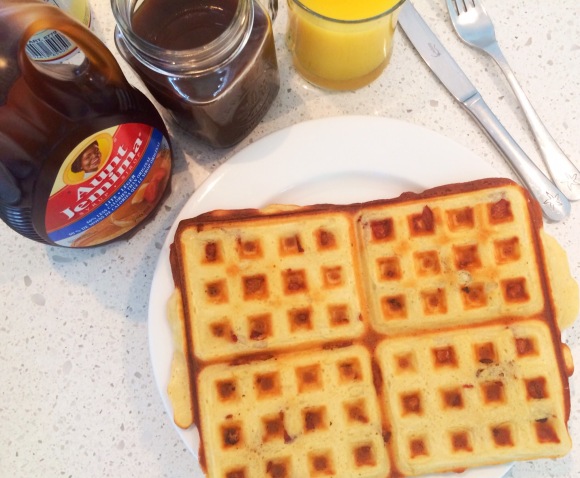
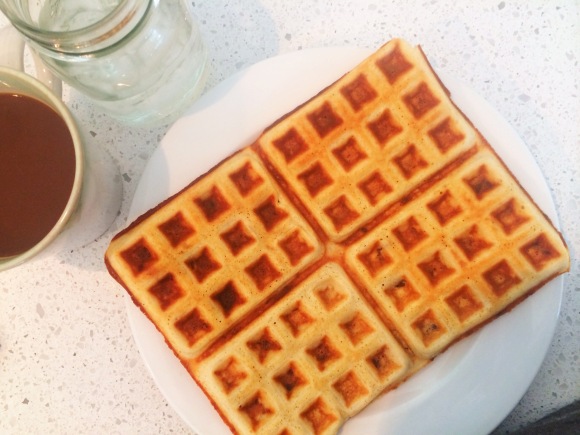
This is what they look like from the top, once they are all done.

All the bacon peeking out and waving to us saying “EAT ME”

What do you put on your waffles?  Hubbster usually smothers them in crunchy peanut butter and then drowns them in syrup.

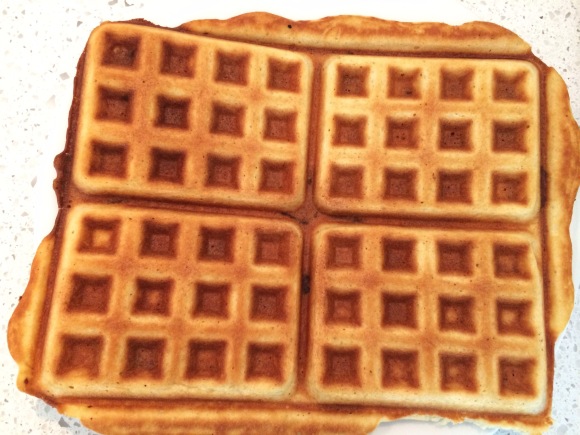
Like I mentioned before. My waffle iron doesn’t flip so the bottom side has that perfect golden waffle appearance you would expect, however no bacon can be seen…. that’s just BORING.

Or it’s a good way to surprise your house guests…”Good Morning, here’s a boring waffle” LOL  And then wait for their mouth to drop once they bite inside. The smell of bacon cooking before hand and none appearing on their plate, may make them think you’re bit of selfish.   They’ll get over it once they take a bite though😋


Mom’s Belgian BACON STUFFED Waffles
Makes 4 Belgian Style Waffles
INGREDIENTS
♥ 1 3/4 CUPS FLOUR
♥ 1 T. BAKING POWDER
♥ 1/2 TSP. SALT
♥ 1 3/4 CUPS MILK
♥ 2 LARGE EGGS
♥ 1/2 CUP MELTED BUTTER
♥ 1 TSP. VANILLA

DIRECTIONS
Preheat waffle iron.
Whisk the flour, baking powder and salt together in a medium bowl.
In a microwave glass bowl melt the butter, beat in the eggs, milk and vanilla.
Combine the wet and dry mixtures and stir until just combined.
Let it sit for a few minutes to develop
Pour the waffle batter into the iron and add the bacon pieces as you like.
Close the lid and be patient.
Mine take almost 10 minutes to cook. I’m going to play with my settings a bit.
Enjoy with your fav waffle condiments


♥♥ Thanks for visiting, if you liked this blog please click LIKE below. If you want to follow my blog please scroll to the bottom, click the FOLLOW button and enter in your email address.
Love Haleykins♥♥


**Please click “OLDER POSTS” button, (bottom of the page)
or the “COOKING WITH HAY” tab (top of the page) to see more**

Tagged , , , , , , , , , , , , , , , , , , , , , , , , , , ,

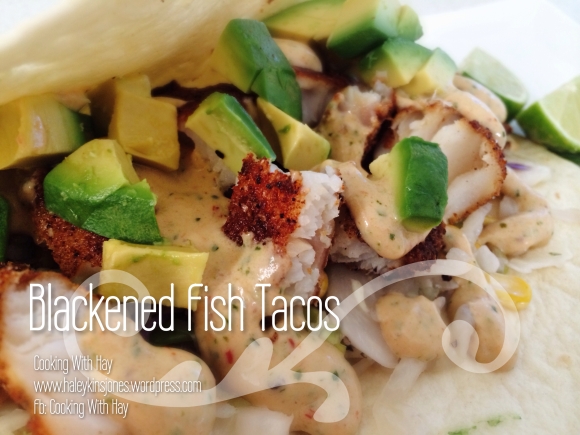
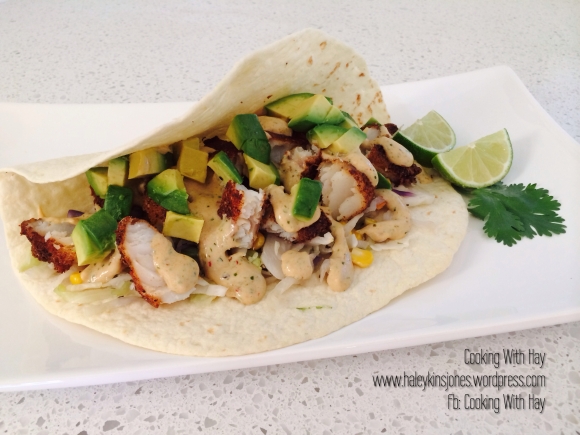
Blackened Fish Tacos with Chipotle Cilantro Dressing (salmon or cod or whichever fish you want)

Finally, this post is done. I still consider myself a beginner food blogger even though this blog has recently had it’s 3rd anniversary. Blogging recipes takes work. Writing an accurate recipe takes work. It’s work but it’s work I enjoy. I just wish I could do nothing but cook, take pics, and blog… Haha True story.


Been talking about these a lot, I know, I apologize for the redundancy. Finally got all the components together….

You’re going to need to check out my last 2 posts!

Click this photo to get this recipe!

Click on the photo to the left to get this yummy Chipotle Cilantro Dressing recipe for these Blackened Fish Tacos that we’re about to make.

Click this photo to get this recipe!

Click this photo to see the ingredients needed to make the Blackened Seasoning that will crispify (is that a word?)the fish to a nice golden crunch on the outside and give it a deep savory flavour.


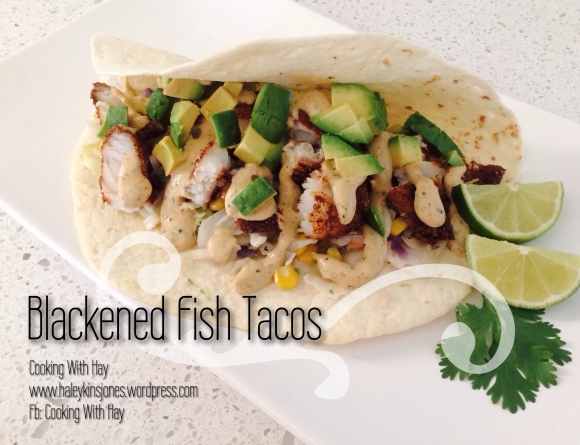
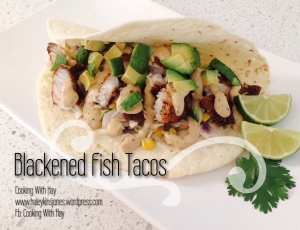
BLACKENED FISH TACOS
♥ 2 BAGS COLESLAW
♥ 1½ C. CORN KERNELS
♥ SALT + PEPPER
♥ FLOUR TORTILLAS
♥ 1 BIG SALMON FILET or 4 LARGE COD FILETS
♥ HIGH SMOKE POINT OIL FOR FRYING (i used Canola Oil)
1 BATCH OF BLACKENED SEASONING
1 BATCH OF CHIPOTLE CILANTRO DRESSING
♥ AVOCADO, FRESH, CHOPPED
♥ CILANTRO + LIME FOR GARNISH

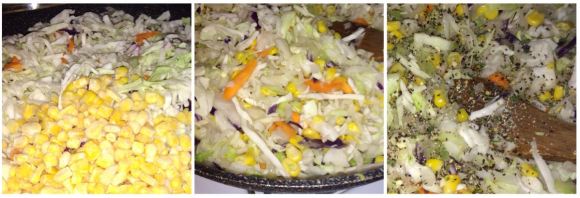
Saute the coleslaw and corn with salt and pepper until just tender.
Set aside, but keep warm.
Heat oven to low temp and slowly warm the tortillas. I like em just before they get toasted.
Cut salmon or fish into large pieces suitable for frying.
Heat oil, just above medium, not too hot or the fish won’t cook thoroughly and not too cold or the fish will soak up to much oil and become soggy.
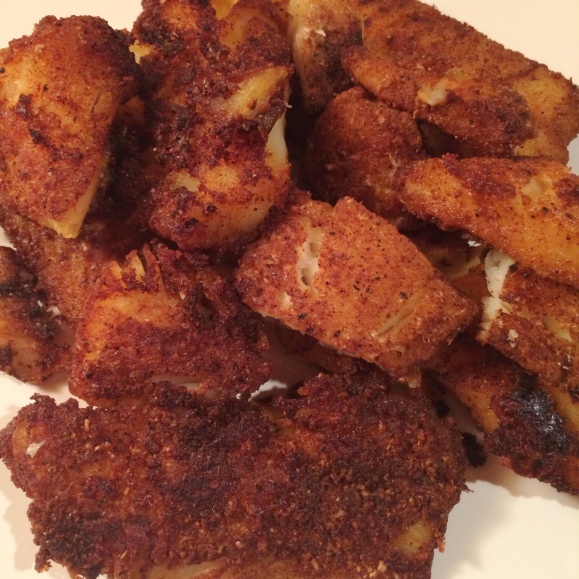
Fry till dark and golden on each side.
If you’re using salmon you may have to do the ends too. Use tongs. They work best.
When they are done gently remove from hot oil onto a papertowel lined dish to remove excess oil.
Let cool for about 5 minutes and break into good chunks.

THE ASSEMBLY
Warmed Tortilla
Sauteed slaw and corn
Blackened fish
Drizzle with some Chipotle Cilantro Dressing
Top with chopped fresh avocado, cilantro and a squeeze of fresh lime juice


Place the Blackened Seasoning in a shallow flat bottom container of some sort so you can press the fish into it.  Coating every inch of it.  The better it’s coated the better the crisp.

You don’t want to over cook the cabbage, or it will lose all it’s structure.  You want to saute it till it just starts to wilt.  Keeping it warm will also allow it to keep cooking so with the pan on medium heat, just keep an eye on it.
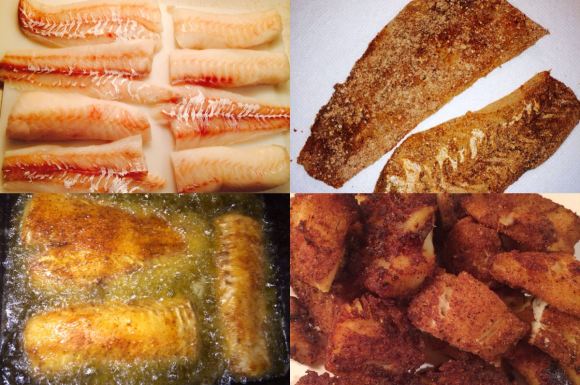
This is the cod I used last night.  Seasoned all over every surface of fish with the Blackened Seasoning.

Fried in some oil till golden and delicious. I use a large cast iron flat bottom deep dish for frying. Allows maximum room for the fish to fry properly without over crowding the pan.   The heavy duty cast iron can withstand the high temperatures and will maintain it’s heat better when you drop in the fish.

I fried the fish in 2 batches to ensure it cooked evenly and properly. Or you can use a deep fryer but I’ve only used one once and I didn’t like it…. it was too small for what I needed and I don’t want a big greasy appliance kicking around here. I fry as little as possible.
Frying foods took a lot of practice for me over the years.  So many times chicken or potatoes or whatever it was I was cooking, was either undercooked or well well well done. Practice makes perfect.

Frying can be very unhealthy if done incorrectly.  When done the right way you are using the least amount of oil to get that desired crunch and crispiness.

✰ Oil thats too hot will scortch the food on the outside while leaving it raw inside. ✰

✰ Oil that isn’t hot enough won’t seal the food as it should when you drop it in. ✰

(Rather it will sit and soak up the oil.  This results in that drippy soggy mess we’ve gagged on one too many times.

The first time I made these I used some fresh plump salmon and they were to die for! This time around i used cod. I preferred the salmon over any white fish but both were really good.


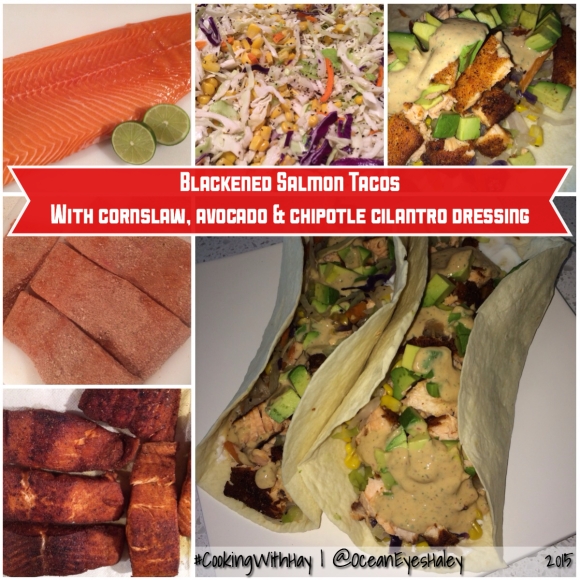
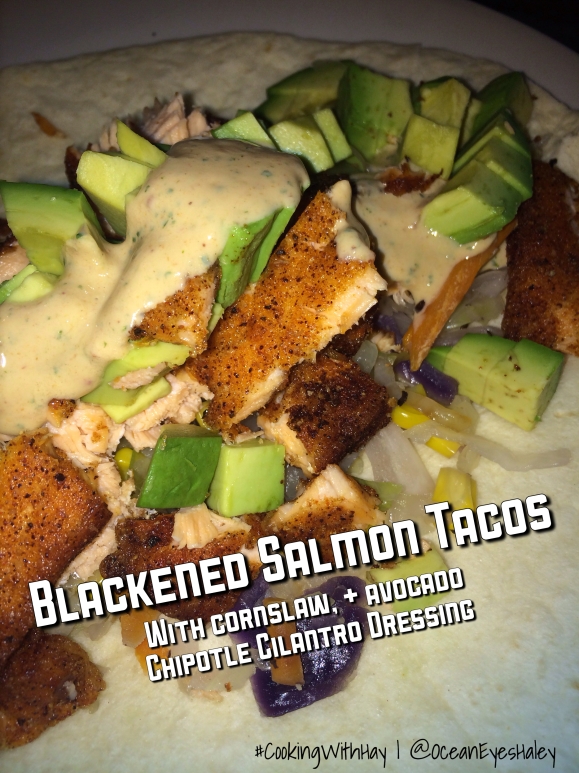
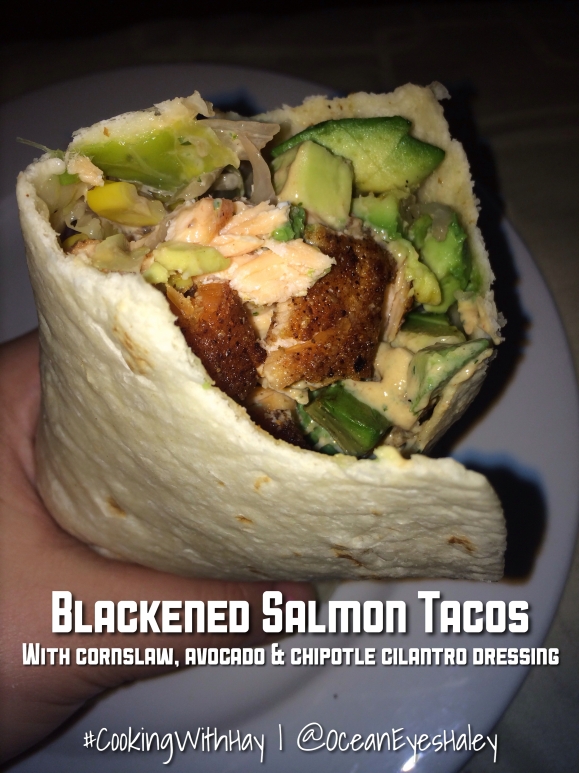
BLACKENED SALMON TACOS

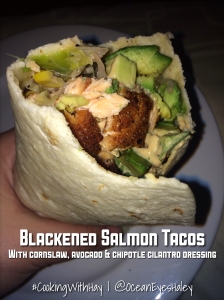
Here are some pics from the salmon ones I made last week!  These ones were my favourite!

Since the photos were taken down in my temporary basement dungeon kitchen they aren’t of the greatest quality.  We can only go up from here my friends ☺

1603

❤️ Thanks for visiting, if you liked this blog please click LIKE below. If you want to follow my blog please scroll to the bottom, click the FOLLOW button and enter in your email address.
Love Haleykins❤️
**Please click “OLDER POSTS” button, (bottom of the page)
or the “COOKING WITH HAY” tab (top of the page) to see more**

Tagged , , , , , , , , , , , , , , , , , , , , , , , , , , , , , , , , , , , , , , , , , , , , , , , , , , , , , , ,

Blackened Seasoning

Hi guys, I posted some pics of the Blackened Salmon and Blackened Fish Tacos to my Cooking With Hay Facebook page, and the requests came in for the recipe. As well as the request for me as your personal chef. Thank you for that! It actually is much easier to make the food than to blog the recipe… just in case you were curious. LOL so much time spent running a photoshoot and a kitchen at the same time. I love it tho and anxious to spend more time doing it. The balance between stoning the front of the fireplace and installing bathroom sinks… or blogging…. its a tough one….

I’m quite pleased with the photos from recent photoshoots. I’m working partially upstairs while I can get the good natural daylight and partially still down in the dungeon, errr, I mean, basement. Natural daylight makes for much more appetizing food pics. Less shadows and more true to life colouring of these meals. After all, we taste with our eyes and our noses before the food even hits our tongue or tummies.


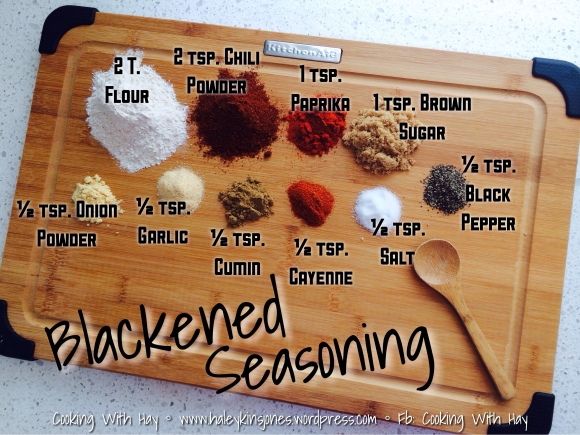
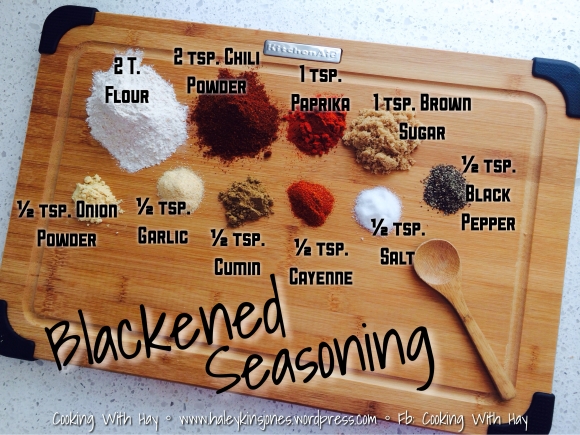
I’ve laid out all the ingredients that I used to make the Blackened Seasoning, on this fancy bamboo KitchenAid cutting board that Hubby came home with for me! *SMILES* This is the seasoning for the Blackened Salmon Tacos and Blackened Fish Tacos that I’ve been mentioning. (Blog posts to follow guys!)

I pulled this from a website a while back, I haven’t altered anything except that I use whole wheat flour instead of white flour. It actually just adds to the crispy factor we’re going for here! Yummy


Don’t confuse T (tablespoon) for TSP (teaspoon)!!
Oh come on, like you haven’t done that before.

The original image said 2 T. Chili Powder… LOL its got to be 2 TSP. Teaspoons
I made the same error when I first made Butter Chicken. That was a hot hot hot meal. Great tho. Just a real kicker that’s for sure.

BLACKENED SEASONING

♥ 2 T. FLOUR (I use whole wheat)
♥ 2 TSP. CHILI POWDER
♥ 1 TSP. PAPRIKA
♥ 1 TSP. BROWN SUGAR
♥ ½ TSP. ONION POWDER
♥ ½ TSP. GRANULATED GARLIC
♥ ½ TSP. CUMIN
♥ ½ TSP. CAYENNE
♥ ½ TSP. SALT
♥ ½ TSP. PEPPER

Mix together well. Store in an air tight container.


↓ This made enough to do a big slab of salmon or 4 large cod fillets. If you’re doing more you may want to double this recipe. Or to save you some prep time on the next go around, make up a big batch now.

↑ I made one batch of this seasoning and mixed it in this shallow plastic container. All ready to go so I can just lay the piece of fish or meat or whatever it is that you’re going to use, onto the seasoning.
This works great for everything, even prawns and scallops. Try it out and I hope you like it.  I’ve made it 3 times this July.  Cuz it’s that good.  LOL yum!


Blog Post with recipe and pics COMING SOON!

Blog Post with recipe and pics COMING SOON!

Blog Post with recipe and pics COMING SOON!

Blog Post with recipe and pics COMING SOON!

Blog Post with recipe and pics COMING SOON!

Blog Post with recipe and pics COMING SOON!


❤️ Thanks for visiting, if you liked this blog please click LIKE below. If you want to follow my blog please scroll to the bottom, click the FOLLOW button and enter in your email address.
Love Haleykins❤️


**Please click “OLDER POSTS” button, (bottom of the page)
or the “COOKING WITH HAY” tab (top of the page) to see more**

Tagged , , , , , , , , , , , , , , , , , , , , , , , , , , , , , , , , ,

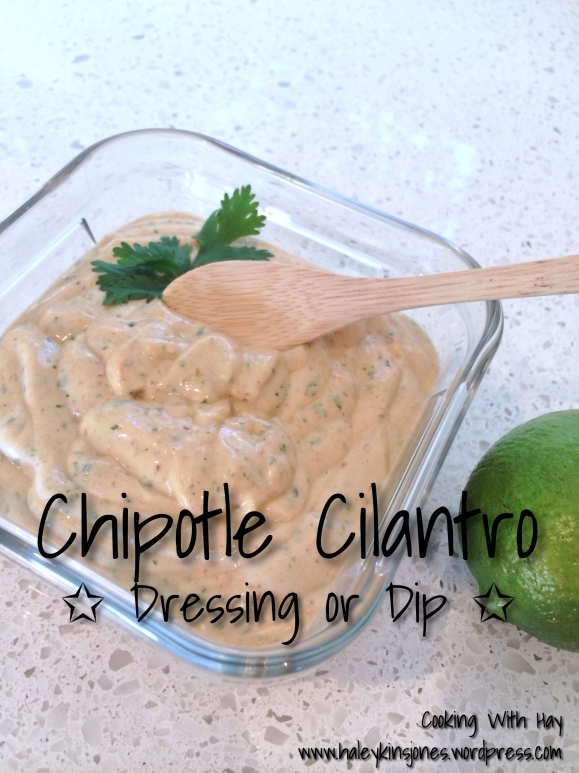
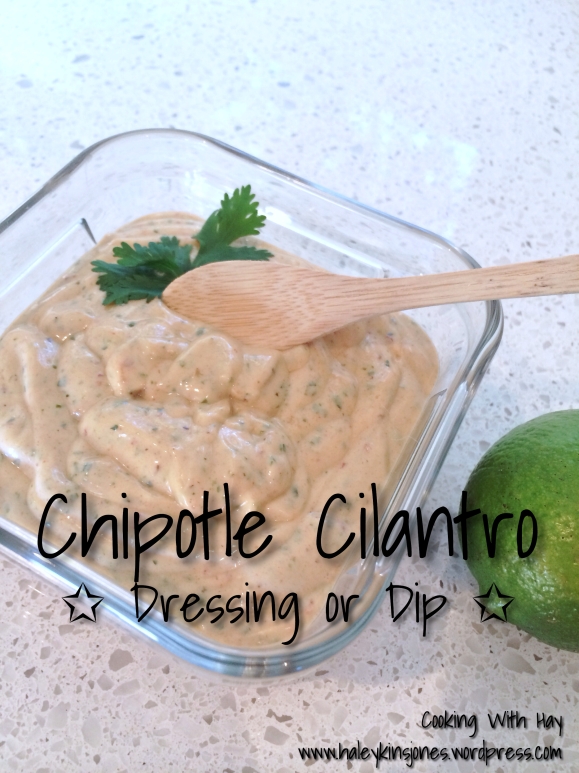
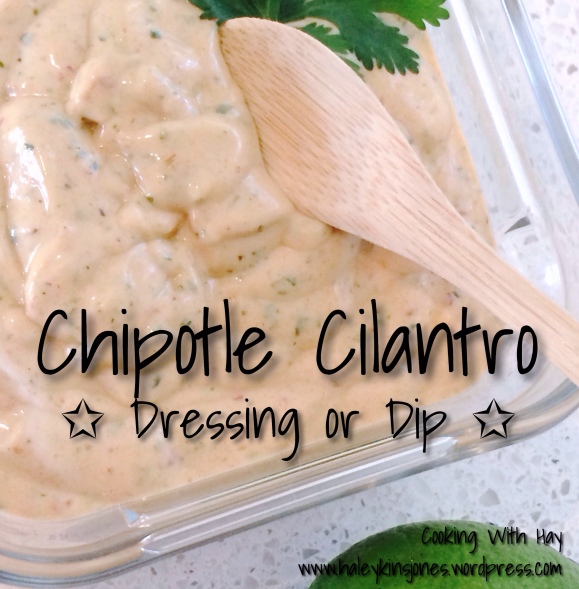
CHIPOTLE CILANTRO DRESSING or dip

Hi Guys, How is summer???  EEEEEK I’m super excited.  As many of you know my house is still under reno’s and just recently got my new Caesarstone counter-tops installed.  I’m ecstatic!  They are flawless and beautiful and exactly what i’ve wanted for oh so long now.  Now my foodblog pics have a higher quality look to them.  I’m so pleased.  Time to fine tune my Canon Rebel T3i camera and get to work!

Last week I made some Blackened Salmon Tacos.  There are no words for this easy recipe and there was also no room…. no room to eat as much as I could have, that’s for sure!  Wow, great way to enjoy some tender flaky juicy fish this summer. The recipe for the Blackening Seasoning will be my next blog post.  This is the dressing that I always make and it was great on the fish tacos.

Hope you like!


CHIPOTLE CILANTRO DRESSING OR DIP

♥ 1½ C FAT FREE SOUR CREAM
♥ 1 T LIGHT MAYO
♥ 1 T MILK
♥ 1 T CHIPOTLE PUREE
♥ 1 TSP CUMIN
♥ ½ TSP CRUSHED BEE POLLEN
♥ HANDFUL FRESH CILANTRO
♥ JUICE OF ONE LIME

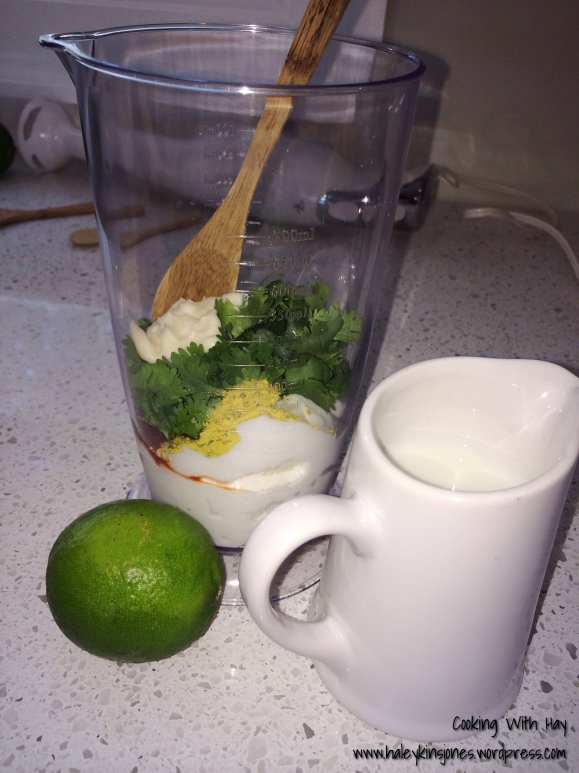
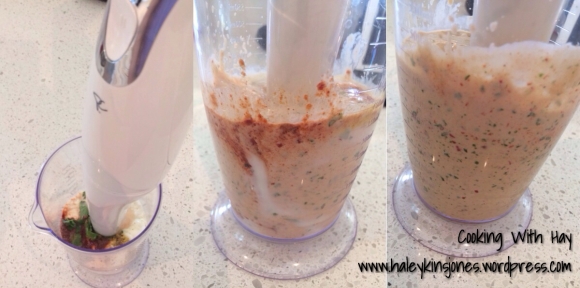
Blend together using an Immersion/Hand Blender or a Food Processor.
Chill in the fridge until its time to serve.


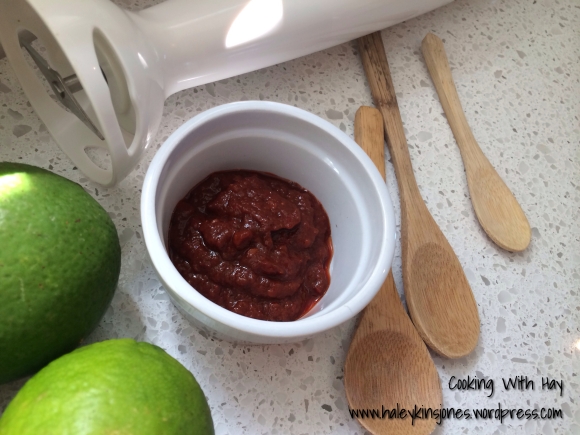
↑ I love me some chipotle! I buy chipotle peppers in small cans in adobo sauce and puree them with a hand blender or food processor. Chipotles pack a punch let me tell ya. The heat from these peppers is potent and smoky and is great for everything.
**If you don’t do heat. Use a very small amount, like 1-2 teaspoons of pureed chipotle for this recipe instead of the requested amount.**

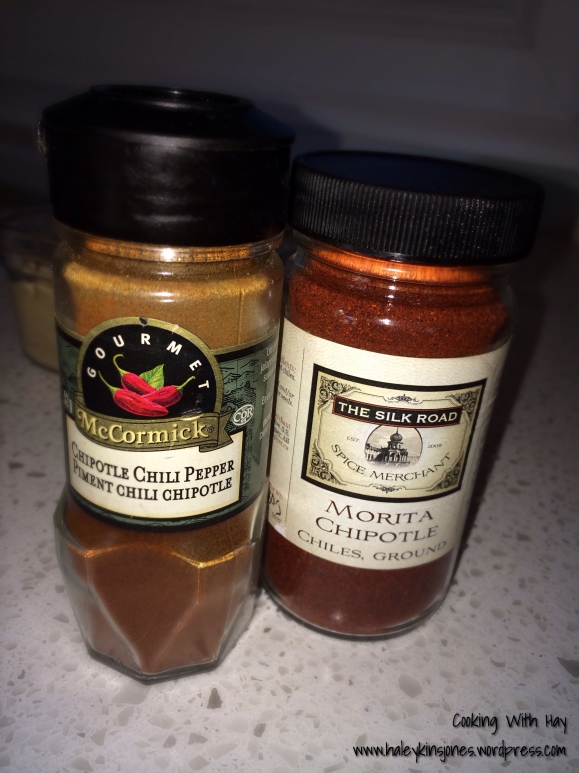
↑ If you don’t have canned chipotles in adobo sauce then you can certainly use a dry powder version, there are many out there. I have these 2 in my pantry. Remember that the longer the dressing sets for the more the flavour is enhanced, and therefore making it much much much hotter the longer it sits.

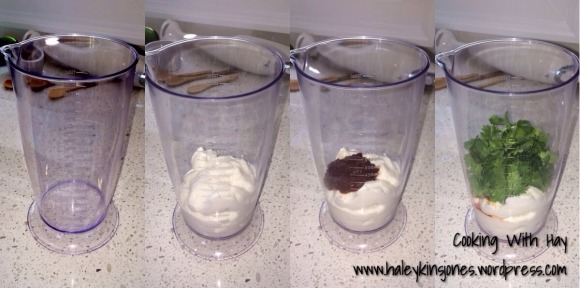
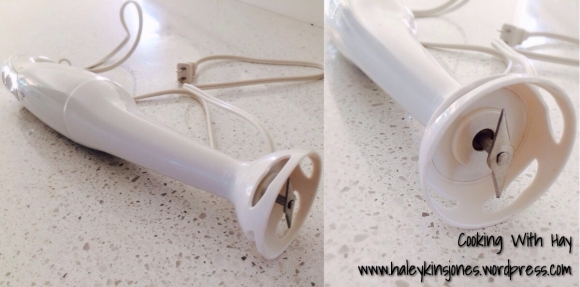
↑ My Immersion Blender came with this cool mixing vessel. What I love about this machine compared to a hand mixer or hand beater is that it will stand up inside the vessel and not topple over. Flat bottom makes it easy to leave it standing and use both hands to if you need to pause to get an ingredient or whatever. Anything to help keep the counters less messy.

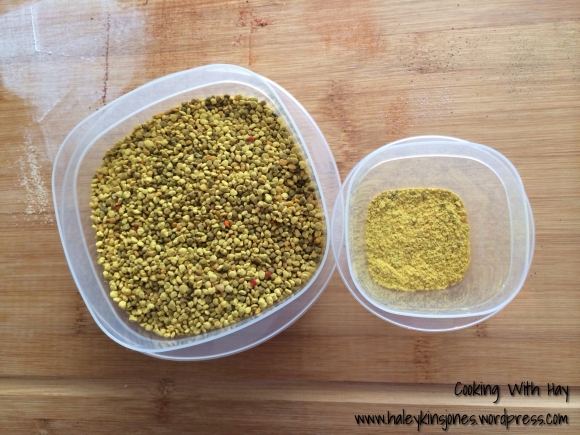
↑ Bee Pollen is one of Mother Natures little goodies. I add a little to every salad dressing I make. You can add it to anything though; soups, sauces, whatever you like. The flavour is like a flower. Its got a floral taste when it hits your tongue. It comes in the natural foods section of your grocery store and looks like little gold nuggets. I grind them down with a mortar and pestle. I have a small one that I use for spices and such. Another inexpensive way to make your kitchen/cooking life a little easier.

Here’s some info on Bee Pollen I picked up from http://www.mercola.com

What Is Pollen?
Pollen is the male seed of flowers. It is required for the fertilization of the plant. The tiny particles consist of 50/1,000-millimeter corpuscles, formed at the free end of the stamen in the heart of the blossom. Every variety of flower in the universe puts forth a dusting of pollen. Many orchard fruits and agricultural food crops do, too.

Bee pollen is the food of the young bee and it is approximately 40% protein. It is considered one of nature’s most completely nourishing foods. It contains nearly all nutrients required by humans. About half of its protein is in the form of free amino acids that are ready to be used directly by the body. Such highly assimilable protein can contribute significantly to one’s protein needs.

To view the full article, please click here.

↑ Place all the ingredients into the mixing vessel and blend away. Lift the machine up and down to get it good and blended. Oh so easy I want to blend everything in sight.

photo 9

↑ ❤ Immersion Hand Blender! ❤ NEW TOY! LOL ❤

↑ COMING UP NEXT → Blackened Fish Tacos, using this dressing!
Stay Tuned and if you’d like…. FOLLOW MY BLOG

❤️ Thanks for visiting, if you liked this blog please click LIKE below. If you want to follow my blog please scroll to the bottom, click the FOLLOW button and enter in your email address.
Love Haleykins❤️
**Please click OLDER POSTS, (bottom of the page)
or the RECIPES tab (top of the page) to see more**
Tagged , , , , , , , , , , , , , , , , , , , , , , , , , , , , , , , , , , , , ,

BAKED TURKEY & SPINACH MEATBALLS

Hello Everyone. Since adding a Facebook Page, Cooking With Hay, {please come by and LIKE my page} I have some more followers this time around and I just wanted to take this opportunity to say ‘Hello and Thank You’
I appreciate every single one of you, and any LIKE or SHARE that you can throw my way as well. You keep this fun for me.

**please look for the buttons that say previous posts or older posts to see more or use the categories at the top or the archives and links at the bottom to get around a little easier. Also look for the search bar near the bottom to make it even more easier**

In just 10 days Hubby and I will be off to Nuevo Vallarta, Mexico. If you’re on my personal FB, you’re most likely annoyed with my daily countdown photos… sorry about that. I’m just super excited! The point to this rambling… I’ve been trying to empty out the freezer before we go. Don’t ask me why, because I don’t have an answer. 😜 One of the last few things In the freezer was 2 lbs of extra lean ground turkey breast!! Awesome. I bought this for one purpose and one purpose only…. our favorite meatballs, Baked Turkey & Spinach Meatballs to be exact! So lean, so good! I will serve these with some turkey gravy, garlic mashed potatoes made with no butter or milk. {I use chicken stock, salt and garlic} and sweet corn.
You may remember an older post about these meatballs, but it didn’t contain any pictures and I’ve since jacked up the spinach and the seasonings a bit. I hope you like this new tweek!

20140214-142826.jpg
BAKED TUREY & SPINACH MEATBALLS

INGREDIENTS:

  • 2 tablespoons olive oil
  • 1 large onion, finely chopped
  • 2 garlic cloves, finely minced
  • 1 teaspoon salt
  • 1/2 teaspoon ground black pepper
  • 1/4 teaspoon dried thyme leaves
  • 1/2 teaspoon dried oregano
  • 1/4 – 1/2 teaspoon crushed red pepper flakes (optional – adjust to your preference)
  • 2 x 16 oz pkg. frozen chopped spinach (defrosted, drained, and squeezed to remove excess water)
  • 2 tablespoons Worcestershire sauce
  • 1/3 cup chicken broth
  • 2 1/2 lbs lean ground turkey
  • 1 cup bread crumbs, {I make my own from the loaf ends if my favorite 12 grain bread.
  • 2 large eggs

 
INSTRUCTIONS:

  • Preheat oven to 400 degrees F. Prepare a large baking sheet by spraying with cooking spray.
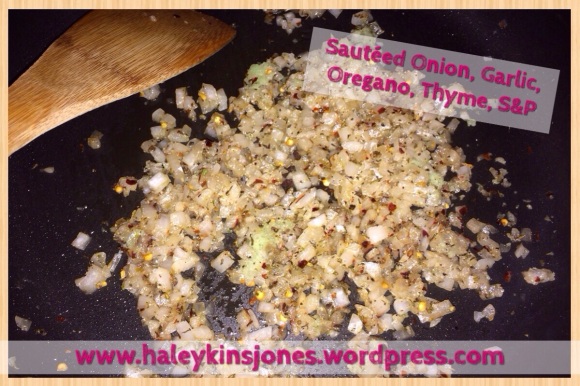
  • In a frying pan on medium heat, heat olive oil until hot. Then add onion, garlic, salt, pepper, thyme, oregano, and red pepper flakes. Sauté until onion is tender.
  • Add spinach to pan and combine with onion mixture. Add Worcestershire sauce and chicken broth and mix well to combine. Cook until most of the liquid has cooked out. Remove from heat and allow to cool to room temperature.
  • In a large bowl, combine the turkey, bread crumbs, and egg. Add cooled onion/spinach mixture to the meat.
  • 5. With your hands, create meatballs that are about 1 – 1 1/2 inches in diameter and place them on the baking sheet. Leave a little bit of space between each meatball. When you are done shaping your meatballs, you will probably have about 40-42 meatballs from this recipe. If you don’t need this many, you can freeze them after baking or cut this recipe in half.
  • Bake until your meatballs are cooked through with an internal temperature of 160 degrees F – which was about 20 minutes for my oven. Remove from oven and serve as desired.

 
20140214-142852.jpgOne my favourite smells is onions in a frying pan. Adding in the garlic and seasonings and you are suddenly transported to a very happy happy land. Haha. Ok it’s good, but maybe not that good… No, it IS that good!!

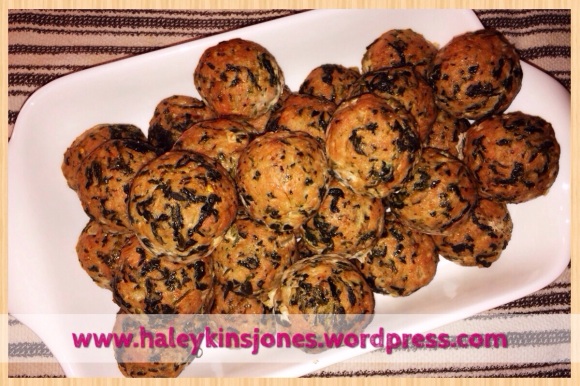
20140214-142839.jpgWhen they are done they are golden and smell divine. Here’s the before and after!
20140214-142901.jpgHa! I’m supposed to freeze some if these. Dude, by the time we are finished with these, there won’t be enough to bother freezing!!

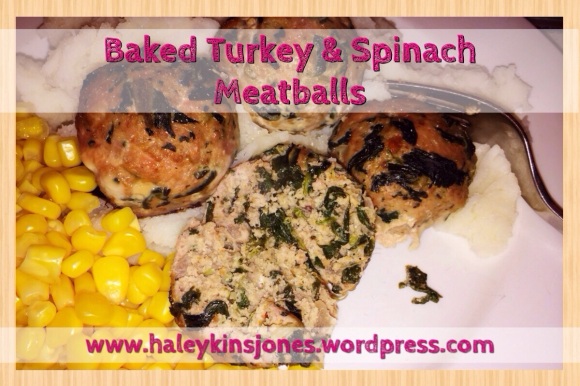
20140214-142912.jpgLike I said ,way back there up above, I served these with garlic mashed potatoes {no butter, no milk}. I put in 1 Garlic Ball {click this link to make them yourself} add in some salt. I use Sea Salt and some of that leftover chicken stock because I know what you were thinking when you had so much stock left… “What am I going to do with this leftover stock?” {Ok maybe you’re not thinking that, but I’m always trying to use everything. Waste not want not after all.}. So you should still have stock left after the meatballs, and the mashed potatoes so tomorrow morning you can add it to some fresh cut hash brown potatoes in a ‘barely’ oiled hot pan. So you don’t need as much oil! Hahaha! Oh, I got sidetracked…. I also served this with turkey gravy, spiced up with oregano and red pepper flake because I idolize red pepper flake hahaha and sweet juicy corn!

20140214-142925.jpgHere, I used my fork and broke one of these scrumptious meatballs open. I have doubled the amount of spinach originally called for to 2 packages. This ensures lots of Popeye strength, and so much healthy goodness and flavour! Your call. I say use 2 packages of spinach and if it’s too much for you cut it down next time but it’s not like it’s intolerable, I swear, you’ll thank me! Hehe!

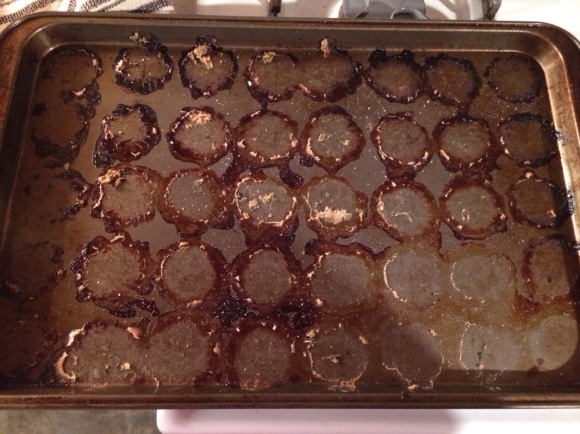
20140214-143048.jpgI thought there would be some sort of drippings in the pan that I could use to make some good gravy but check out this cooking sheet…. Dem are some lean mean healthy machines…. Depending on how much gravy you put on! Another reason to make a shitload of gravy at Christmas time. Freeze it in portions for occasions such as this. I just said ‘shitload’ on my blog. Is that completely inappropriate, it’s just that that seemed like the most appropriate wording. I don’t know. I’m still learning…..

20140214-143059.jpgSeriously hearty, mostly healthy and your tummy will be forever thankful! Please hit me up with a comment below if you make these and what your thoughts were! I love feedback.

Thanks for visiting, if you liked this blog please click LIKE below.
If you want to follow my blog please scroll to the bottom, click the FOLLOW button and enter in your email address.

Love Haleykins
20131230-210222.jpg

**Please click OLDER POSTS, {below} to see more**
Tagged , , , , , , , , , , , , , , , , , , , , , , , , , , ,

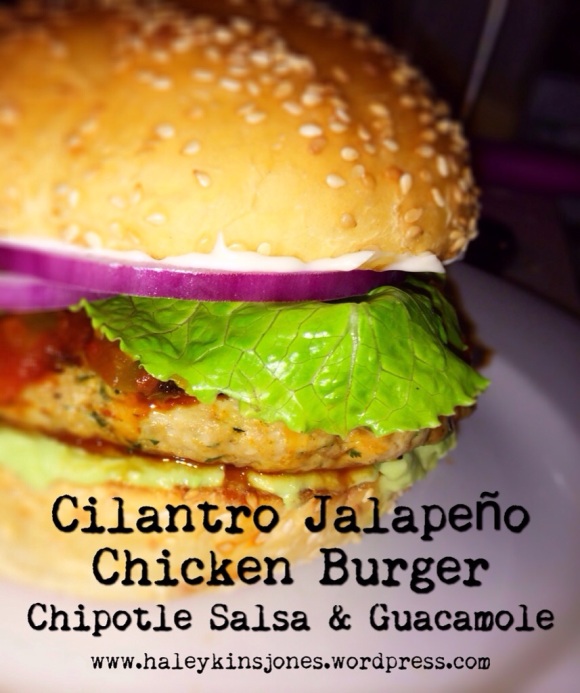
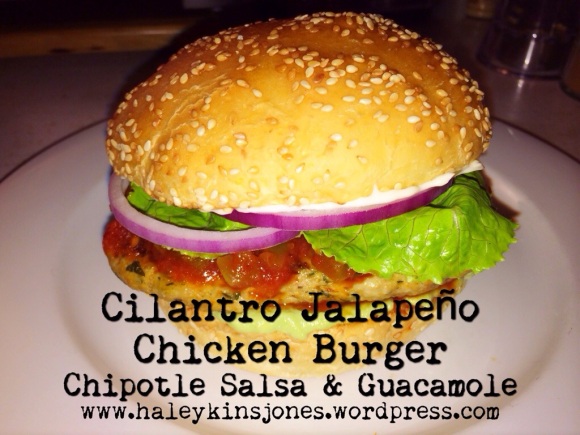
Cilantro Jalapeno Chicken Burger with Chipotle Salsa & Guacamole

20140129-203540.jpg
CILANTRO JALAPEÑO CHICKEN BURGER WITH CHIPOTLE SALSA & GUACAMOLE
Makes 6 burgers

CHIPOTLE SALSA
1 cup chunky salsa
1 tablespoon chipotle purée
Mix it up and chill it until you’re ready to serve.
{this makes just enough for 6}

LIGHT & SIMPLE GUACAMOLE
2 soft avocado
2 tablespoons fat free sour cream
1 tablespoon fresh squeezed lime juice
Mix it up, we like ours slightly smooth and still a bit chunky…. your call.
Chill it until you’re ready to serve.

BURGER INGREDIENTS
2lbs ground chicken breast {I used extra lean}
3/4 cup finely chopped onion
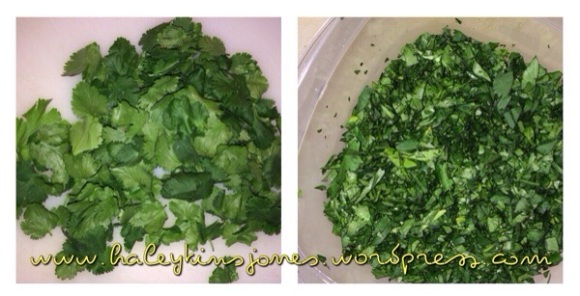
1/2 cup finely chopped fresh cilantro
1 Pre Made Homemade Garlic Balls {or 5 cloves of minced garlic}
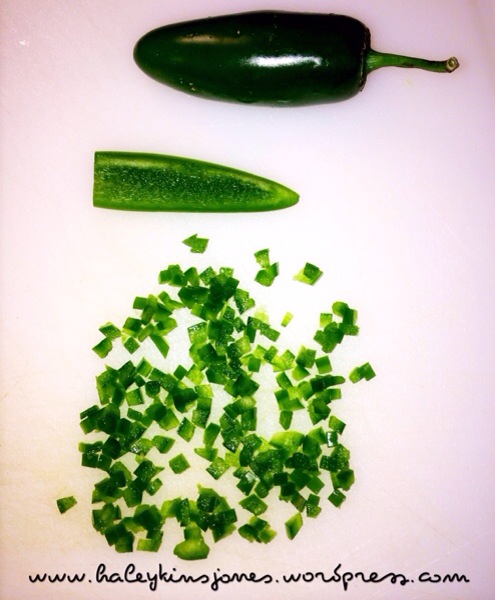
3 teaspoons finely chopped jalapeños
1 1/4 teaspoons paprika
1 1/4 teaspoons cumin
1/4 teaspoon chili powder
1 teaspoon salt {or less, I used less and they needed more}
couple cranks of fresh cracked pepper
1/2 cup grated cheddar cheese {I used the smaller grate}

BUNS & TOPPINGS
6 hamburger buns {sliced and toasted before serving}
Lettuce
Red onion rings
Light mayo
Bacon {this burger be beggin for bacon but my waistline was not 😦 }

BURGER DIRECTIONS
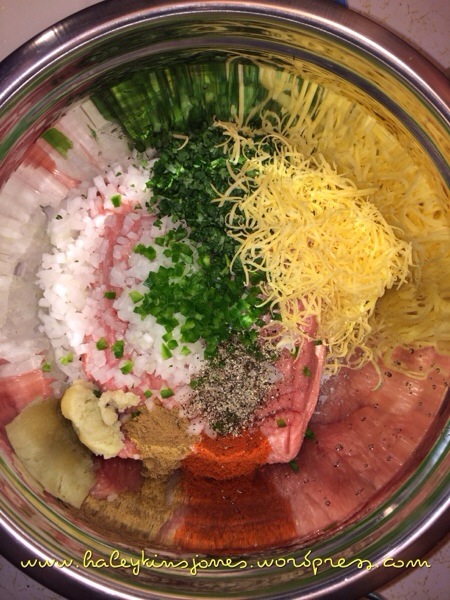
In a large bowl add everything in the order listed.
Using your hands, gently combine all the ingredients.
DO NOT OVER MIX OR OVERWORK
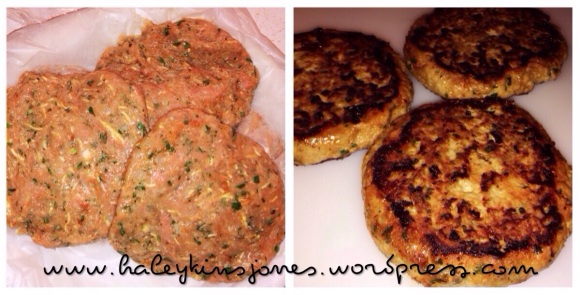
Make 6 patties { I lined a dish in wax paper so they didn’t stick to each other}
I cooked mine on my Cuisinart Griddler, about 15-20 minutes {cooked through}
Would have used the bbq but it’s just too cold outside and I had wet hair from swimming.

BURGER ASSEMBLY
Chipotle Salsa on the bottom of the bun
Add your burger
Top the burger with some Guacamole
Here’s where I would add the bacon if I had included bacon
Lettuce
Red onion
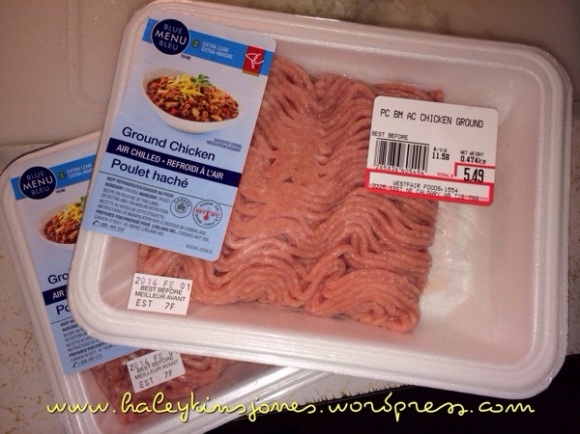
And finally, light mayo, on the top bun.20140128-222558.jpgI came across the idea for this on another site. I had been wanting to do something different with a chicken burger and this ground version seemed great for it. The original recipe called for 1 1/2 lbs of ground chicken, and since my 2 packages of chicken came to more than that, I had to adjust the rest of the ingredients.
1kg = 2.2lbs
Keep this in mind when shopping and referring to your recipes.20140128-222640.jpg20140128-224625.jpg20140128-222727.jpgEverything gets combined in a bowl. Don’t mix it too much. Just enough to incorporate everything.
20140129-195724.jpgMakes 6 patties.
I have to say…. I really don’t like the way ground chicken looks and feels compared to ground beef… Regardless these looked good and they were very tasty. Plus the Chipotle Salsa on these gives you a great mix of flavours in yo mouth!20140129-203530.jpg20140129-203540.jpg
Thanks for visiting, if you liked this blog please click LIKE below.
If you want to follow my blog please scroll to the bottom, click the FOLLOW button and enter in your email address.

Love Haleykins
20131230-210222.jpg

Tagged , , , , , , , , , , , , , , , , , , , , , , , , ,

Chicken Hoisin Rolls aka Chicken Teriyaki Rolls Haleykins Style

20140124-201803.jpg I just don’t like bottled teriyaki sauce… neither does Hubby… I use these two sauces. Hoisin Sauce and Stir Fry Sauce. Why? Because the first time I went to make these rolls I thought I had teriyaki sauce in the fridge but I was wrong and it was too late to run to the store, so I improvised. Hoisin and stir fry sauces in the pan of cooked sliced chicken breast. 20140124-204925.jpg

Super funny thing is that these are both Chinese sauces… for my sushi dinner?!?!
I don’t care, it works! It works well if you ask me. But you didn’t ask, so I’ll let it be.20140124-204947.jpgWhat would normally be a Chicken Teriyaki Roll now becomes a Haleykins Chicken Hoisin Roll.20140124-204954.jpgThanks for visiting, if you liked this blog please click LIKE below.
If you want to follow my blog please scroll to the bottom, click the FOLLOW button and enter in your email address.

Love Haleykins
20131230-210222.jpg

Tagged , , , , , , , , , , , , , , , , , , , , , , , ,

Fajita Seasoning

Hey Guys!  I had been using a fajita seasoning mix recipe that I got a few years back.  I had posted about some yummy Chicken Fajita’s back in 2012 and I’ve been using this combo ever since.  I just came across one that sounds even better on Food.com.  In previous years I had used those Old El Paso packets when I made fajita’s and this one claims to be alot like it if not better.  I am making some fajita’s tomorrow night for dinner, shrimp ones, chicken ones and some steak ones.  Only because I can’t settle for just one kind.  I just made up a batch of this seasoning and I am going to give it a go tomorrow.  I have high faith that this is a keeper.
20140120-173223.jpg
Here’s the recipe!

FAJITA SEASONING
2 tablespoons – cornstarch
4 teaspoons – chili powder
2 teaspoons – salt
2 teaspoons – paprika
2 teaspoons – sugar
1.5 teaspoons – chicken bouillon crushed
1 teaspoon – onion powder
1/2 teaspoon – garlic powder
1/2 teaspoon – cayenne powder
1/2 teaspoon – cumin

Mix it all together and keep it in a dry container. 

Approximately 2 tablespoons of this mixture equals a packet of that store bought stuff. 
This recipe made just over 6.5 Tablespoons.

This will save you money too as those packets can start to add up after a while.

Please give it a try! 
If you do make it, please leave me a comment below and let me know what you think. 

I will be writing a new blog tomorrow after I make up these fajita’s so I’ll have a final verdict for you soon.

Thanks for visiting, if you liked this blog please click LIKE below.

If you want to follow my blog please scroll to the bottom, click the FOLLOW button and enter in your email address.

Love Haleykins
20131230-210222.jpg

Tagged , , , , , , , , , , , , , , , , , , , , , , , , , , ,

Bruschetta Chicken on Spinach and Avocado Salad

20140118-220113.jpgLook at it all steaming and juicy up there. My photos are aways rushed and half assed because I’m anxious to eat it! Haha. #bloggerproblems

I made my Bruschetta Chicken again. I baked it in the oven this time, because the air is thick and the fog is heavy and I really don’t want to be out by the BBQ right now.

I make this often it seems but I added a little twist by putting it on a salad this time. It’s that good. Plus, I need to eat more green veggies.

Fresh Spinach is a favorite in our house.
20140118-220133.jpgSince I decided to do a salad with the chicken this time, I got to work on the tomatoes and dressing the day before so it had lots of time to marinade together.

Start by chopping up and deseeding 4 Roma tomatoes, into small even pieces so they stay on the chicken nicely.

Add in 2 Premade Homemade Garlic Balls or 4 or 5 minced garlic cloves.

I used 1 full packet of fresh basil and about half of another one {rolled and sliced, chiffonade style}.

But the good thing about cooking and the reason I find it so hard to post specific recipes is that… it’s always up to you, as to how much of what, you add. Your palate is different than mine and the joy of cooking is making it your own Fo Sho! Whoa, ramble, where was I? Oh ya the tomato mixture…

K, add in some coarse sea salt and about a cup and a bit more of the balsamic vinegar. Give it a good mix and then refrigerate it over night.
20140118-220141.jpgDay of dinner!

Butterfly 4 boneless, skinless, chicken breasts {see how in my previous Bruschetta Chicken post done a few months ago}

I then scored them and drizzled on some balsamic and popped those bad boys in a preheated 400 degree oven for 25 minutes. After this time I cranked the heat up to 425 and left them for another 5 minutes.
20140118-220208.jpg15 minutes after you’ve put the chicken in you’ll want to prepare the basic salad. This is made up of fresh baby spinach leaves, cubed avocado {this is why we wait 15 minutes. Don’t want your avocados to brown on you.} and some more chopped up Roma tomatoes.

Next pull out your marinaded tomatoes. With a spoon take some of the liquid, the oh-so-yummy, garlicky, vinegary, tomatoey goodness, and drizzle it over your salad. Some might want to add some olive oil but I don’t see the point. It’s not needed!!

My phone starts wailing “I’m Different by 2 Chains signifying that the chicken is ready for toppings. I let it play for a few beats and jam out obviously, before taking it out of the oven.
Reduce the heat back down to 400 degrees.

Sprinkle some mozzarella cheese and heap on the marinated tomatoes. I think I get them close to an inch high. Completely cover the chicken with the tomatoes, in my opinion this is the best!

Bake in the oven again for about 10 minutes keep your eye on em.
Tomatoes stay fairly fresh and juicy.
20140118-220218.jpgWhen they’re done they look like this. I know, I can’t believe the cooking sheet actually comes clean after this, but it does, to some degree… LOL

Now, I like to find my biggest knife and chop up the chicken into lengthwise strips on a cutting board. Lift the cutting board and swipe that juicy, hot, steaming chicken onto your oh-so-fresh salad.

Need I say more? No, I thought not.
Now grab a fork and dig in.
You have waited long enough.
20140118-220230.jpg

20140118-220237.jpg

20140118-220245.jpg

20140118-220251.jpg
Thanks for visiting, if you liked this blog please click LIKE below.
If you want to follow my blog please scroll to the bottom, click the FOLLOW button and enter in your email address.

Love Haleykins
20131230-210222.jpg

Tagged , , , , , , , , , , , , , , , , , , , , , , , , , , ,

Sushi with Hay

20140113-231128.jpg

First toast your seasame seeds in a hot pan.  Just toasty not too toasty.

Rinse your uncooked sticky/sushi rice for a few minutes until the water runs clear.  This gets rid of all the starch that can burn.

2 cups of uncooked rice and 2 1/2 cups water in the rice cooker and when it’s done add about 2 tbsp of rice vinegar to season the rice.  Don’t forget this step or your sushi will taste like rice and not sushi.

20140113-231257.jpg

Avocados, cucumber and crab meat for the California rolls.  Don’t cut your avocado too early or it will brown on you.  Cut the cucumber into strips as wide as the roasted seaweed wraps.  Cut the crab sticks in half

20140113-231321.jpgI used the big jumbo prawns.  Raw, peeled and deveined with the tails on.  Make 2 or 3 small slices on the bottom side of the prawn to help keep them straight when frying and not curling up tight like they like to do.  See the pictures above. I made my tempura batter exactly as the instructions said on the package but what I got was so thick and doughy… so I added more water but I could have added even more…. mine were awful at first and my oil was way too hot….. by the end of it they turned out much better but nothing like the picture they had…. I’ll keep practicing… Practice makes perfect after all.  Hubby says… “why are you taking pictures of the burnt ones?”  well, because, that’s what happens when you are trying something new.  You fail and then you learn how not to fail…. IMPROVE.
20140118-162319.jpg
20140113-231335.jpg

This is the Tempura I bought… Yup, Cock Brand Tempura…..20140113-231352.jpg

I made a spicy mayo for the Dynamite Rolls.  Very basic, Mayo and Srirracha sauce… mix it up.  Put it in a baggy for easy piping and snip the tip before using.

20140113-231407.jpg

Wrap your rice mat with saran wrap otherwise that rice will stick to everything.  Including your hands.  A tip…. rub your hands with a bit of mayo…. like lotion,  creates a barrier and nothing for the rice to stick to.

Next place your roasted seaweed on the mat.  Cover it with some rice, I use the back of a flat wooden spoon to help smooth it out.  Then sprinkle the rice with the toasted seasame seeds.

Now you can choose to flip it so that the rice will be on the outside of the sushi roll or you can leave it and the seaweed is on the outside.  I actually like them with the seaweed on the outside more.  Make a few of each to keep the presentation pretty!

Layer with cucumber, avocado and crab.  Roll em up and roll em up tight.  Practice makes perfect for this as well.  TIGHT!!!!

Rinse a sharp knife under water or a light spray of cooking oil and slice the ends of the roll first.  then cut the main section in half and then cut those halves into smaller pieces.  Depending on your preference.  Plate them!  Yum

20140113-231835.jpg

20140113-231843.jpg

20140113-231850.jpg

20140113-231903.jpg

For the Dynamite rolls you do the same thing as before, rice on the mat, sprinkled with seasame seeds.  Now here’s where you at a squirt of that spicy mayo lengthwise to the rice, add cucumber, and avocado and I add 2 of the prawns tails out.  Roll it up, TIGHT and  cut the same way.  Ends off, then in half, then into smaller pieces.20140113-231912.jpg

20140113-231935.jpg

Tagged , , , , , , , , , , , , , , , , , , , , , , , , , , , , , , , , ,