Tag Archives: lunch

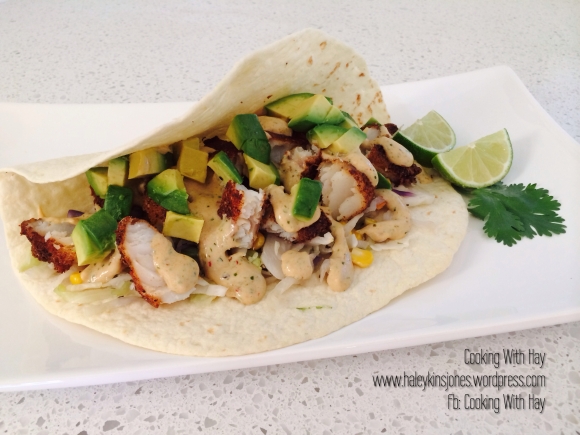
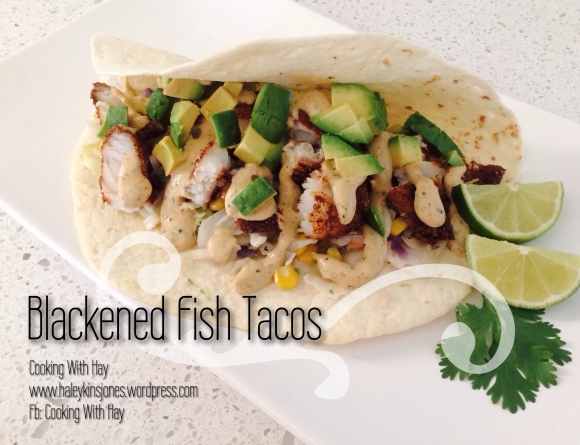
Blackened Fish Tacos with Chipotle Cilantro Dressing (salmon or cod or whichever fish you want)

Finally, this post is done. I still consider myself a beginner food blogger even though this blog has recently had it’s 3rd anniversary. Blogging recipes takes work. Writing an accurate recipe takes work. It’s work but it’s work I enjoy. I just wish I could do nothing but cook, take pics, and blog… Haha True story.

Been talking about these a lot, I know, I apologize for the redundancy. Finally got all the components together….

You’re going to need to check out my last 2 posts!
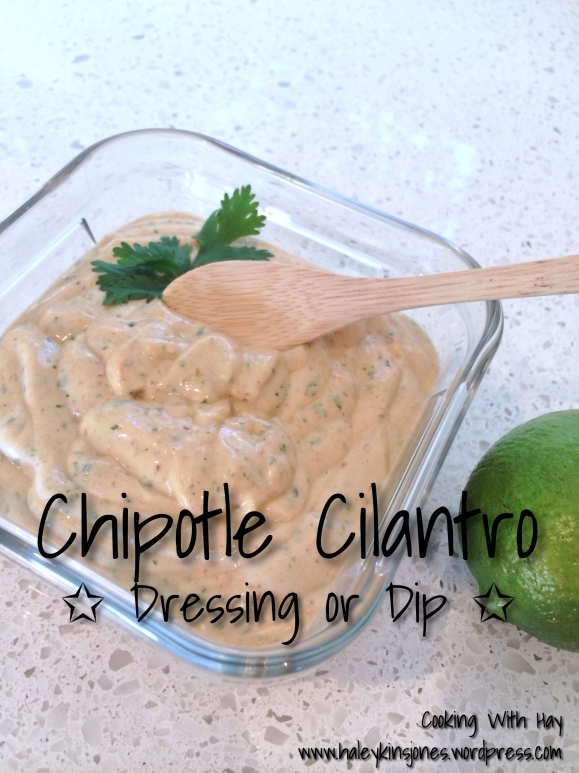
Click this photo to get this recipe!

Click on the photo to the left to get this yummy Chipotle Cilantro Dressing recipe for these Blackened Fish Tacos that we’re about to make.
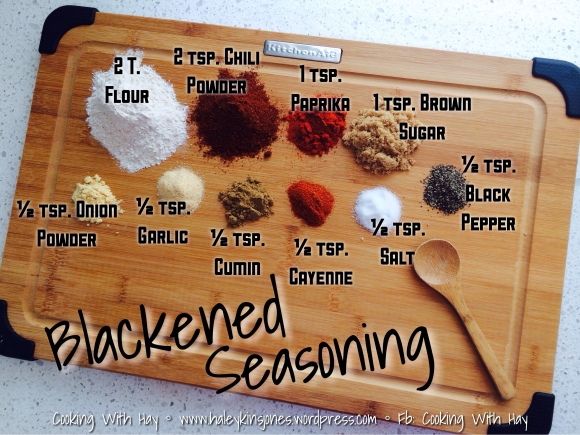
Click this photo to get this recipe!

Click this photo to see the ingredients needed to make the Blackened Seasoning that will crispify (is that a word?)the fish to a nice golden crunch on the outside and give it a deep savory flavour.


BLACKENED FISH TACOS
♥ 2 BAGS COLESLAW
♥ 1½ C. CORN KERNELS
♥ SALT + PEPPER
♥ FLOUR TORTILLAS
♥ 1 BIG SALMON FILET or 4 LARGE COD FILETS
♥ HIGH SMOKE POINT OIL FOR FRYING (i used Canola Oil)
1 BATCH OF BLACKENED SEASONING
1 BATCH OF CHIPOTLE CILANTRO DRESSING
♥ AVOCADO, FRESH, CHOPPED
♥ CILANTRO + LIME FOR GARNISH

Saute the coleslaw and corn with salt and pepper until just tender.
Set aside, but keep warm.
Heat oven to low temp and slowly warm the tortillas. I like em just before they get toasted.
Cut salmon or fish into large pieces suitable for frying.
Heat oil, just above medium, not too hot or the fish won’t cook thoroughly and not too cold or the fish will soak up to much oil and become soggy.
Fry till dark and golden on each side.
If you’re using salmon you may have to do the ends too. Use tongs. They work best.
When they are done gently remove from hot oil onto a papertowel lined dish to remove excess oil.
Let cool for about 5 minutes and break into good chunks.

THE ASSEMBLY
Warmed Tortilla
Sauteed slaw and corn
Blackened fish
Drizzle with some Chipotle Cilantro Dressing
Top with chopped fresh avocado, cilantro and a squeeze of fresh lime juice


Place the Blackened Seasoning in a shallow flat bottom container of some sort so you can press the fish into it.  Coating every inch of it.  The better it’s coated the better the crisp.
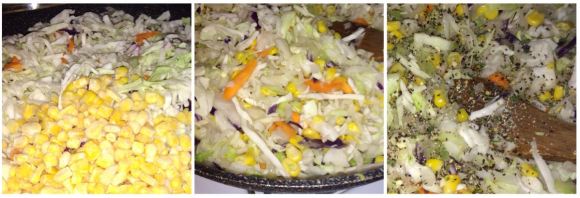
You don’t want to over cook the cabbage, or it will lose all it’s structure.  You want to saute it till it just starts to wilt.  Keeping it warm will also allow it to keep cooking so with the pan on medium heat, just keep an eye on it.
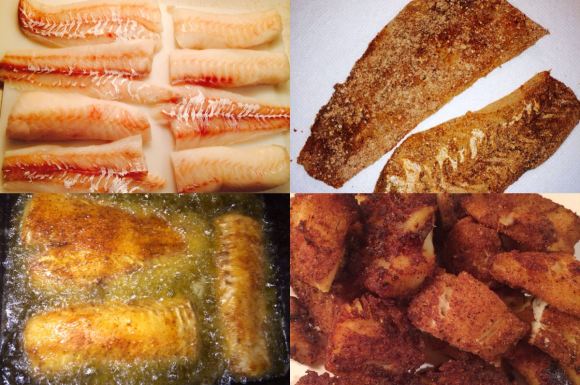
This is the cod I used last night.  Seasoned all over every surface of fish with the Blackened Seasoning.

Fried in some oil till golden and delicious. I use a large cast iron flat bottom deep dish for frying. Allows maximum room for the fish to fry properly without over crowding the pan.   The heavy duty cast iron can withstand the high temperatures and will maintain it’s heat better when you drop in the fish.

I fried the fish in 2 batches to ensure it cooked evenly and properly. Or you can use a deep fryer but I’ve only used one once and I didn’t like it…. it was too small for what I needed and I don’t want a big greasy appliance kicking around here. I fry as little as possible.
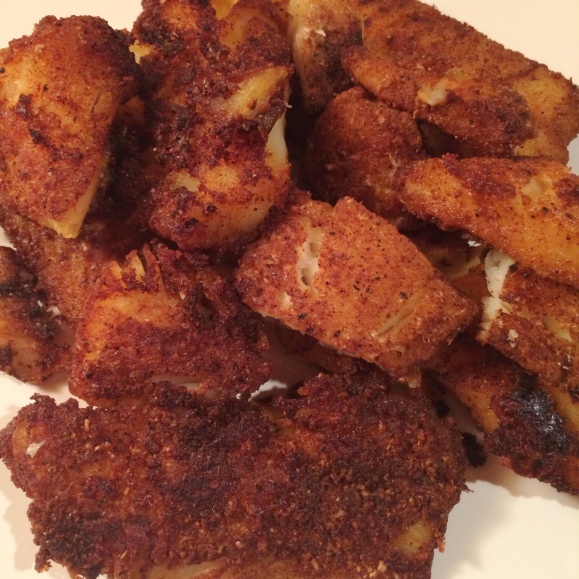
Frying foods took a lot of practice for me over the years.  So many times chicken or potatoes or whatever it was I was cooking, was either undercooked or well well well done. Practice makes perfect.

Frying can be very unhealthy if done incorrectly.  When done the right way you are using the least amount of oil to get that desired crunch and crispiness.

✰ Oil thats too hot will scortch the food on the outside while leaving it raw inside. ✰

✰ Oil that isn’t hot enough won’t seal the food as it should when you drop it in. ✰

(Rather it will sit and soak up the oil.  This results in that drippy soggy mess we’ve gagged on one too many times.

The first time I made these I used some fresh plump salmon and they were to die for! This time around i used cod. I preferred the salmon over any white fish but both were really good.


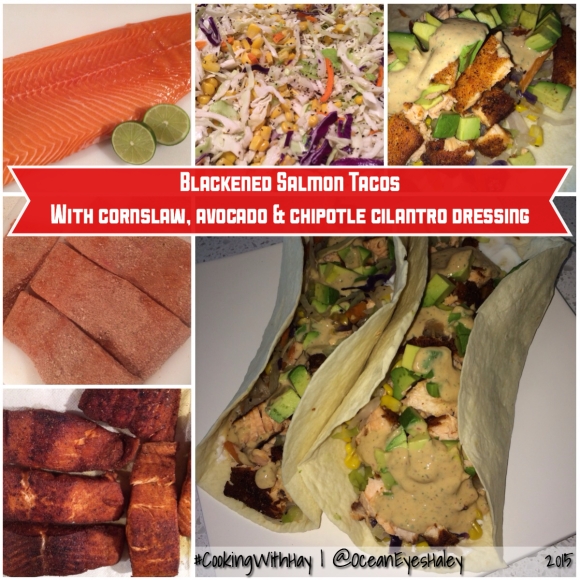
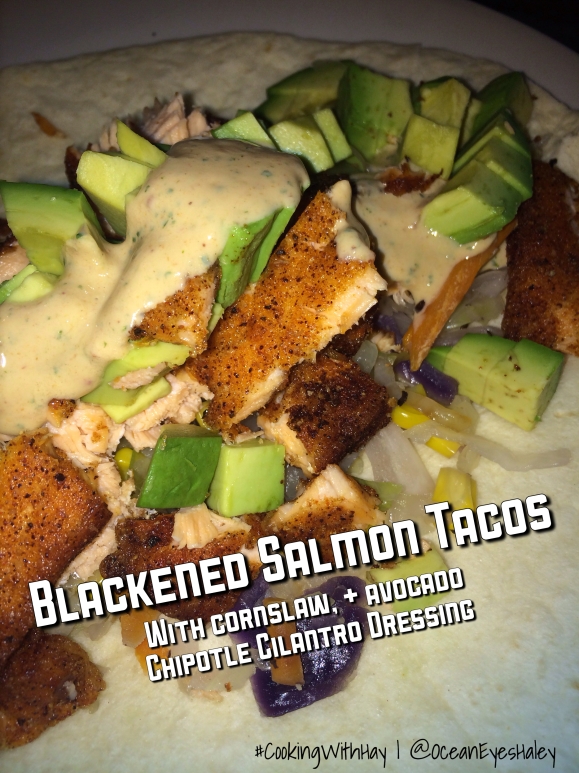
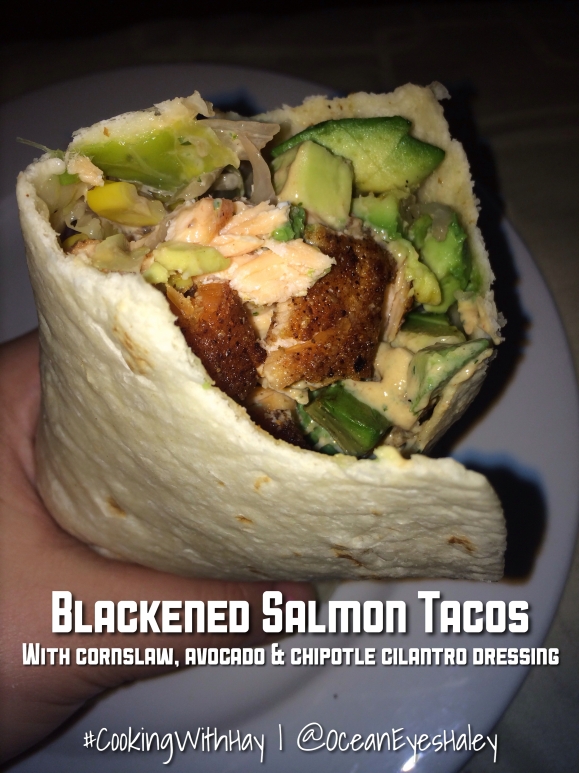
BLACKENED SALMON TACOS

Here are some pics from the salmon ones I made last week!  These ones were my favourite!

Since the photos were taken down in my temporary basement dungeon kitchen they aren’t of the greatest quality.  We can only go up from here my friends ☺

1603

❤️ Thanks for visiting, if you liked this blog please click LIKE below. If you want to follow my blog please scroll to the bottom, click the FOLLOW button and enter in your email address.
Love Haleykins❤️
**Please click “OLDER POSTS” button, (bottom of the page)
or the “COOKING WITH HAY” tab (top of the page) to see more**
Tagged , , , , , , , , , , , , , , , , , , , , , , , , , , , , , , , , , , , , , , , , , , , , , , , , , , , , , , ,

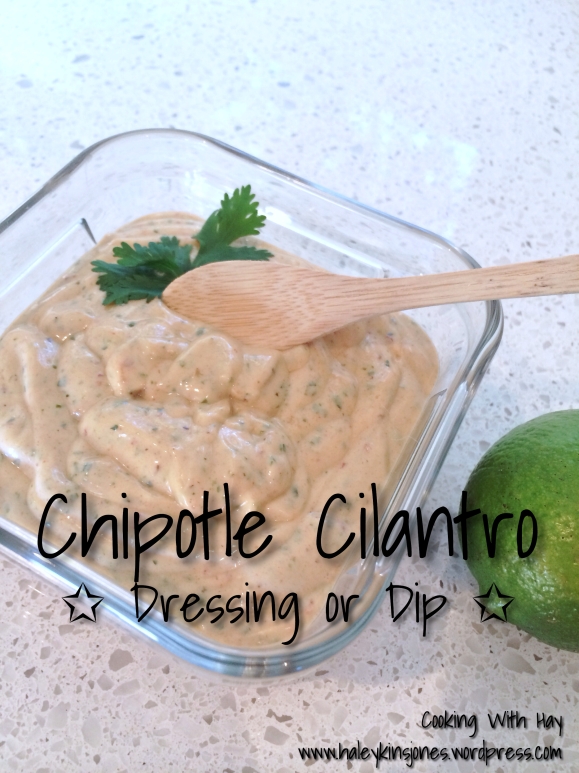
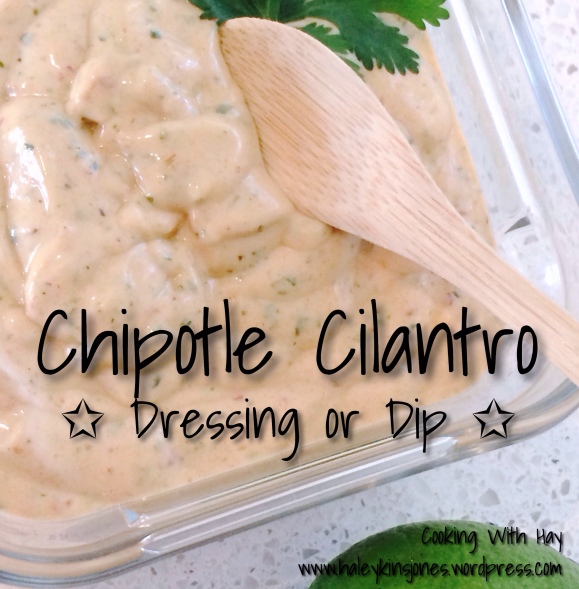
CHIPOTLE CILANTRO DRESSING or dip

Hi Guys, How is summer???  EEEEEK I’m super excited.  As many of you know my house is still under reno’s and just recently got my new Caesarstone counter-tops installed.  I’m ecstatic!  They are flawless and beautiful and exactly what i’ve wanted for oh so long now.  Now my foodblog pics have a higher quality look to them.  I’m so pleased.  Time to fine tune my Canon Rebel T3i camera and get to work!

Last week I made some Blackened Salmon Tacos.  There are no words for this easy recipe and there was also no room…. no room to eat as much as I could have, that’s for sure!  Wow, great way to enjoy some tender flaky juicy fish this summer. The recipe for the Blackening Seasoning will be my next blog post.  This is the dressing that I always make and it was great on the fish tacos.

Hope you like!


CHIPOTLE CILANTRO DRESSING OR DIP

♥ 1½ C FAT FREE SOUR CREAM
♥ 1 T LIGHT MAYO
♥ 1 T MILK
♥ 1 T CHIPOTLE PUREE
♥ 1 TSP CUMIN
♥ ½ TSP CRUSHED BEE POLLEN
♥ HANDFUL FRESH CILANTRO
♥ JUICE OF ONE LIME

Blend together using an Immersion/Hand Blender or a Food Processor.
Chill in the fridge until its time to serve.


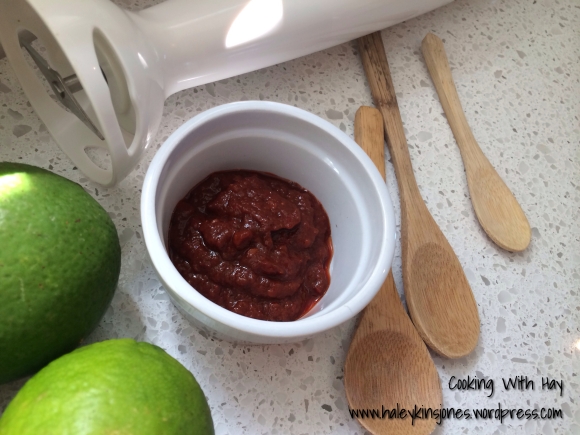
↑ I love me some chipotle! I buy chipotle peppers in small cans in adobo sauce and puree them with a hand blender or food processor. Chipotles pack a punch let me tell ya. The heat from these peppers is potent and smoky and is great for everything.
**If you don’t do heat. Use a very small amount, like 1-2 teaspoons of pureed chipotle for this recipe instead of the requested amount.**

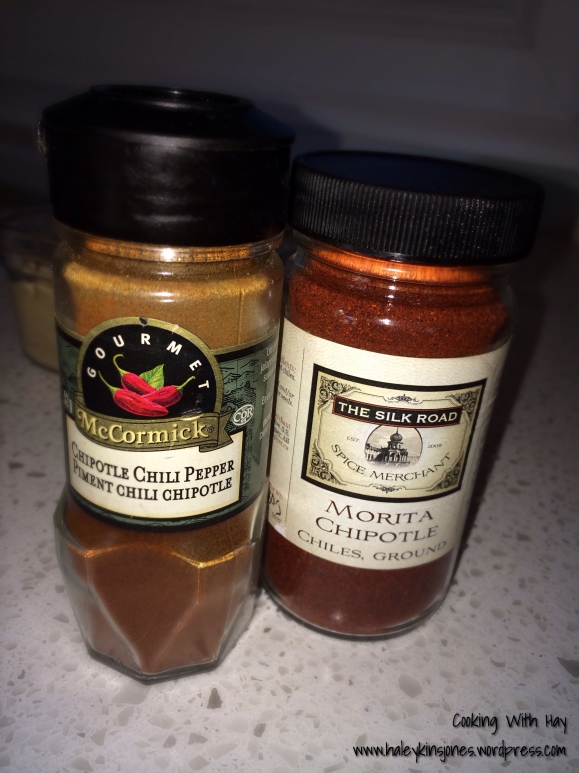
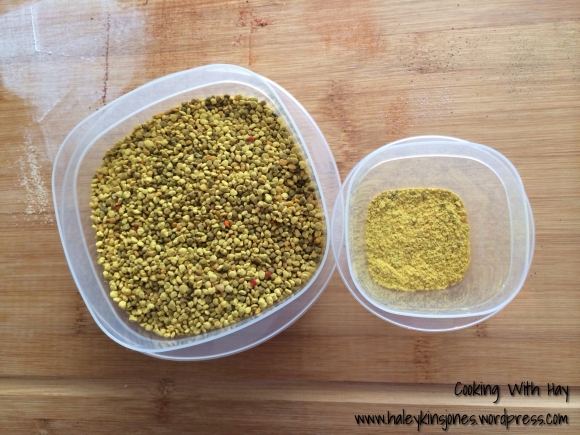
↑ If you don’t have canned chipotles in adobo sauce then you can certainly use a dry powder version, there are many out there. I have these 2 in my pantry. Remember that the longer the dressing sets for the more the flavour is enhanced, and therefore making it much much much hotter the longer it sits.

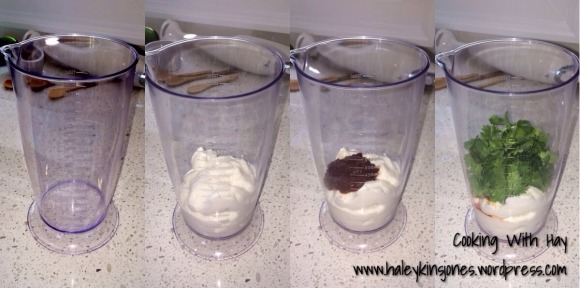
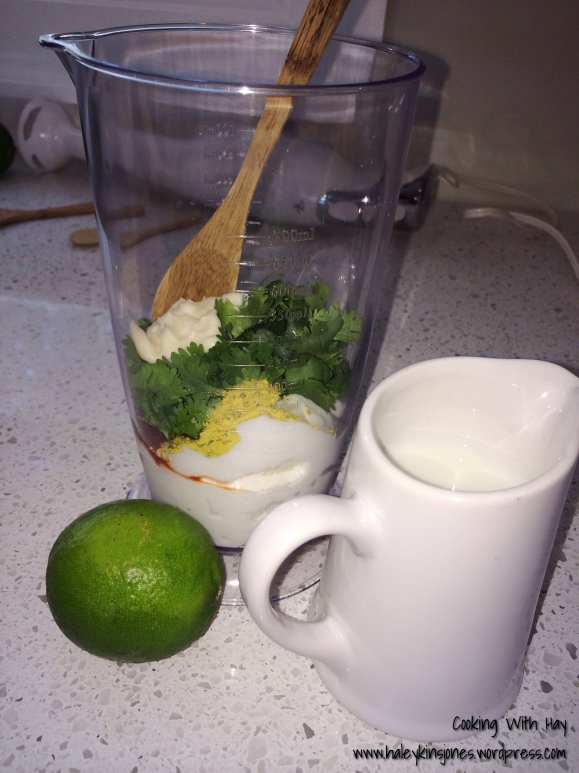
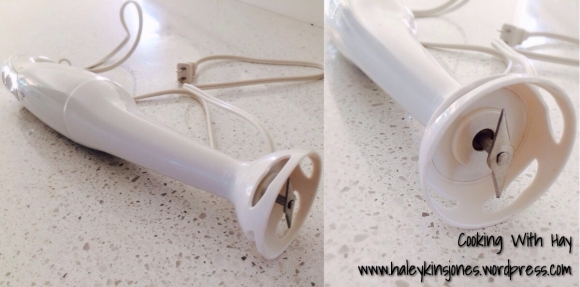
↑ My Immersion Blender came with this cool mixing vessel. What I love about this machine compared to a hand mixer or hand beater is that it will stand up inside the vessel and not topple over. Flat bottom makes it easy to leave it standing and use both hands to if you need to pause to get an ingredient or whatever. Anything to help keep the counters less messy.

↑ Bee Pollen is one of Mother Natures little goodies. I add a little to every salad dressing I make. You can add it to anything though; soups, sauces, whatever you like. The flavour is like a flower. Its got a floral taste when it hits your tongue. It comes in the natural foods section of your grocery store and looks like little gold nuggets. I grind them down with a mortar and pestle. I have a small one that I use for spices and such. Another inexpensive way to make your kitchen/cooking life a little easier.

Here’s some info on Bee Pollen I picked up from http://www.mercola.com

What Is Pollen?
Pollen is the male seed of flowers. It is required for the fertilization of the plant. The tiny particles consist of 50/1,000-millimeter corpuscles, formed at the free end of the stamen in the heart of the blossom. Every variety of flower in the universe puts forth a dusting of pollen. Many orchard fruits and agricultural food crops do, too.

Bee pollen is the food of the young bee and it is approximately 40% protein. It is considered one of nature’s most completely nourishing foods. It contains nearly all nutrients required by humans. About half of its protein is in the form of free amino acids that are ready to be used directly by the body. Such highly assimilable protein can contribute significantly to one’s protein needs.

To view the full article, please click here.

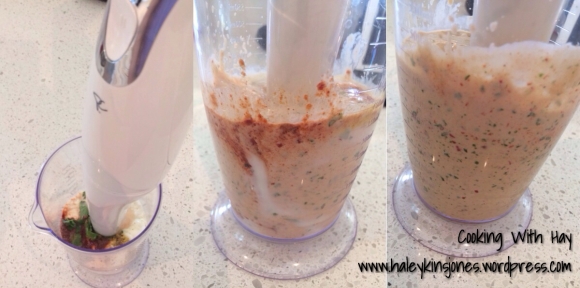
↑ Place all the ingredients into the mixing vessel and blend away. Lift the machine up and down to get it good and blended. Oh so easy I want to blend everything in sight.

photo 9

↑ ❤ Immersion Hand Blender! ❤ NEW TOY! LOL ❤

↑ COMING UP NEXT → Blackened Fish Tacos, using this dressing!
Stay Tuned and if you’d like…. FOLLOW MY BLOG

❤️ Thanks for visiting, if you liked this blog please click LIKE below. If you want to follow my blog please scroll to the bottom, click the FOLLOW button and enter in your email address.
Love Haleykins❤️
**Please click OLDER POSTS, (bottom of the page)
or the RECIPES tab (top of the page) to see more**
Tagged , , , , , , , , , , , , , , , , , , , , , , , , , , , , , , , , , , , , ,

Roast Beef & Jalapeno Halvarti Panini’s

20131231-162029.jpg

After a long rainy afternoon of shopping and errands… A hot, crispy and fresh Panini is a must!
Treat yourself to something yummy…. Could be your last meal of this year!!

Love Hay 💋
XoXoX

Tagged , , , , , , , , , , , , , , , , ,

Vegetable Beef Barley Soup

Soup craze! Yup that is me! Pure satisfaction of chopping everything up into uniform pieces. Pure satisfaction of smelling it all come together. Pure satisfaction when I get rave reviews from Hubby. We were down in the states getting gas, groceries and stuff for the renovations and I picked up a nice beef chuck oven roast and my first thought was beef barley soup. But remember we are trying to be healthy or rather, healthier…. so I added in a bunch of veggies.

20130527-110716.jpg

-My Vegetable Beef Barley Soup is made up of beef broth and water.
-Rubbed the roast with salt, pepper and garlic and browned each side in a frying pan in a little butter.
-Put the roast into my slow cooker with a little water and let her go till tender and medium rare.
-Let it cool before chopping it up into bite size little uniform cubes
-Throw the beef pieces into the frying pan with a tiny bit more butter, sprinkle with more S & P and quickly get it searing hot and just toss the pieces for a few minutes. This will bring out more flavor and seal in its juices.
-Sautéed onions in butter in the bottom of my favorite stock pot, a gift from my Grandma 🙂
-Added beef broth and water, lots and lots of both! I like a lot of soup!
-Bring it to a light boil and then added in the barley. I like my barley to be pretty soft so I let that cook for 45 minutes to an hour before adding in some of the veggies.
-When barley is 3/4 cooked to your liking add in cubed potatoes, chopped carrots, celery and the beef.
-Light boil till veggies are tender
-Now I added in the fun stuff: cut green beans, corn, & tomatoes
-Add some salt and pepper to your liking
Let it meld together for about 15 minutes and then jar it up while it’s hot!

20130527-112904.jpg

My pot of soup filled up two pasta jars and one XL jar as well as three 1.6 ltr tubs that I put in the freezer.

20130527-112511.jpg

First time making this soup and it was really great! If you like soup as much as I do please share some of your favorites! I’ve got everything I need to make one of my all time favorite soups next, New England Clam Chowder! Can’t wait, in fact I’m having to wait so that I have room for it in the fridge and freezer!!

Thanks for visiting, if you liked this blog please click LIKE below.
If you want to follow my blog please scroll to the bottom, click the FOLLOW button and enter in your email address.

Love Haleykins

Tagged , , , , , , , , , , , , , , , , , , , , , , , , , , , , , , , , ,

Easy Split Peasy Soup with Ham

It seems that all I do these days are cook and clean. Leaning more on the cooking side of course 🙂

So sorry that all my recent blog posts have been about food! Mmmmm food. But who doesn’t love good yummy food. Here’s a yummy liciousness soup I cooked up a few days ago.
20130507-201826.jpg
Easy Split Peasy Soup with Ham
20130507-221759.jpg
First, start with the ham and then the broth:
Bone In Ham
-cook the ham
-remove the meat from the bone
-boil ham bone in a stock pot with lots of water, 24 cups maybe

To make the broth I added what I had left in the fridge…

3/4 of an onion, quartered
2 carrots, chopped in 3rds
3 celery stalks cut in half, leaves still intact
4 gloves of garlic, cut in half
3 or 4 baby yellow potatoes, cut in half
4 bay leaves
some salt
20130507-221939.jpg
bring the ham bone, water, and veggies to a boil
reduce heat and let bubble gently for a few hours
strain and save the liquid

**Careful! It’s easy to accidentally dump your hard work down the drain! This is not pasta water! Save your broth**

place liquid in the freezer over night or until the fat has settled and hardened at the top (a few hours), makes it easy to remove the fat for a healthy soup.

Let’s make soup!
Ingredients:
approx. 24 cups of vegetable broth
2 bags of green split peas
3-4 carrots, peeled & chopped
2 celery stalks, chopped
1 onion, chopped
4 russet potatoes cubed
4-5 cups ham, cooked and cubed

Directions:
bring the fat removed back to a boil
reduce heat to a gentle bubble
add the peas
20130507-221558.jpg
cook em down 3/4 of the way, taste em, should be almost fully creamed but just a little bit hard in the centre
add the veggies
20130507-221653.jpg
cook till the peas are smooth and no longer hard
the potatoes will have cooked down and added to the thickened soup base
add salt and pepper to taste, I only added about 2 tsps of salt

While soup is still piping hot you can put it into resealable jars with the correct lids to seal and store in the fridge.
As it starts to cool the bubble in the lid should suck down. That’s how you know it’s sealed. A friend of mine recently told me this method and she says it works for here as she never wants to freeze her stuff. If it doesn’t suck down it probably didn’t seal. Store in fridge and eat it within a few days.
20130507-220838.jpg
I ended up making up 5 jars and then freezing the rest.

This will make nice, quick and Easy Split Peasy lunches over the next couple of weeks. 😊
20130507-222052.jpg

20130507-222103.jpg

Thanks for visiting, please click LIKE below if you liked this blog\
If you would like to follow my blog please click the FOLLOW button below this blog or at the bottom of the page, enter your email address and you will be notified of any new posts.

Thanks
Haley

Tagged , , , , , , , , , , , , , , , , , , , , , , , , , , , , , , , , ,

Creamy Potato & Cauliflower Soup with Roasted Garlic

There was a very good reason for roasting that garlic this afternoon, see previous post.
I was talking with my mom last night and she had made a yummy sounding creamy potato soup. It sounded like a great idea.
She sent me her recipe and with other recipes I found online and my own thoughts, I twisted it!
I made a recipe to suit my tastebuds and to use up more items in my fridge. Those items being chicken stock and… cauliflower!

Here’s the recipe and if you make it, please let me know what you think!

IMG_7169

IMG_7172

Creamy Potato & Cauliflower Soup with Roasted Garlic

1 ½ fists of roasted garlic
2 cups cooked cauliflower, chopped in (approx) ½ inch chunks (half a head of cauliflower)
1 cup onion, finely diced
2 tbsp. butter
4 cups raw russet potatoes, chopped in even ½ inch cubes (2 large russets)
2 cups water
2 cups low sodium chicken stock
2 cups skim milk
½ cup fat free greek yogurt
2 tsp. salt
2 tsp. pepper
green onions
cheddar cheese
cooked crumbled bacon

Add butter to soup pot, sauté onions till clear, do not overcook
Add garlic, potatoes, water, and stock and simmer for 10-15 minutes until the potatoes are tender
To the pot, add the cooked cauliflower, milk and greek yogurt, salt & pepper.
Give it all a good mix.
In small batches, puree till smooth and creamy
Pour back into the pot and reheat
You may need to add more milk depending on the consistency, you don’t want it too thick, or maybe you do 🙂

Garnish with more fat free greek yogurt, green onions, cheddar cheese and if you feel sinful, bacon!

I have to say, it tastes soooooo good, I filled a shot glass of it and downed it! Can’t wait for lunch tomorrow!

Tagged , , , , , , , , , , , , , , , , , , , , , , , , ,

ANOTHER SCHOOL YEAR ~ ANOTHER BAG LUNCH

  
I started this blog a few weeks ago for various reasons but I had no idea it would be used mainly to share yummy recipes with you…  I hope you don’t mind but here’s another… but it’s a gooder too!

The start of the school year reminds me of when I was in school… of course I can remember because it wasn’t THAT long ago geez… My mommy always put a lot of effort into our lunches, more specifically the snack or ‘treat’ part of it.  There was always something yummy and delicious that she had slaved over the night before…  My favorite, and a favorite of a few of my fellow classmates, was her Land O Lakes Glazed Apple Pie Bar recipe.  Like apple pie but better and you can hold it in your hand.  Once completely cooled it was just like candy!  She made these every so often and I’ve loved loved loved them.  If know me, you would know that I didn’t like food that much growing up… well not food just what it tastes like and their textures.  I was a picky eater that’s for sure but she couldn’t go wrong with these.

I made them a few nights ago in honor of the approaching school year.  Perhaps you have young children and would like to knock your kids socks off with these yummy bars in their lunch this year.   Or maybe you think it’s too much sugar… but if you do want to make them the recipe is below 😉


GLAZED APPLE PIE BARS

(source: http://www.landolakes.com)

60 min.prep time 1:45 total time

36 bars

Ingredients

Pastry

1 Land O Lakes® All-Natural Egg, separated, reserve egg white

1/2 cup milk

2 1/2 cups all-purpose flour

1 teaspoon salt

1 cup cold Land O Lakes® Butter, cut into chunks

Filling

1 cup crushed corn flakes

8 to 10 medium (8 cups) tart cooking apples, peeled, sliced

1 cup sugar

2 teaspoons ground cinnamon

1/2 teaspoon ground nutmeg

1 reserved Land O Lakes® All-Natural Egg white

2 tablespoons sugar

Glaze

1 cup powdered sugar

1/2 teaspoon vanilla

1 to 2 tablespoons milk

Directions

Heat oven to 350°F. Beat egg yolk in small bowl. Add 1/2 cup milk; mix well. Set aside.

Combine flour and salt in medium bowl; cut in butter with pastry blender or fork until mixture resembles coarse crumbs. Stir in egg yolk mixture with fork until dough forms a ball. Divide dough in half.

Roll out half of dough on lightly floured surface into 15×10-inch rectangle; place onto bottom of ungreased 15x10x1 inch jelly-roll pan. Sprinkle with corn flakes; top with apples.

Combine 1 cup sugar, 1 1/2 teaspoons cinnamon and nutmeg in small bowl. Sprinkle over apples. Roll remaining half of dough into 15 1/2×10 1/2-inch rectangle; place over apples.

Beat reserved egg white with fork until foamy; brush over top crust. Combine remaining cinnamon and 2 tablespoons sugar in small bowl; sprinkle over crust. Bake for 45 to 60 minutes or until lightly browned.

Combine powdered sugar, vanilla and enough milk for desired glazing consistency in small bowl. Drizzle over warm bars.

  
– If pastry dough does not form a ball easily, add up to 1 tablespoon additional milk, 1 teaspoon at a time.

– To easily transfer pastry to jelly-roll pan, fold pastry in half; fold in half again. Place folded corner at center of pan. Unfold pastry carefully.

– Top pastry should be rolled on lightly floured surface slightly larger than bottom pastry to allow pastry to cover filling easily.


Tagged , , , , , , , , , , , , , , , , , , , , , , , , , , , , ,